Creating a journey
Build, test, and publish a journey from a template or from scratch.
Written By Bruno
Last updated 11 minutes ago
Overview
Create a journey on the canvas: choose who enters, add the messages and rules they move through, set a goal, then publish. Every change saves to a draft automatically, so nothing reaches people until you publish.
Before you start, check that you have a full seat with the Manage Outbound permission. To publish, you also need Manage Outbound State. Ask a workspace admin to update your admin role if these controls are unavailable.
For email blocks, your workspace needs approved email-sending access. For chat, banner, survey, product tour, and post blocks, install the Featurebase Messenger on your website or web app.
Create a journey
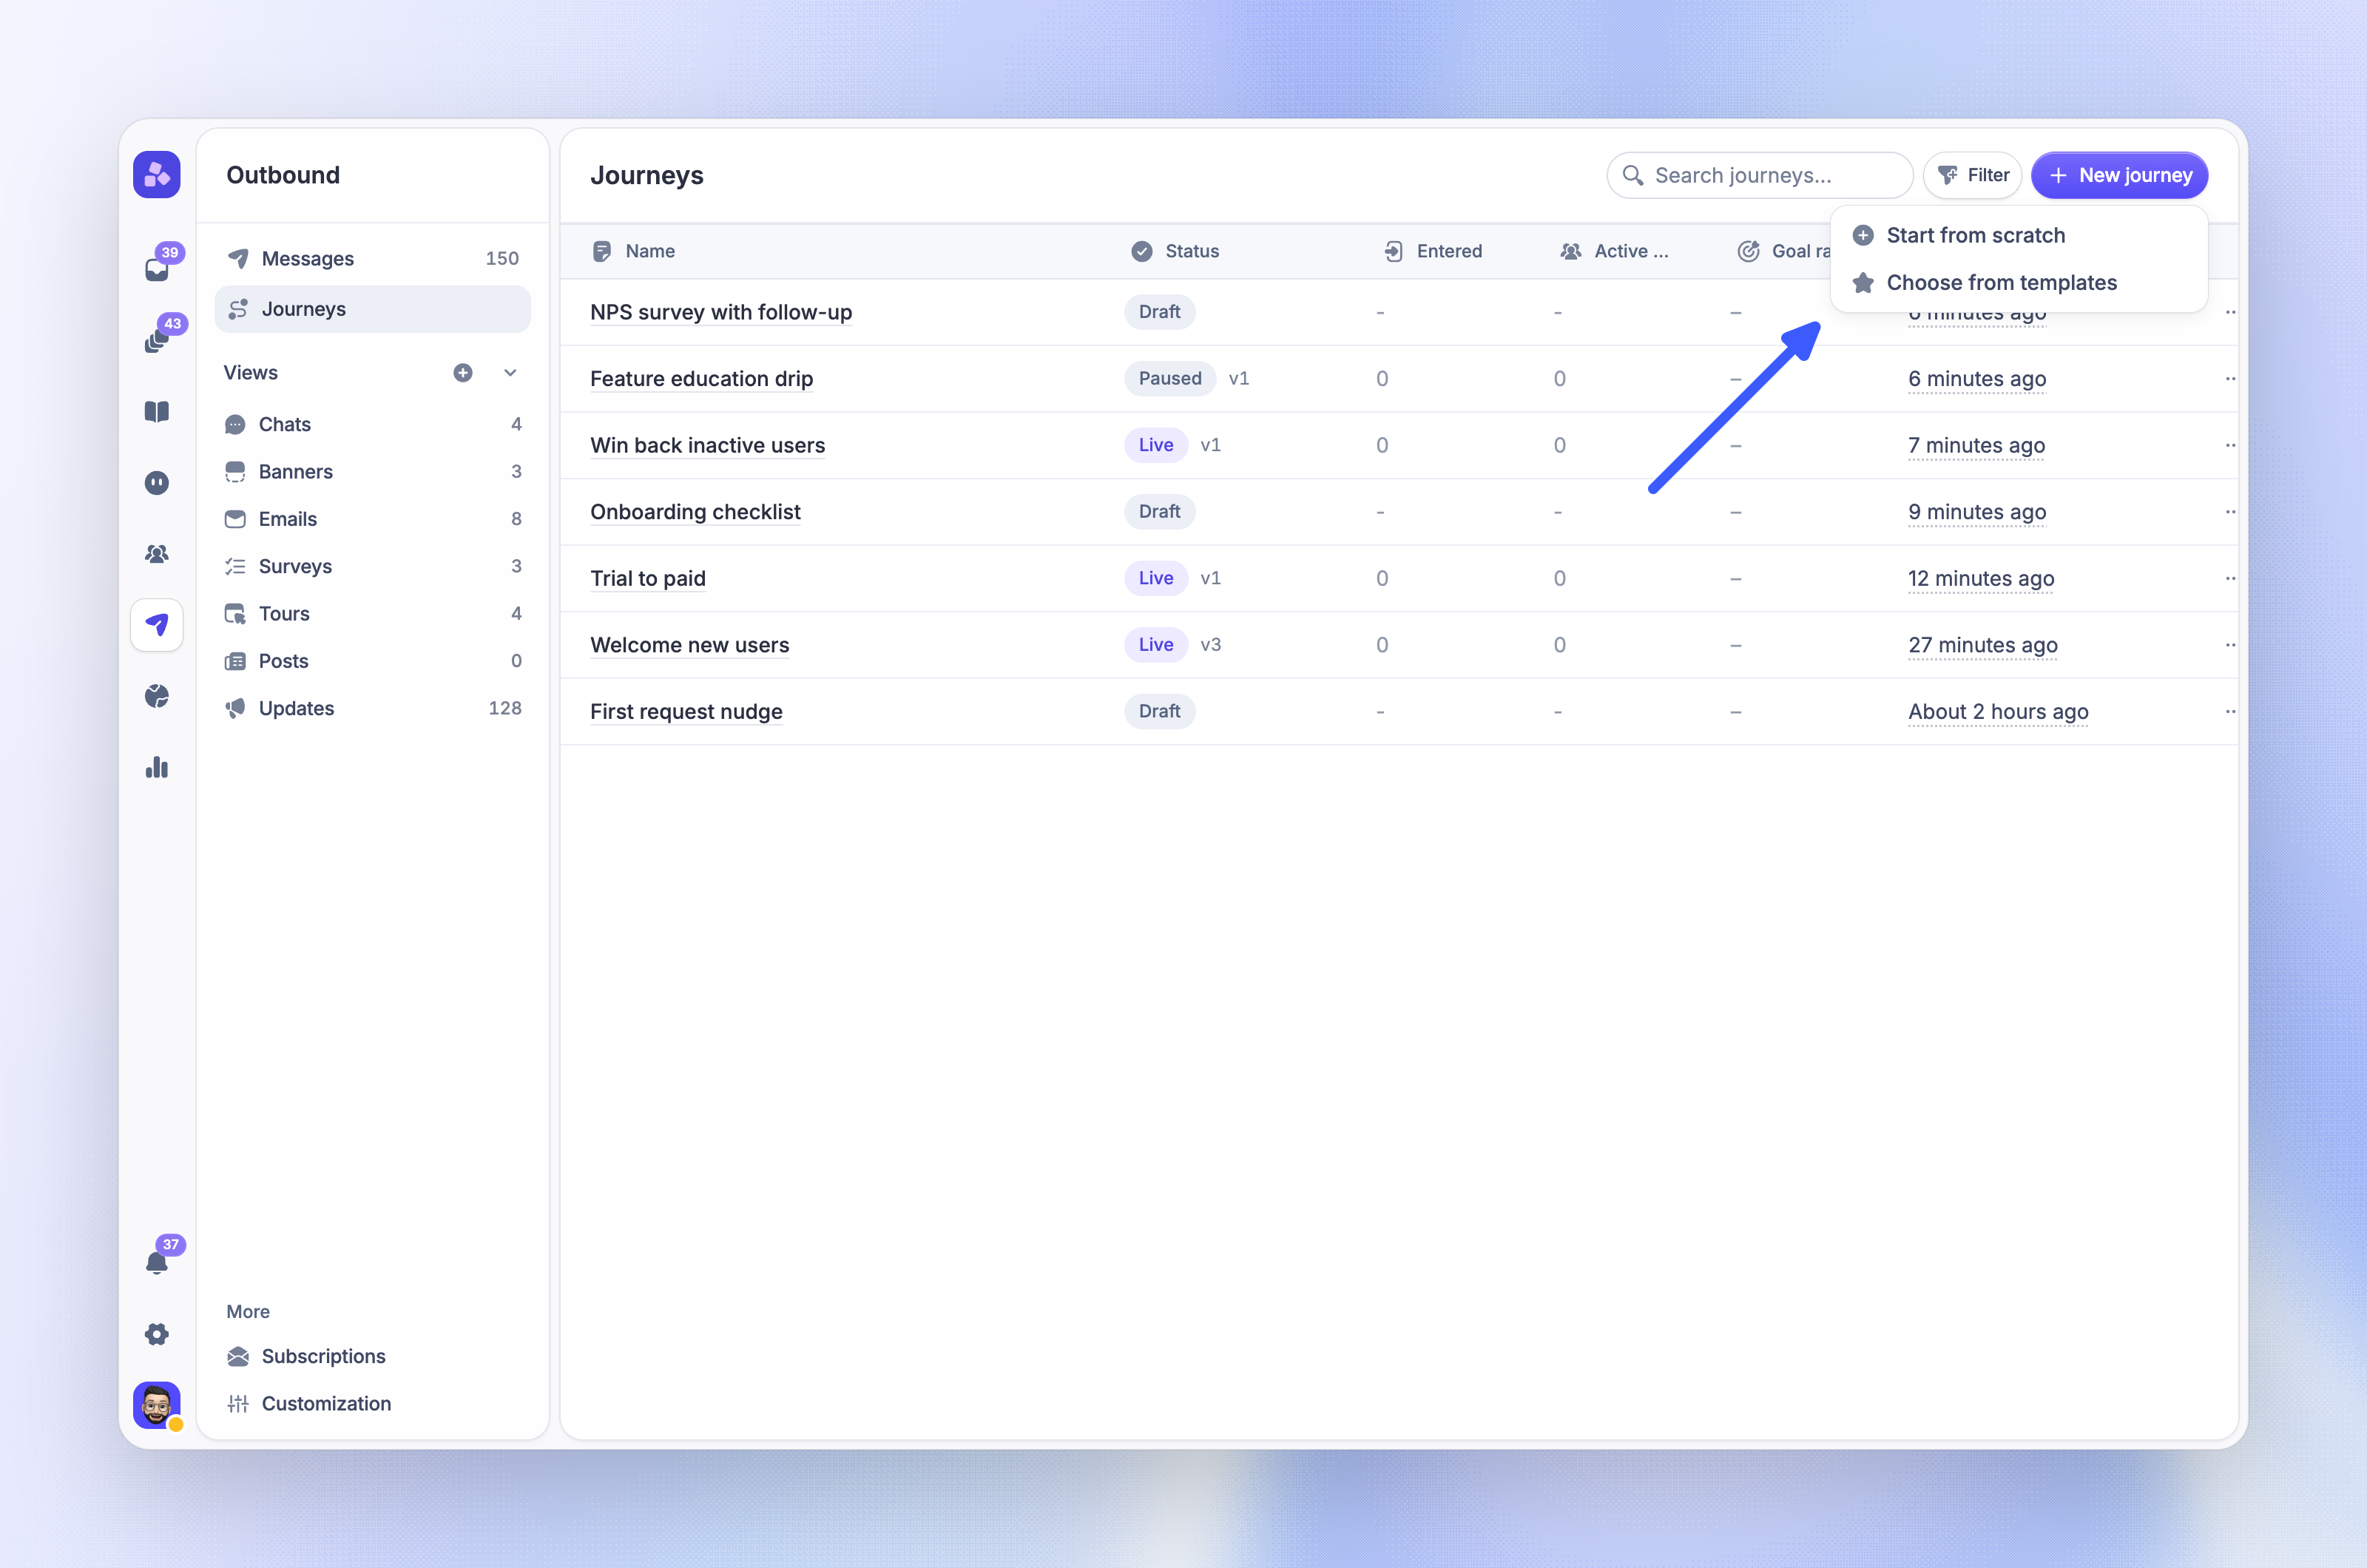
Start a journey
Click 'New journey'
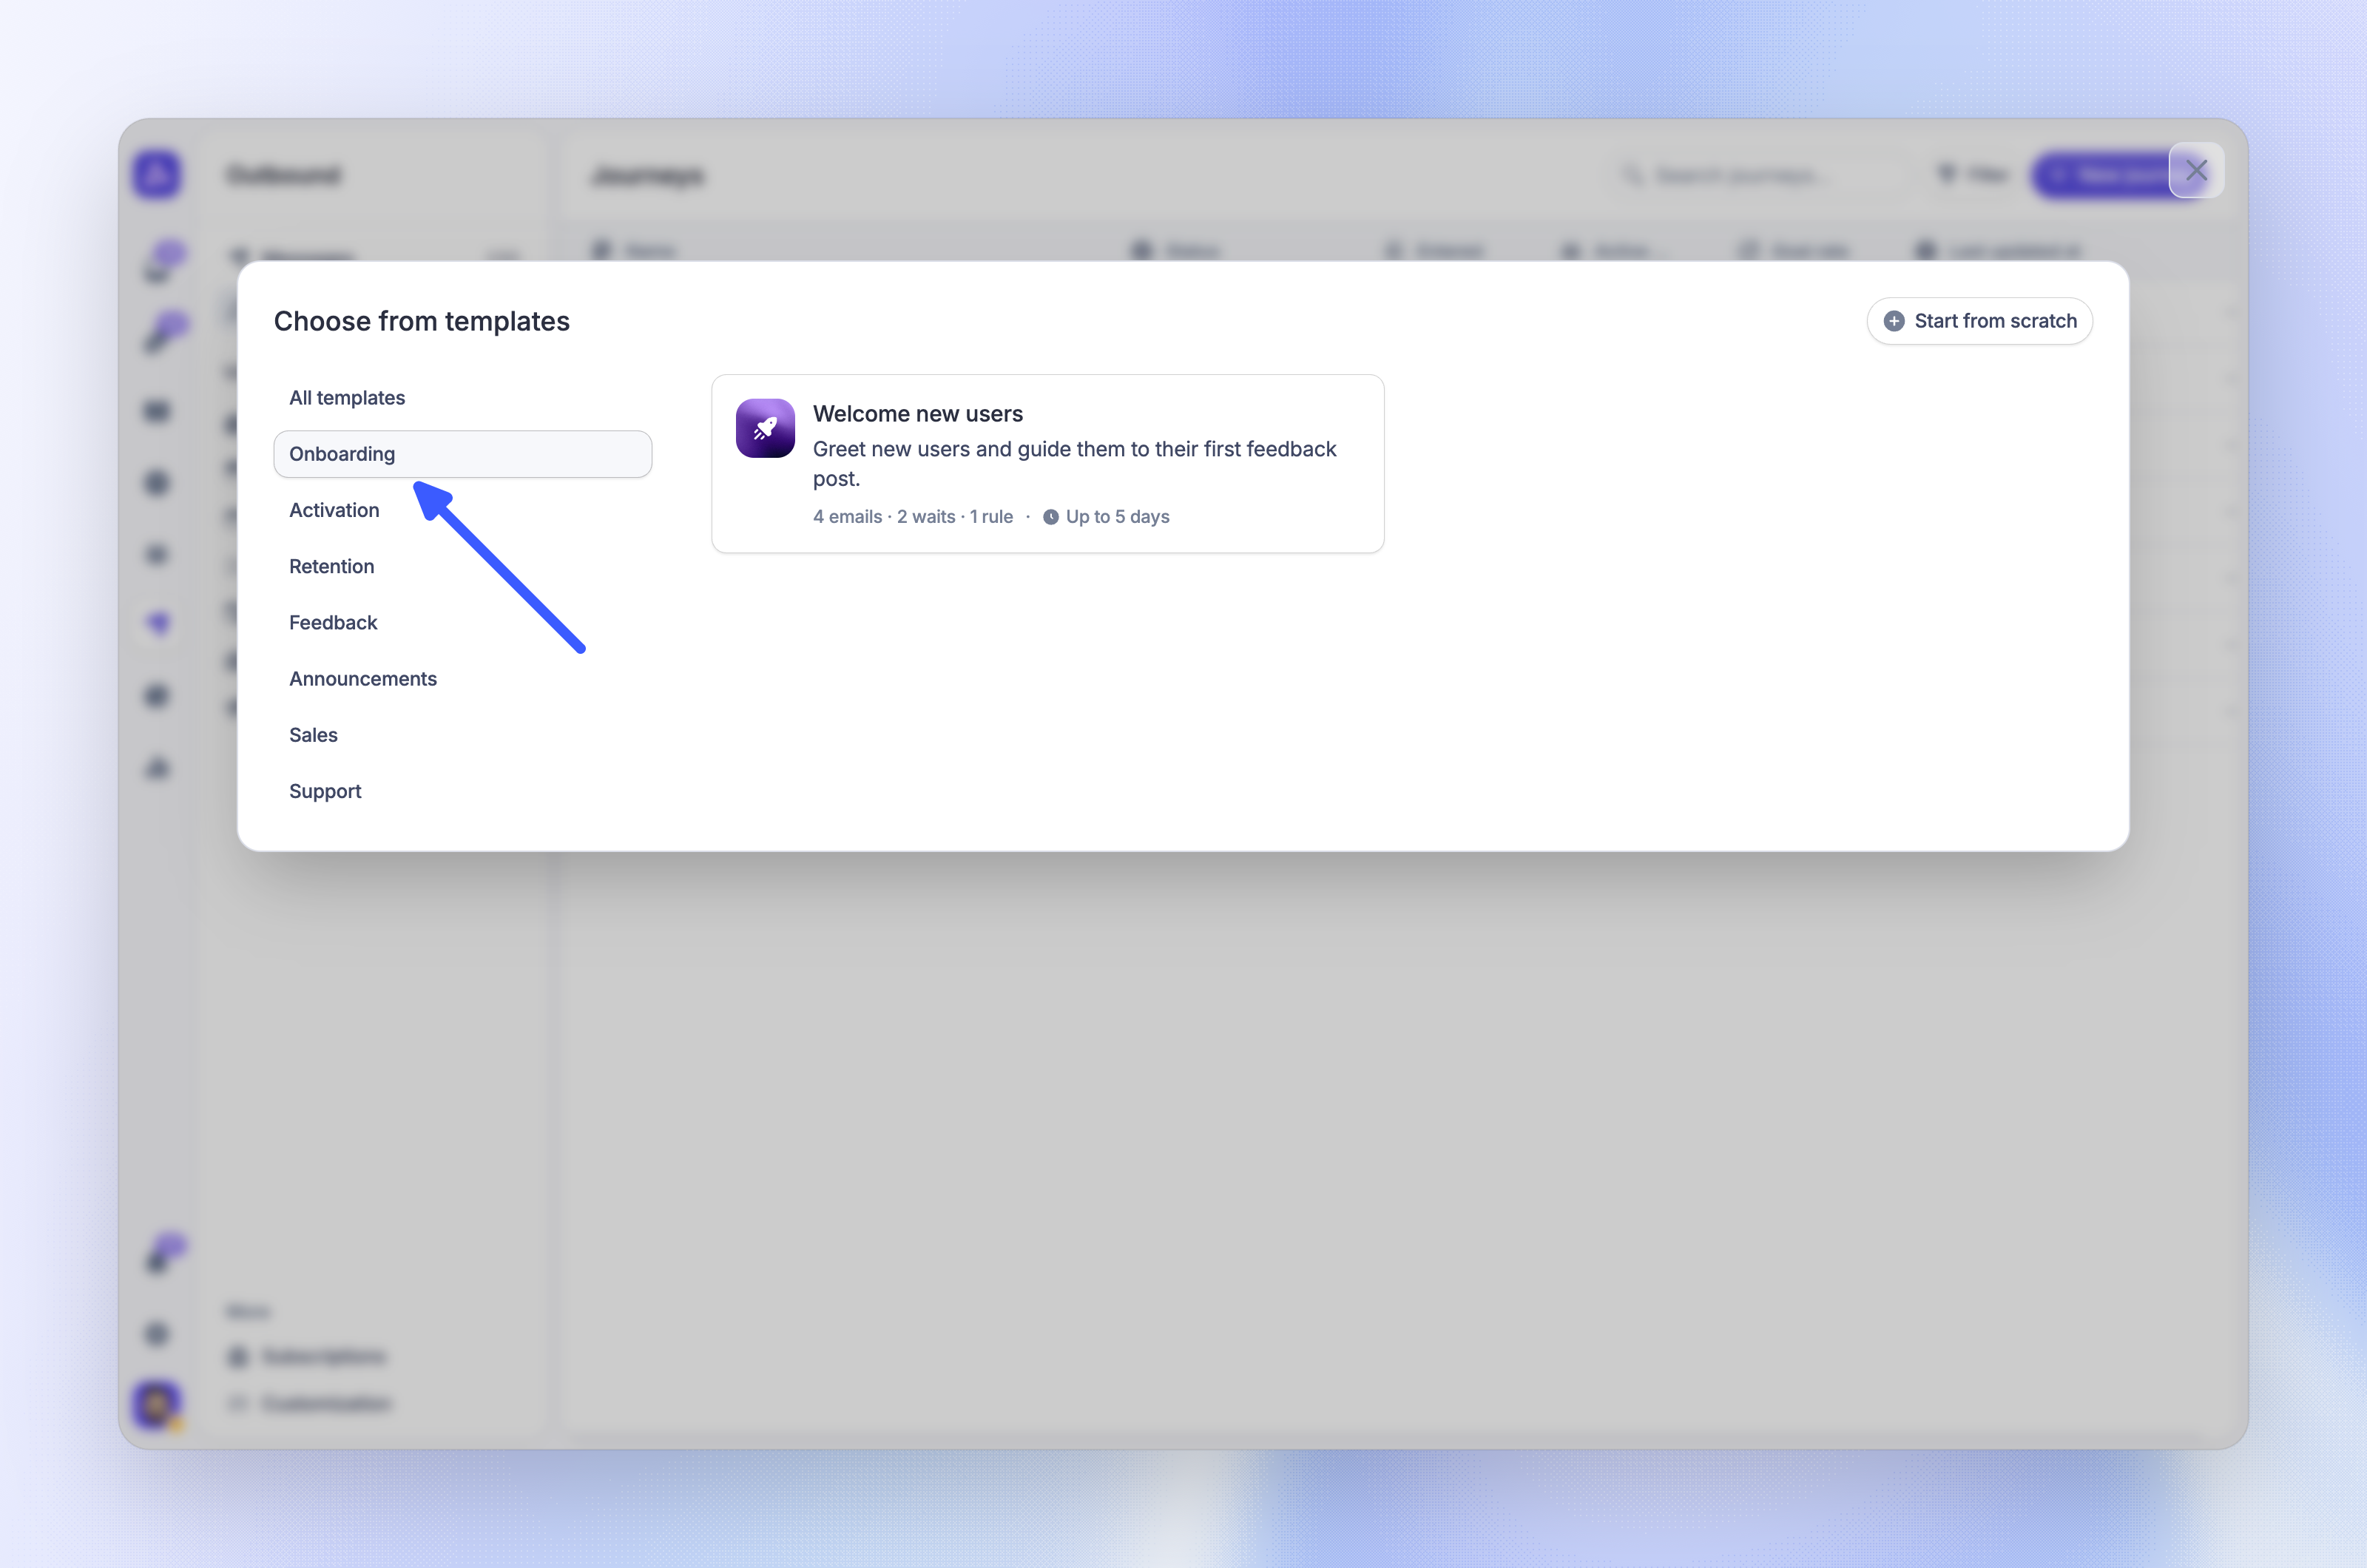
Choose 'Choose from templates' to pick a template, or 'Start from scratch' to begin with an empty entry block
For a template, pick a category on the left if you want to narrow the list, click a card to preview the blocks, then click 'Use this template'
The journey opens in the editor as a draft. A template journey takes the template's name and includes its blocks, settings, and sample content that you replace before you publish. A journey from scratch is named "Untitled journey". Click the name in the header to rename it.
Choose who enters
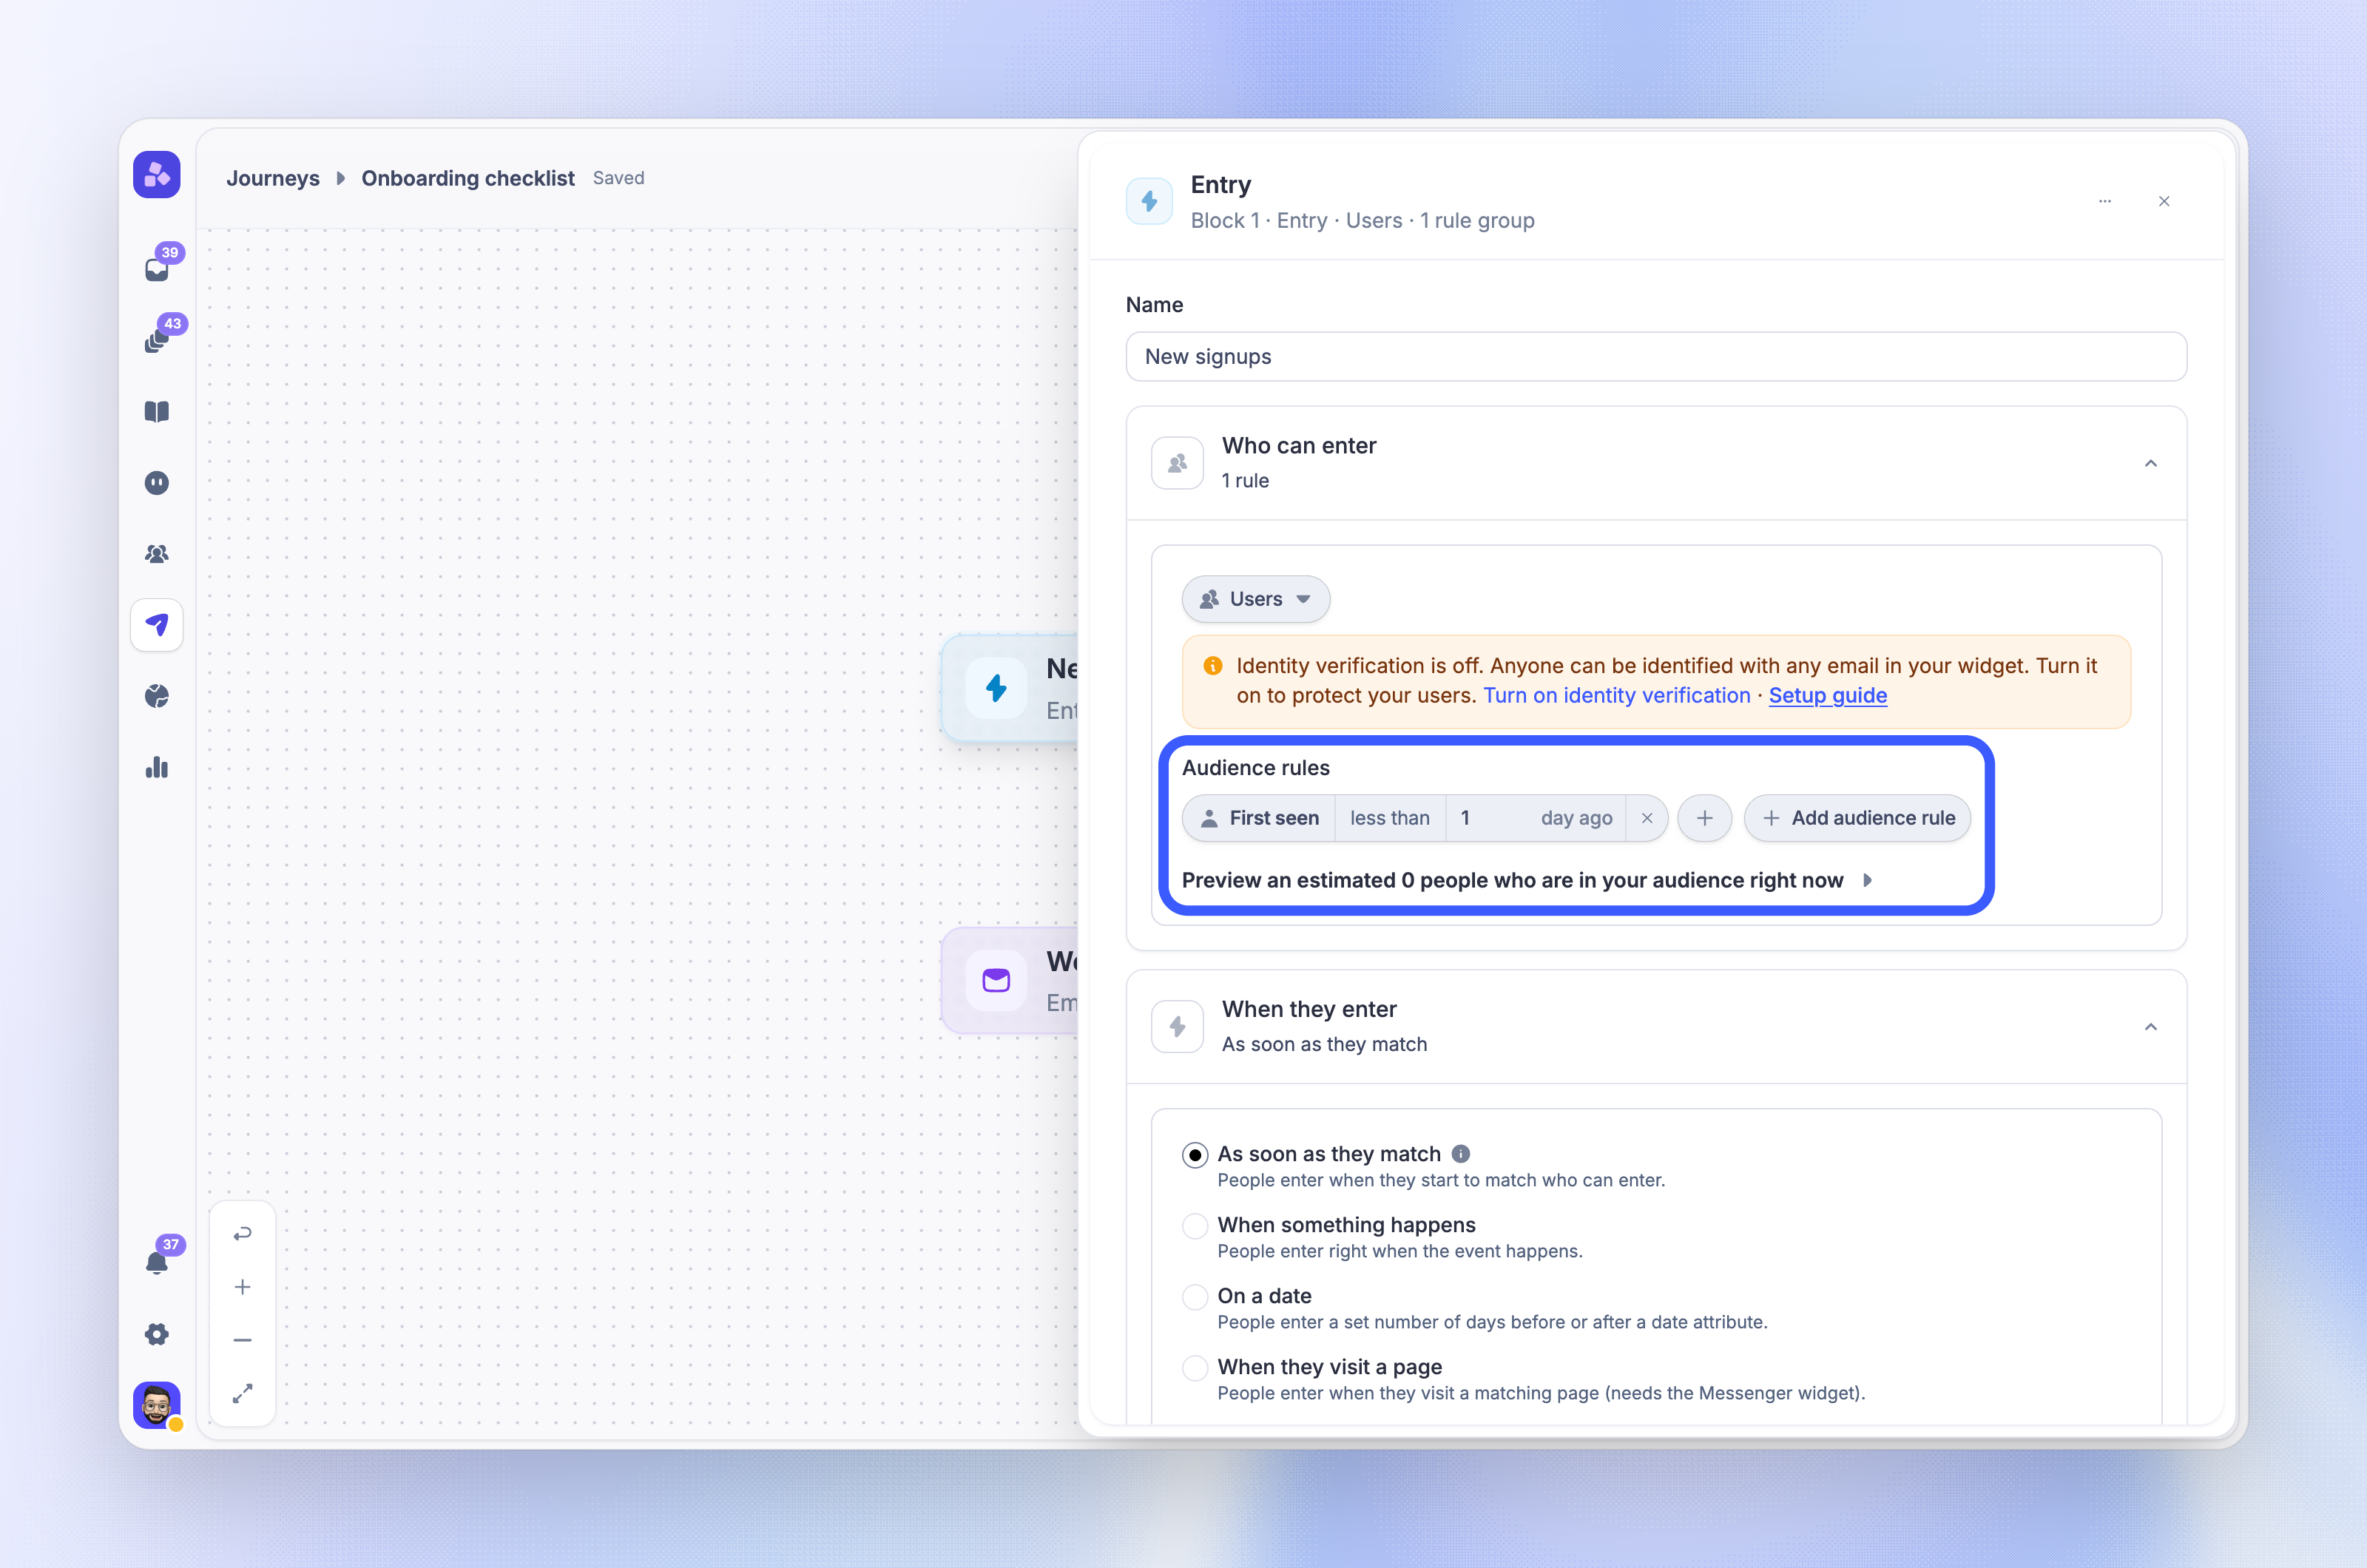
Click the Entry block on the canvas
Under Who can enter, choose Users, Visitors & Leads, or both, then add Audience rules
Under When they enter, choose when people start the journey:
As soon as they match - People enter when they start to match who can enter
When something happens - People enter right when a custom event happens
On a date - People enter a set number of days before or after a date attribute
When they visit a page - People enter when they visit a matching page
Under Enter more than once, choose whether people can go through the journey again
Add blocks
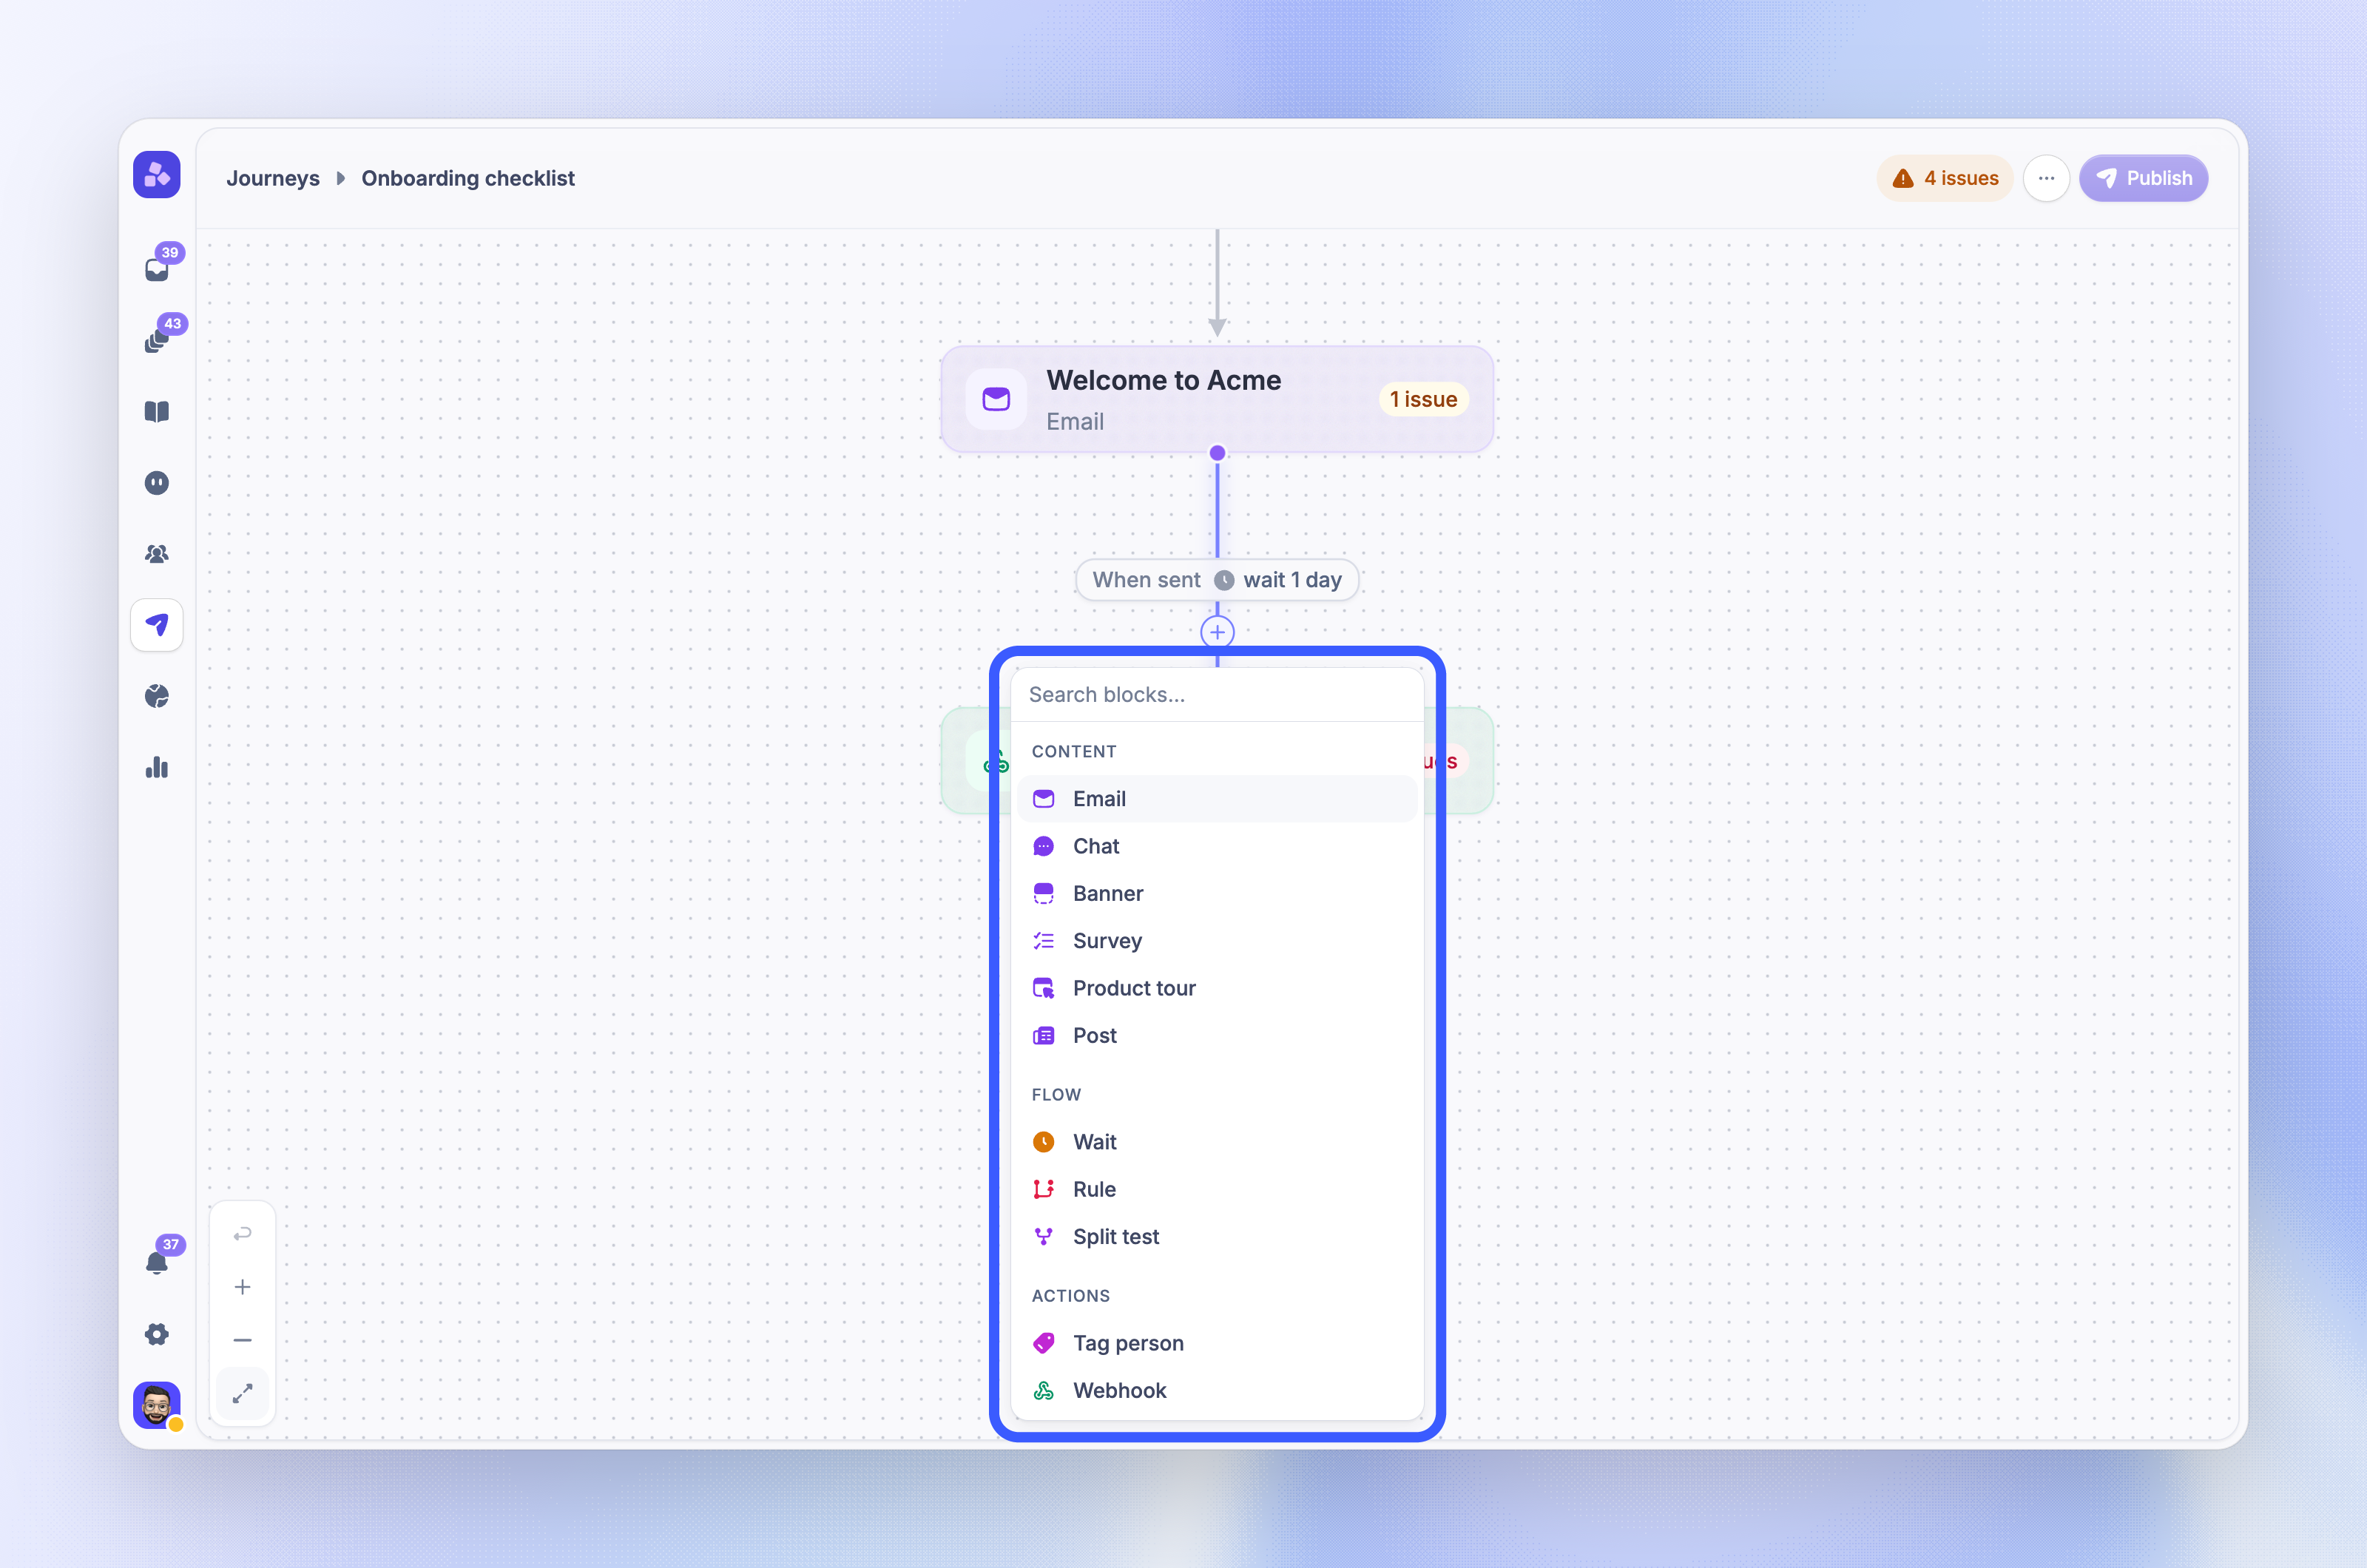
Click + below a block or on an open path
Choose a block from Content, Flow, or Actions
Configure the block in the panel that opens on the right
Content blocks open their editor right away, so you can write the email or in-app message in place. Blocks with more than one result, such as a rule or an email, have a path for each result. A path with no next block ends the journey for people who take it.
Tip: Press ⌘Z (Ctrl+Z on Windows) to undo a change on the canvas, and ⇧⌘Z (Ctrl+Shift+Z or Ctrl+Y) to redo it. Press Delete or Backspace to remove the selected block. These keys do not work while you type in a field.
Set a goal and exit rules
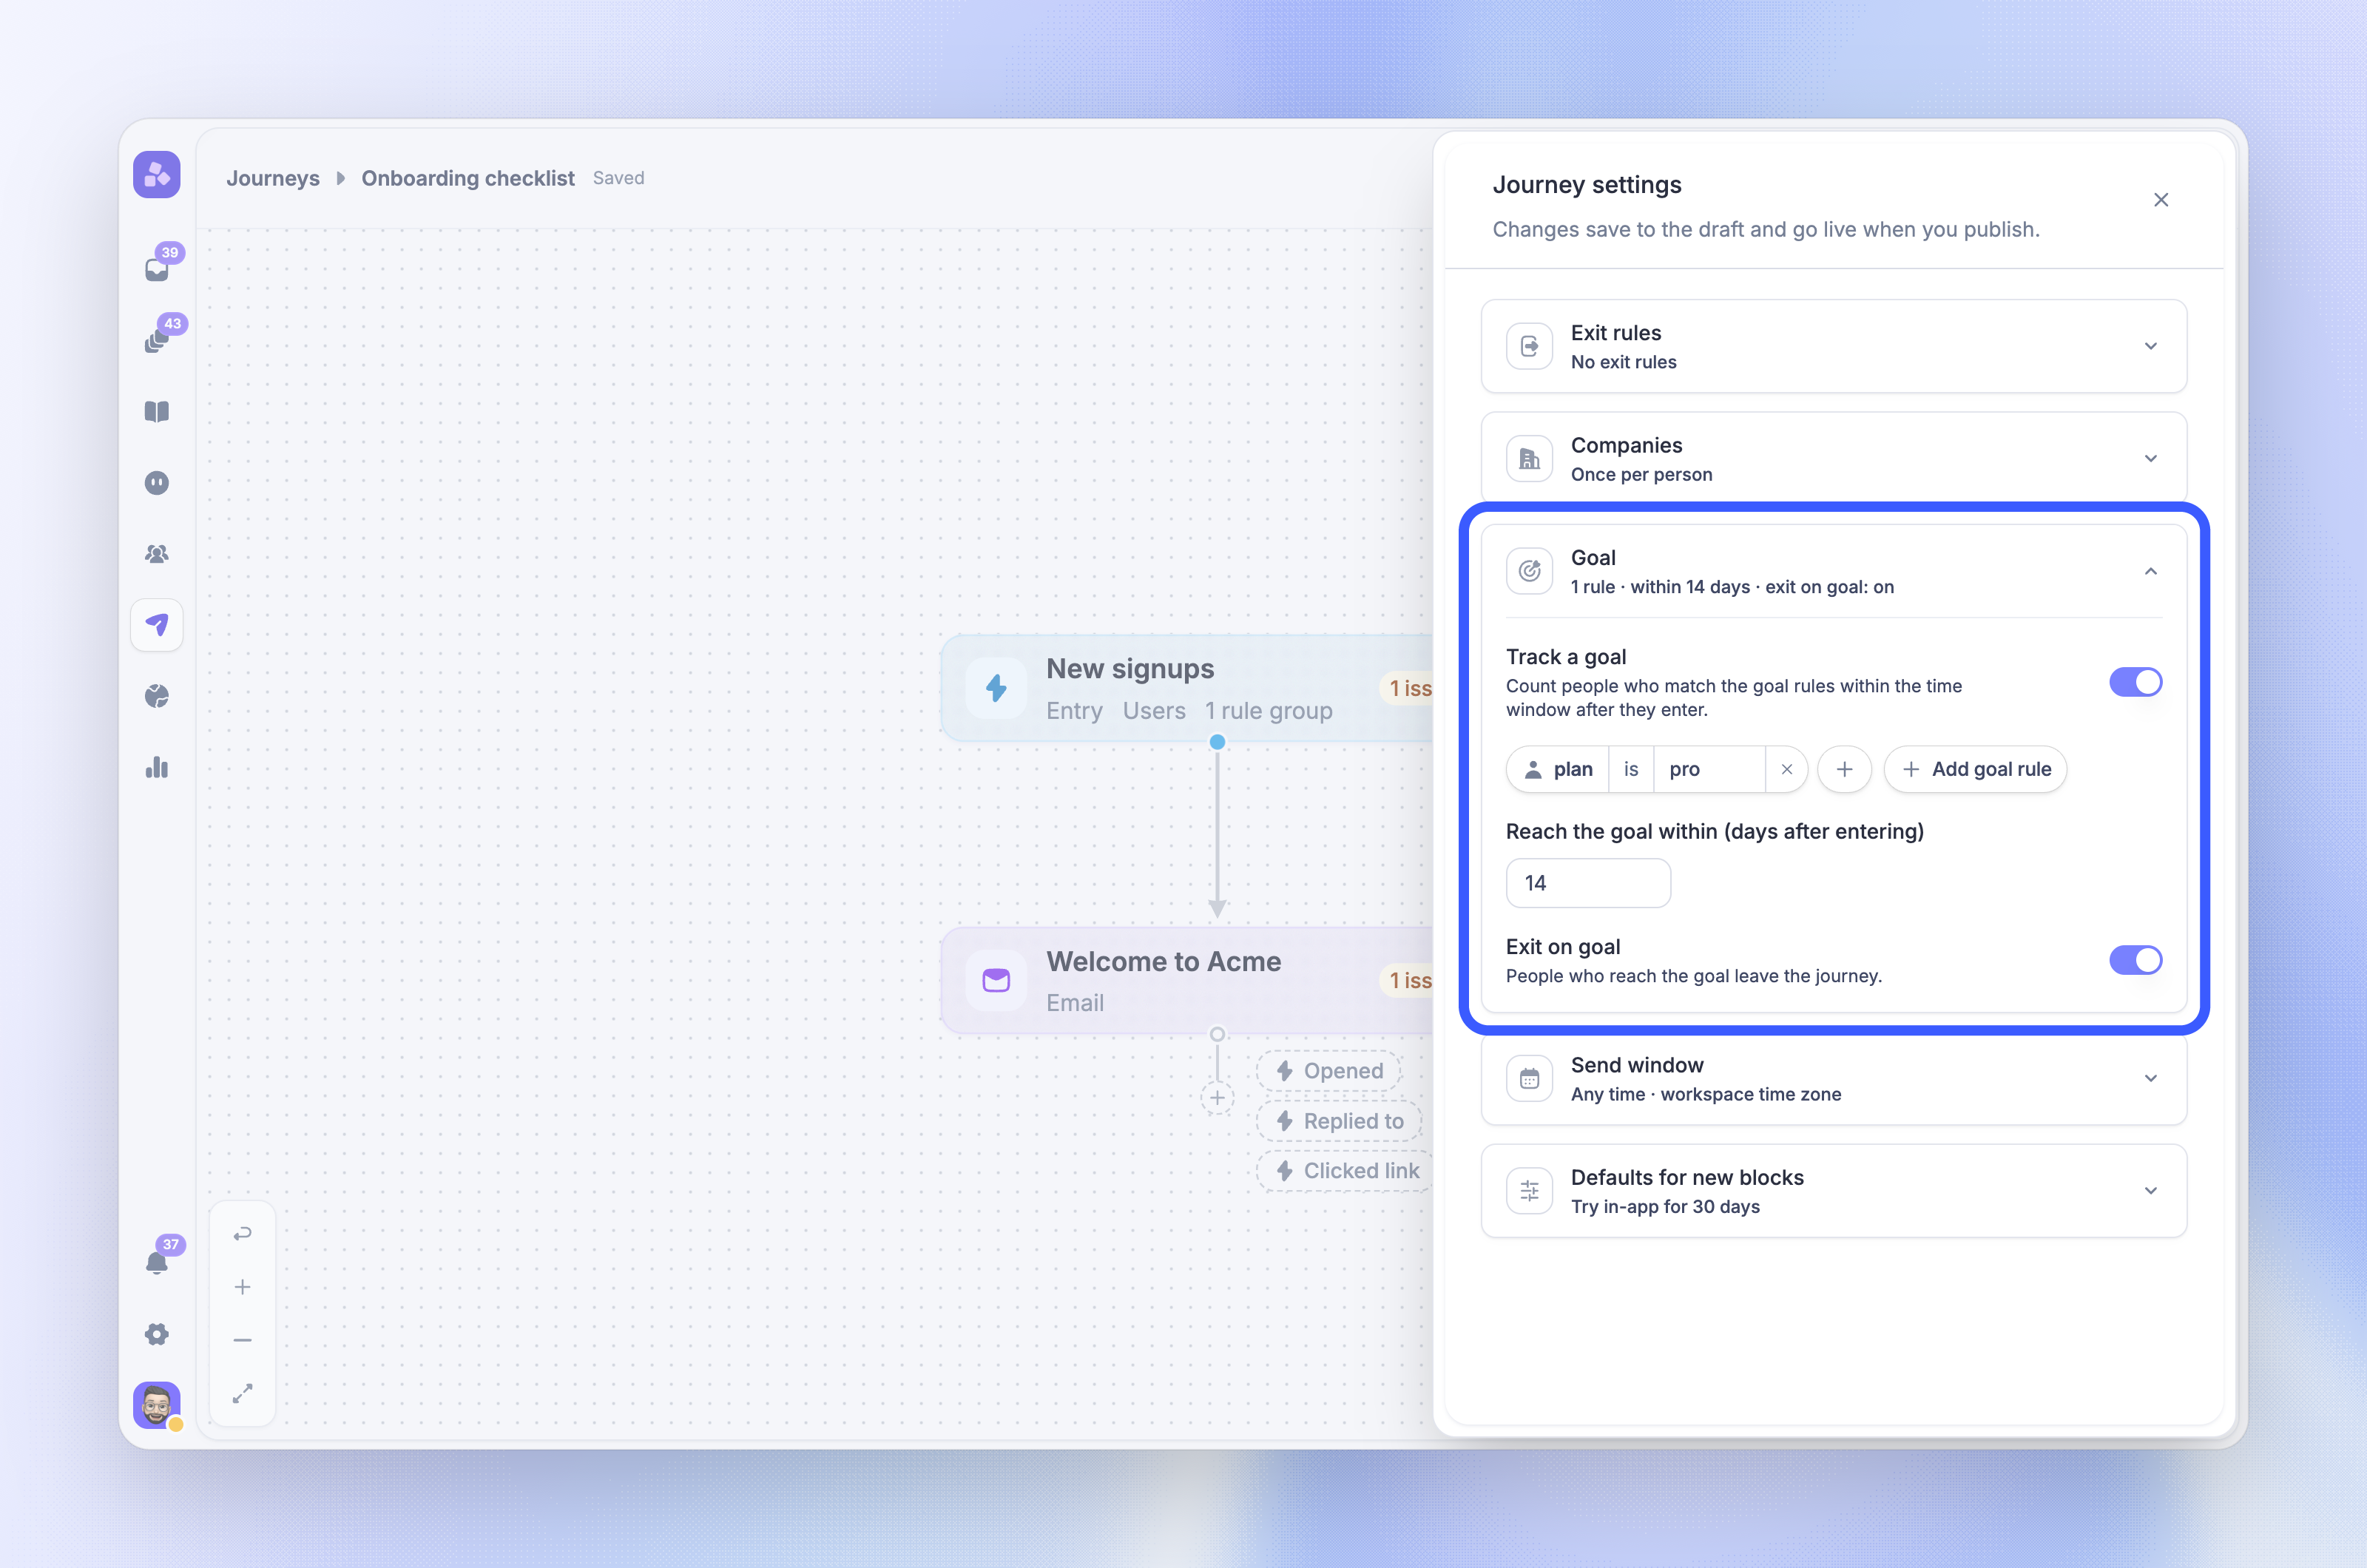
Open the ⋯ (More actions) menu in the header and choose 'Settings'
Under Goal, turn on Track a goal and add the goal rules
Set Reach the goal within (days after entering)
Turn on Exit on goal to remove people from the journey when they reach the goal
Under Exit rules, click 'Add exit rule' for conditions that should end the journey early
You can also set the Send window for all messages here.
Test the journey
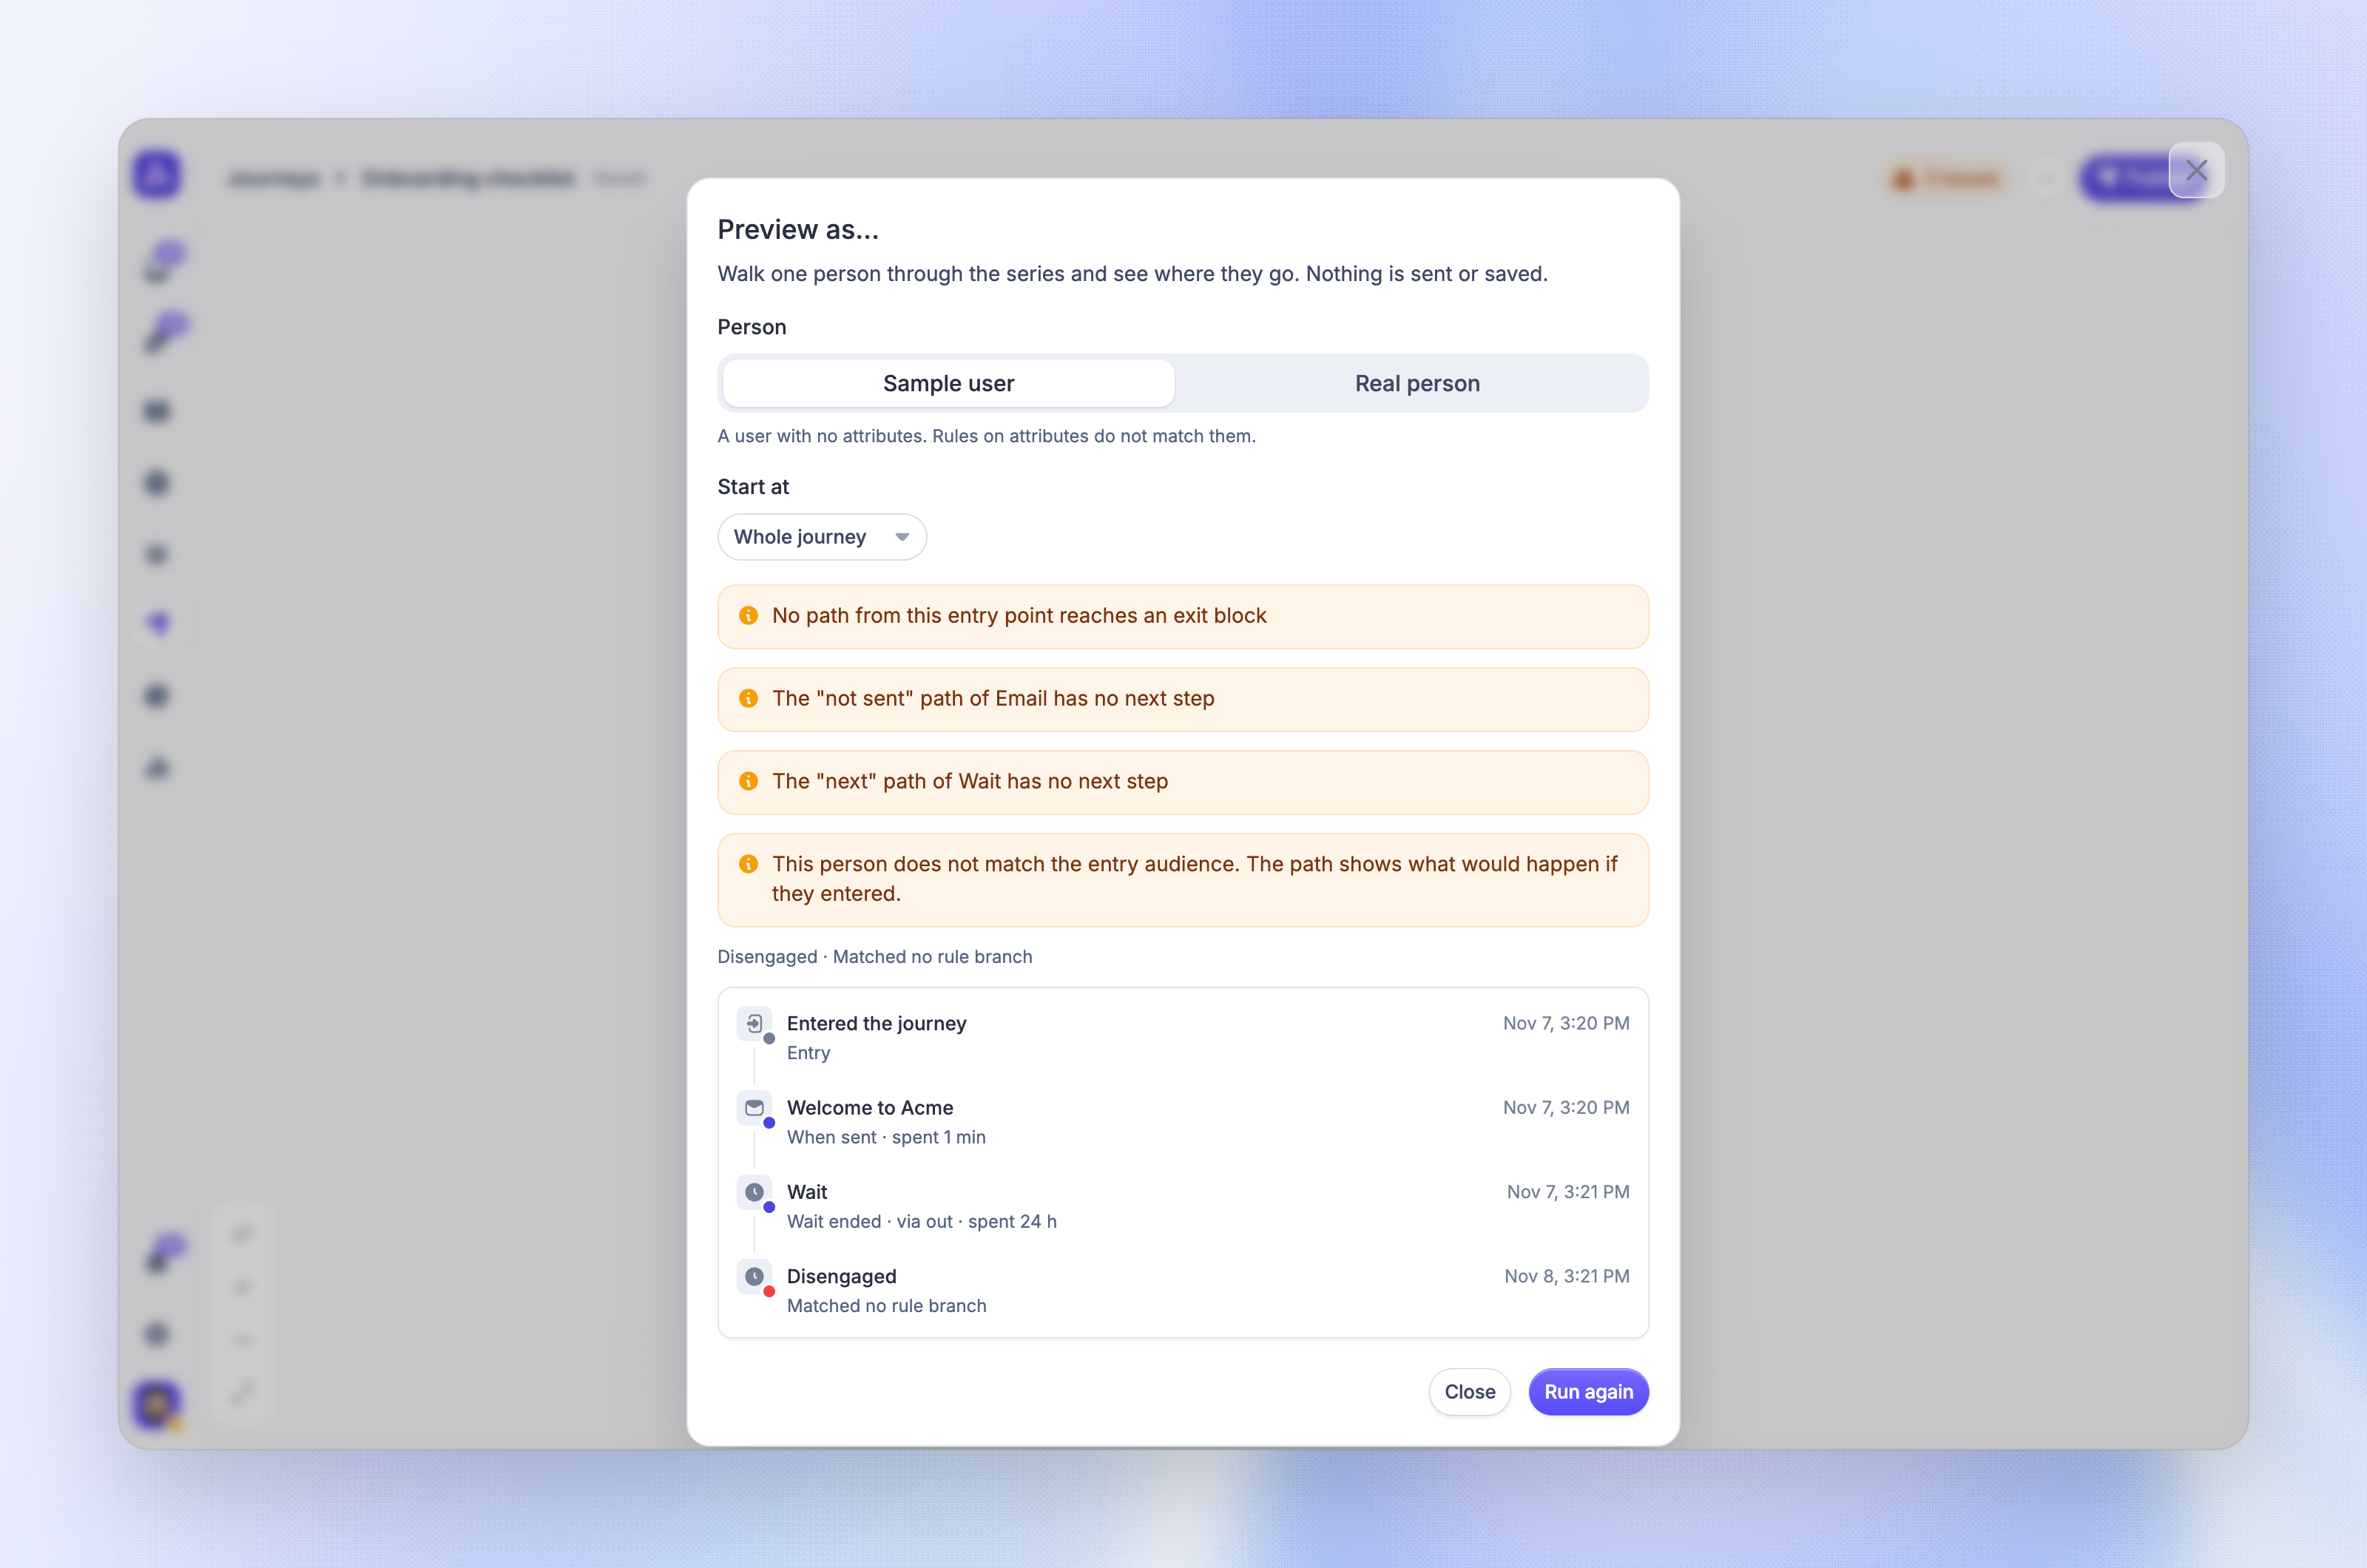
Open the ⋯ (More actions) menu and choose 'Preview as…'
Choose Sample user, or choose Real person and pick a person from your workspace. Real person needs the View Users permission
Click 'Run preview' to see which blocks the person reaches
The preview walks one person through the journey. Nothing is sent or saved. To check an email, open its block and click 'Send test'. Featurebase sends the saved version of the email to you only.
Note: Test sends of in-app blocks use the published version of the block. Publish the journey first, then send yourself a test from the block.
Publish
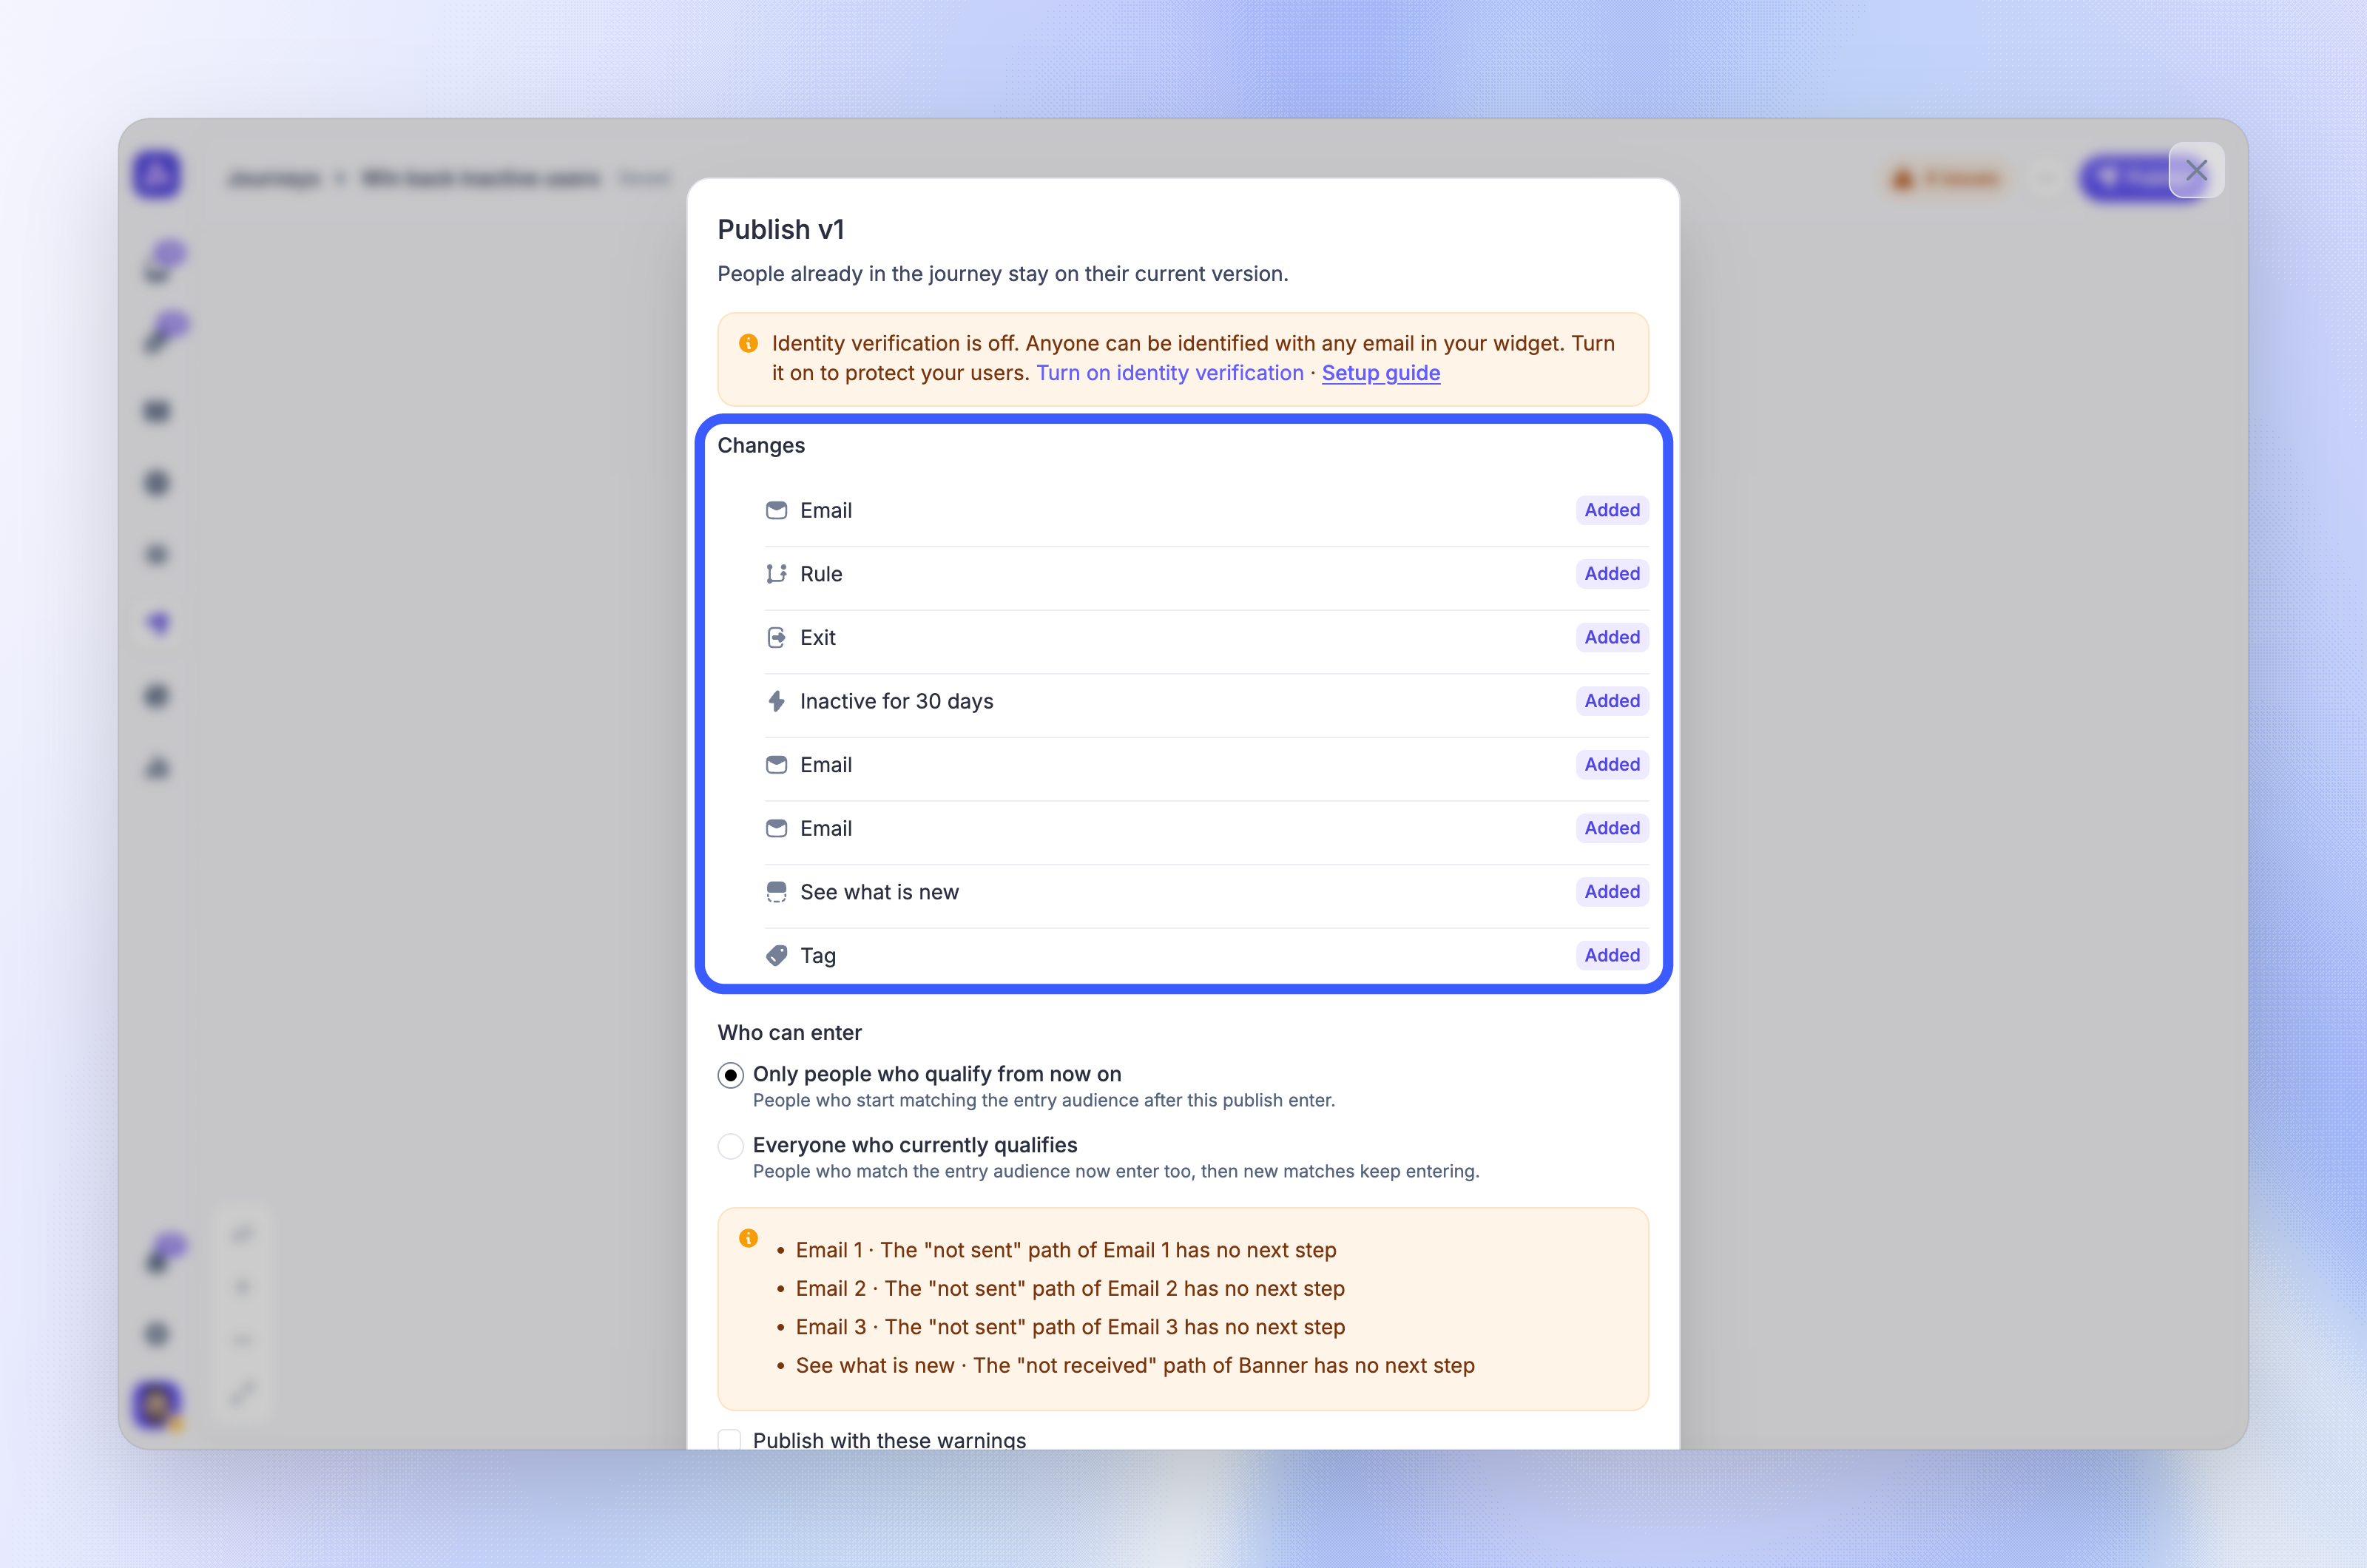
Click 'Publish' in the header
Fix any items listed under Fix these before you publish:, and review any warnings
Under Who can enter, choose Only people who qualify from now on or Everyone who currently qualifies. Journeys with an event or page trigger skip this choice: only events and visits after you publish count
Click 'Publish v1'
The journey goes live and people who qualify start to enter.
Important: With Everyone who currently qualifies, everyone who matches now enters and can get messages soon after you publish. Check the audience rules and message content before you choose it.
Edit after publishing
Your next edits save to the draft, and the live journey keeps running unchanged. When you are ready, click 'Publish changes' to publish a new version. You can choose whether people already in the journey move to the new version.
FAQs
Why is the 'Publish' button disabled?
Why is the 'Publish' button disabled?
Hover over the button to see the reason. The draft may have errors to fix, it may be the same as the live version, or you may not have the Manage Outbound State permission. If your plan does not include Journeys, the publish dialog shows 'Upgrade plan' instead.
Can I copy an existing journey?
Can I copy an existing journey?
Yes. In Dashboard → Outbound → Journeys, open the menu on the journey's row and choose 'Duplicate'. The copy is a new draft named after the original with "(copy)" at the end. It has no people and no published version. Archived journeys cannot be duplicated.
Can I use an existing Outbound message in a journey?
Can I use an existing Outbound message in a journey?
Each block has its own message, which you write in the block. For a product tour or post block, you can copy the content of an existing tour or post from the block editor's menu. The original is not changed.
Was this helpful?
Still need help? Ask the team