Getting started with workflows
Get started with building your Workflows with ease in a visual canvas.
Written By Markus from Featurebase
Last updated 8 days ago
✨ Get started with Workflows from Automations → Workflows
Overview
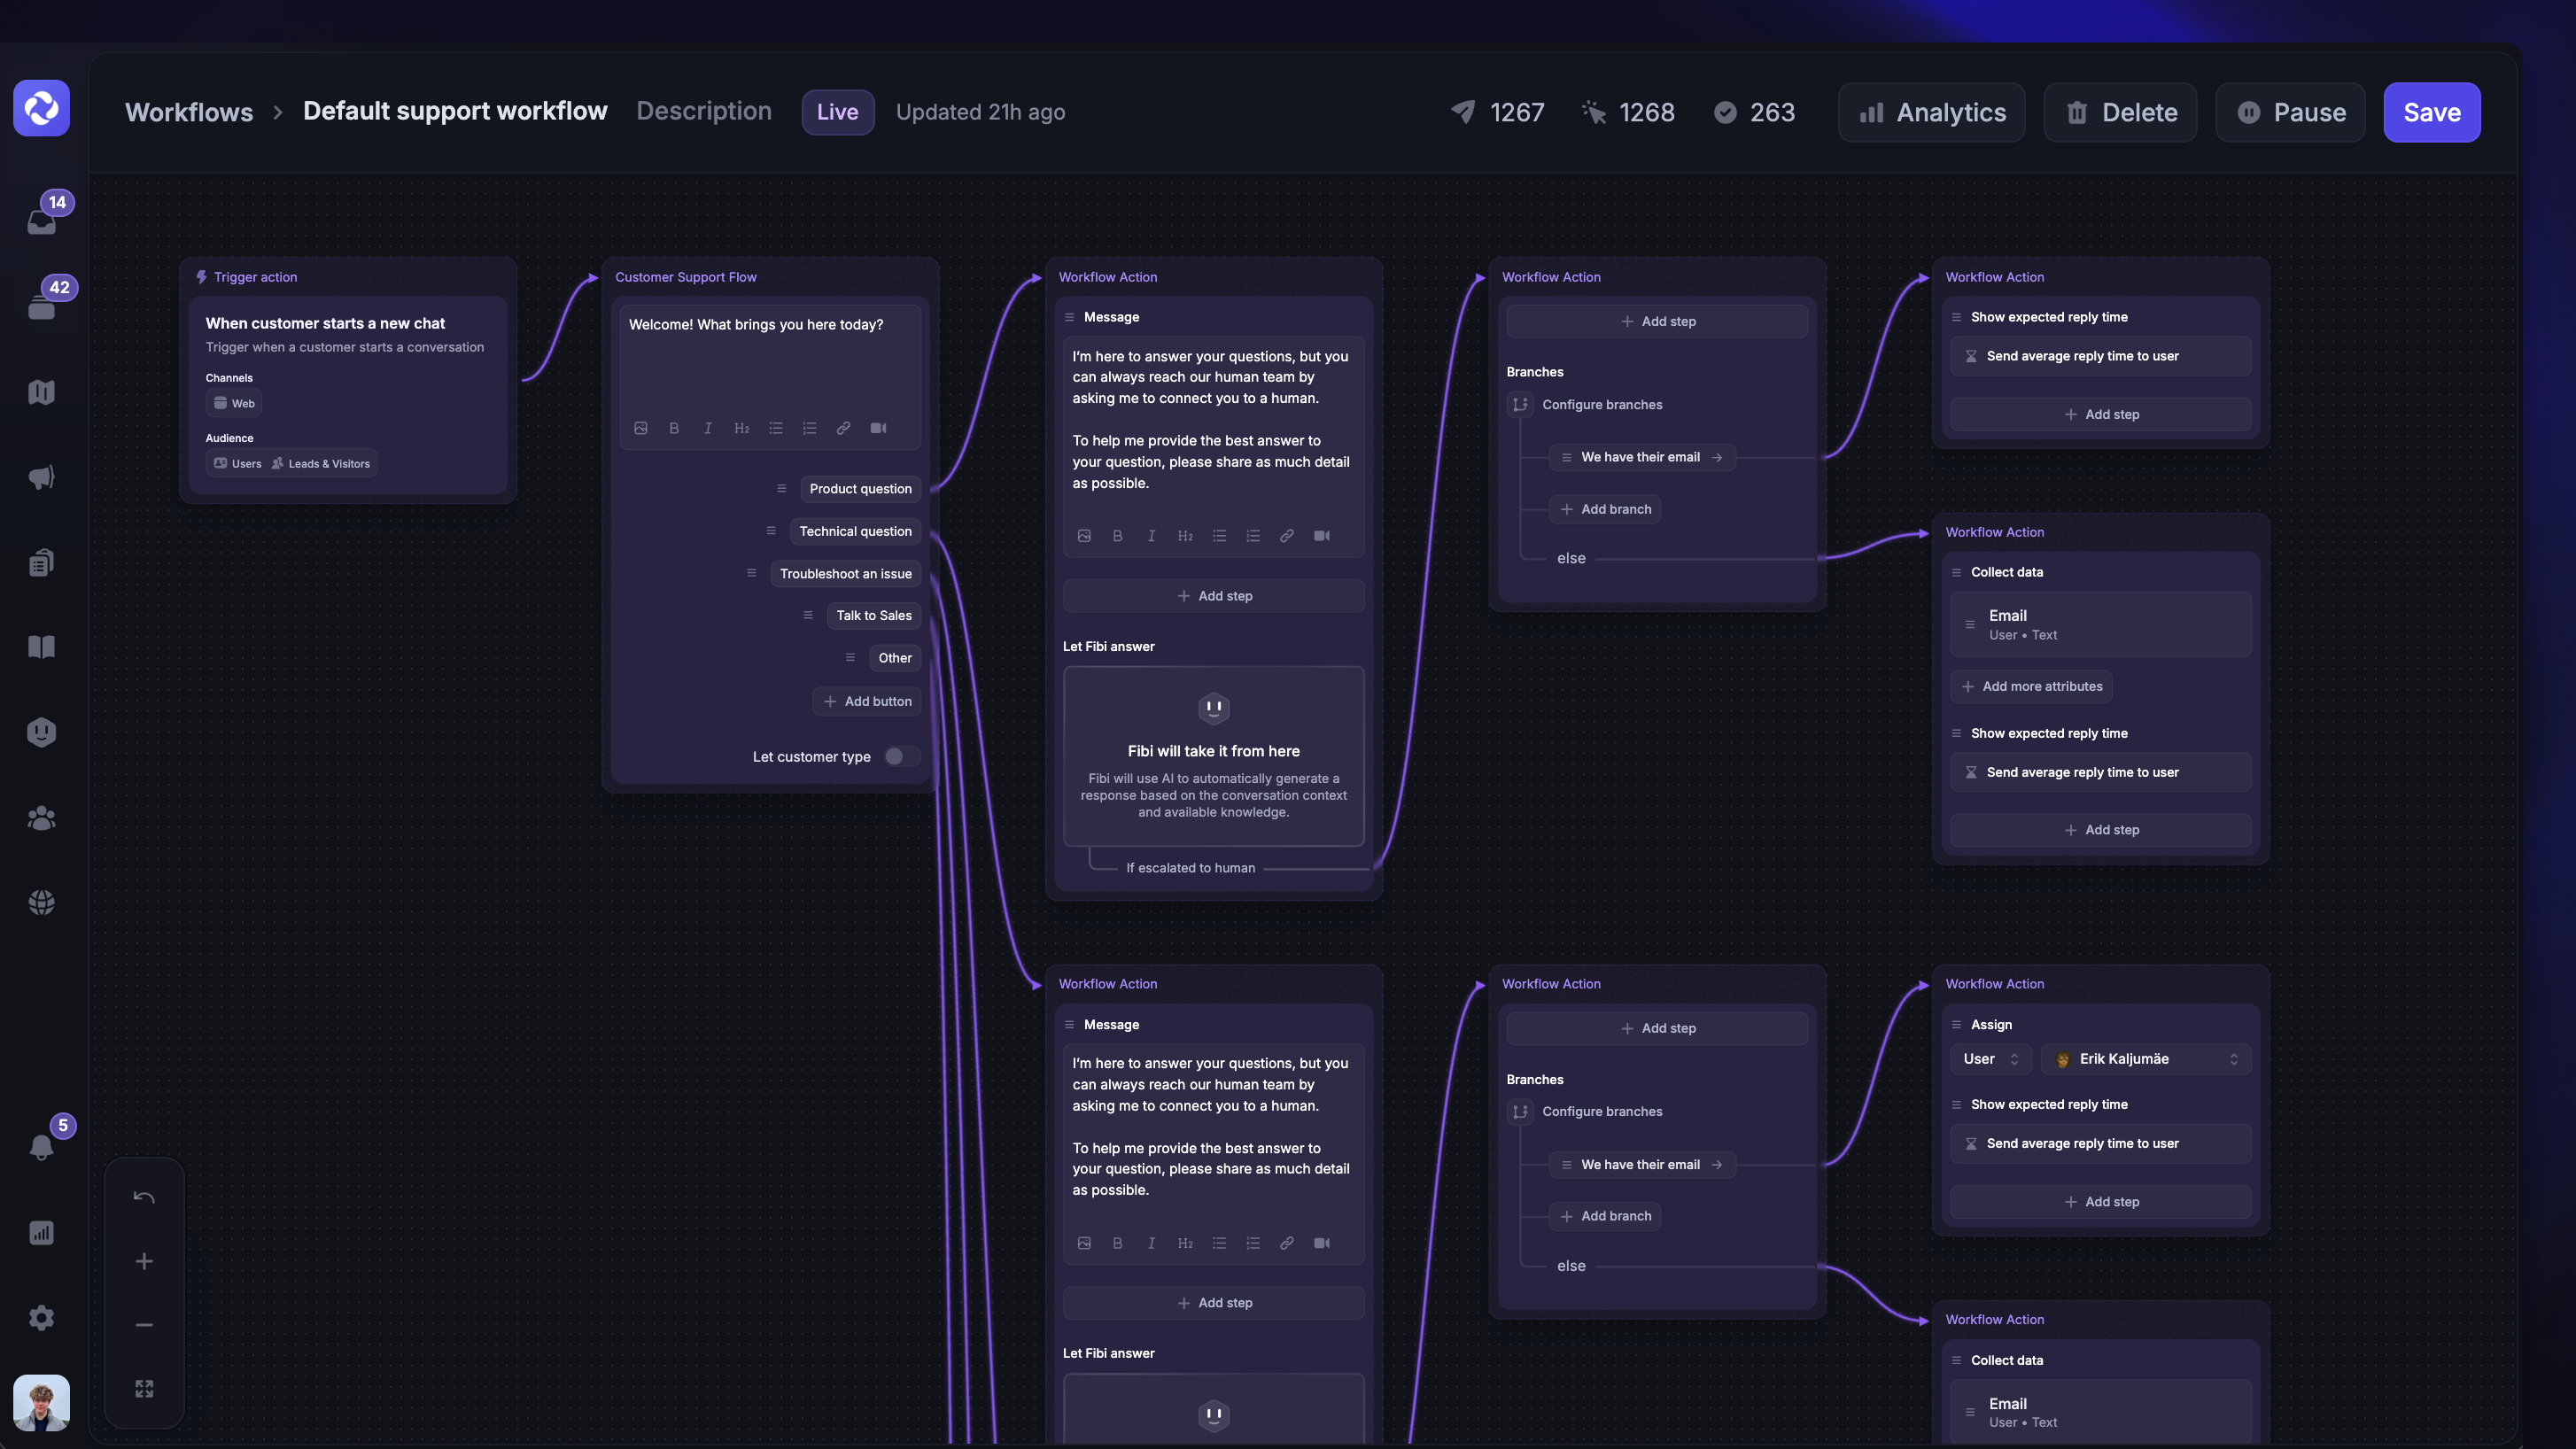
The Workflows builder is a canvas that lets you see the entire workflow in one view. Create and edit messages, actions, and conditions with ease, then connect them together with path arrows. Let’s go over the basics of how ot start building workflows to automate your support efforts.
Configure the trigger settings
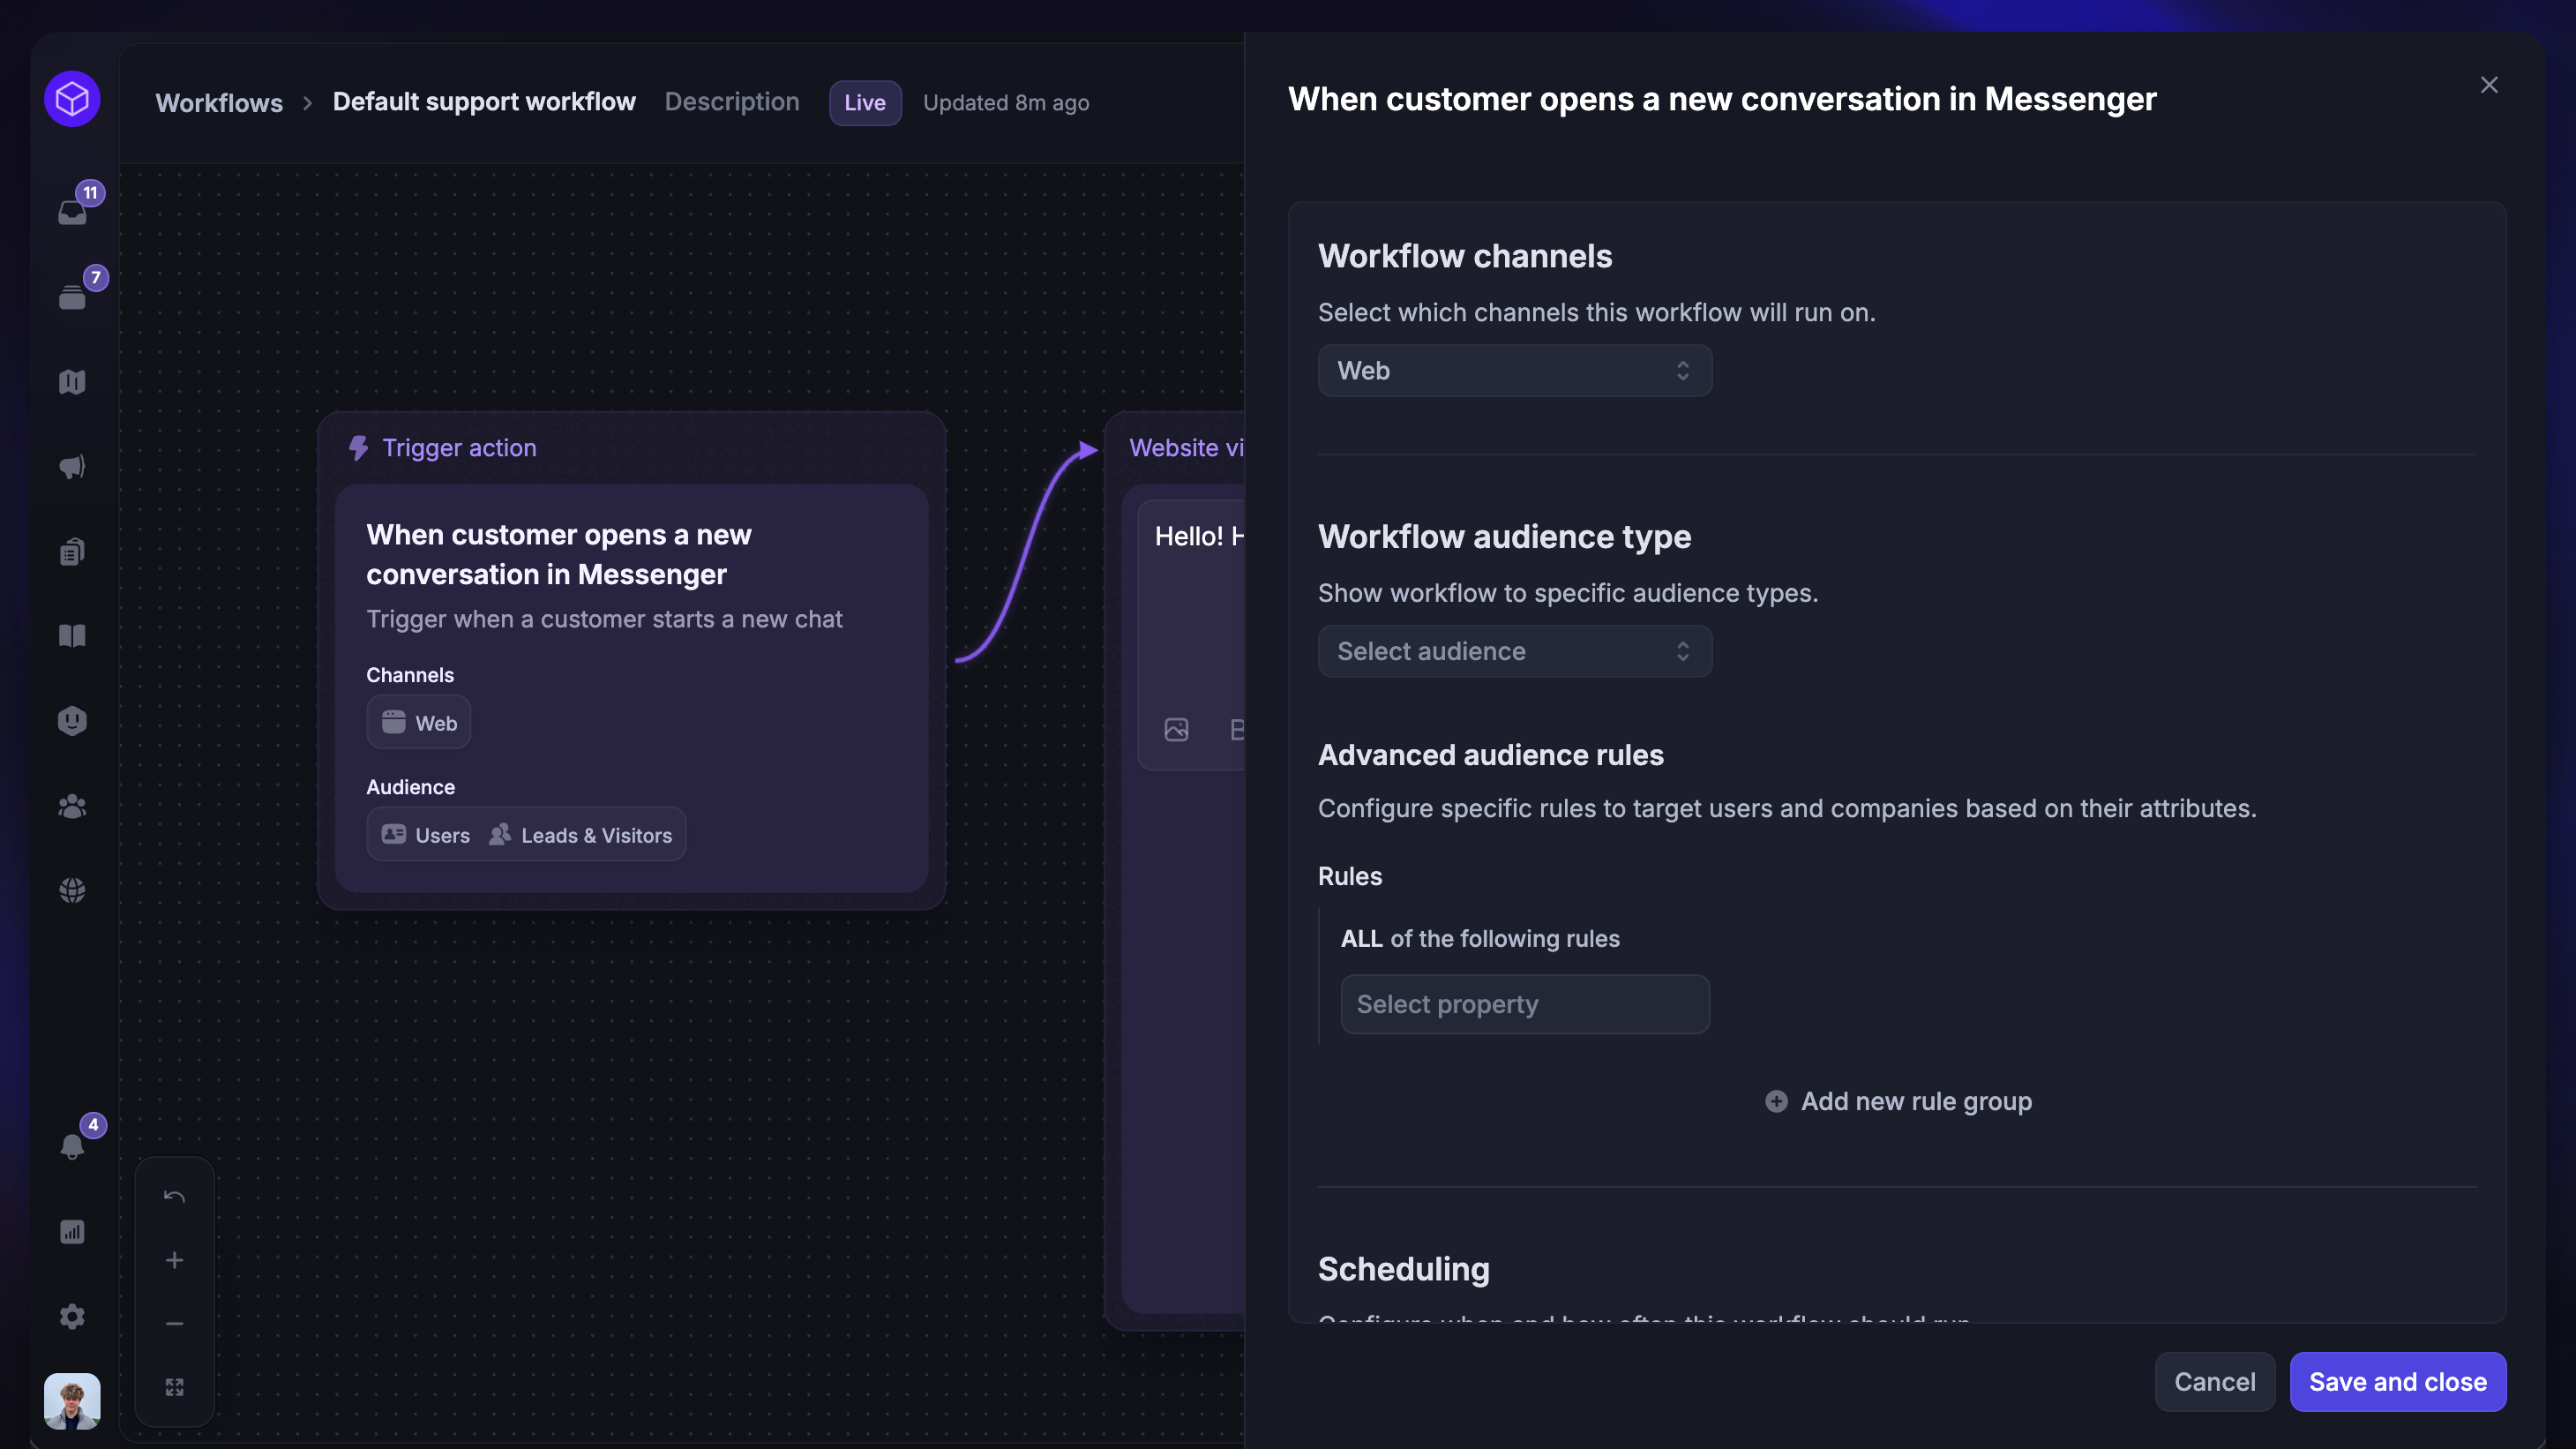
The first block in the Workflows builder is the trigger you selected. Click on this block to configure the trigger settings.
This is where you'll be able to configure the channel, audience rules, frequency and scheduling, and the goal for this workflow.
You can't change the type of trigger here. You'll need to create a new Workflow and choose a different trigger.
Navigating a Workflow
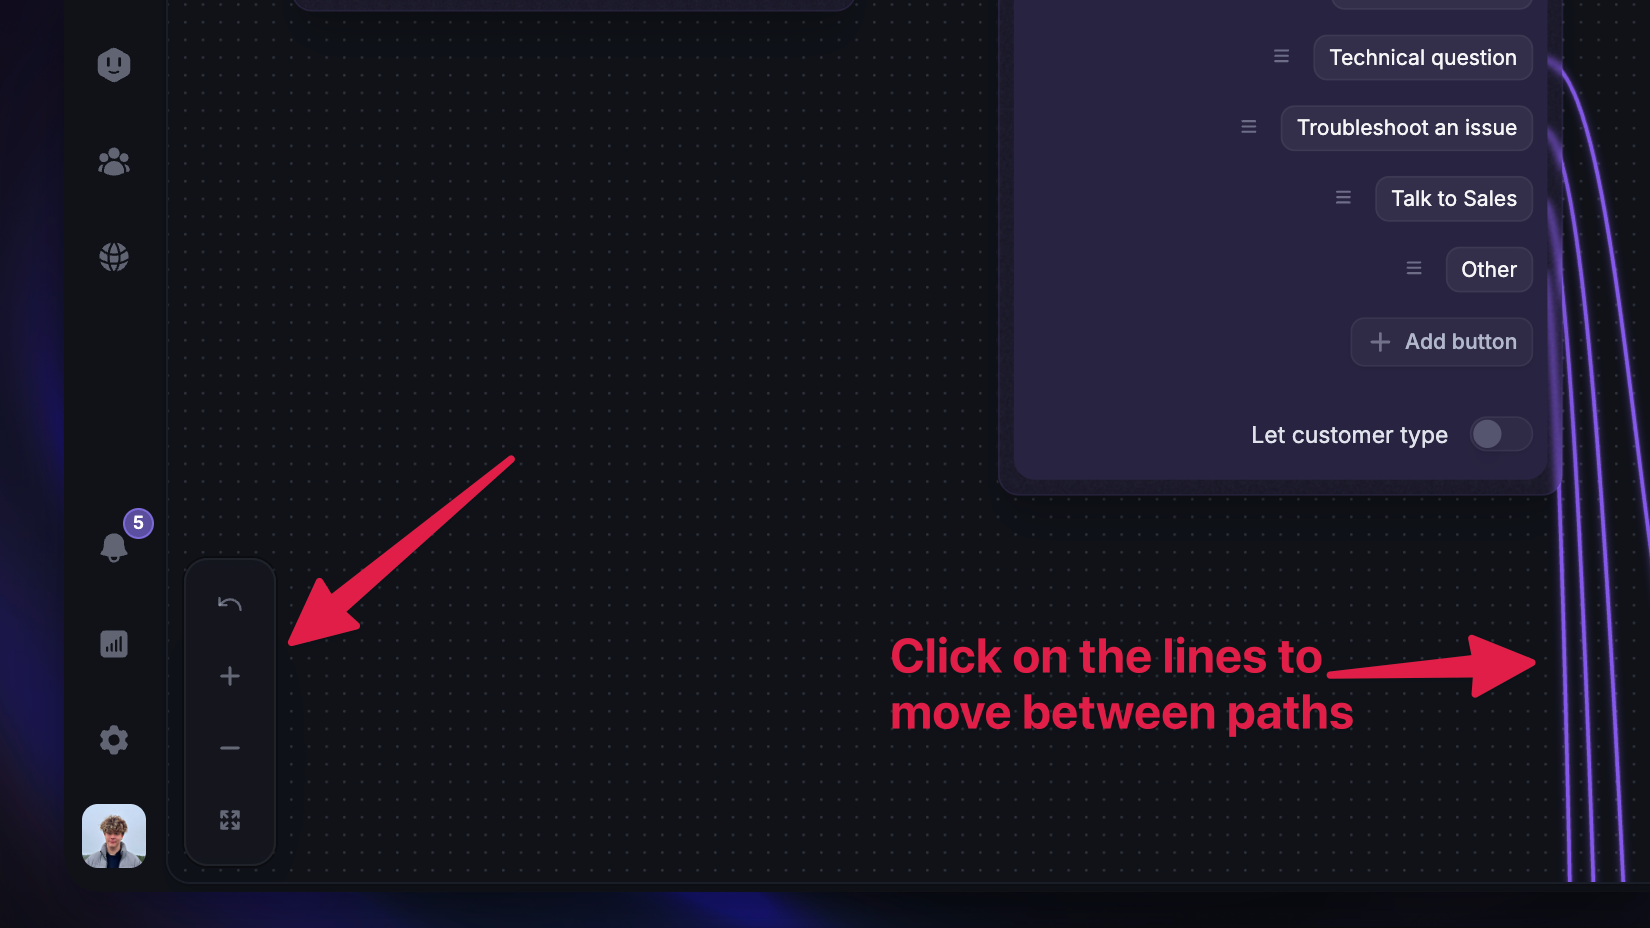
From the builder page, you can see the trigger and a list of paths. From here, you can zoom in and out, pan, and recenter to bring the first path into view using the controls from the bottom-left of the canvas or via keystrokes.
Use CMD/CTRL + to zoom in, or CMD/CTRL - to zoom out. Click on the connecting lines to move seamlessly between paths in the canvas.
Note: You cannot click and drag to move the pathways in the Workflow. All new steps will be created in a neat and organized way.
Building a Workflow from scratch
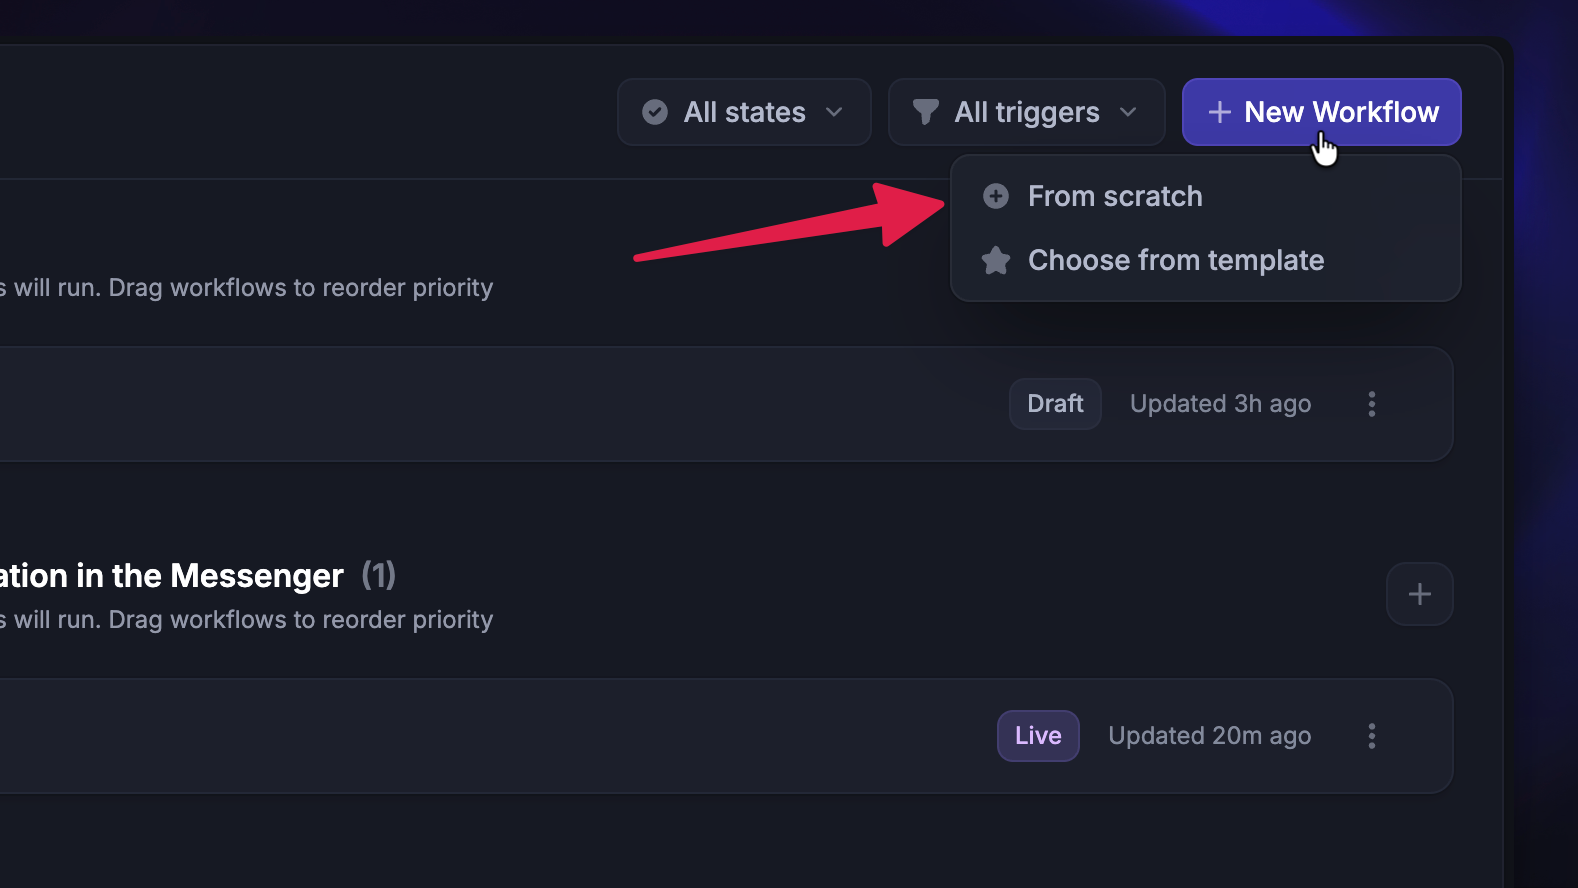
Let’s go over the basics of how to start building Workflows from scratch. You can start by creating new Workflows from Automations → Workflows.
Adding a path from the first block
Every trigger will always start a new path on the canvas. To begin your workflow, you can customize the reply buttons or start by adding actions.
Click one of the paths and choose how to continue from a panel of possible messages, actions, and conditions. This creates a new path with a connecting line.
Note: The first path will change slightly depending on the trigger you selected and can have different constraints on the different messages and actions that can be used.
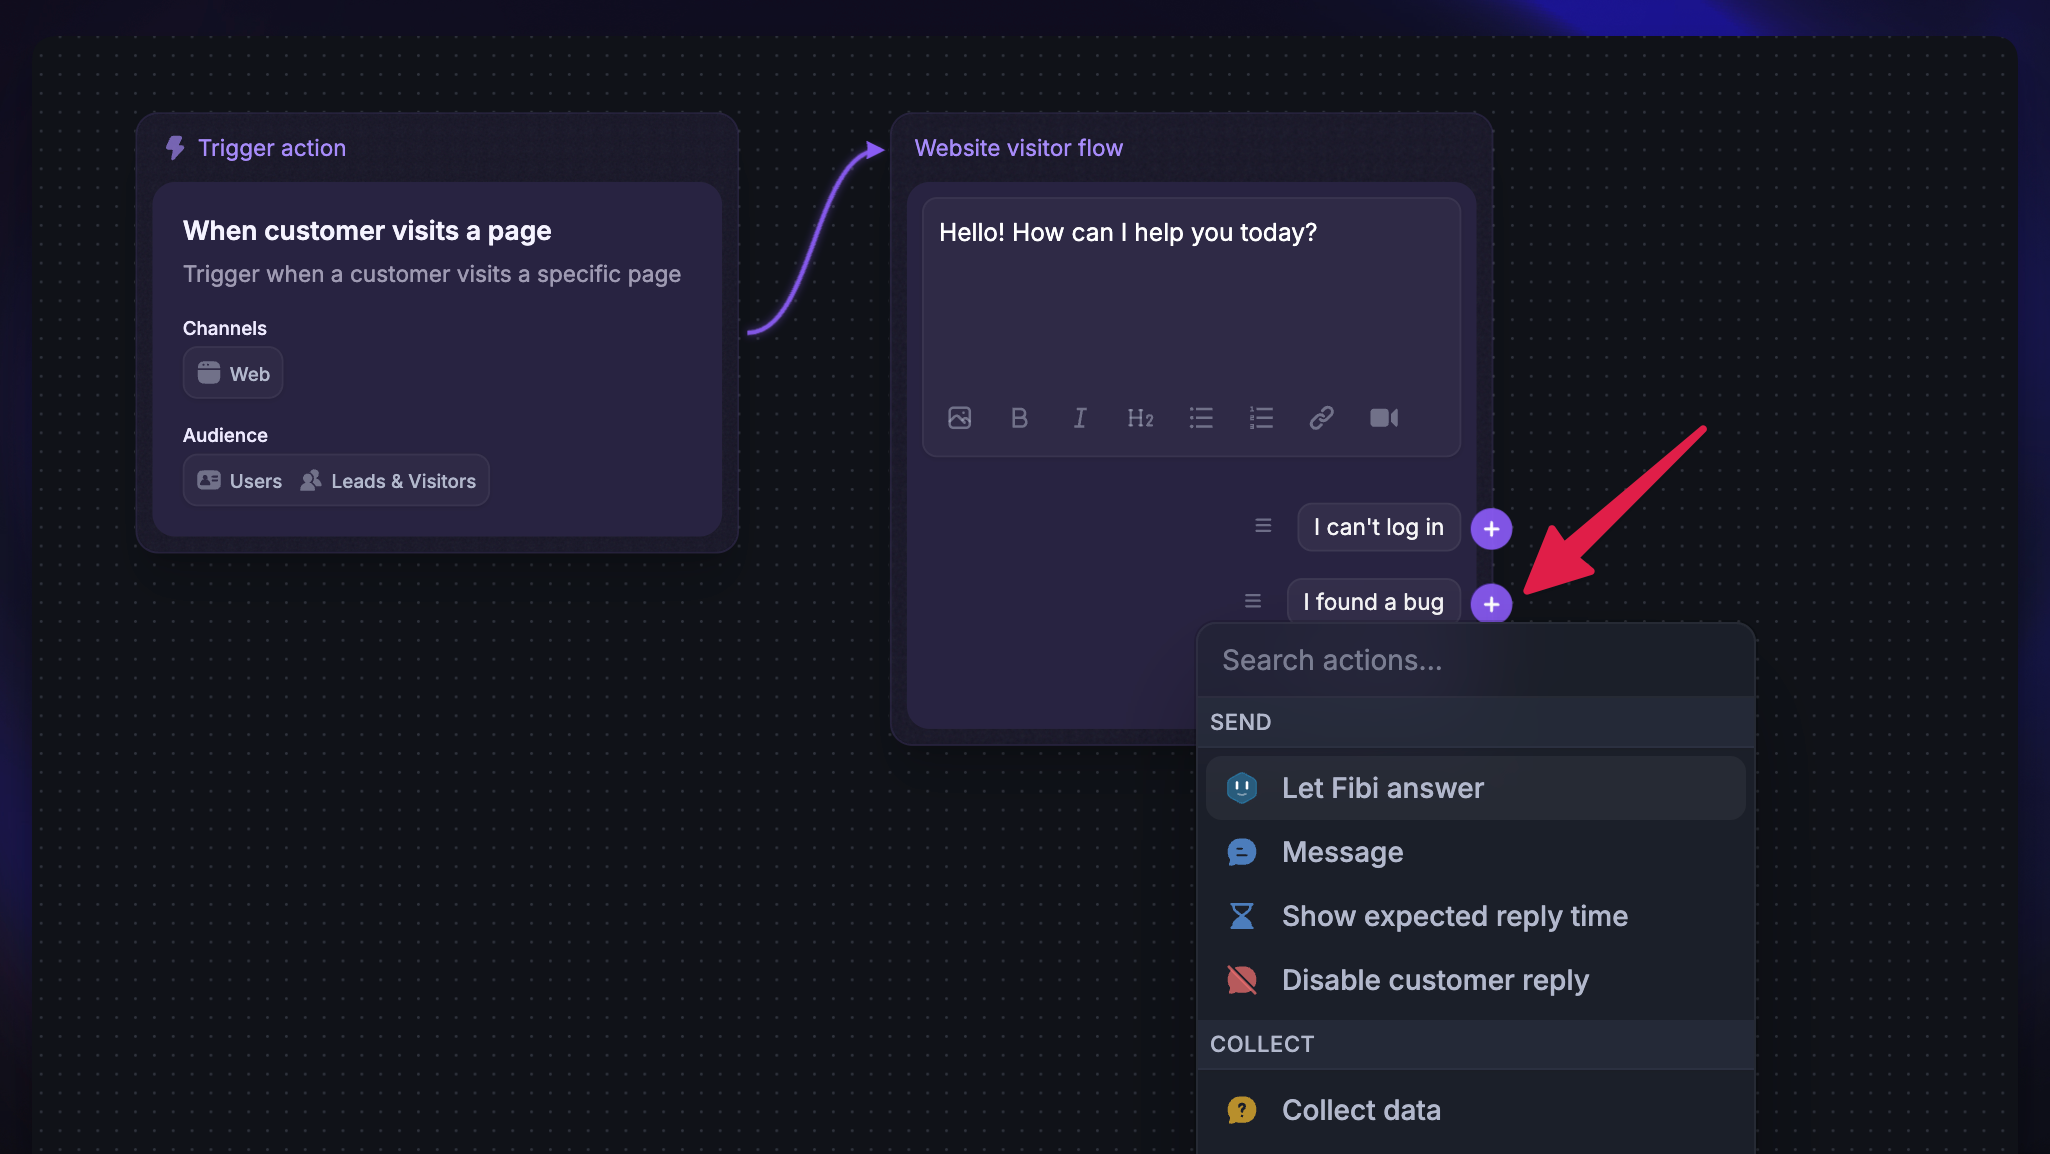
Adding a message, action, or condition within an existing path
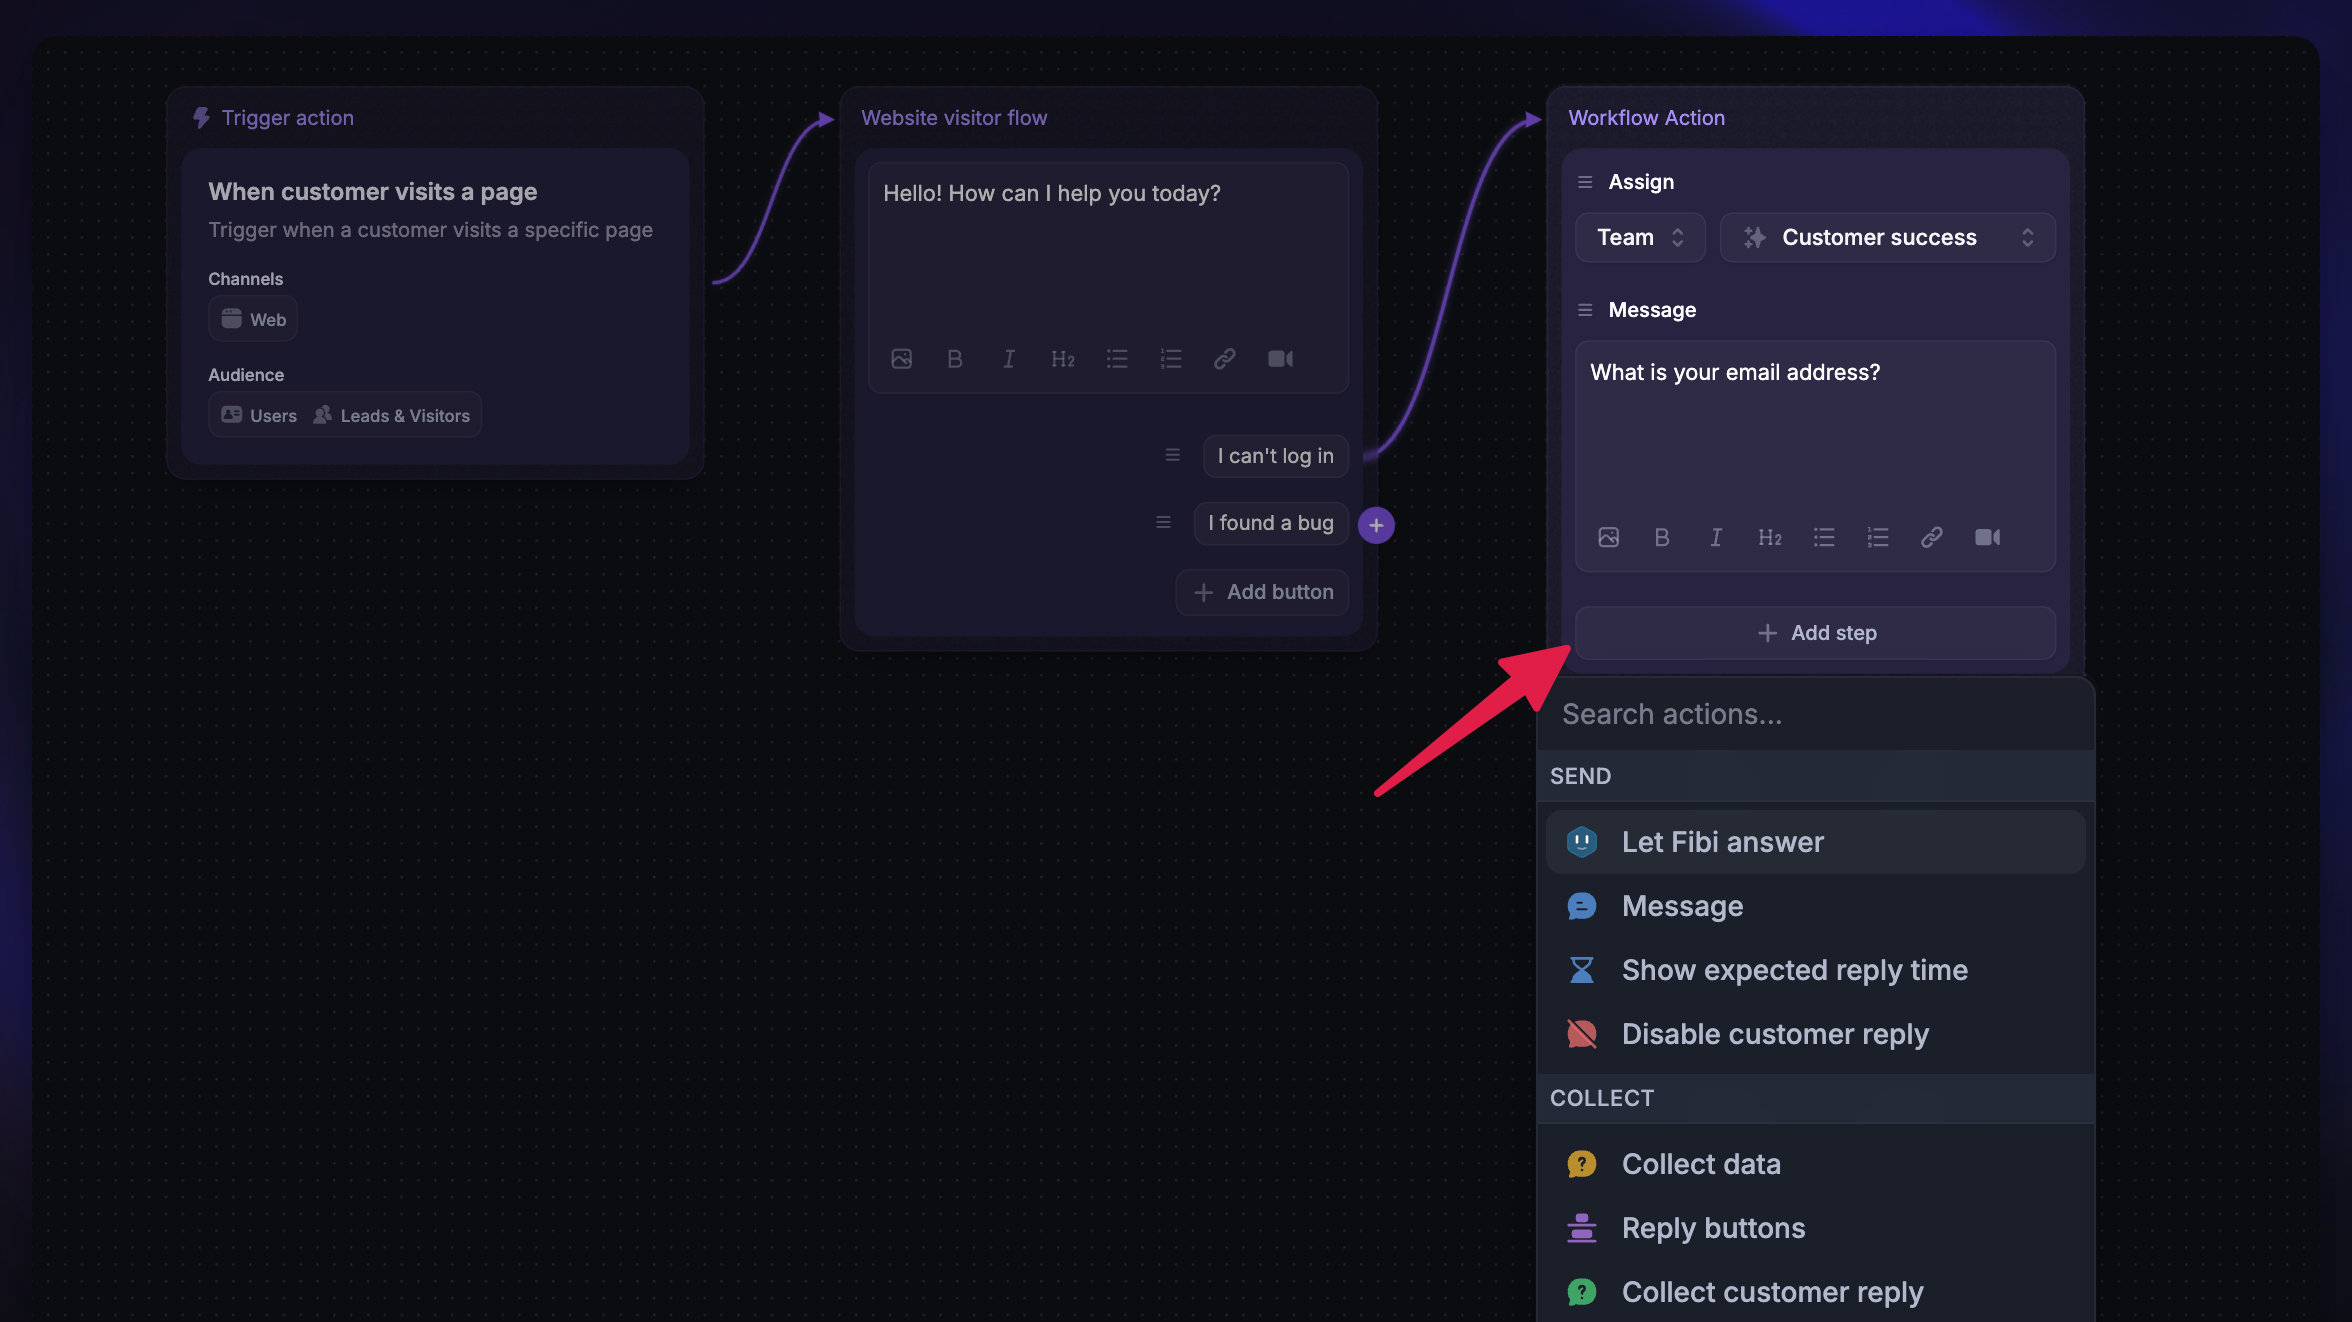
Add further messages, actions, or conditions within a path by clicking + Add step.
You can choose from the following message types:
Let Fibi answer
Send a message
Show expected reply time
Disable customer reply
Collect data (custom attribute to save to users profile or conversation data)
Collect customer reply
You can also choose from a number of conversation actions. These are not customer-facing and will run in the background:
Assign
Mark as priority
Close
Snooze
Wait
Add note
Tag end user
Set conversation attribute
Or, you can proceed to another path using:
Reply buttons
Branches
Tip: You can use dynamic variables like {First name} to make your messages more personal to customers.
Add conditional branches to a Workflow
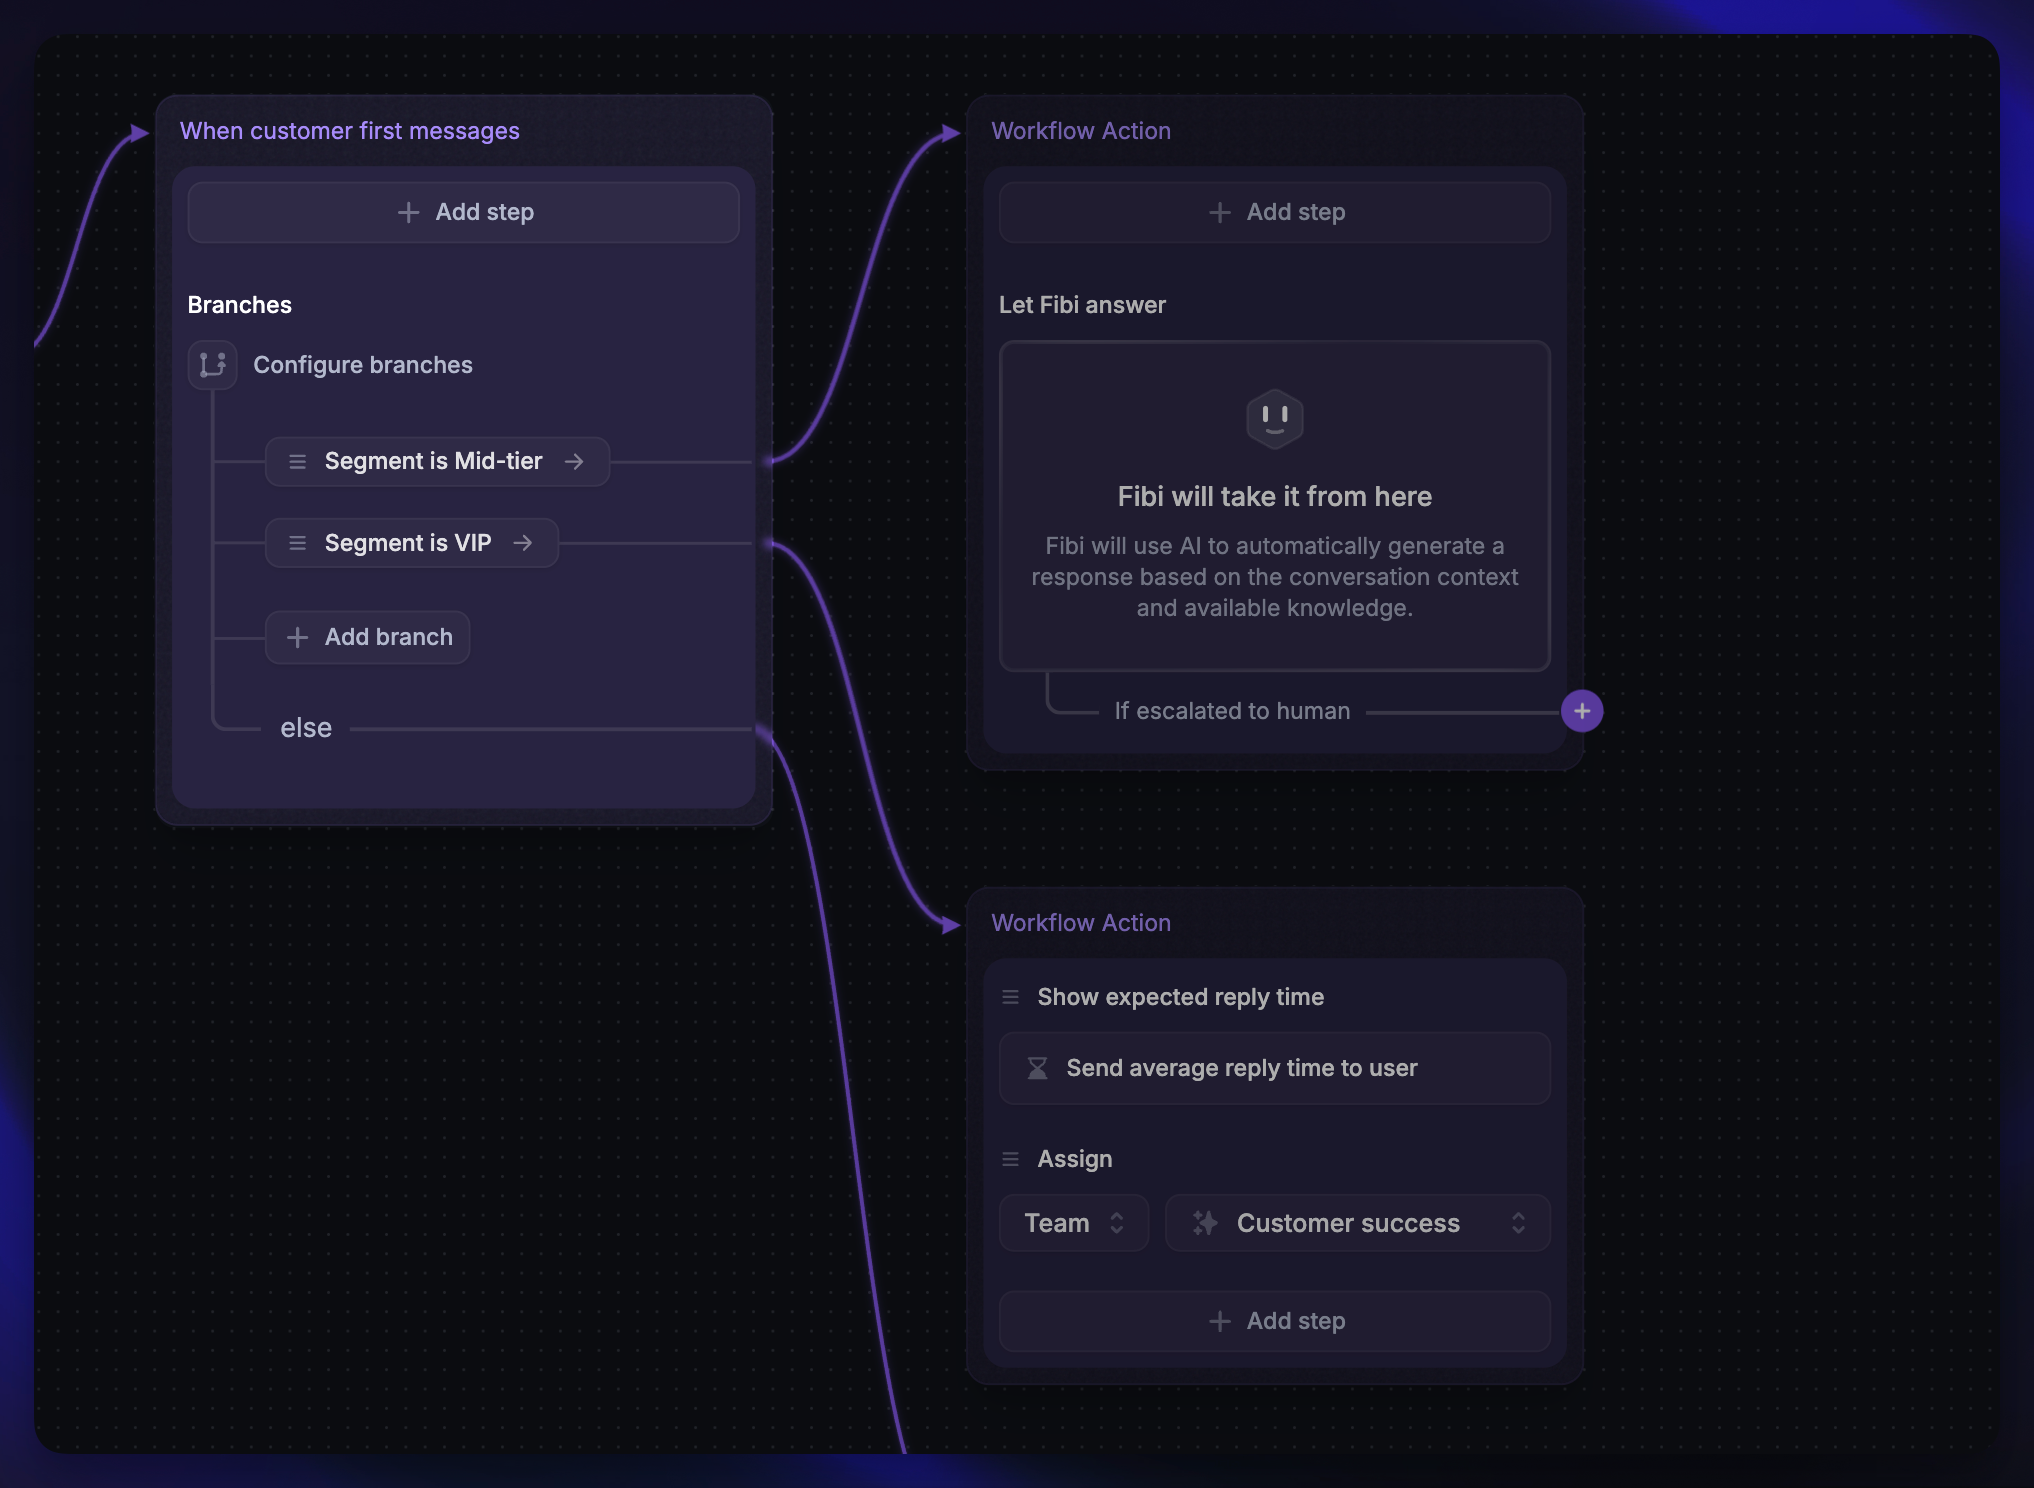
With Branches, you can configure a Workflow to continue to the relevant path depending on specific conditions. To set up branching:
Click the + Add step icon below a path and select Branches
Then click on Missing condition to add your conditions
Now you can route to the correct path based on the condition(s). E.g. if customer is VIP then route to “Tier 1 Support”, else answer with Fibi AI Agent.
Note: It’s possible to add multiple conditions to a path by clicking the plus icon below an existing branch. If a user matches multiple conditions, they will proceed down the first path that they match for.
Deleting a path
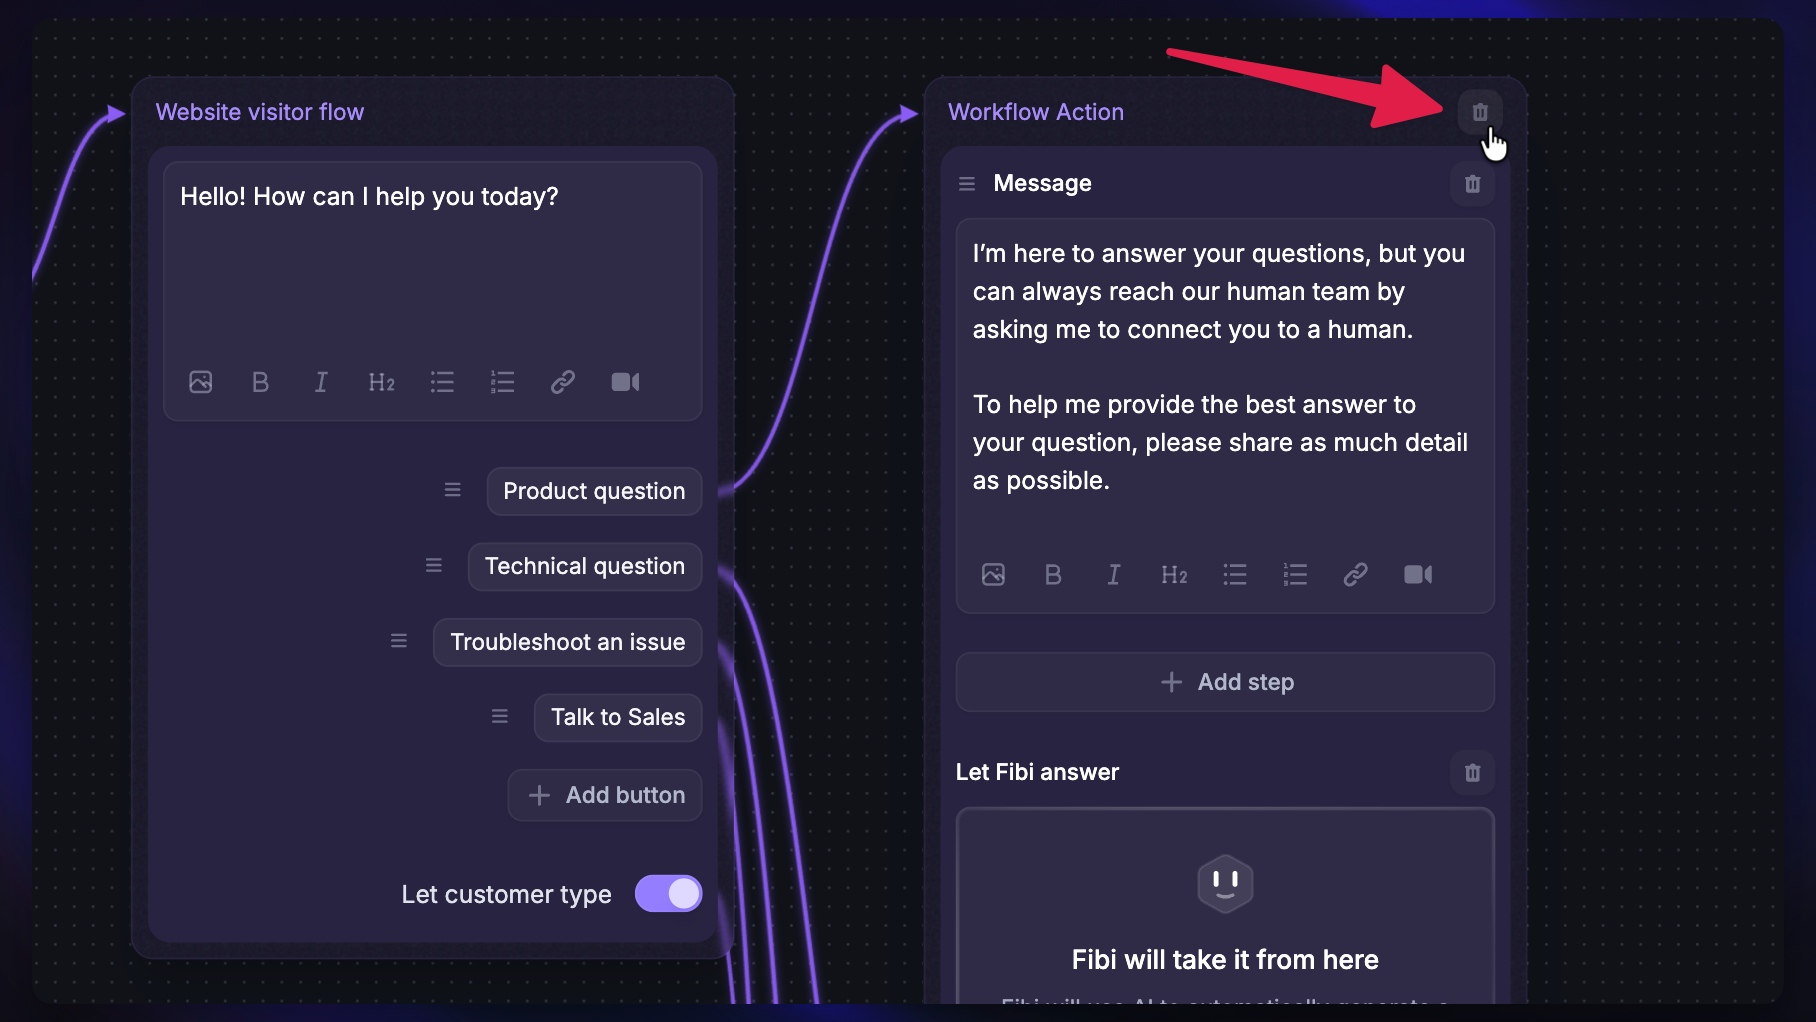
To delete a path, click on the three dots in the top left corner of the path and select Delete path. This automatically removes it from the canvas along with any connections to the path.
Test & set a Workflow live

Once you’re happy with the Workflow and your trigger settings, click Set live in the top-right.
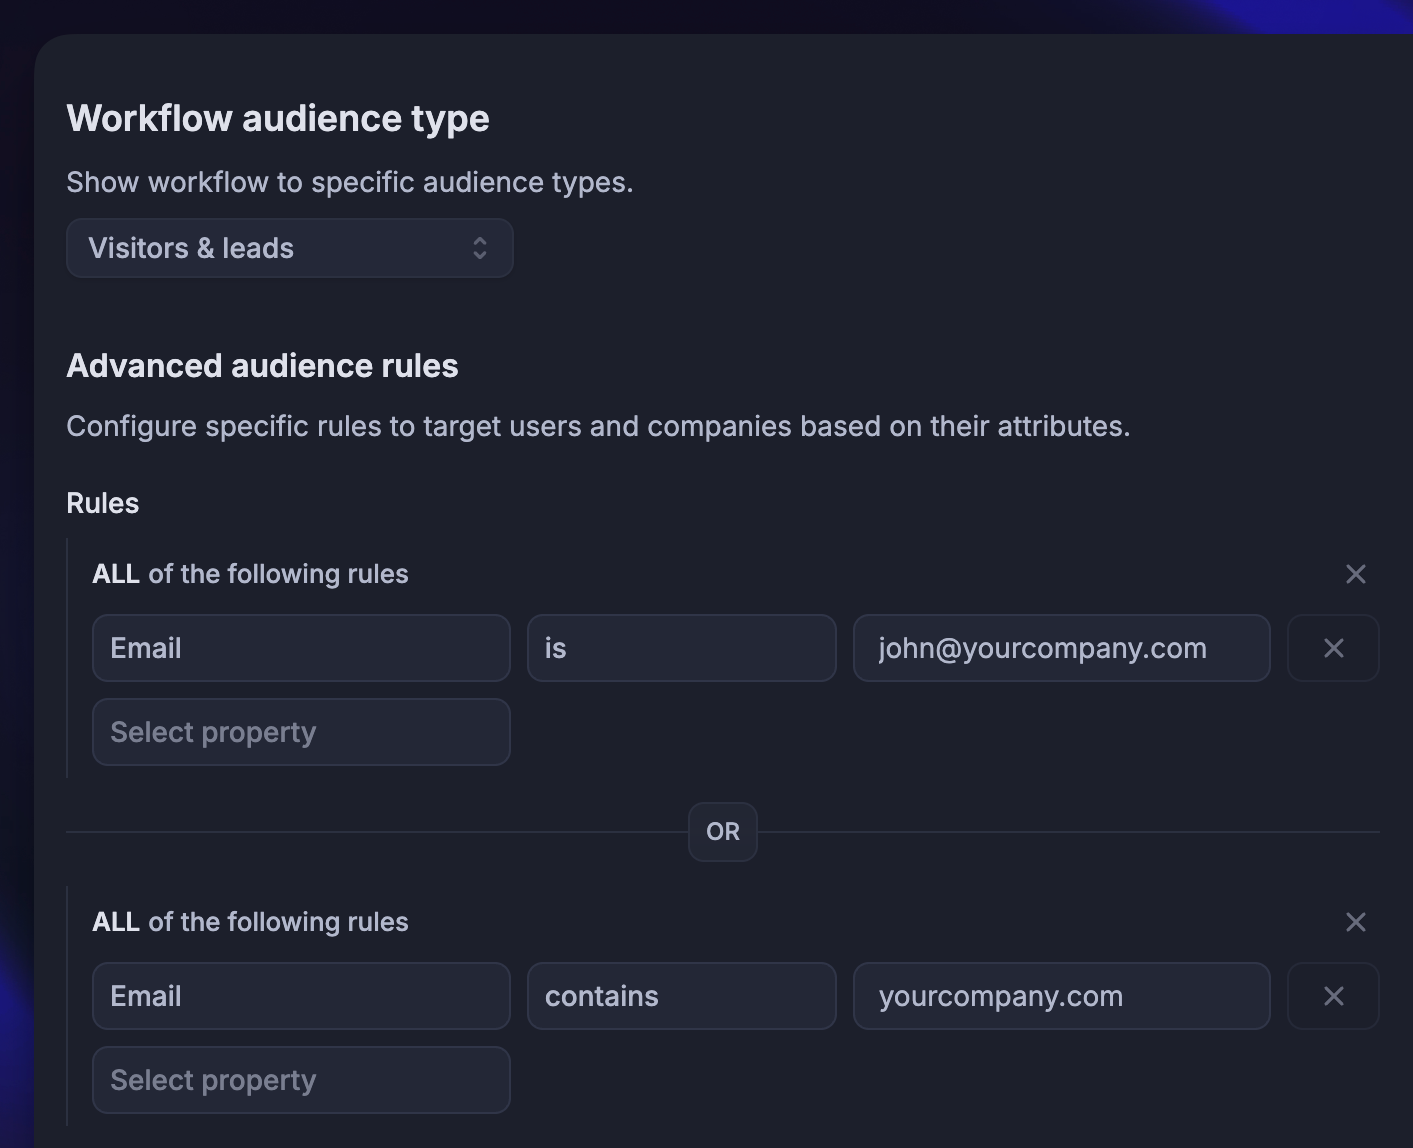
If you or your team want to test a Workflow in action before any customers see it, you can target it to only yourself or your teammates, then set it live.
To do this, simply select the Email attribute from the Workflow trigger settings, and enter your own email address - or “contains” your company’s email domain (@yourcompany.com).
Editing existing Workflows
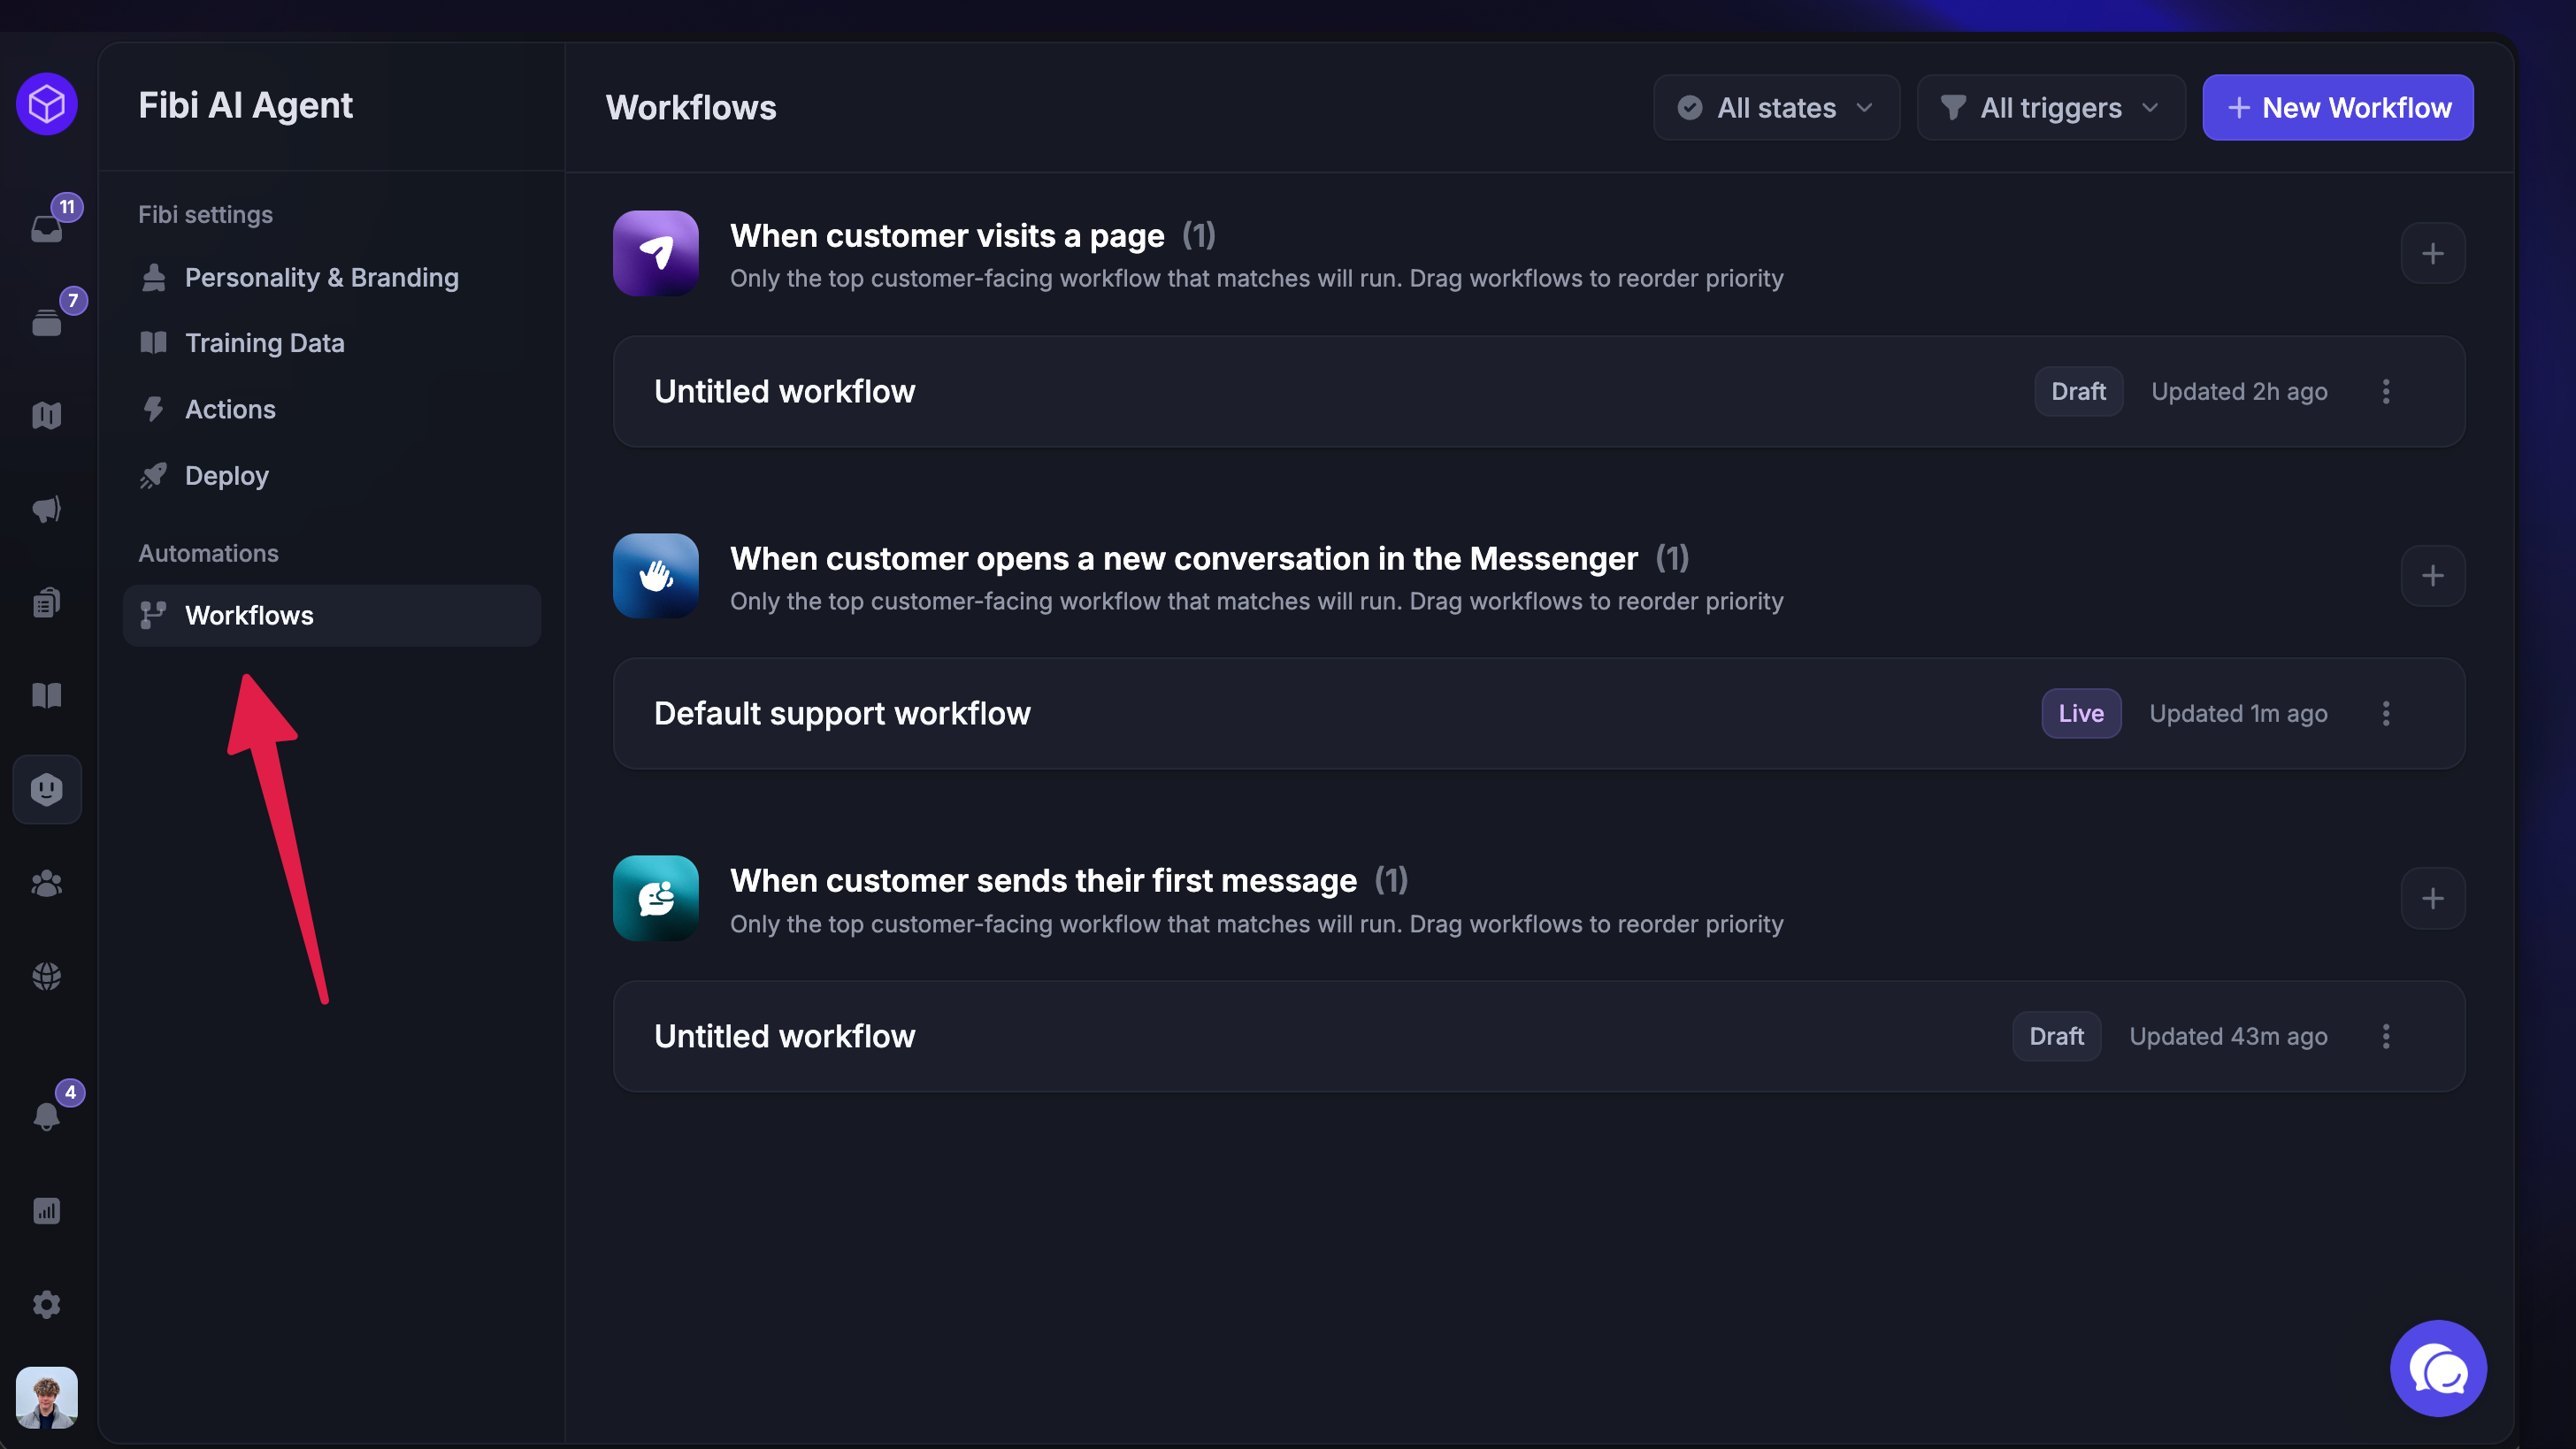
Browse, view and manage your Workflows all from Automations → Workflows. Here, you can search or filter by State and Trigger type.
To make changes to a Workflow, simply click any Workflow and make changes in the visual canvas following the steps above. Make sure to save your changes!
Delete Workflows
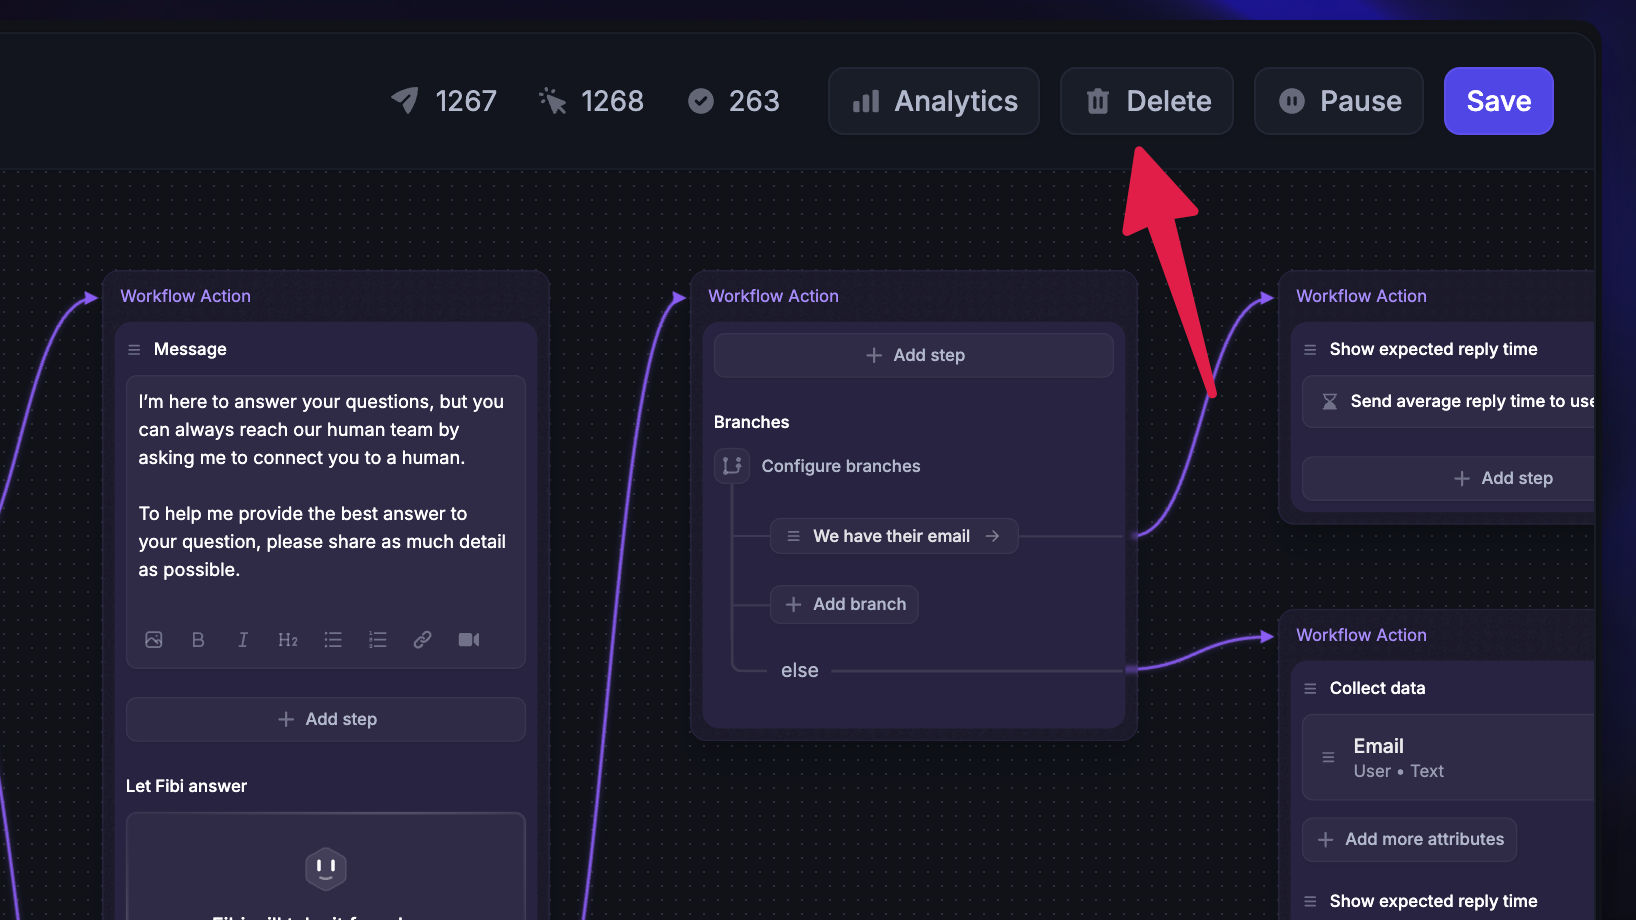
You can delete Workflows by opening them and clicking the ‘Delete ‘ button.
Best practice advice
If a customer reaches the end of the path, but there's no actionable outcome, we recommend a follow-up line when people click the
No thanksbutton, and a response like "That's cool, enjoy exploring our site," or "Let us know if you need any help later." Messages like that help you appear more approachable and assistive.Try to keep your responses concise. Information provided by bots is typically received better if it's efficient and timely, as if it were a natural conversation.
Require new conversations to enter an email address in the Messenger Settings.
We often recommend using some emojis to make messages personal. We've found that emojis can signify more than a picture in business and personal relationships.
Want to view conversations that went down a certain path? Add an action to tag any users on that path so you can see who has responded to the bot when you pull up the tag.