Creating Updates
Learn how to write, target, publish, schedule, and edit Updates in Featurebase.
Written By Markus Palm
Last updated About 3 hours ago
Overview
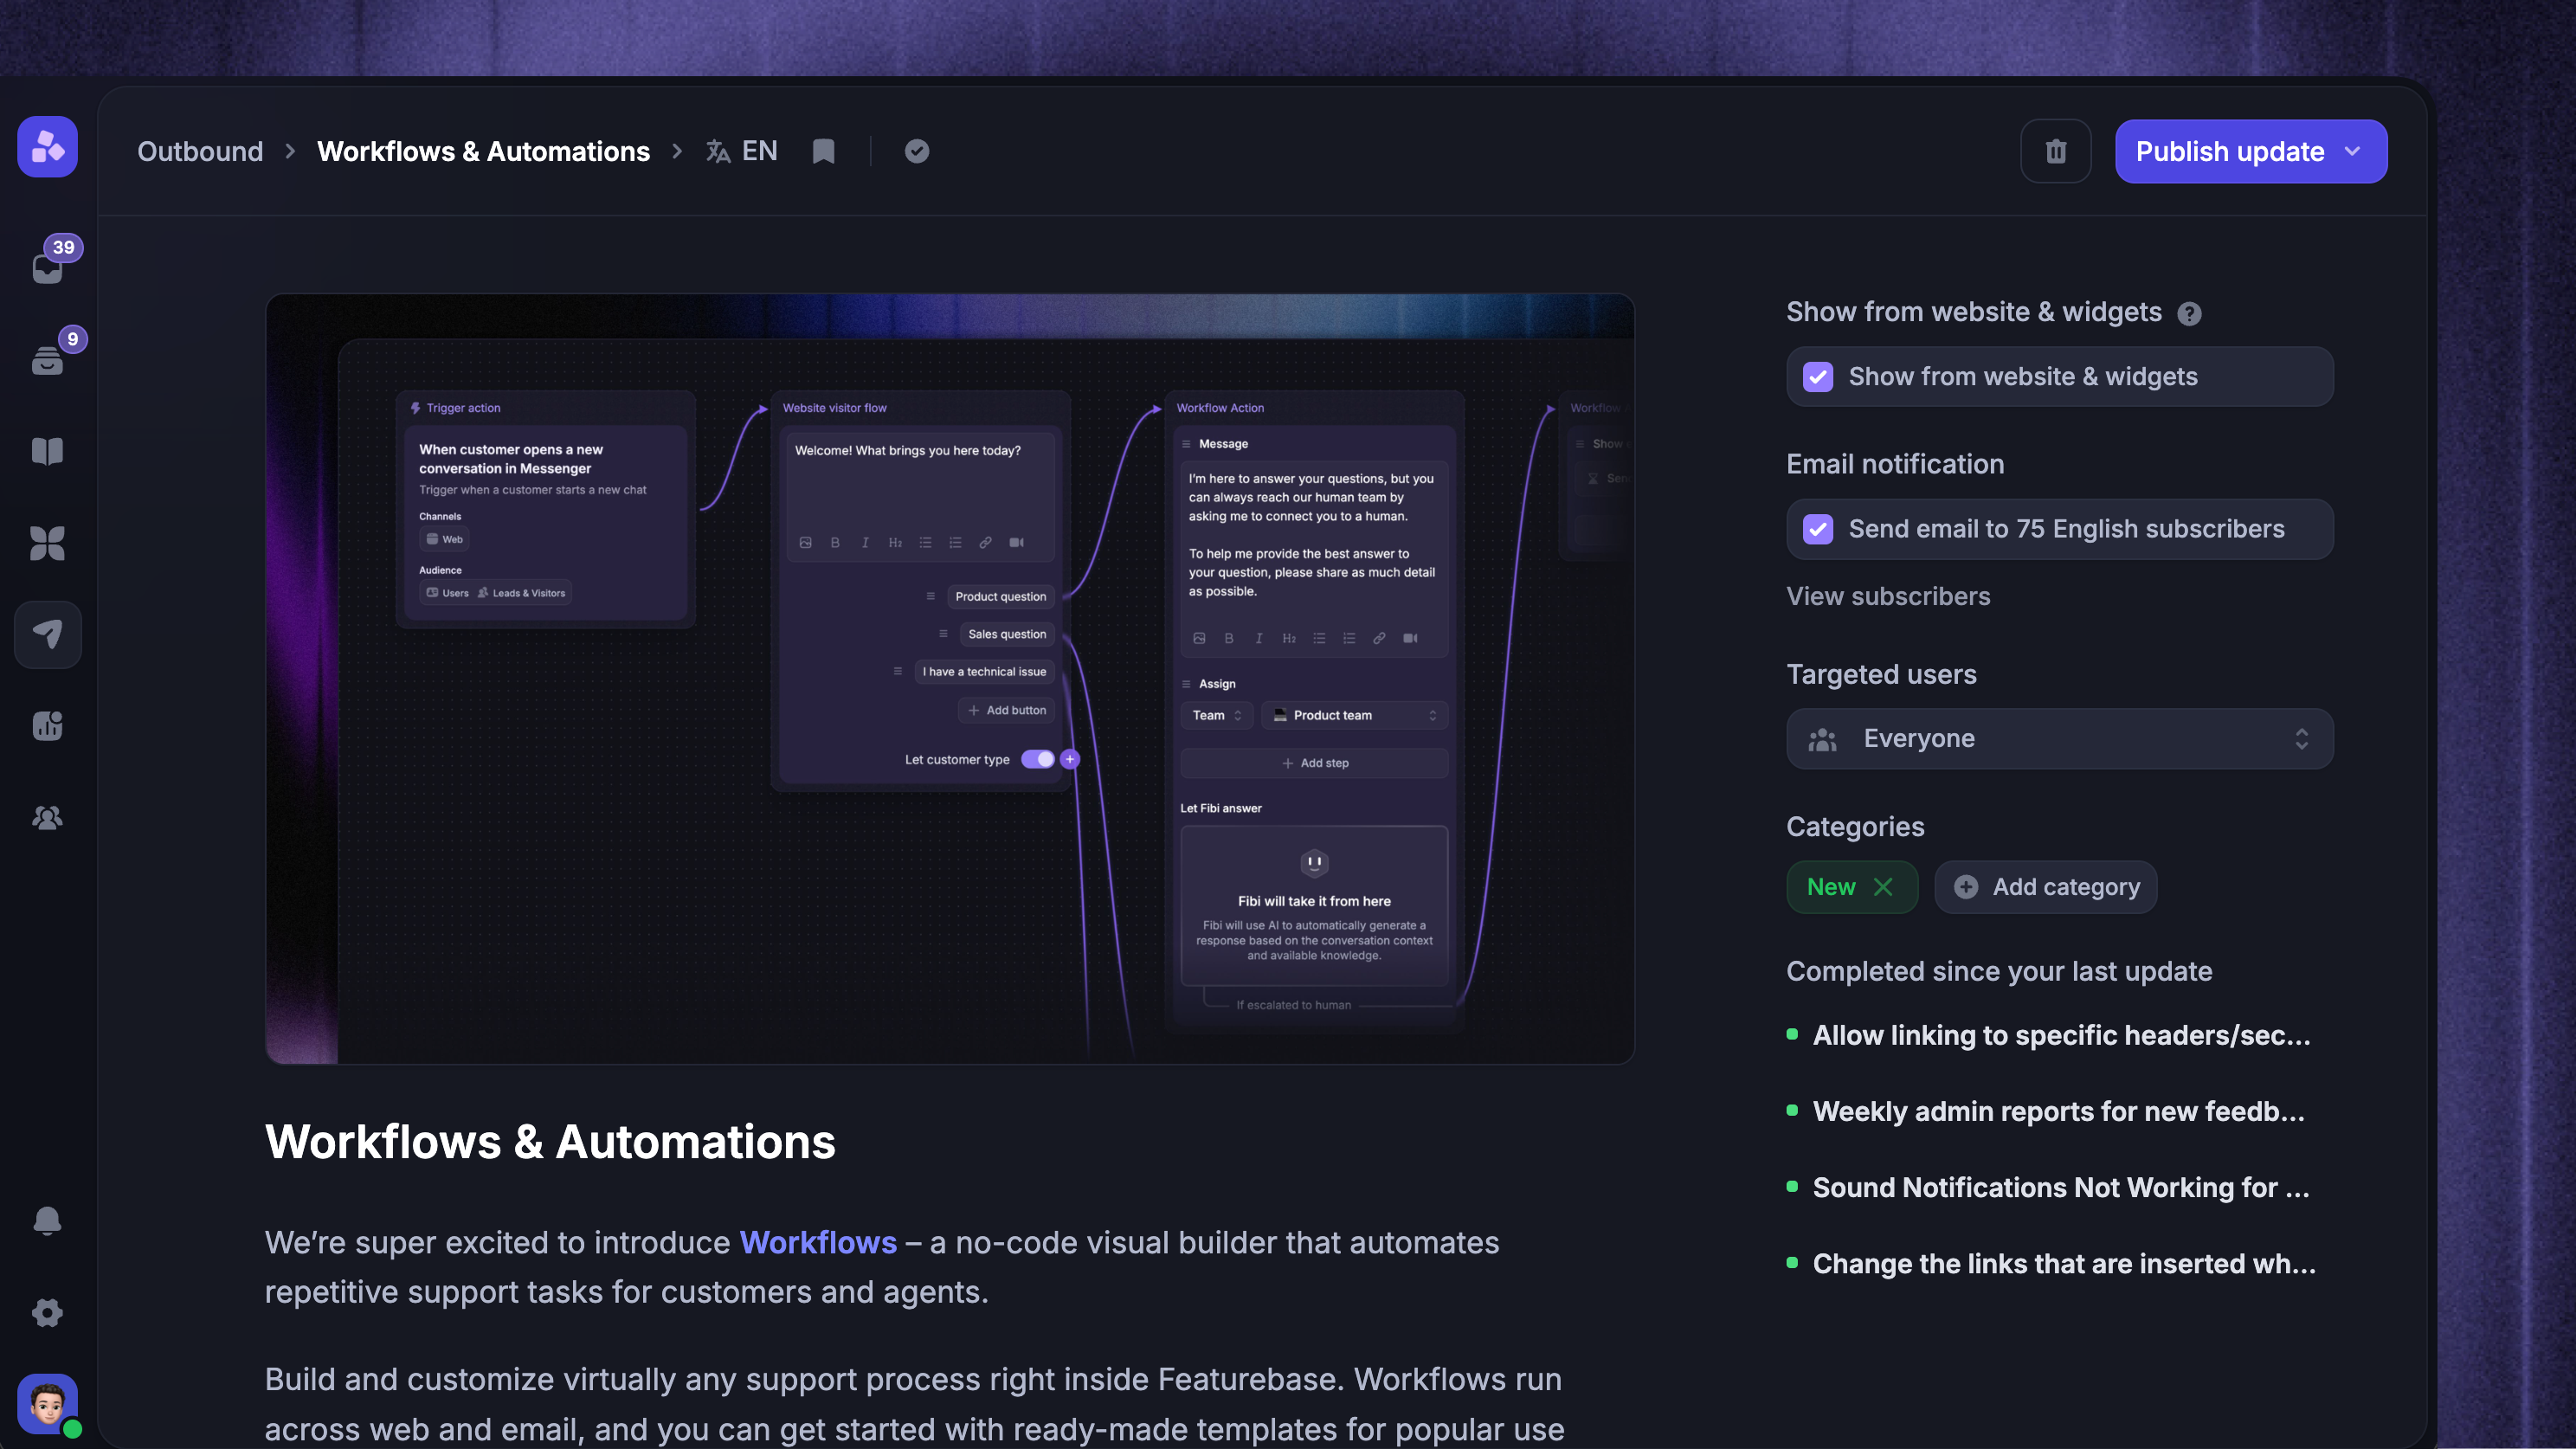
Create an Update by adding your content, choosing the audience and delivery channels, and deciding whether to publish immediately or schedule it for later. You can target specific segments and manage website, widget, email, Slack, and language settings from the same editor.
Tip: Use our MCP to ask Claude or ChatGPT to generate Updates from completed feedback posts, Linear or Jira issues, release notes, or code changes.
Create a new Update
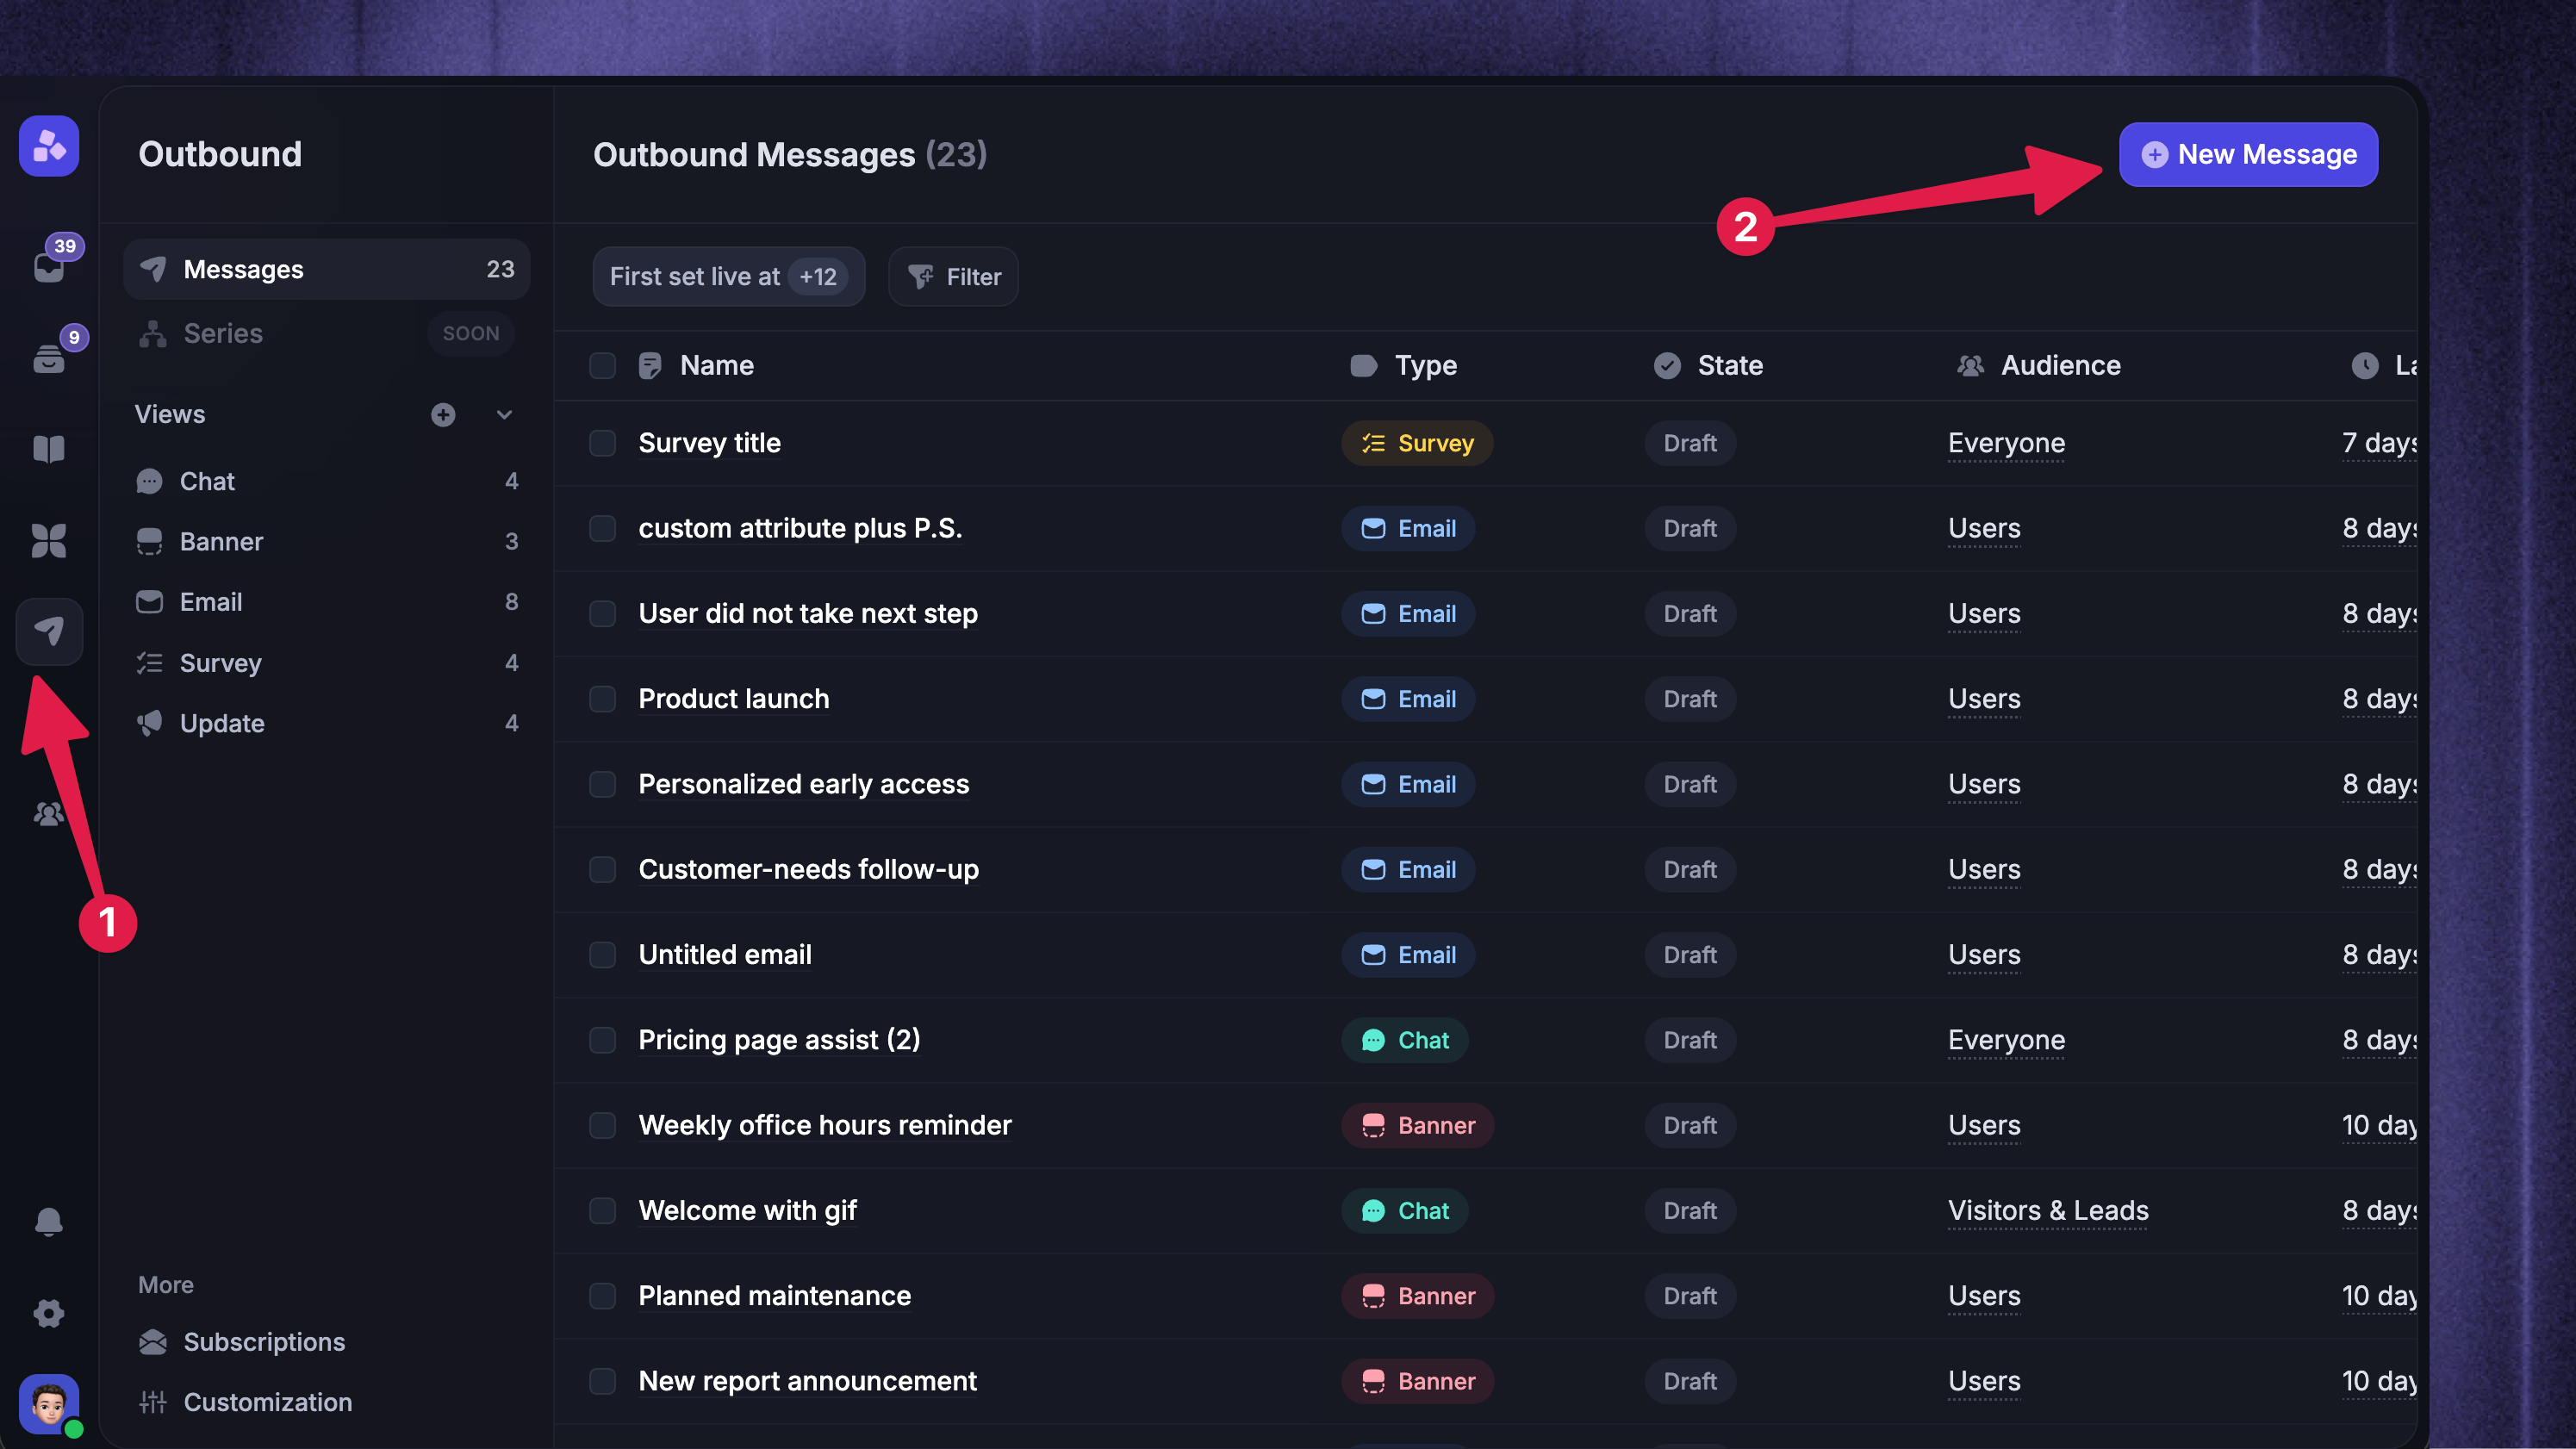
Go to Dashboard → Outbound
Click New Message
Choose Update
Write the Update
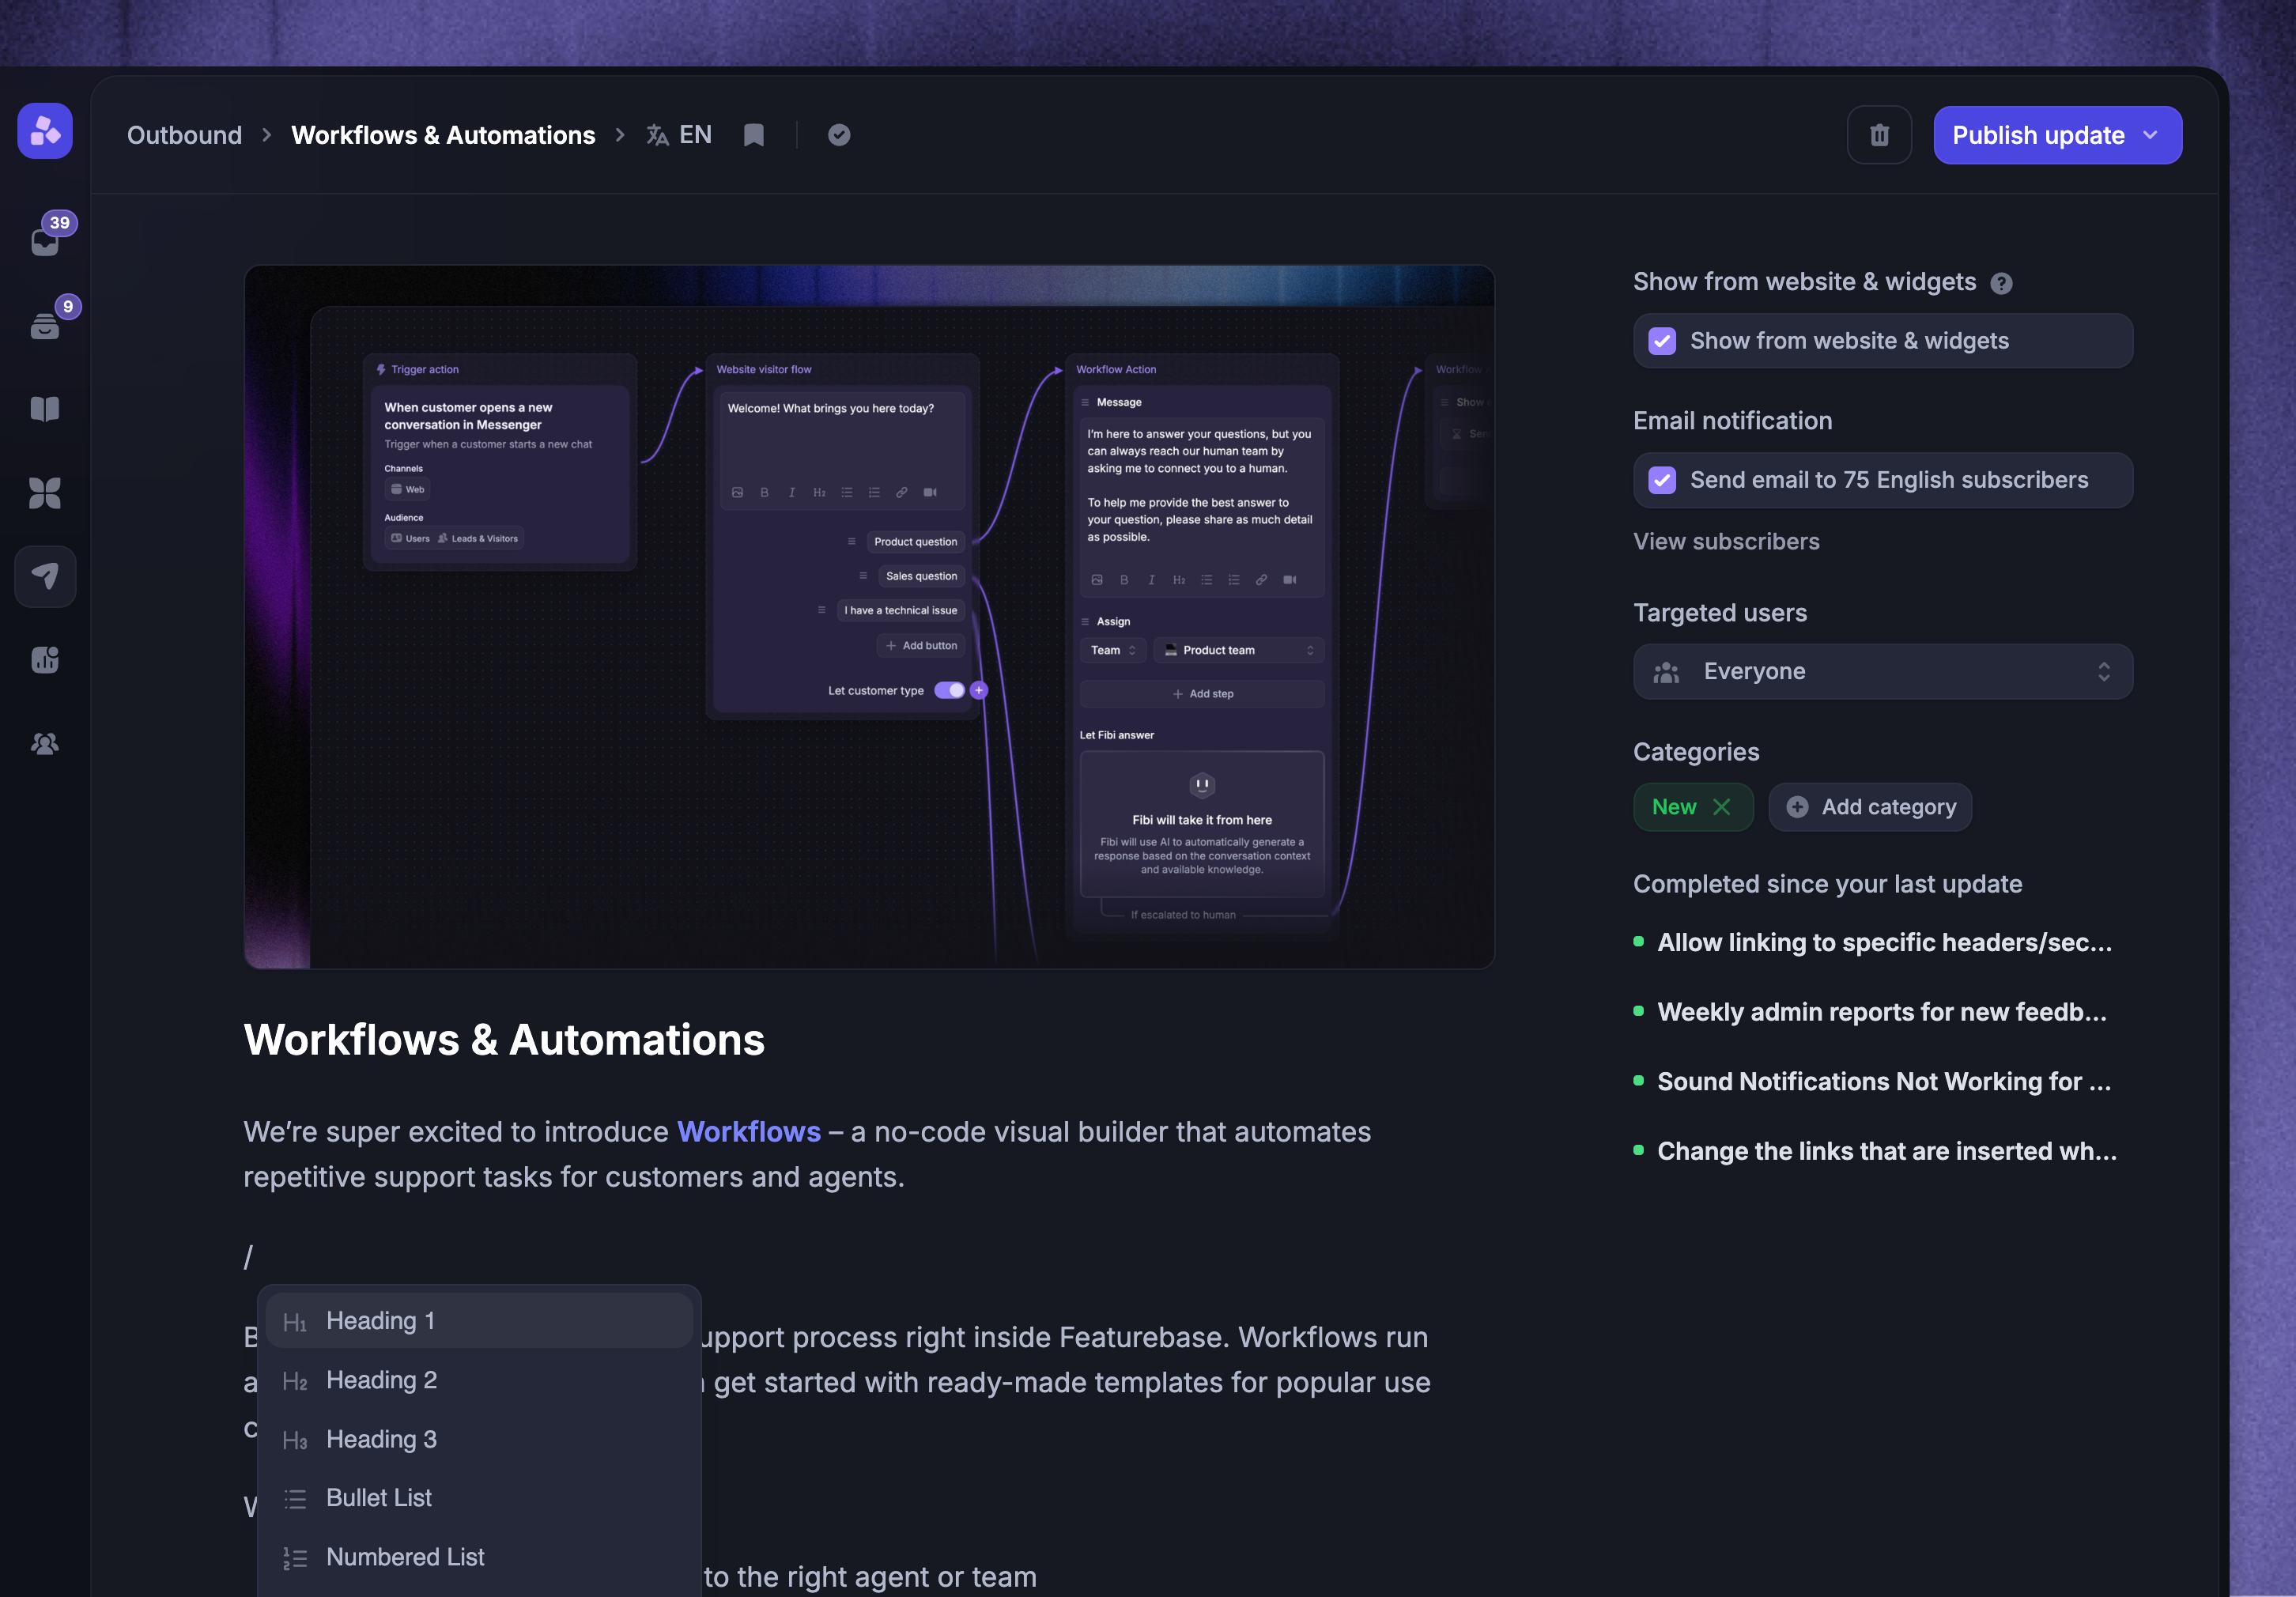
In the editor, you can draft your update. Add a featured image, title, and content. You can use rich formatting and different components using the / command.
You can also add categories and fully translate the update to automatically reach your customers in their native languages.
You don't have to worry about your work getting lost. Our editor auto-saves the draft for you.
Tips:
You can use dynamic variables like
{First name}to make your product updates more personal to customers.You can mention people & posts in your changelog release using
@. For example, we use it for minor updates at the end of our releases.Use the AI writing assistant at the bottom to speed up your drafting.
Configure delivery
Use the right sidebar to control who can see the Update and how:
Show from website & widgets – Shows the Update on your public Updates page and embedded widgets. Turn this off if the Update should not appear on public surfaces.
Email notification – Sends an email notification to subscribers. Use View subscribers or View all email recipients to review who can receive it.
Send Slack notification - Posts the Update to selected Slack channels when you publish its default-language version
Targeted users – Show the Update to Everyone or select user segments
Categories – Labels the Update and helps visitors filter Updates on the page and widgets

Note: If your workspace is not approved to send Update notification emails yet, Featurebase shows a warning before publishing. Until approved, notification emails are sent only to workspace admins.
Publish or schedule
When the Update is ready:
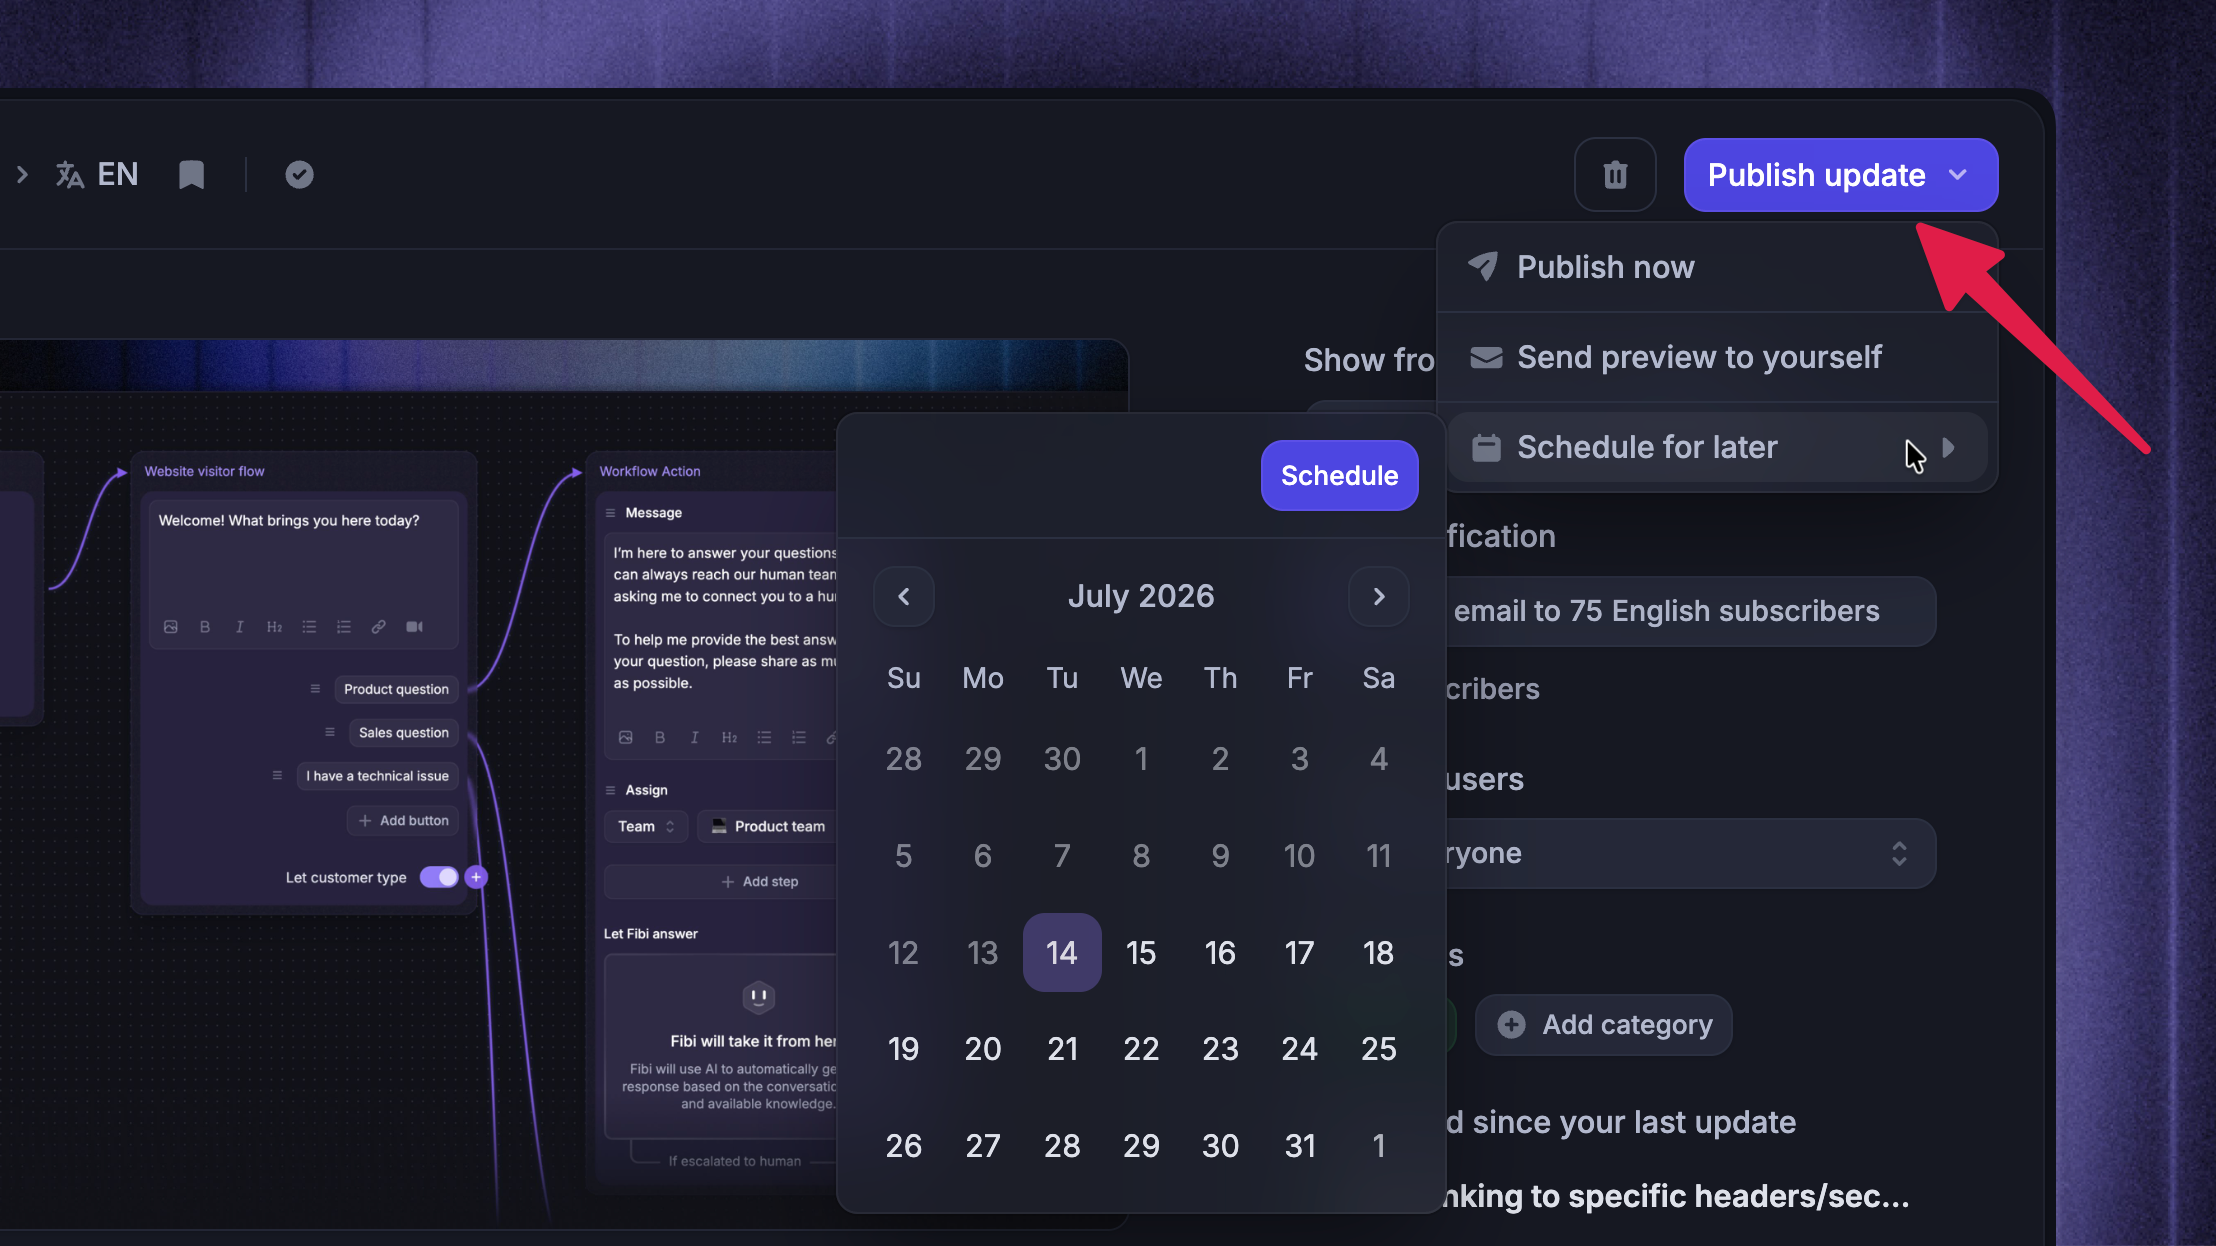
Click on the ‘Publish update’ button top right
Choose Send preview to yourself if you want to test the email first
Choose Publish now for immediate release, or Schedule for later to publish at a future date and time
Note:
When ‘Show from website & widgets’ is enabled, publishing makes the Update visible on your Updates page and embedded widgets.
When ‘Email notification’ is enabled, Featurebase sends the notification to eligible subscribers for the selected language.
Send an Update to Slack
Connect Slack and add the channels before choosing an audience.
Open the default-language version of your Update
Under Slack notification, turn on Send Slack notification
Choose the sender and select channels or a Slack channel segment
Review the audience. For a segment, click 'View channels' to check its current matches
Use 'Preview in Slack' to test the message
Publish now or schedule the Update
Slack receives the default-language version only, when that version is published. Each send supports at most 500 channels.
Important: Configure Slack before the first publication. Afterward, you cannot enable Slack for that publication or change its Slack audience or sender. Everyone in a selected channel can read the message, so check that the content is suitable for that audience.
Publish in multiple languages
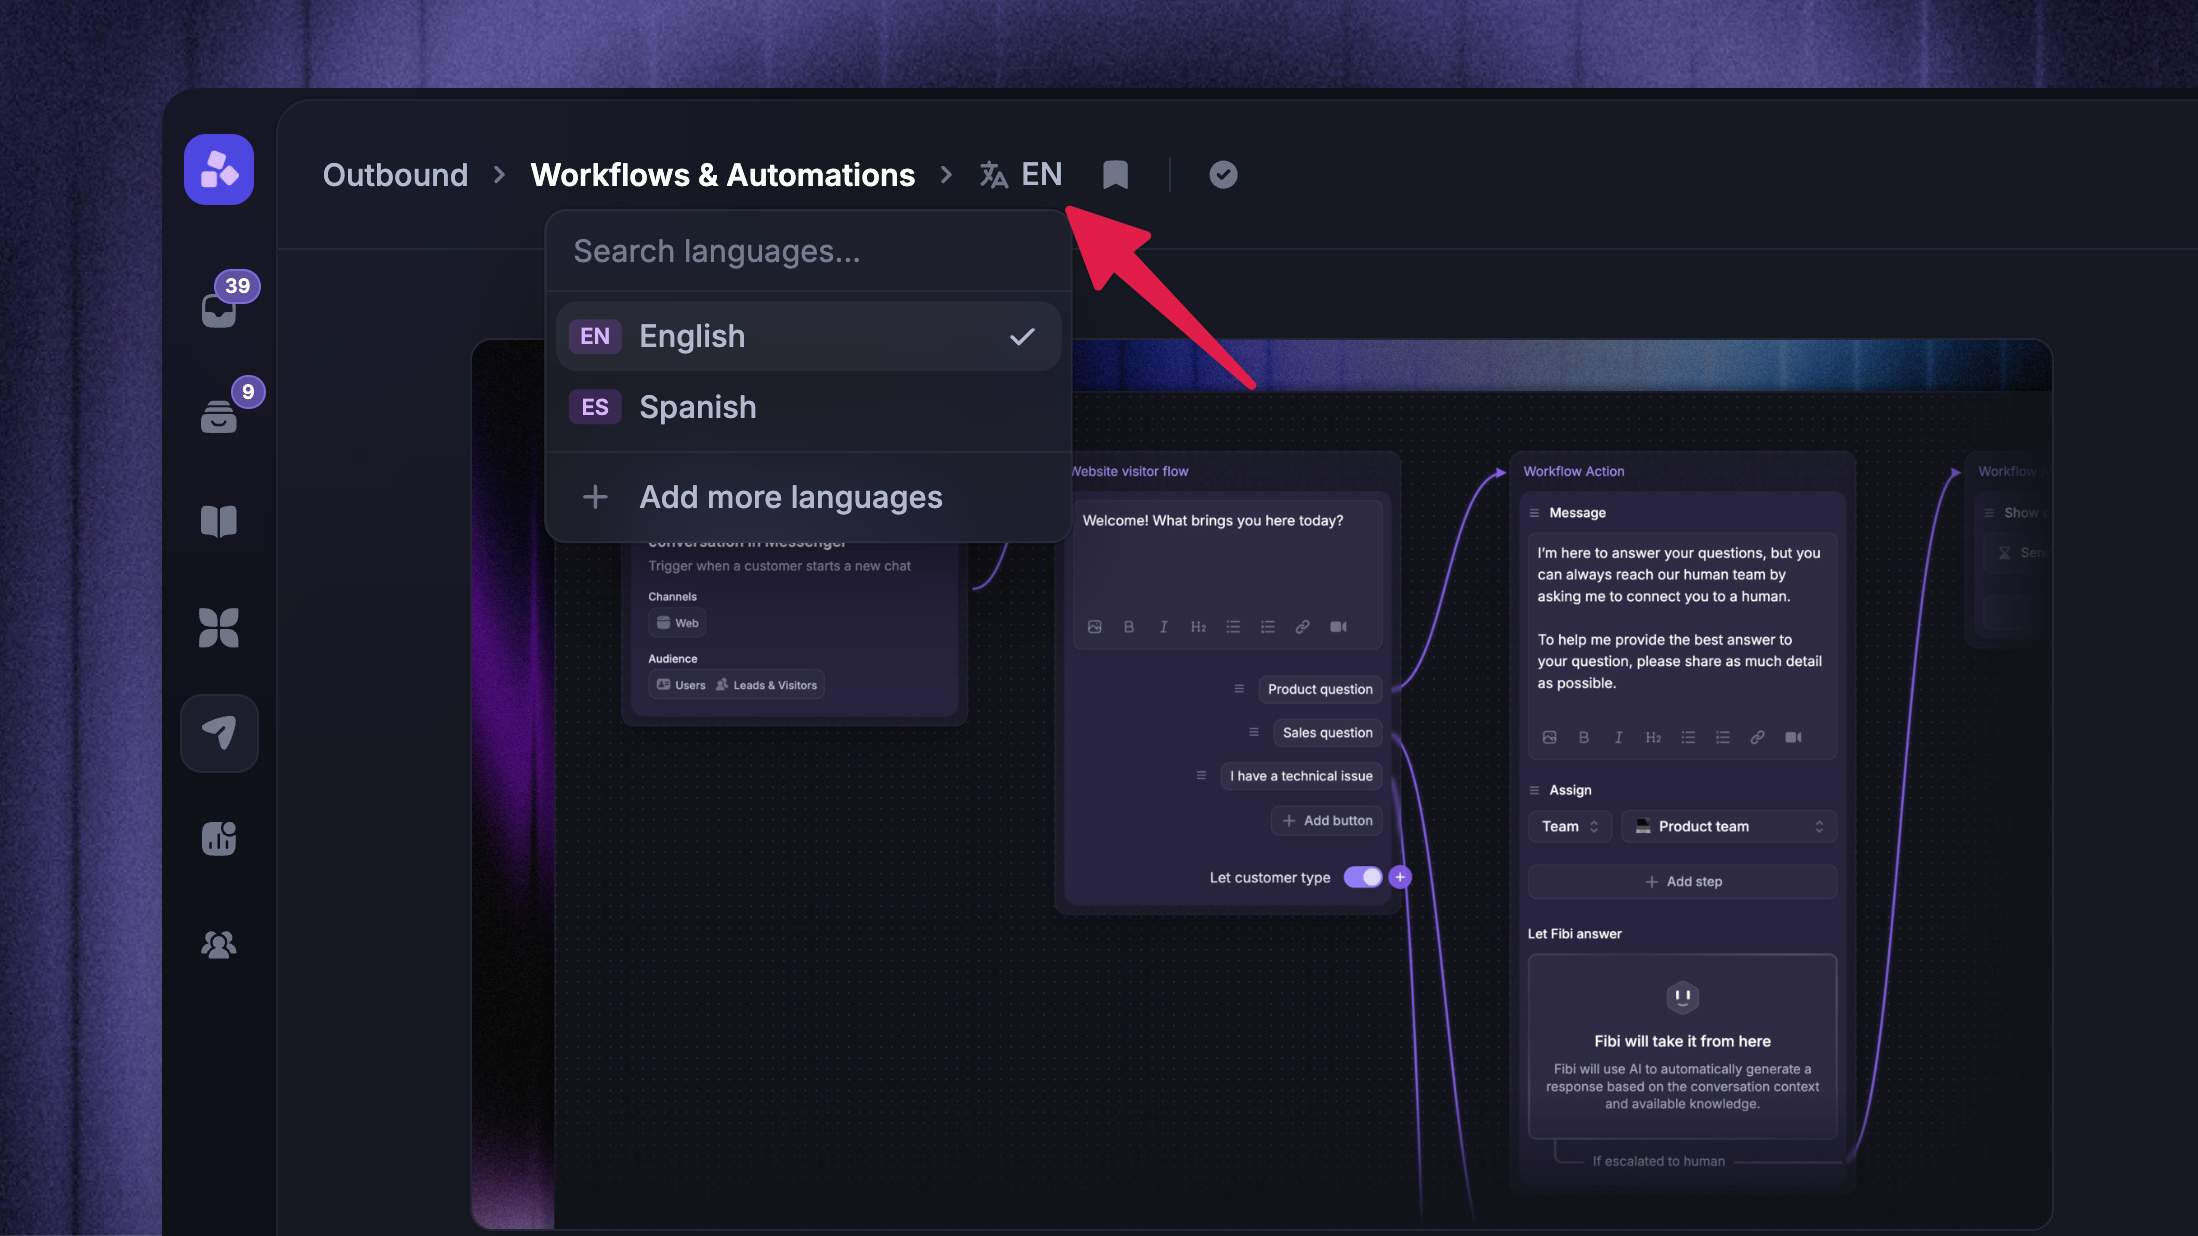
If your workspace has multiple Updates languages, use the language dropdown in the editor to switch between versions.
Each language has its own draft version, email notification setting, and website and widget visibility setting. When publishing or scheduling, choose which completed language versions to include. All languages selected in the same scheduling action use the same publish date and time.
Featurebase builds a separate email audience for each language using the locale synced for each subscriber. If a subscriber has no synced locale, or their locale is not enabled for Updates, they are included in the default-language audience. They receive that version when it is published with ‘Email notification’ enabled.
Edit published Updates
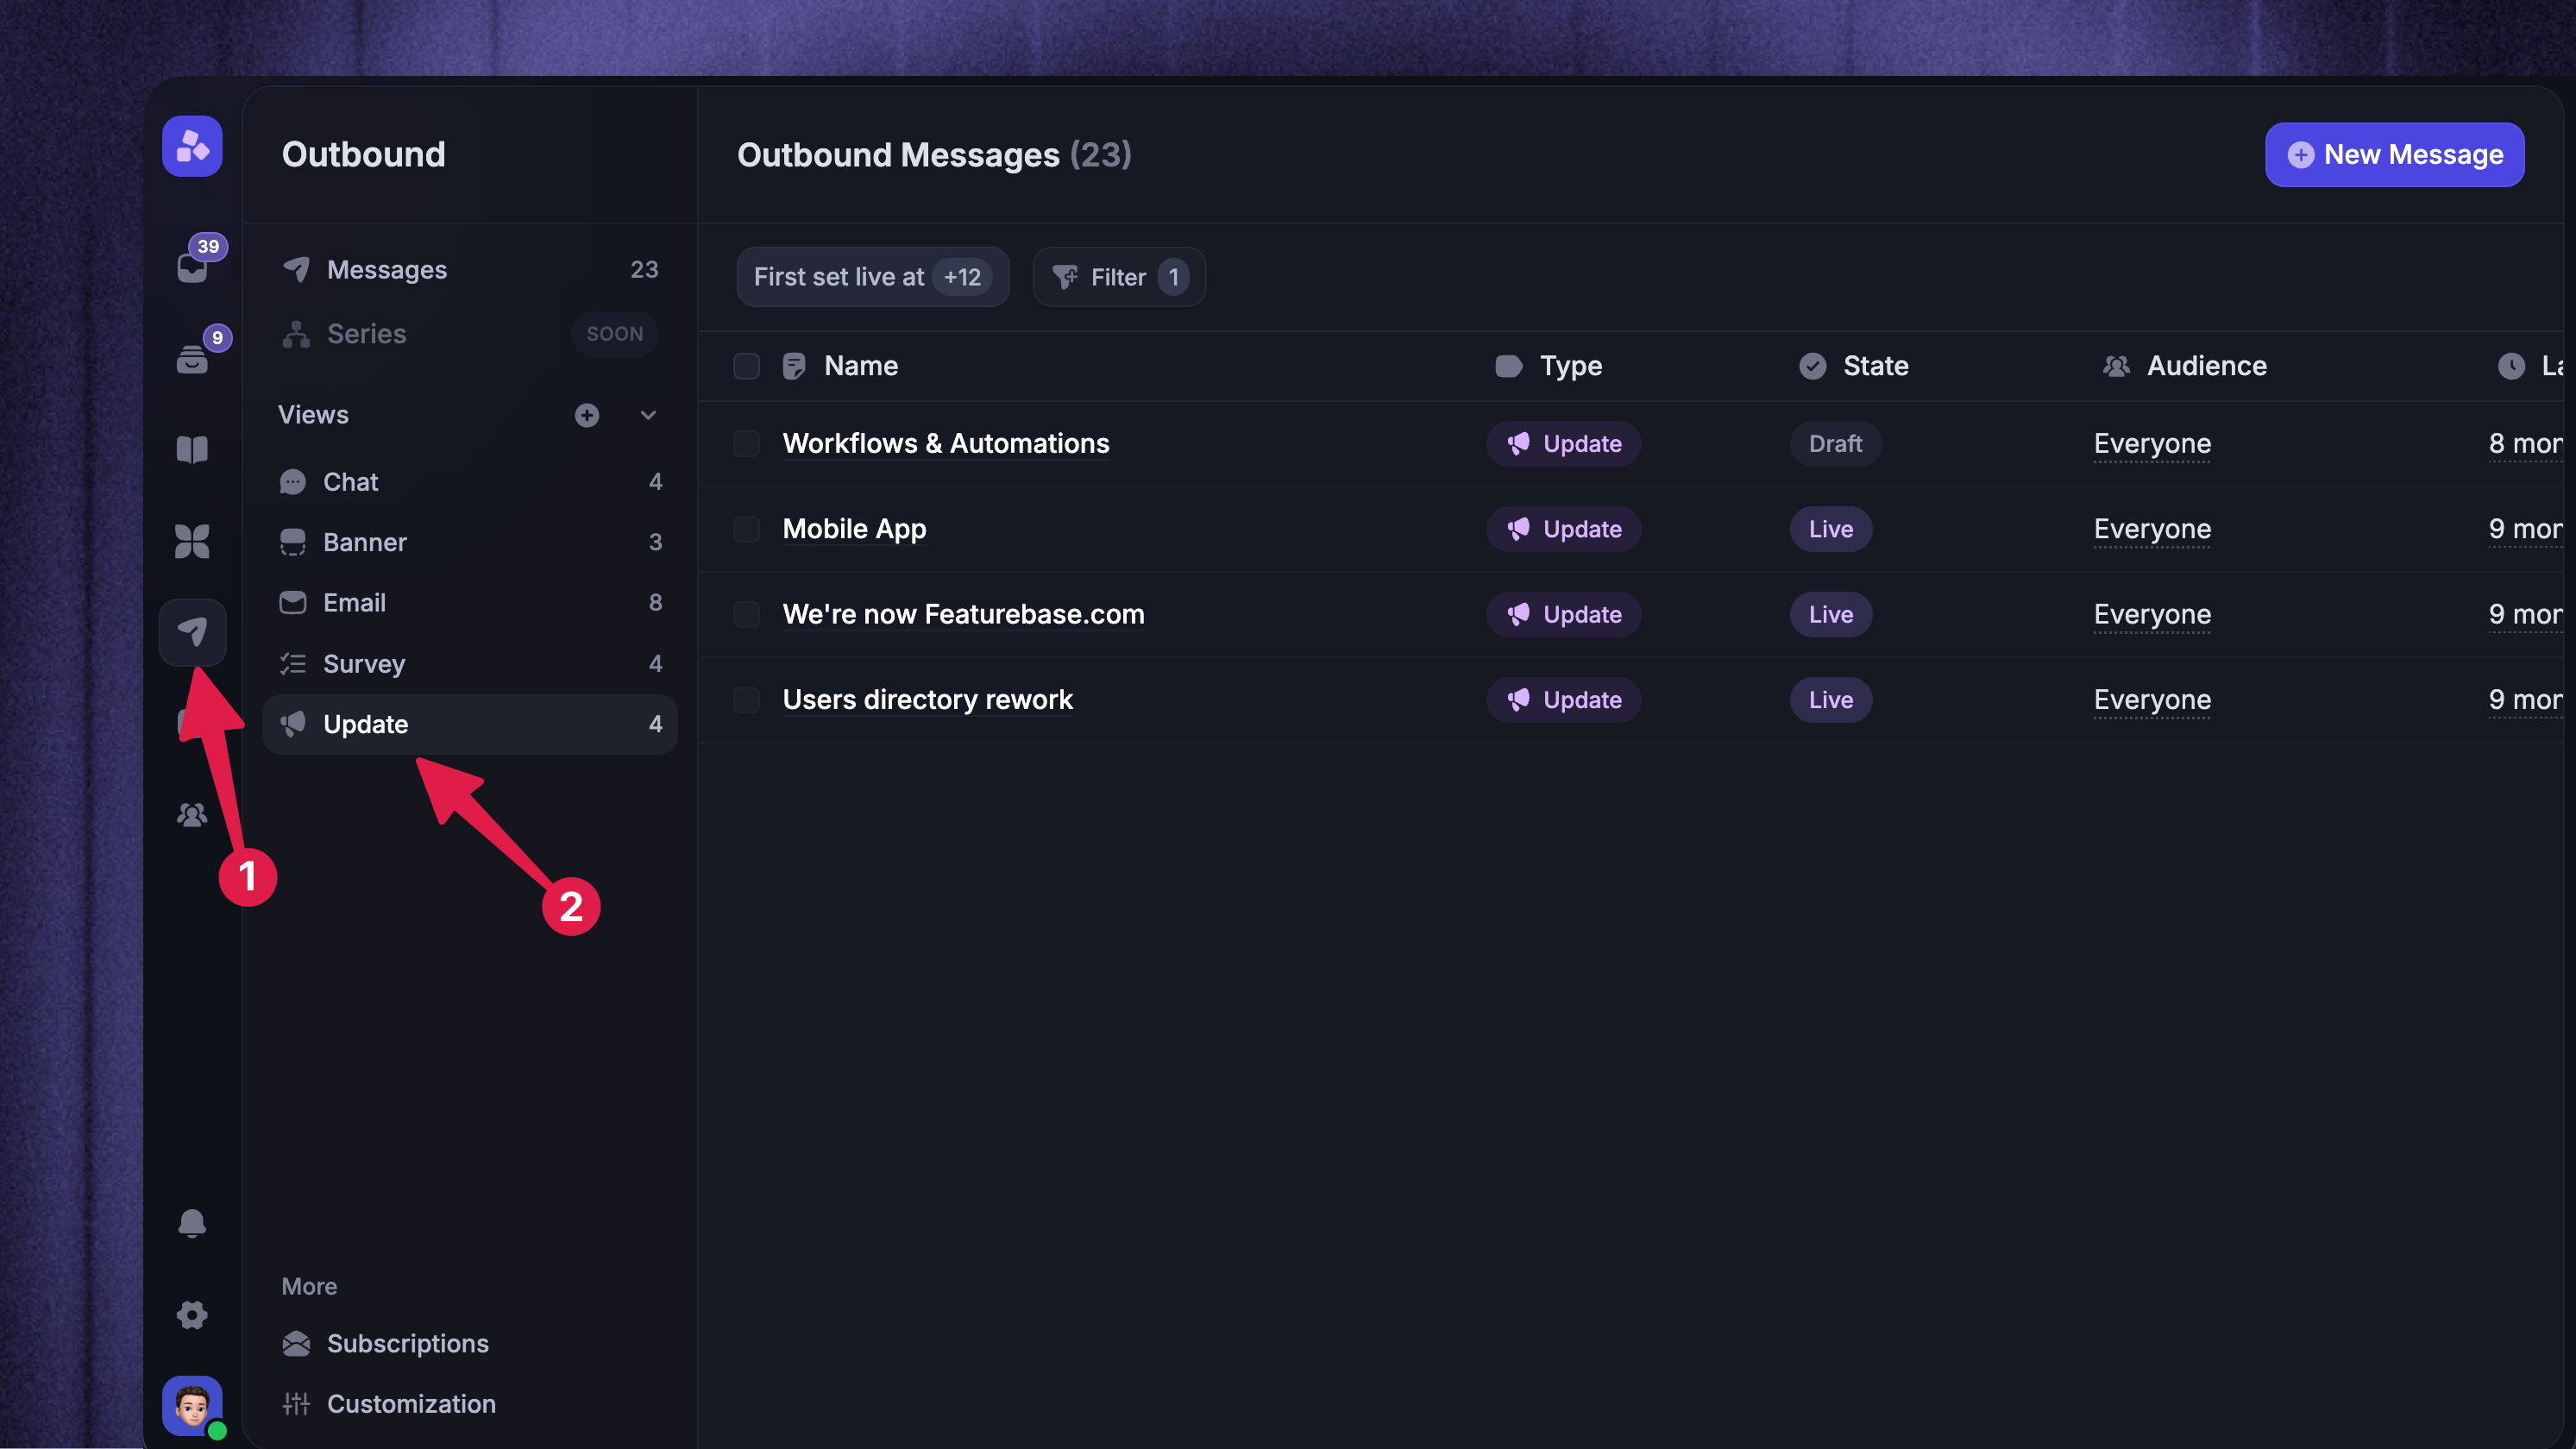
You can always edit published Updates:
Open a published Update from Dashboard → Outbound
Make the needed edits (changes to the content are initially saved to the draft version). You can also use the date picker in the top bar to change the displayed publish date.
Click Publish changes to update the live version
Publishing changes to the default-language version updates its existing Slack messages. It does not send the Update to additional channels. Click 'View Slack delivery' to check each channel's result.
To hide a published Update from the Updates page and widgets without deleting it, turn off ‘Show from website & widgets’. To remove it completely, use the delete button.
FAQ
What time zone does the Changelog scheduling use?
What time zone does the Changelog scheduling use?
The time zone information is automatically taken from your browser settings.
Does updating a published changelog send a new email to users?
Does updating a published changelog send a new email to users?
No. 'Publish changes' does not send another notification email.
How can I draft a published changelog without deleting it?
How can I draft a published changelog without deleting it?
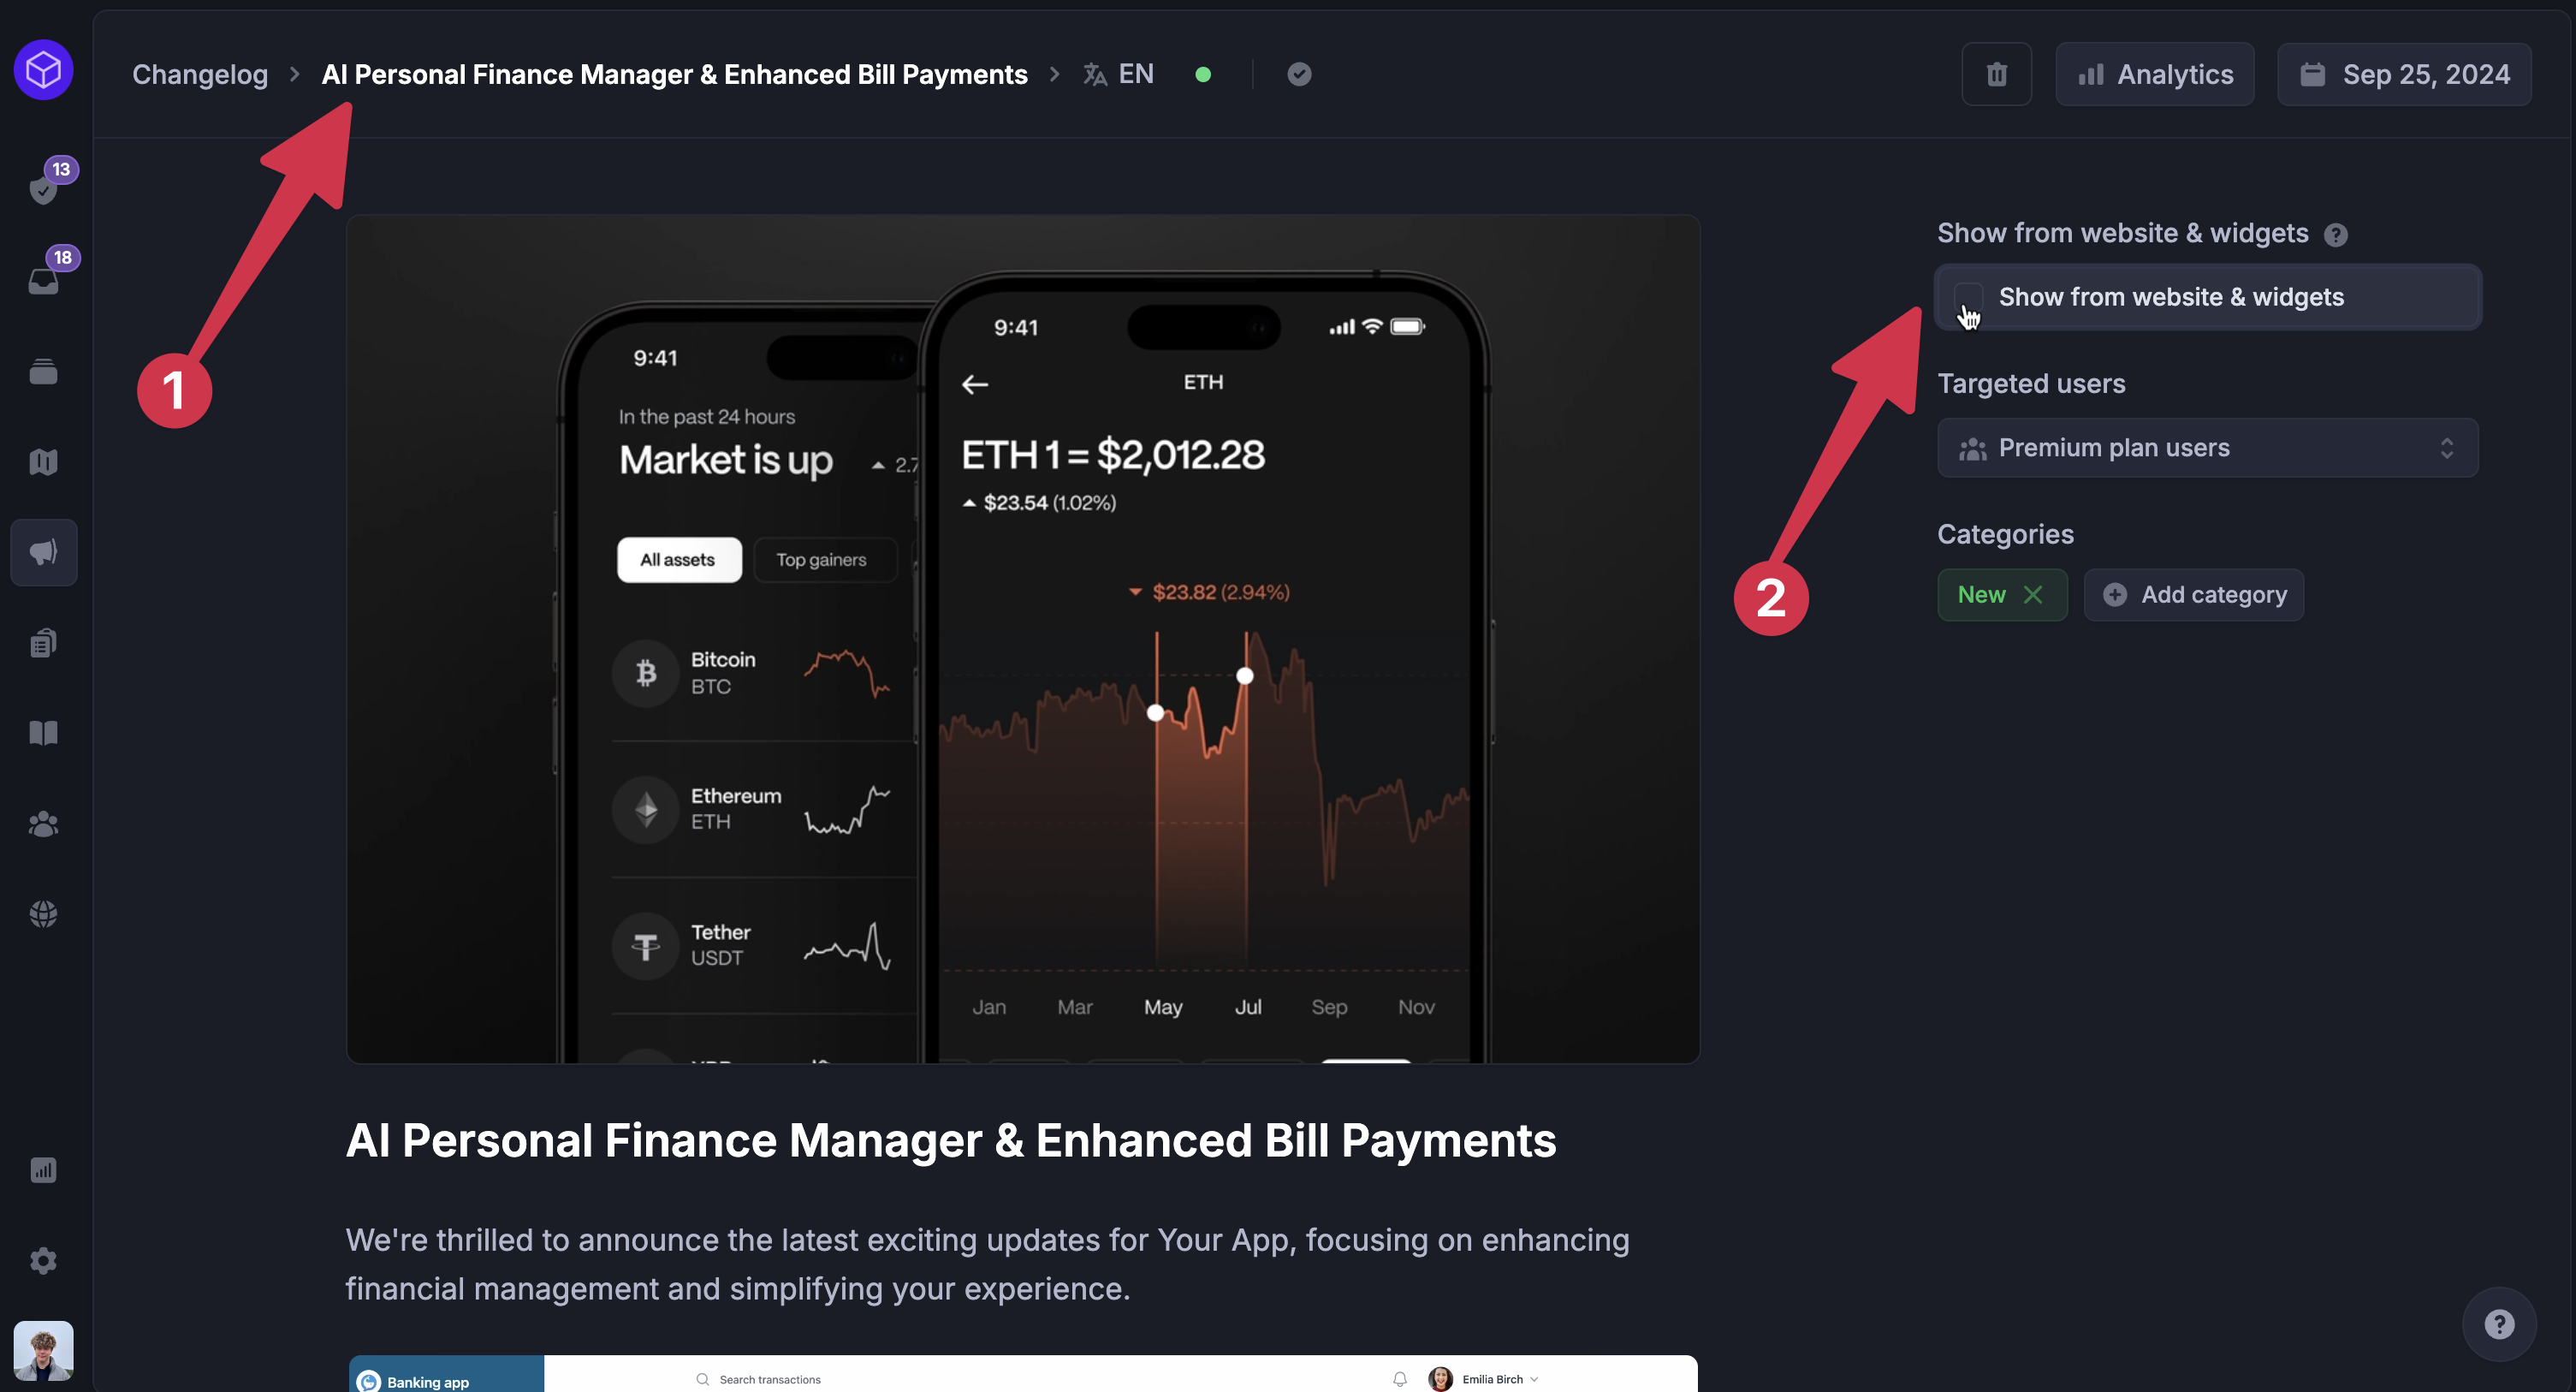
To unpublish a changelog without deleting it:
Navigate back to the editor page from the upper breadcrumb menu
Uncheck the ‘Show from website & widgets’ option
Will my work get lost if I forget to save the changelog post when exiting?
Will my work get lost if I forget to save the changelog post when exiting?
No, your work will always be autosaved, no matter what. You can always come back to the changelog draft.
What’s the best resolution for my changelog illustrations?
What’s the best resolution for my changelog illustrations?
Our recommended resolution for changelog illustrations is 16:9 1920×1080 👌
Can I publish an Update without showing it on the Updates page or widgets?
Can I publish an Update without showing it on the Updates page or widgets?
Yes. Turn off Show from website & widgets before publishing or scheduling. Enabled email and Slack notifications can still reach their selected audiences.
Why can I not select a language when publishing?
Why can I not select a language when publishing?
A language is disabled when the Update has not been written in that language yet. Switch to that language from the editor dropdown, add the translated content, then publish or schedule it.
Does deleting an Update remove its Slack messages?
Does deleting an Update remove its Slack messages?
If you delete the Update within 12 hours of its first Slack publication, Featurebase attempts to remove its Slack messages. After that window, the Slack messages remain. Check the original Slack threads to confirm removal.
Turning off Show from website & widgets only hides the Update from those surfaces.
Was this helpful?
Still need help? Ask the team