Teammate roles and permissions
Assign shared roles, choose which Inbox conversations a teammate can see, and change individual permissions.
Written By Markus Palm
Last updated About 7 hours ago
Overview
A role sets the permissions a group of teammates shares. You can also change access for one teammate, including which Inbox conversations they can see.
Choose from three preset roles:
Admin - manages Workspace settings, including billing and teammates
Manager - manages day-to-day settings such as request statuses, categories, and form fields
Contributor - categorizes requests, manages public comments, and votes on behalf of customers
On the Enterprise plan, you can also create shared custom roles.
Note: Admin roles control permissions. Your teammate’s seat type determines billing. Changing their role does not change their seat type.
Assign a role to a teammate
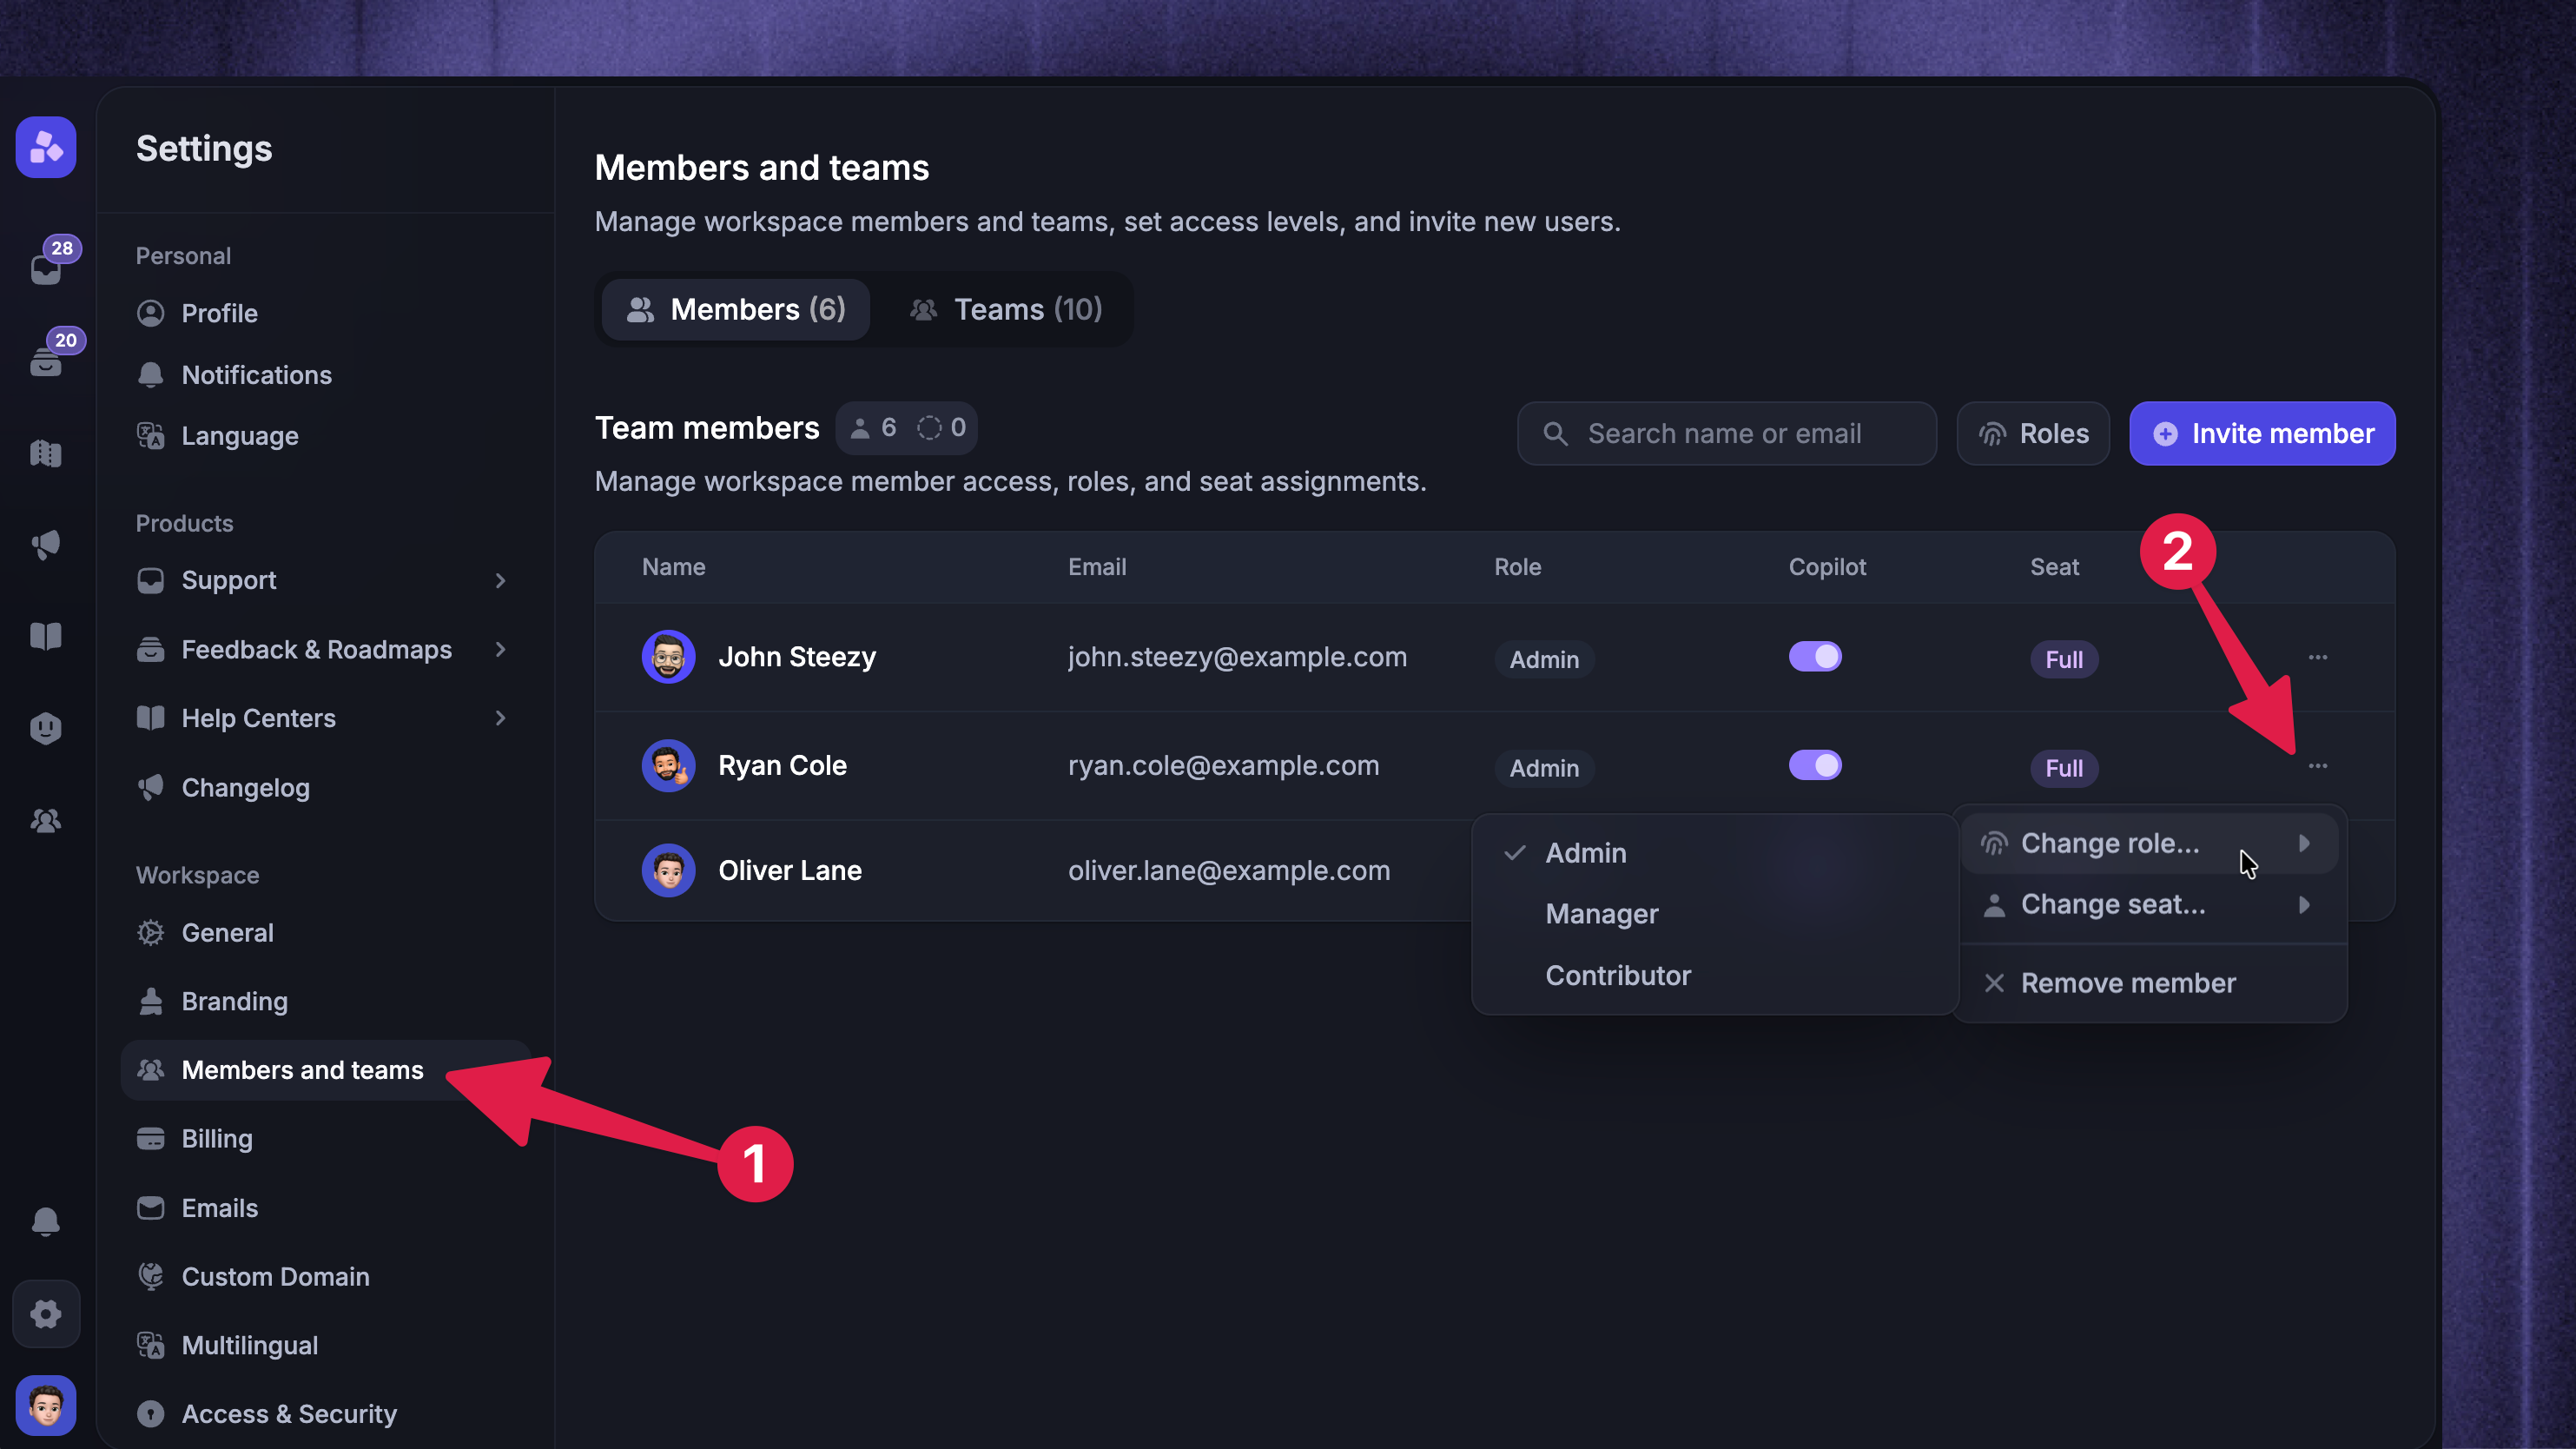
To give a teammate an existing role:
Open Settings → Members & Teams → ••• → Change role for the teammate.
Select the role you want to assign.
Changing a teammate’s role keeps their individual permission changes and conversation access settings.
Change one teammate’s access
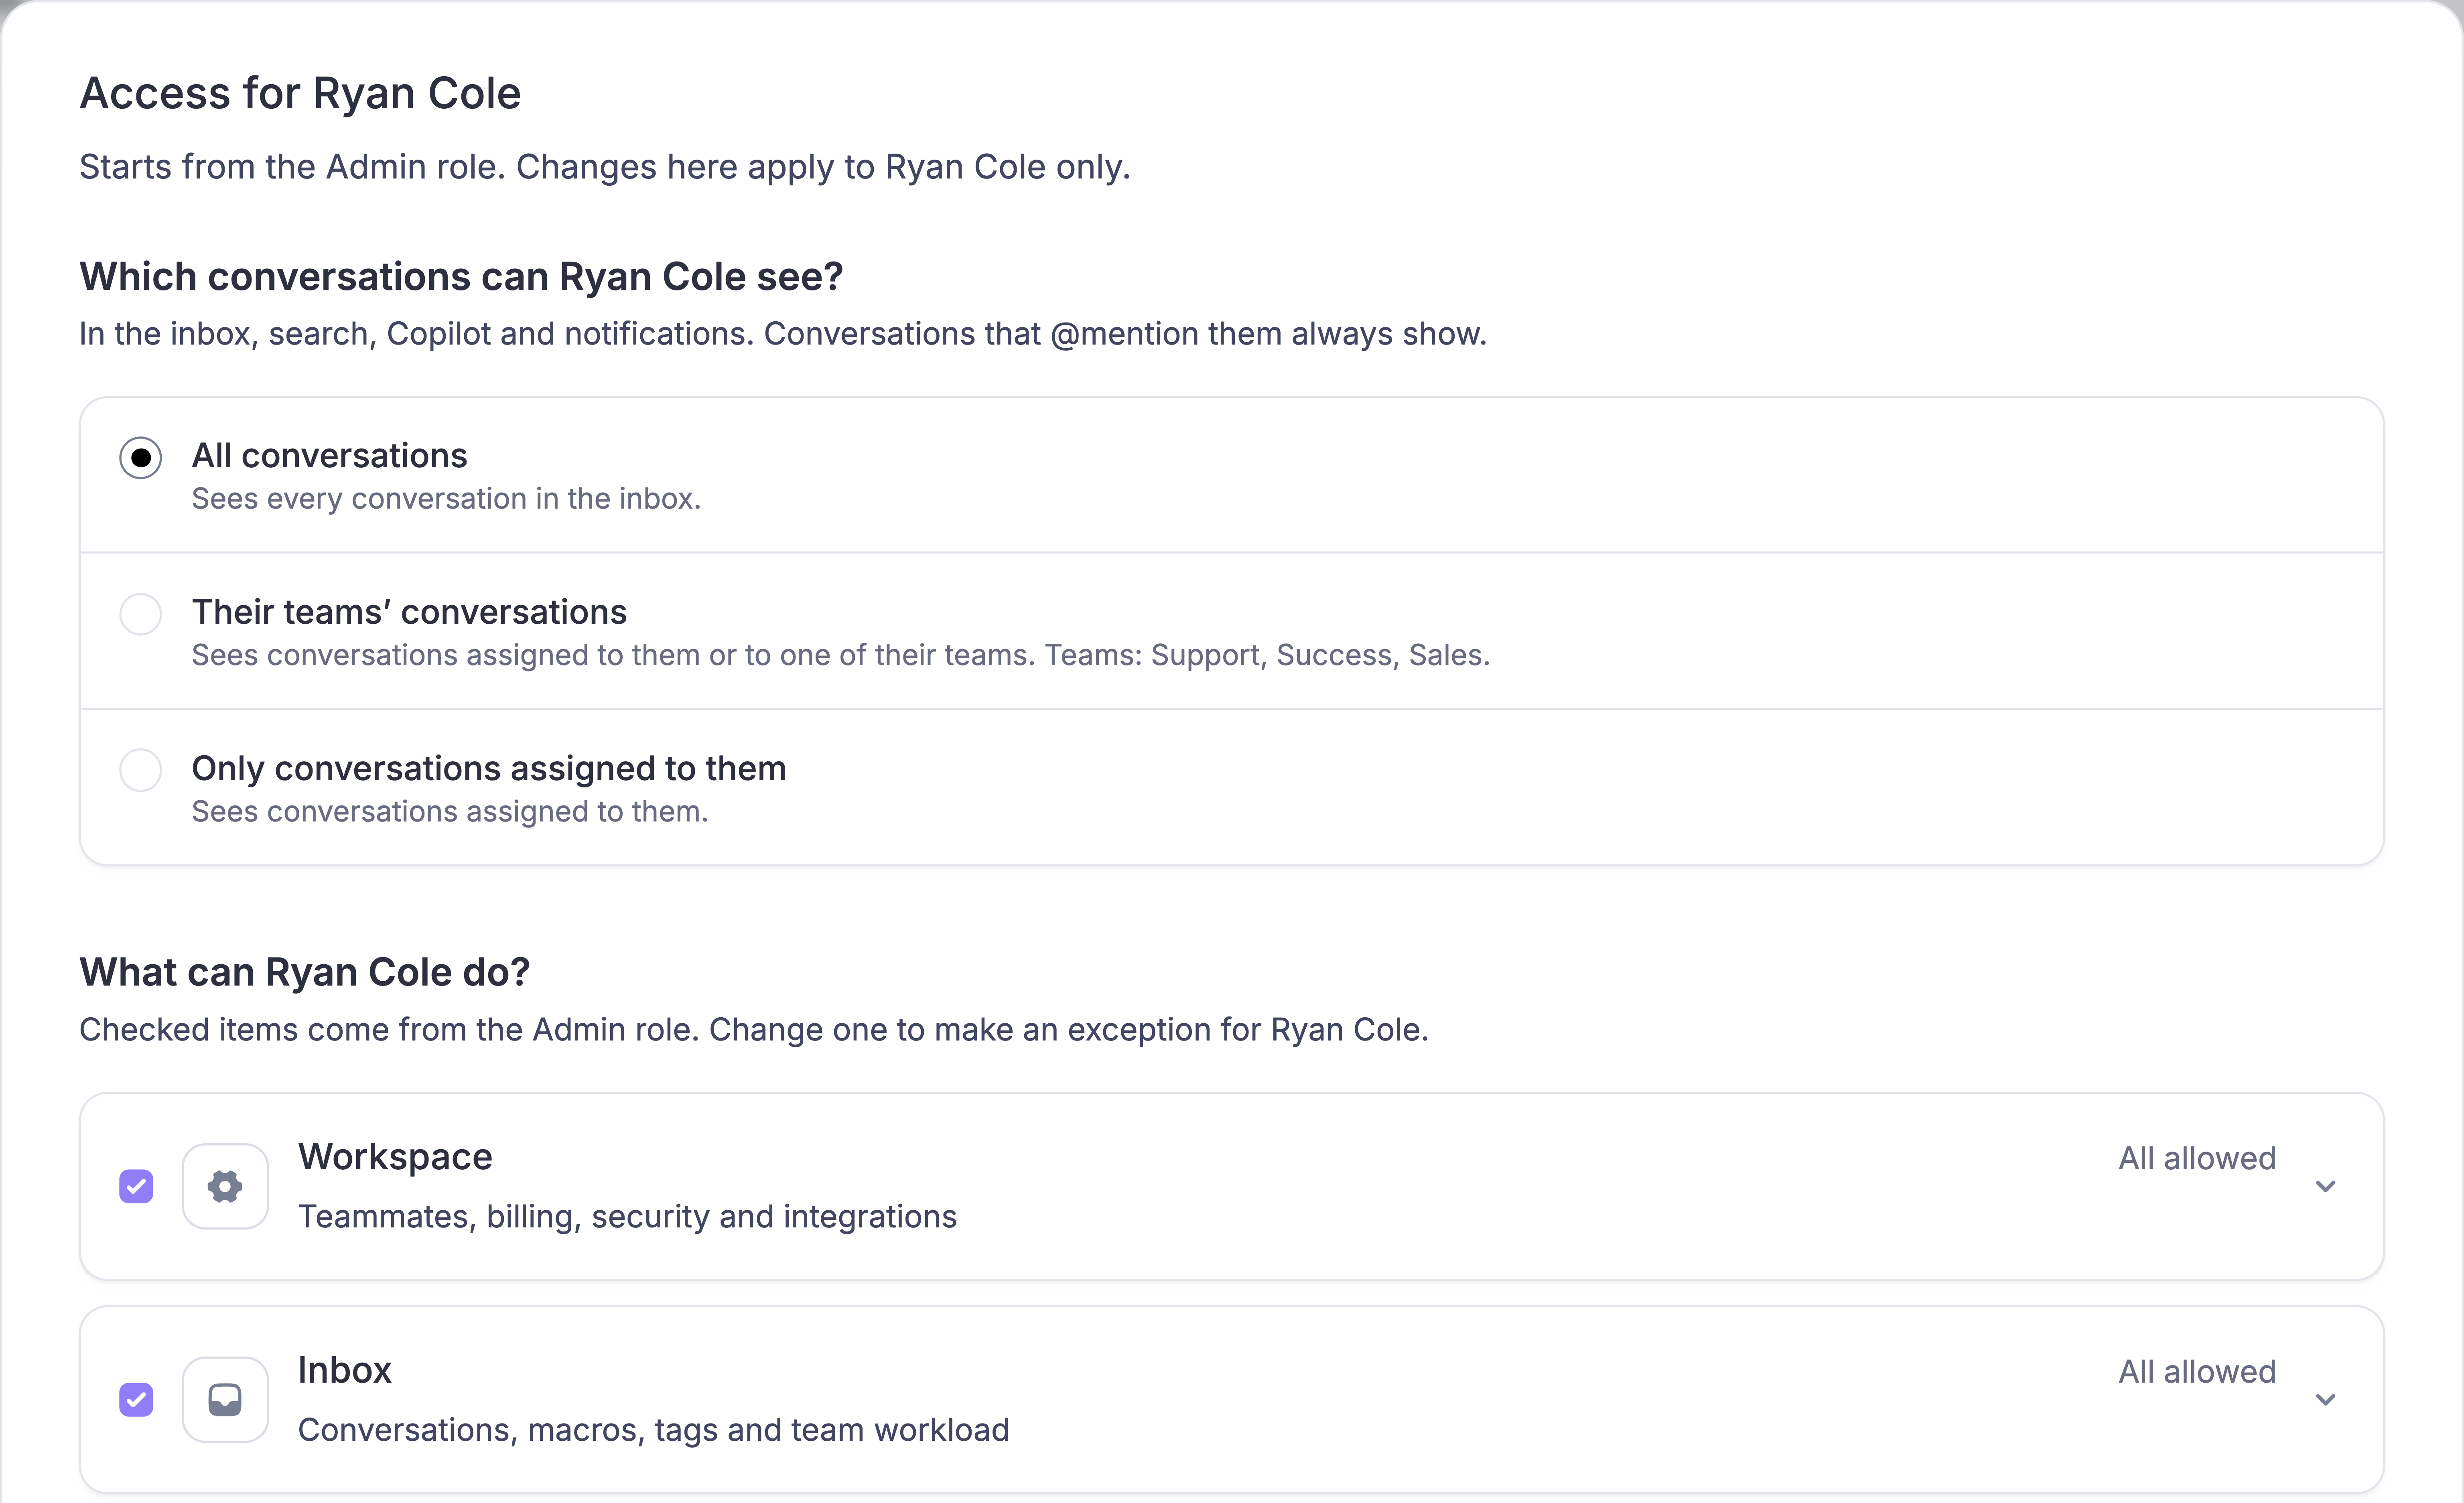
You can change which conversations one teammate sees and which actions they can take. This is available on Professional and Enterprise on current plans, and on legacy Growth, Business, and Enterprise plans.
You need Manage teammates and roles. You can grant permissions you hold yourself. Choose someone other than yourself or the Workspace owner. If the teammate has a permission you don’t have, ask the owner to make the change.
Open Settings → Members & Teams → ••• → Edit access for the teammate.
Choose which conversations they can see. For either limited option, select Also show unassigned conversations if they should see conversations with no teammate or team assigned.
Under What can [name] do?, select or clear individual permissions. For example, leave Use macros on and turn off Create macros, Edit macros, and Delete macros. The teammate can use shared replies without changing them for everyone.
Click Save access.
All conversations - the teammate can see every conversation their seat allows.
Their teams’ conversations - conversations assigned to the teammate or to any team they belong to.
Only conversations assigned to them - conversations assigned directly to the teammate.
A direct @mention in an internal note gives the teammate access to that conversation at any level. Lite seats can only view Inbox conversations where they’re mentioned and cannot be assigned conversations.
To restore the role defaults, click the Reset button for permission changes and save. To restore full conversation visibility for the seat, also select All conversations.
What changes with limited conversation access?
The Inbox, search, and notifications show only conversations the teammate can see. Copilot uses the same limit when it searches past conversations.
Reports and Workload - the teammate cannot open Reports, including reports shared with them, or the Workload dashboard. They cannot export Workspace CSVs or receive scheduled reports or dataset exports.
Spam and Insights - the Spam view and Insights triage are unavailable. The teammate can see only Insights they captured.
Workspace settings - the teammate cannot manage teammates, API keys, integrations, SSO, or Workflows. These restrictions apply even if their role grants the permission.
New conversations and tickets - when unassigned conversations are hidden, Featurebase assigns new conversations to the teammate who starts them. They need a Full seat and permission to assign conversations to themselves before they can start a conversation or create a ticket.
Workspaces with up to 200 teammates can apply a new conversation limit. Above 200, existing limits stay in effect. If you switch a limited teammate to All conversations, you cannot limit them again while the Workspace is above 200. You can still change individual permissions.
Important: Existing Workspace API keys keep their access when their creator’s conversation access changes. Review and revoke any keys that should no longer have access.
Create a custom role
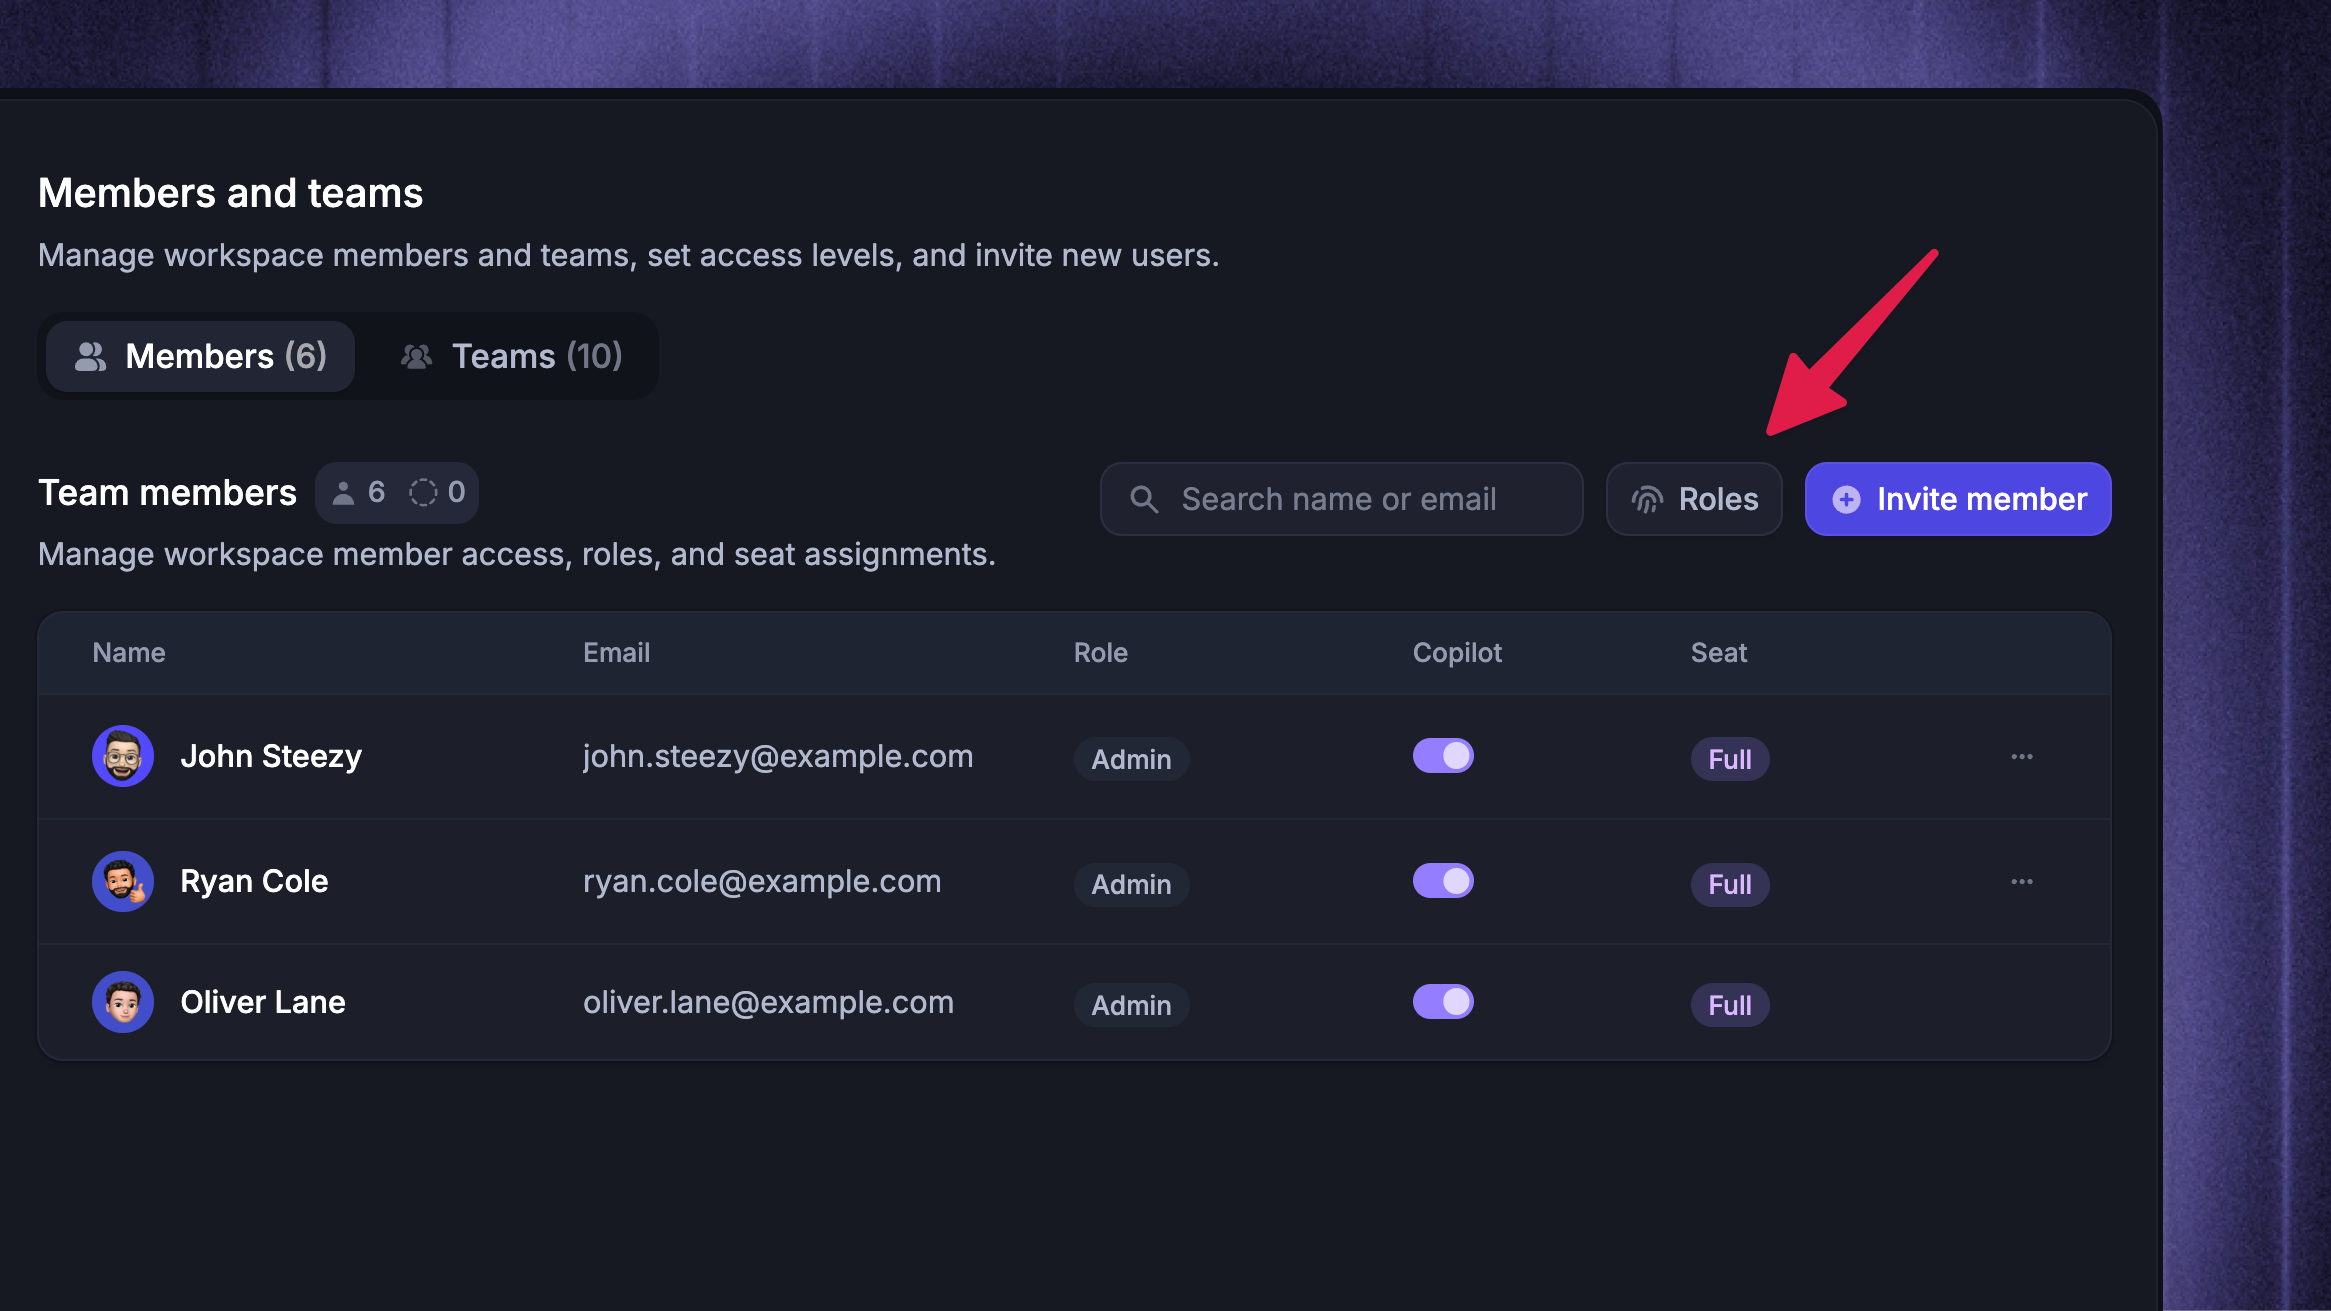
On Enterprise, teammates with Manage teammates and roles can create and edit shared roles from a Full or Lite seat.
Select an existing role or click New role and enter a name.
Choose its permissions and click Save Changes.
Role permissions by area
Expand an area in the editor to see its permissions. Inbox permissions cover assignment, conversations, shared views, and Macros. Existing roles keep the actions they could already perform.
FAQ
What does the Crown icon mean next to my name in Team settings?
What does the Crown icon mean next to my name in Team settings?
The Crown icon beside your name means you are the organization’s owner. You can transfer ownership of the organization if needed.
What are Admin roles vs. User tags?
What are Admin roles vs. User tags?
Admin roles let you restrict your team members’ access in Featurebase, while User tags limit end-users' access to categories, Updates, and other portal content.
What are Admin roles vs Seat types?
What are Admin roles vs Seat types?
Seat types determine whether a teammate has full access or limited access to your workspace. A Full seat is billed. A Lite seat is free and supports a smaller set of actions. Role permissions and individual settings apply within those seat limits.
Admin roles control what a teammate can do inside the workspace. Roles like Admin, Manager, or Contributor define permissions but do not affect billing. A teammate can have any role regardless of whether they use a Full or Lite seat.
Was this helpful?
Still need help? Ask the team