Set up and manage two-factor authentication (2FA)
Set up two-factor authentication, manage recovery options, and require 2FA for admins in your Featurebase Workspace.
Written By Markus Palm
Last updated 5 days ago
Overview
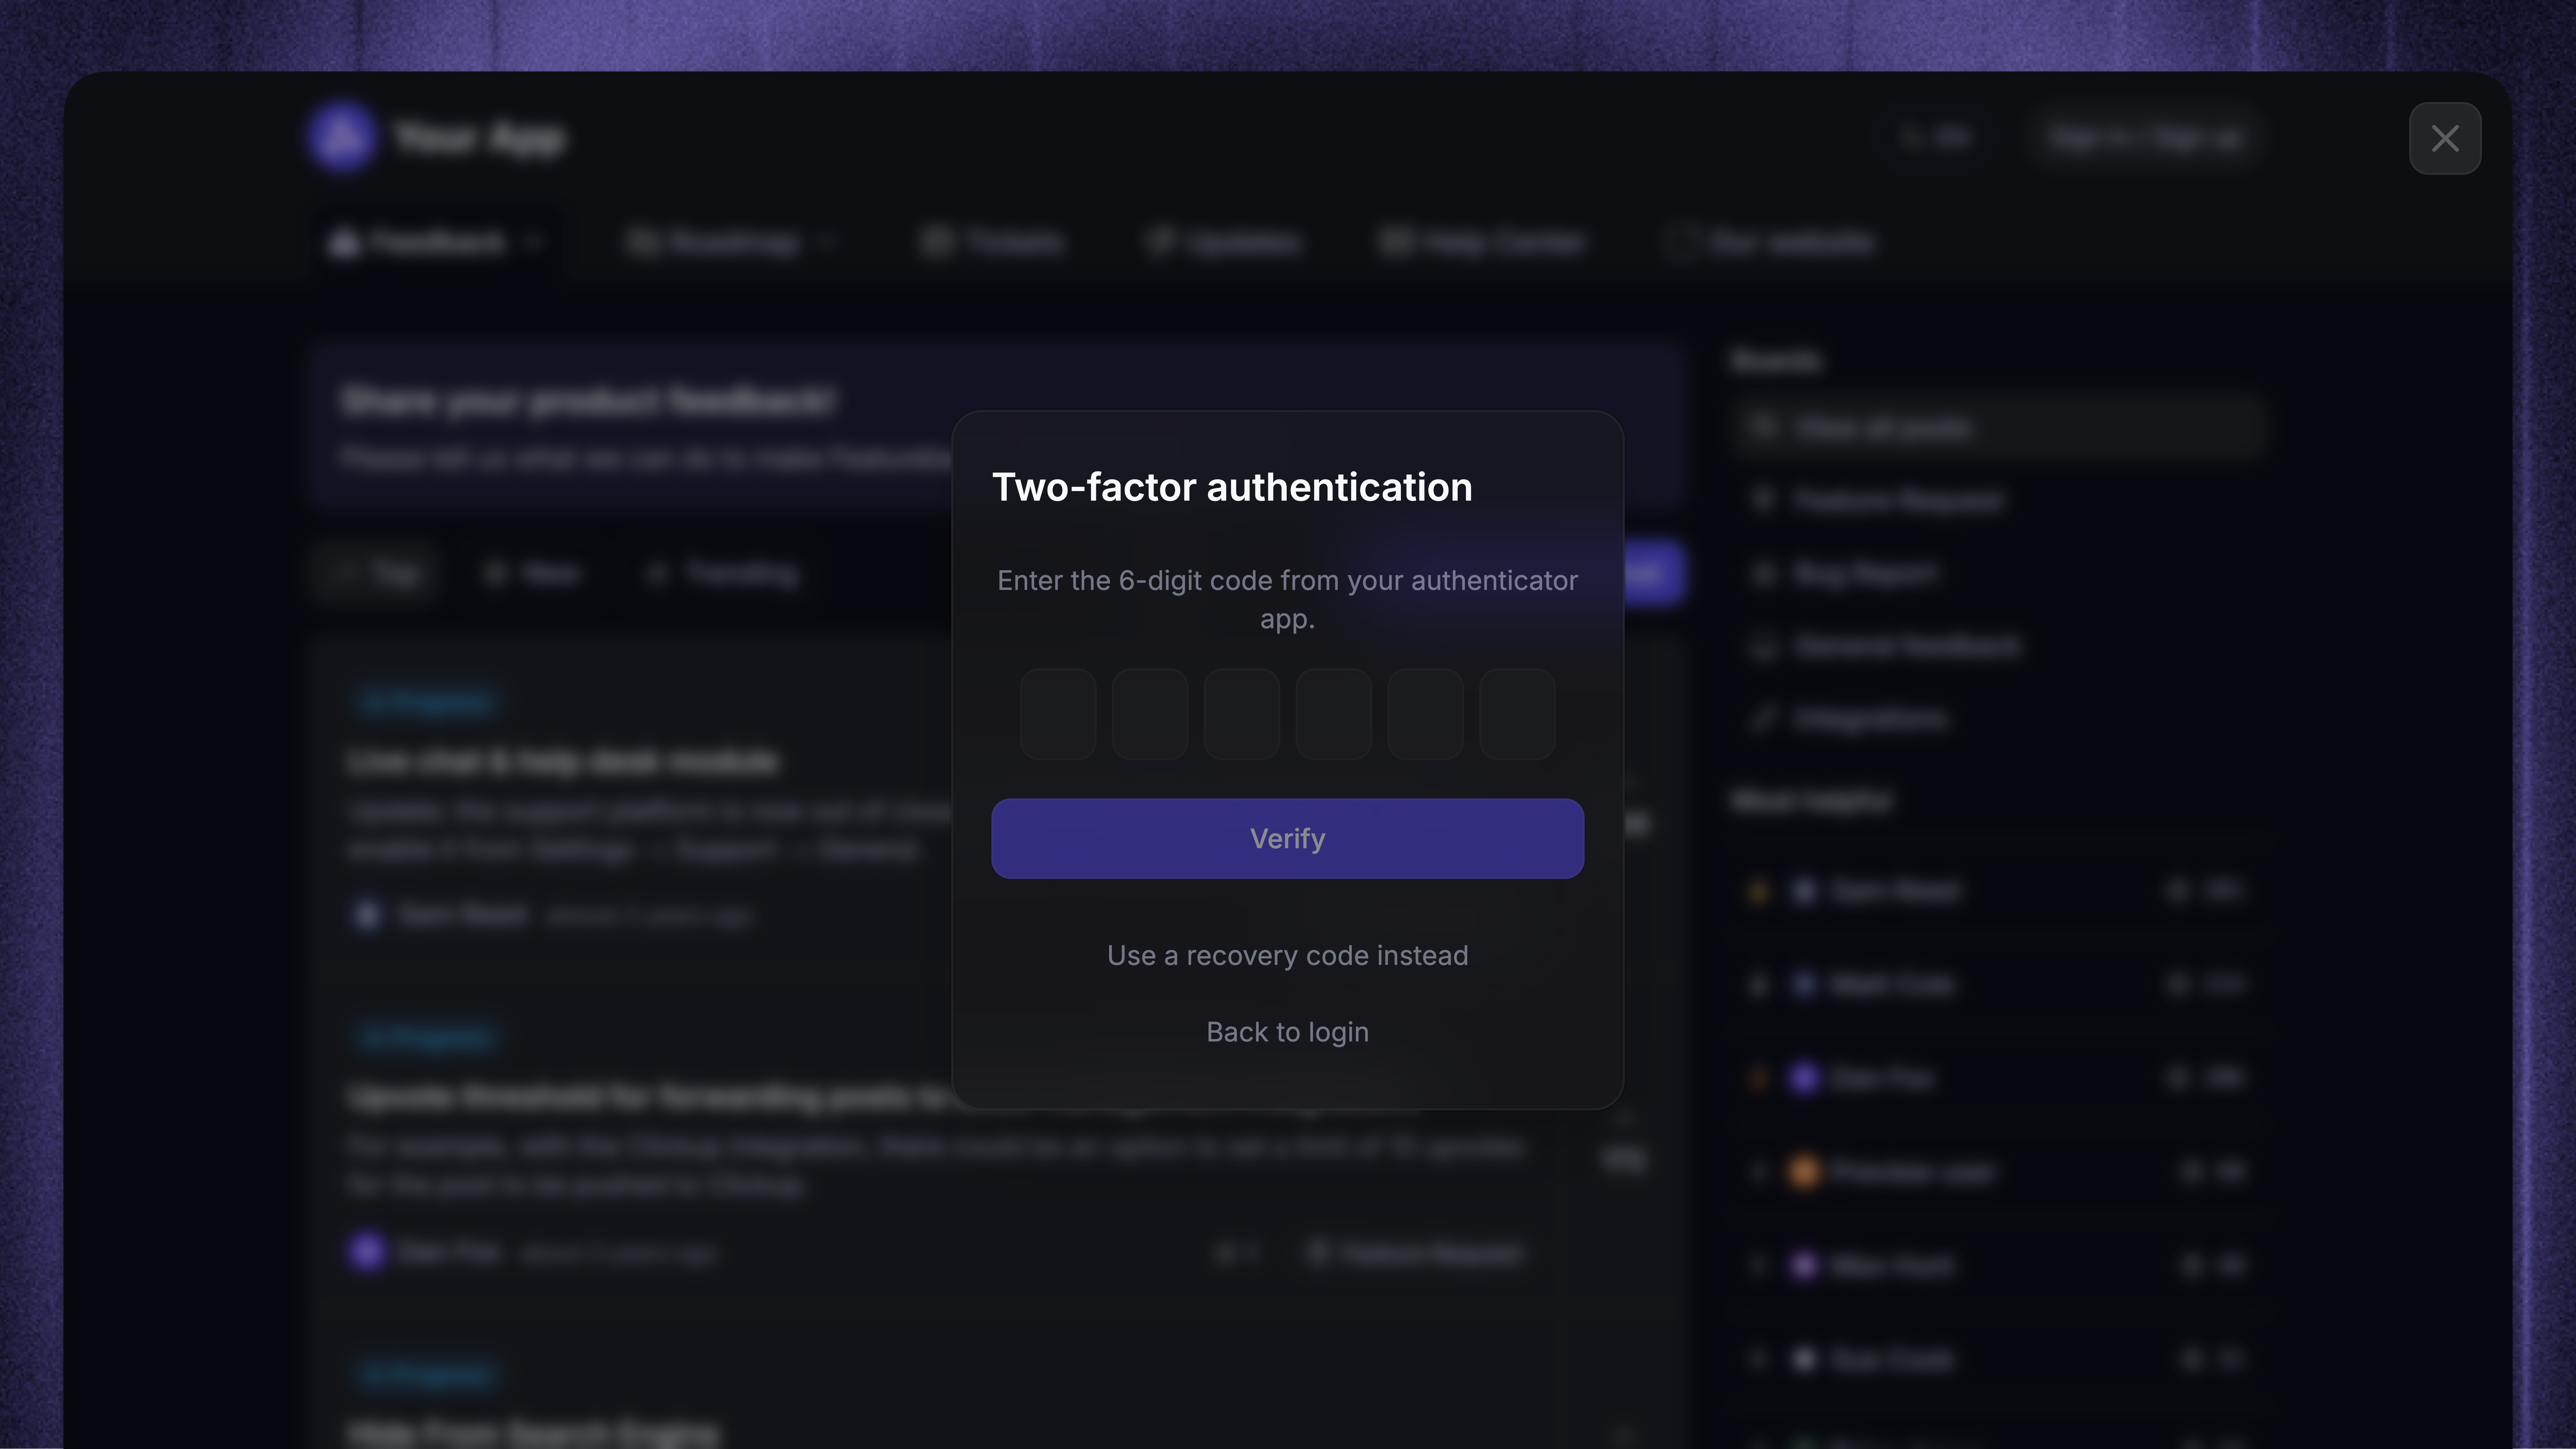
Two-factor authentication (2FA) protects your Featurebase account by requiring a verification code from an authenticator app after your usual sign-in method.
Each teammate manages 2FA for their own account. Workspace admins with the required permission can also require every admin to use 2FA.
Set up two-factor authentication
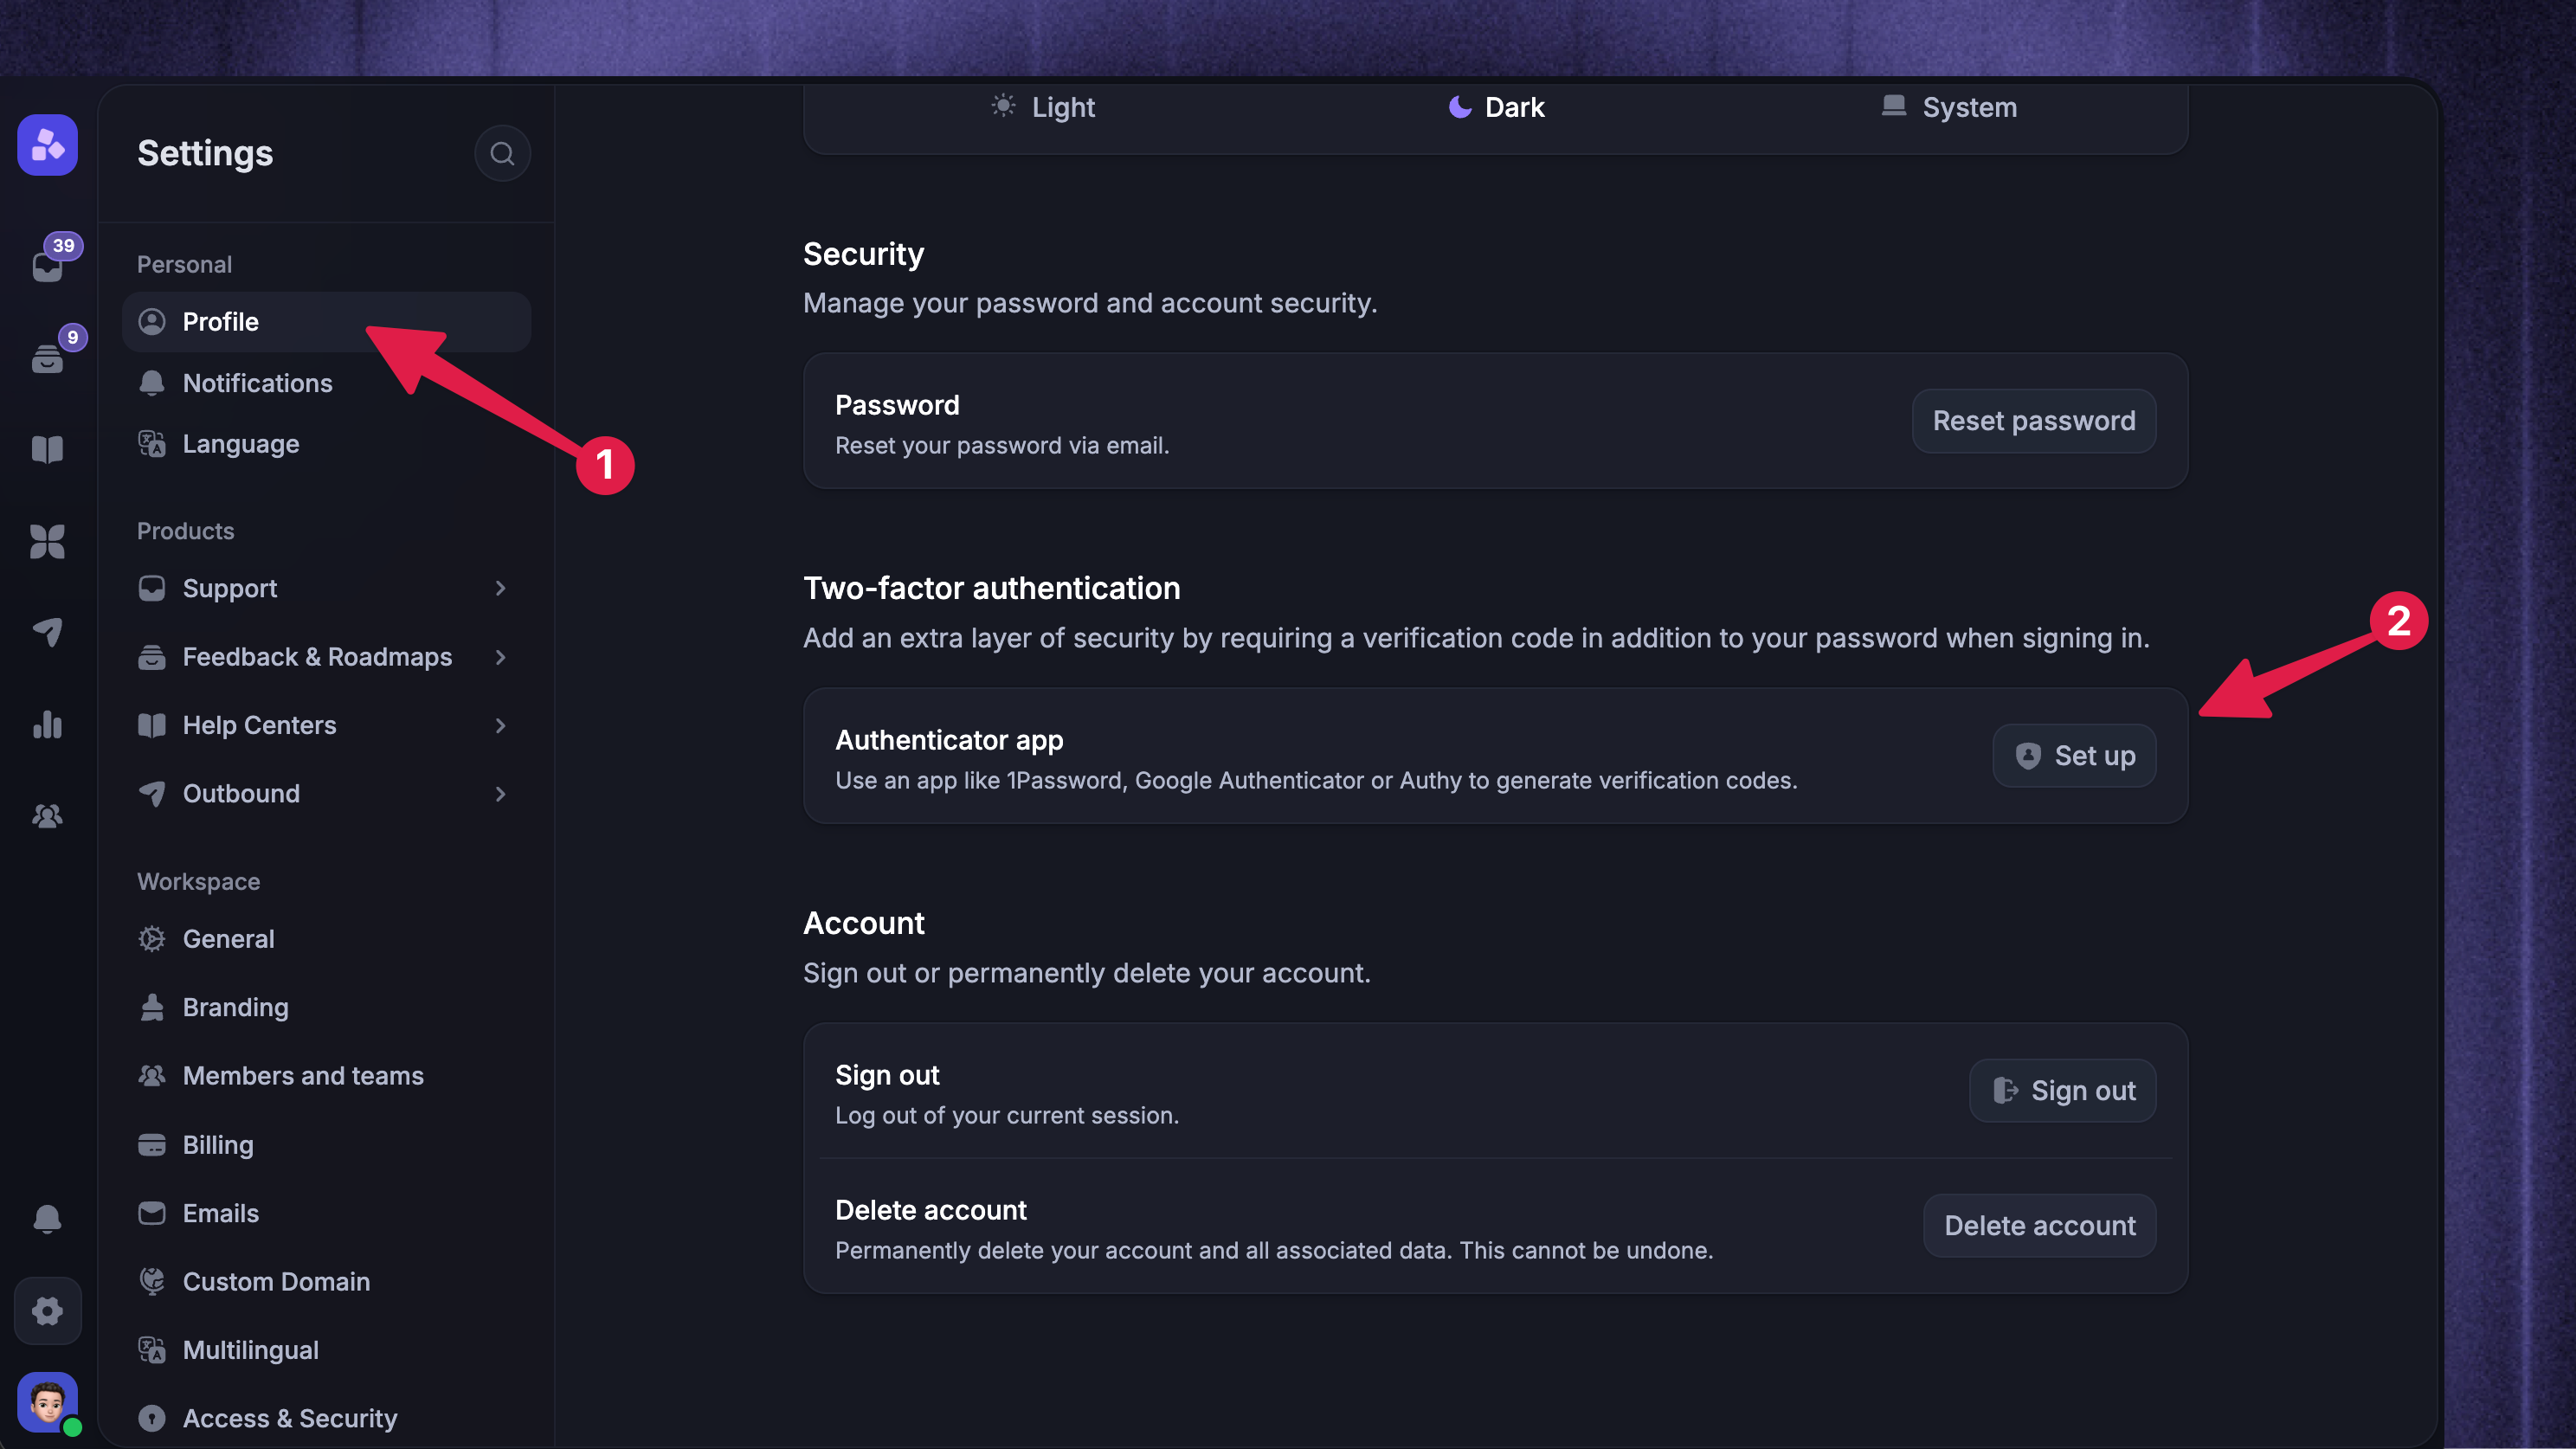
You can use 1Password, Google Authenticator, Authy, or another compatible authenticator app. To enable 2FA:
Go to Settings → Profile
Find the ‘Two-factor authentication’ section and click ‘Set up’
Scan the QR code with your authenticator app, or enter the displayed code manually
Enter the 6-digit verification code generated by your app
Click Verify & enable
Click ‘Copy codes’ and store your recovery codes somewhere secure
Click Done
Featurebase shows 10 recovery codes when you first enable 2FA. They will not be shown again after you leave this section.
Sign in with 2FA
After completing your usual sign-in method, enter the 6-digit code from your authenticator app.
If you cannot access your authenticator app:
Click Use a recovery code instead
Enter one of your saved recovery codes
Click Verify
Each recovery code can only be used once.
Manage your 2FA
Regenerate recovery codes
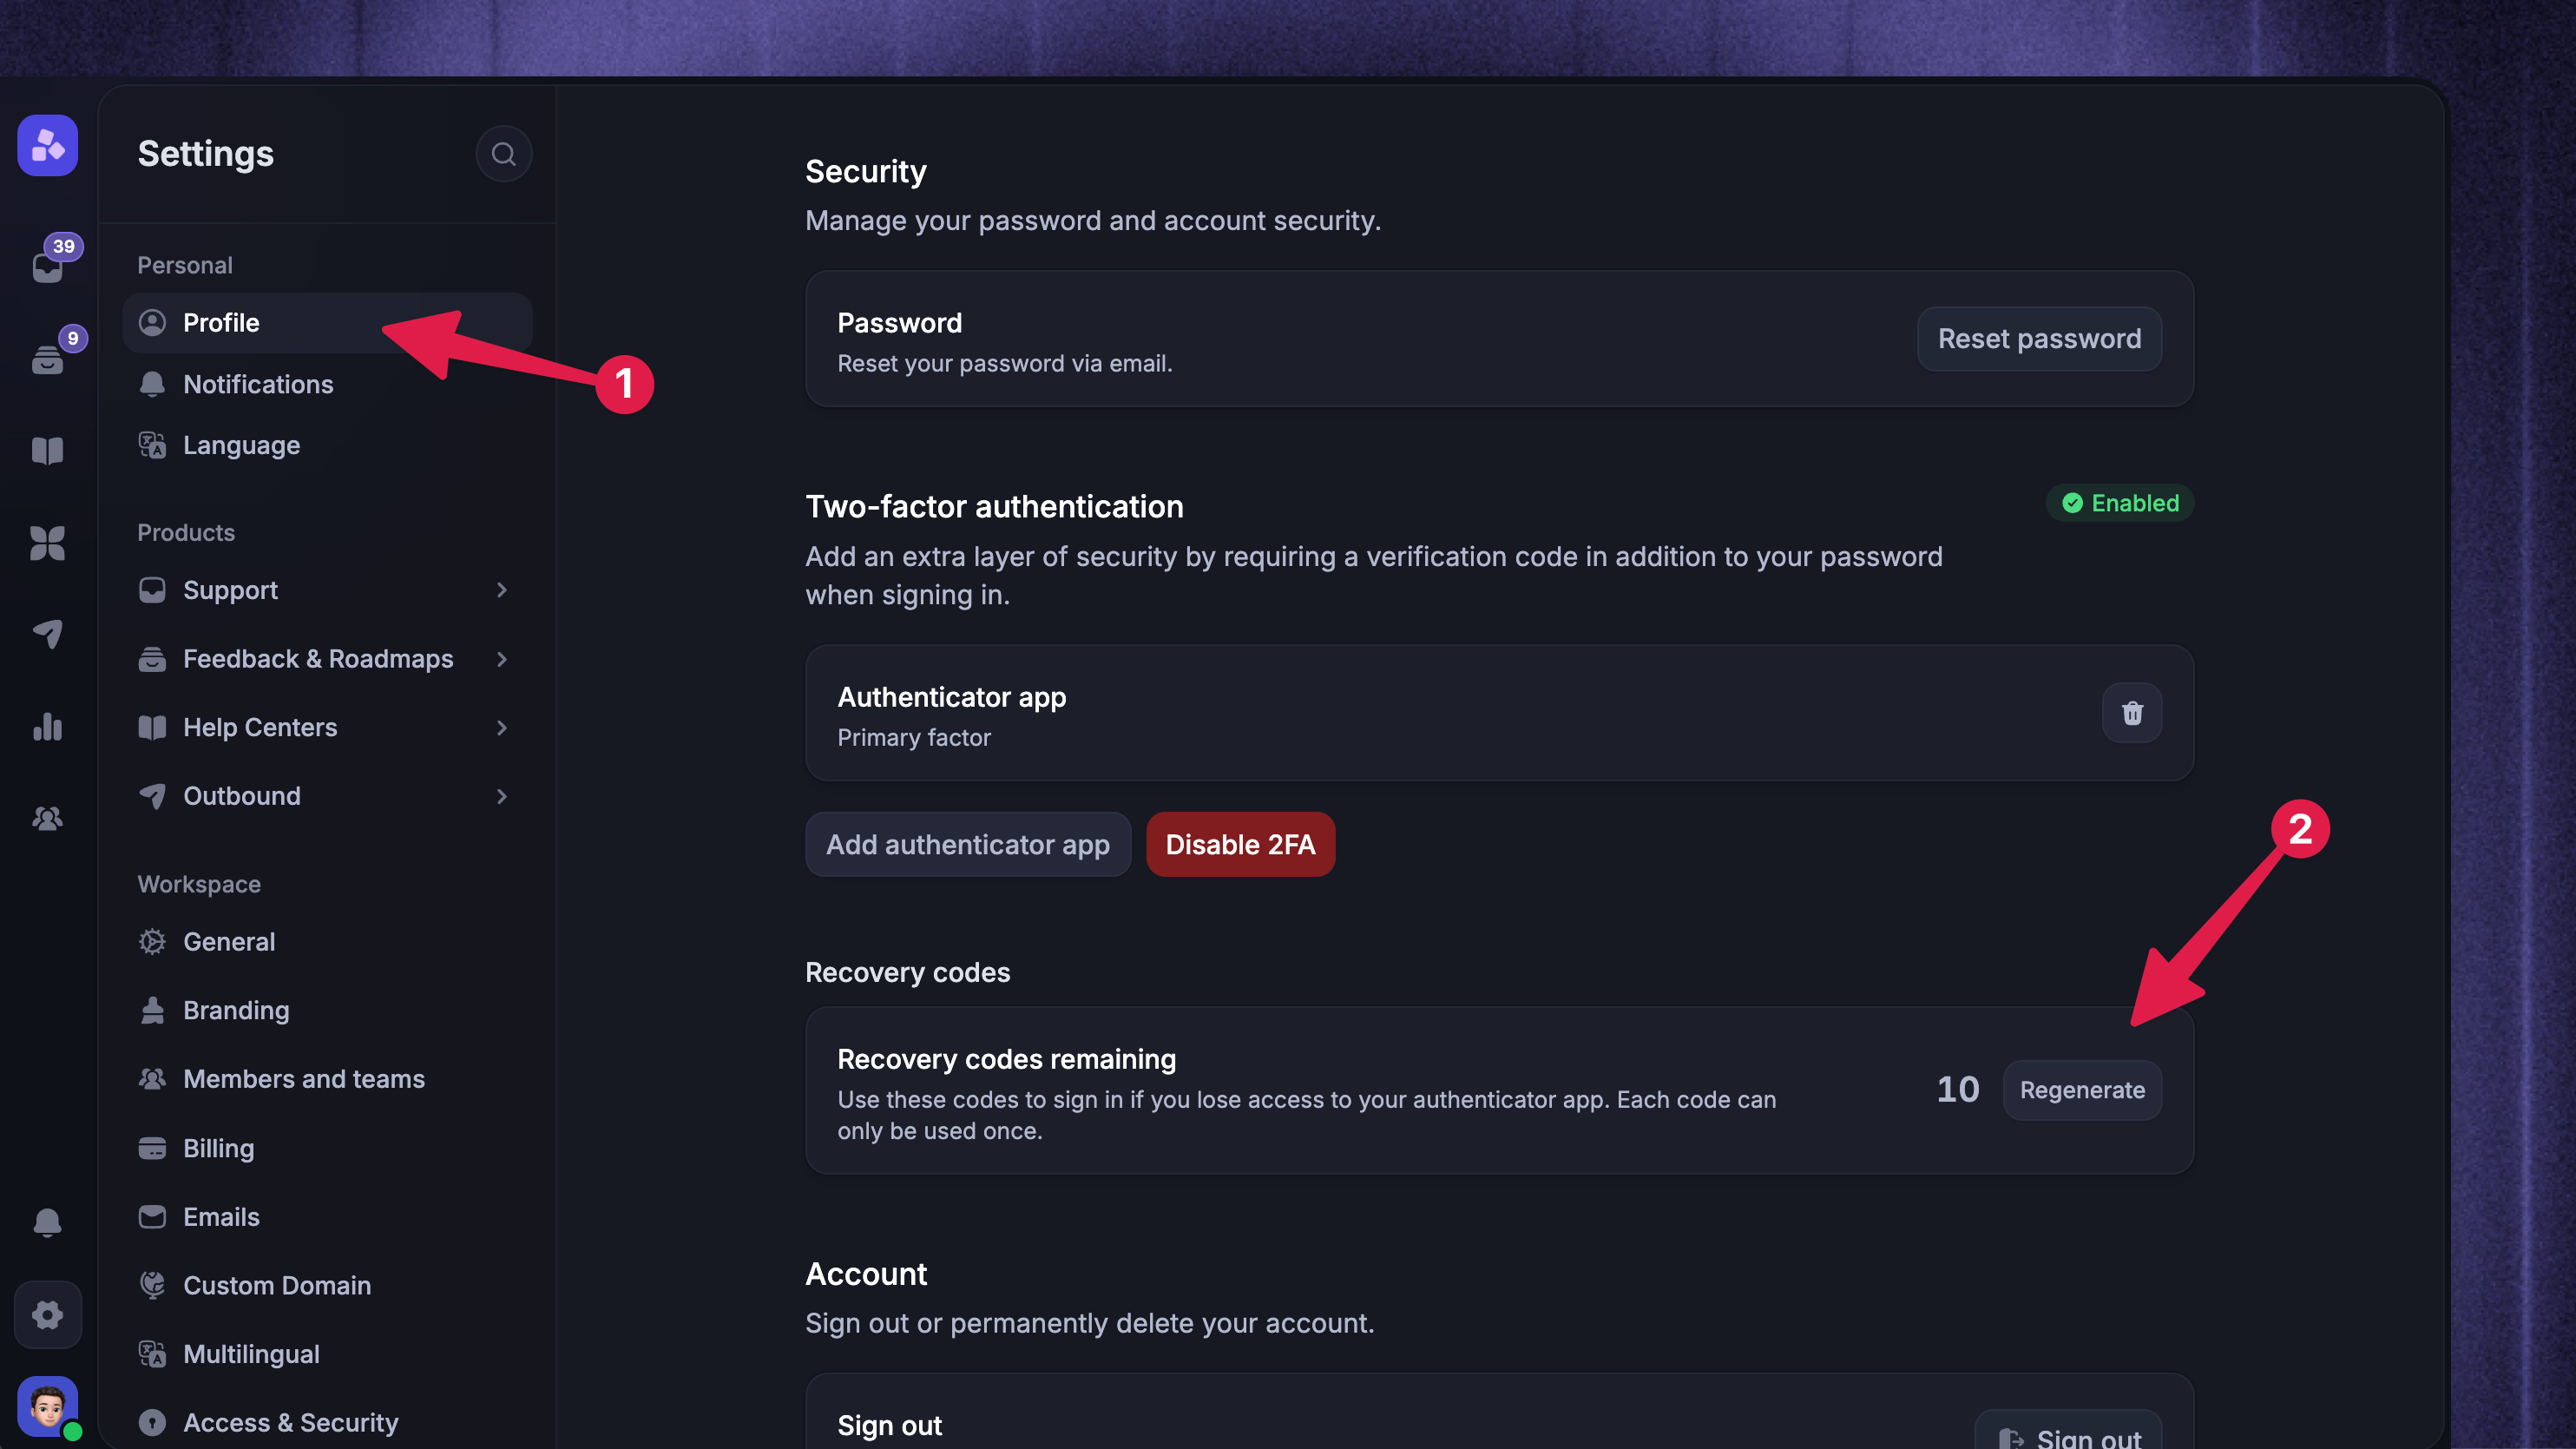
Your Profile page shows how many recovery codes remain, but it does not display the codes you previously saved. To create a new set:
Go to Settings → Profile
Find Recovery codes and click Regenerate
Enter the 6-digit code from your authenticator app
Click Regenerate codes
Click Copy codes and securely store the new codes
Click Done
Regenerating recovery codes immediately invalidates the previous set.
Add or replace an authenticator app
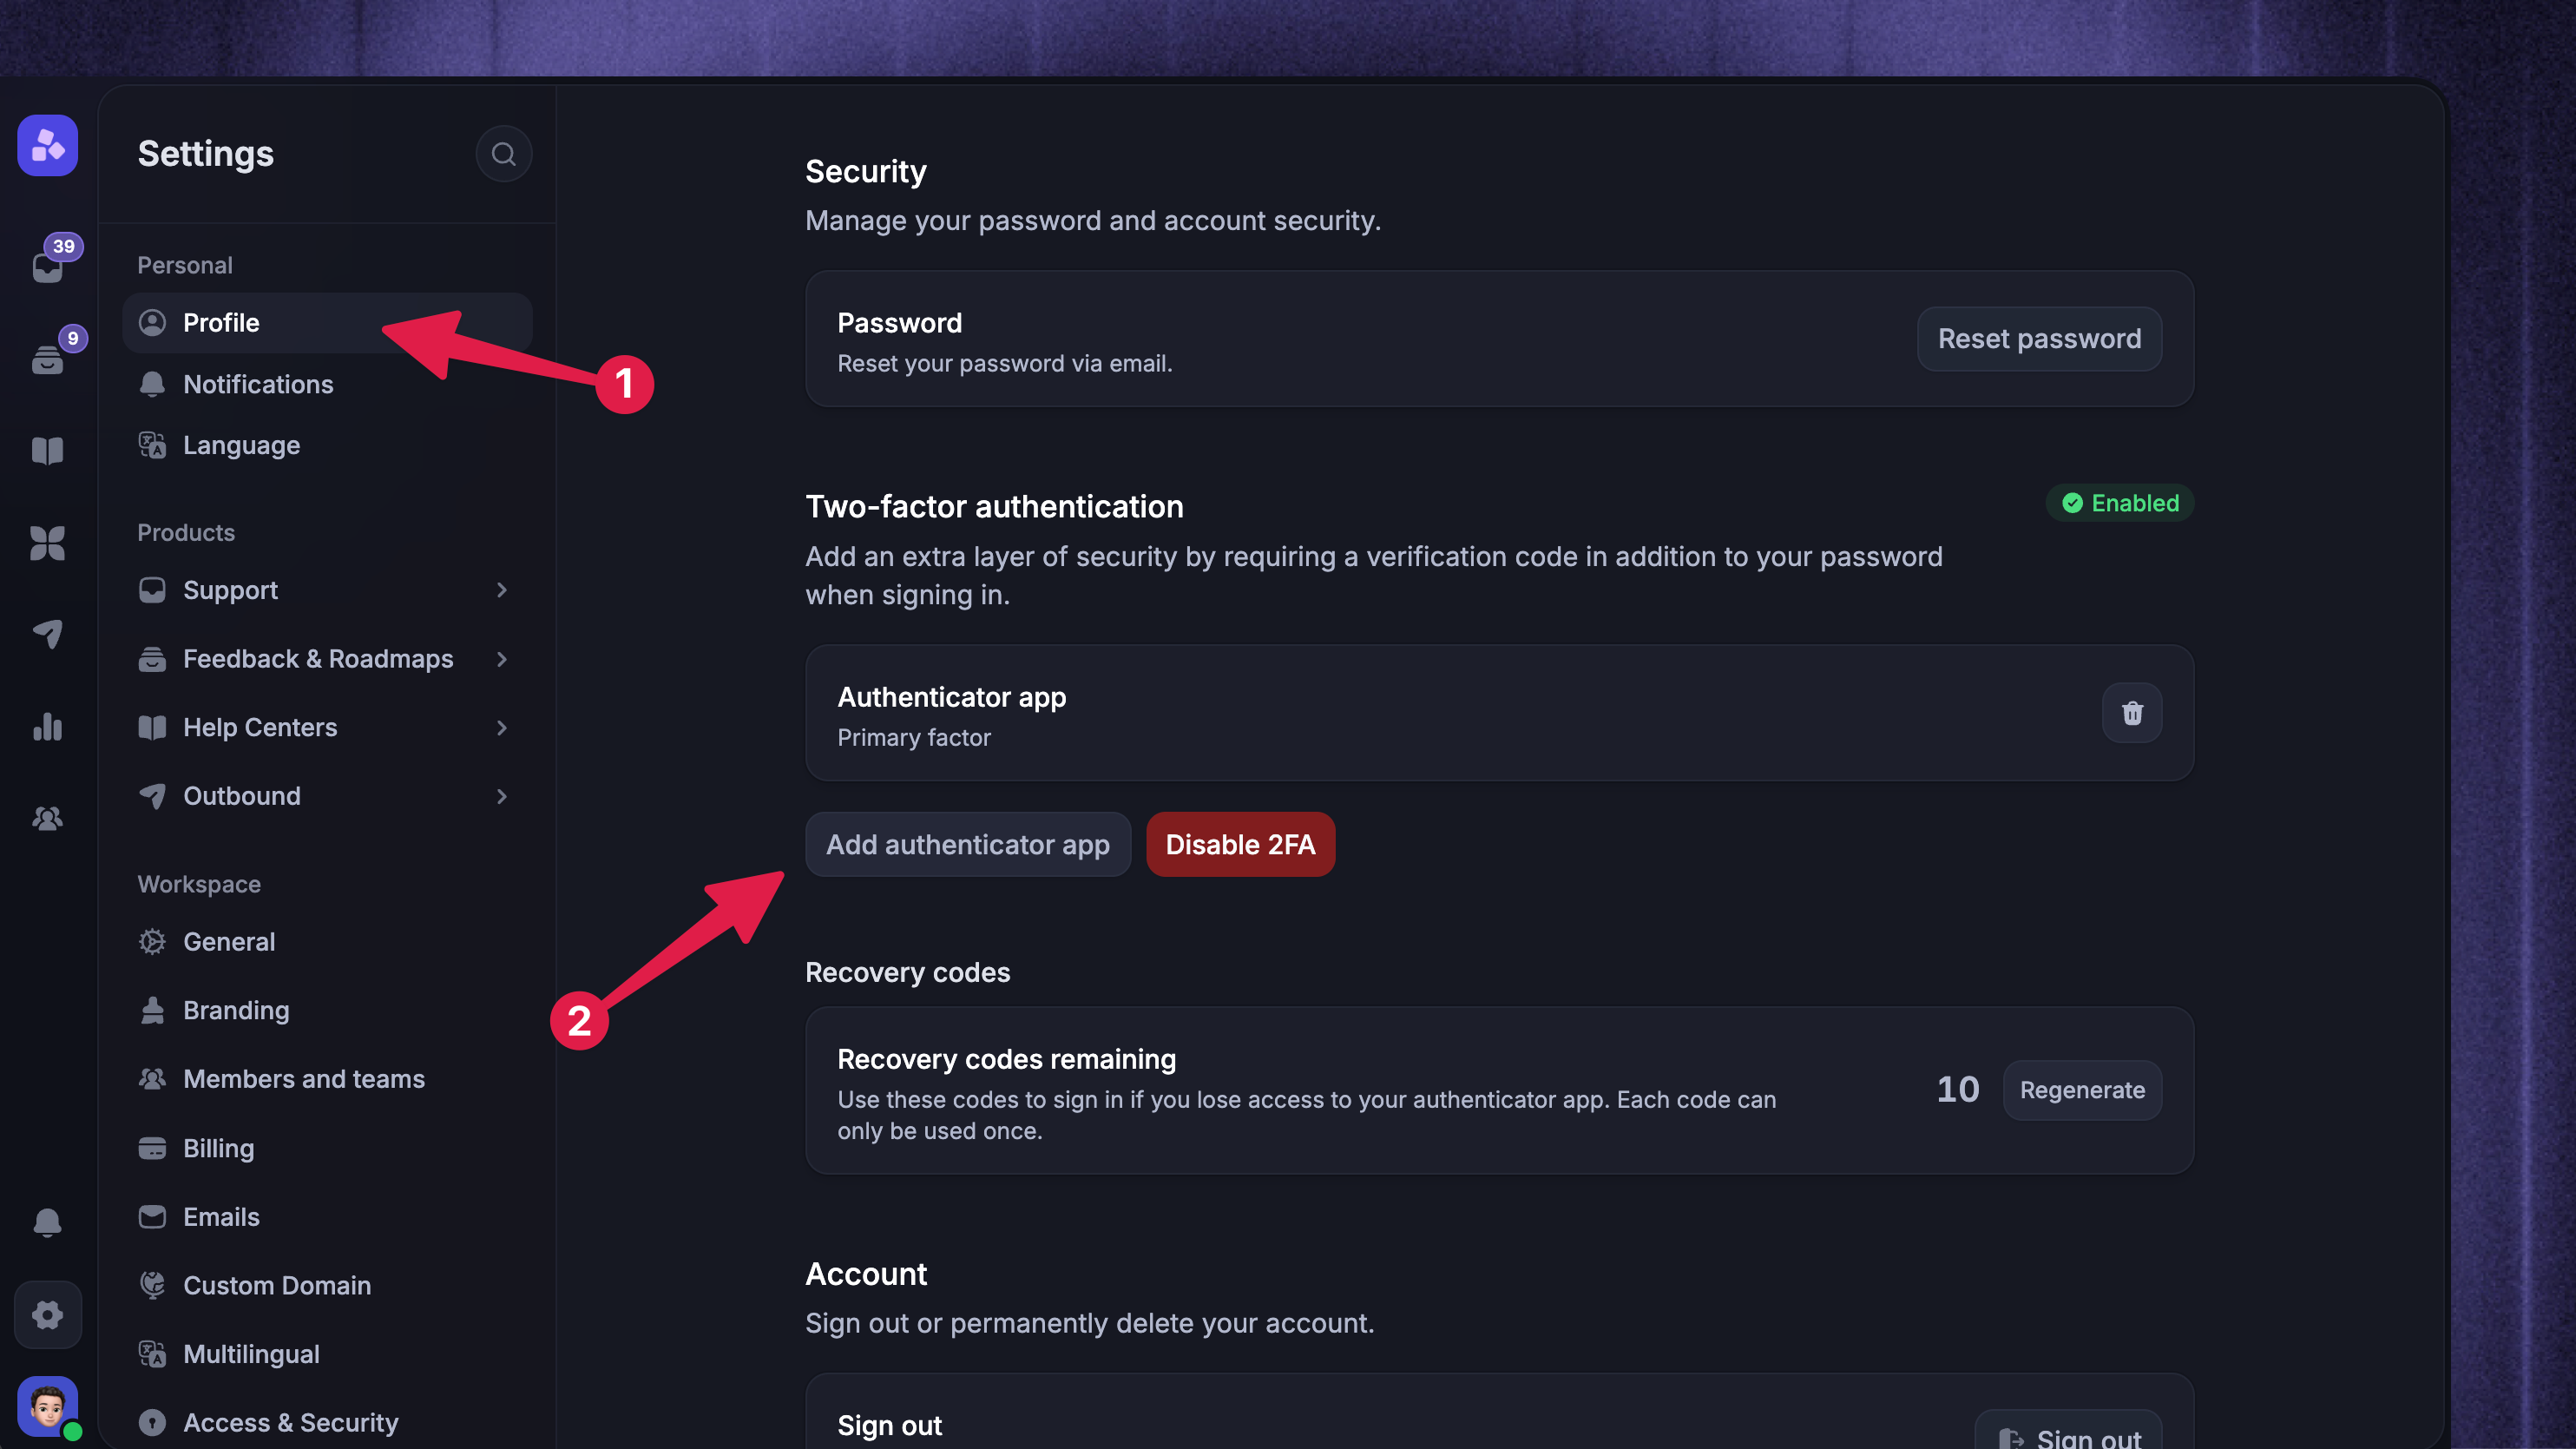
You can add a backup authenticator app before removing an old device:
Go to Settings → Profile
Under Two-factor authentication, click Add authenticator app
Enter the code from your current authenticator app
Scan the new QR code and verify the 6-digit code from the new app
The new app appears as a Backup factor. Click ‘Set as primary’ if you want to use it as your primary authenticator.
After confirming the new app works:
Select the delete icon beside the old authenticator app
Enter the 6-digit code from your authenticator app
Click Remove factor
Disable 2FA
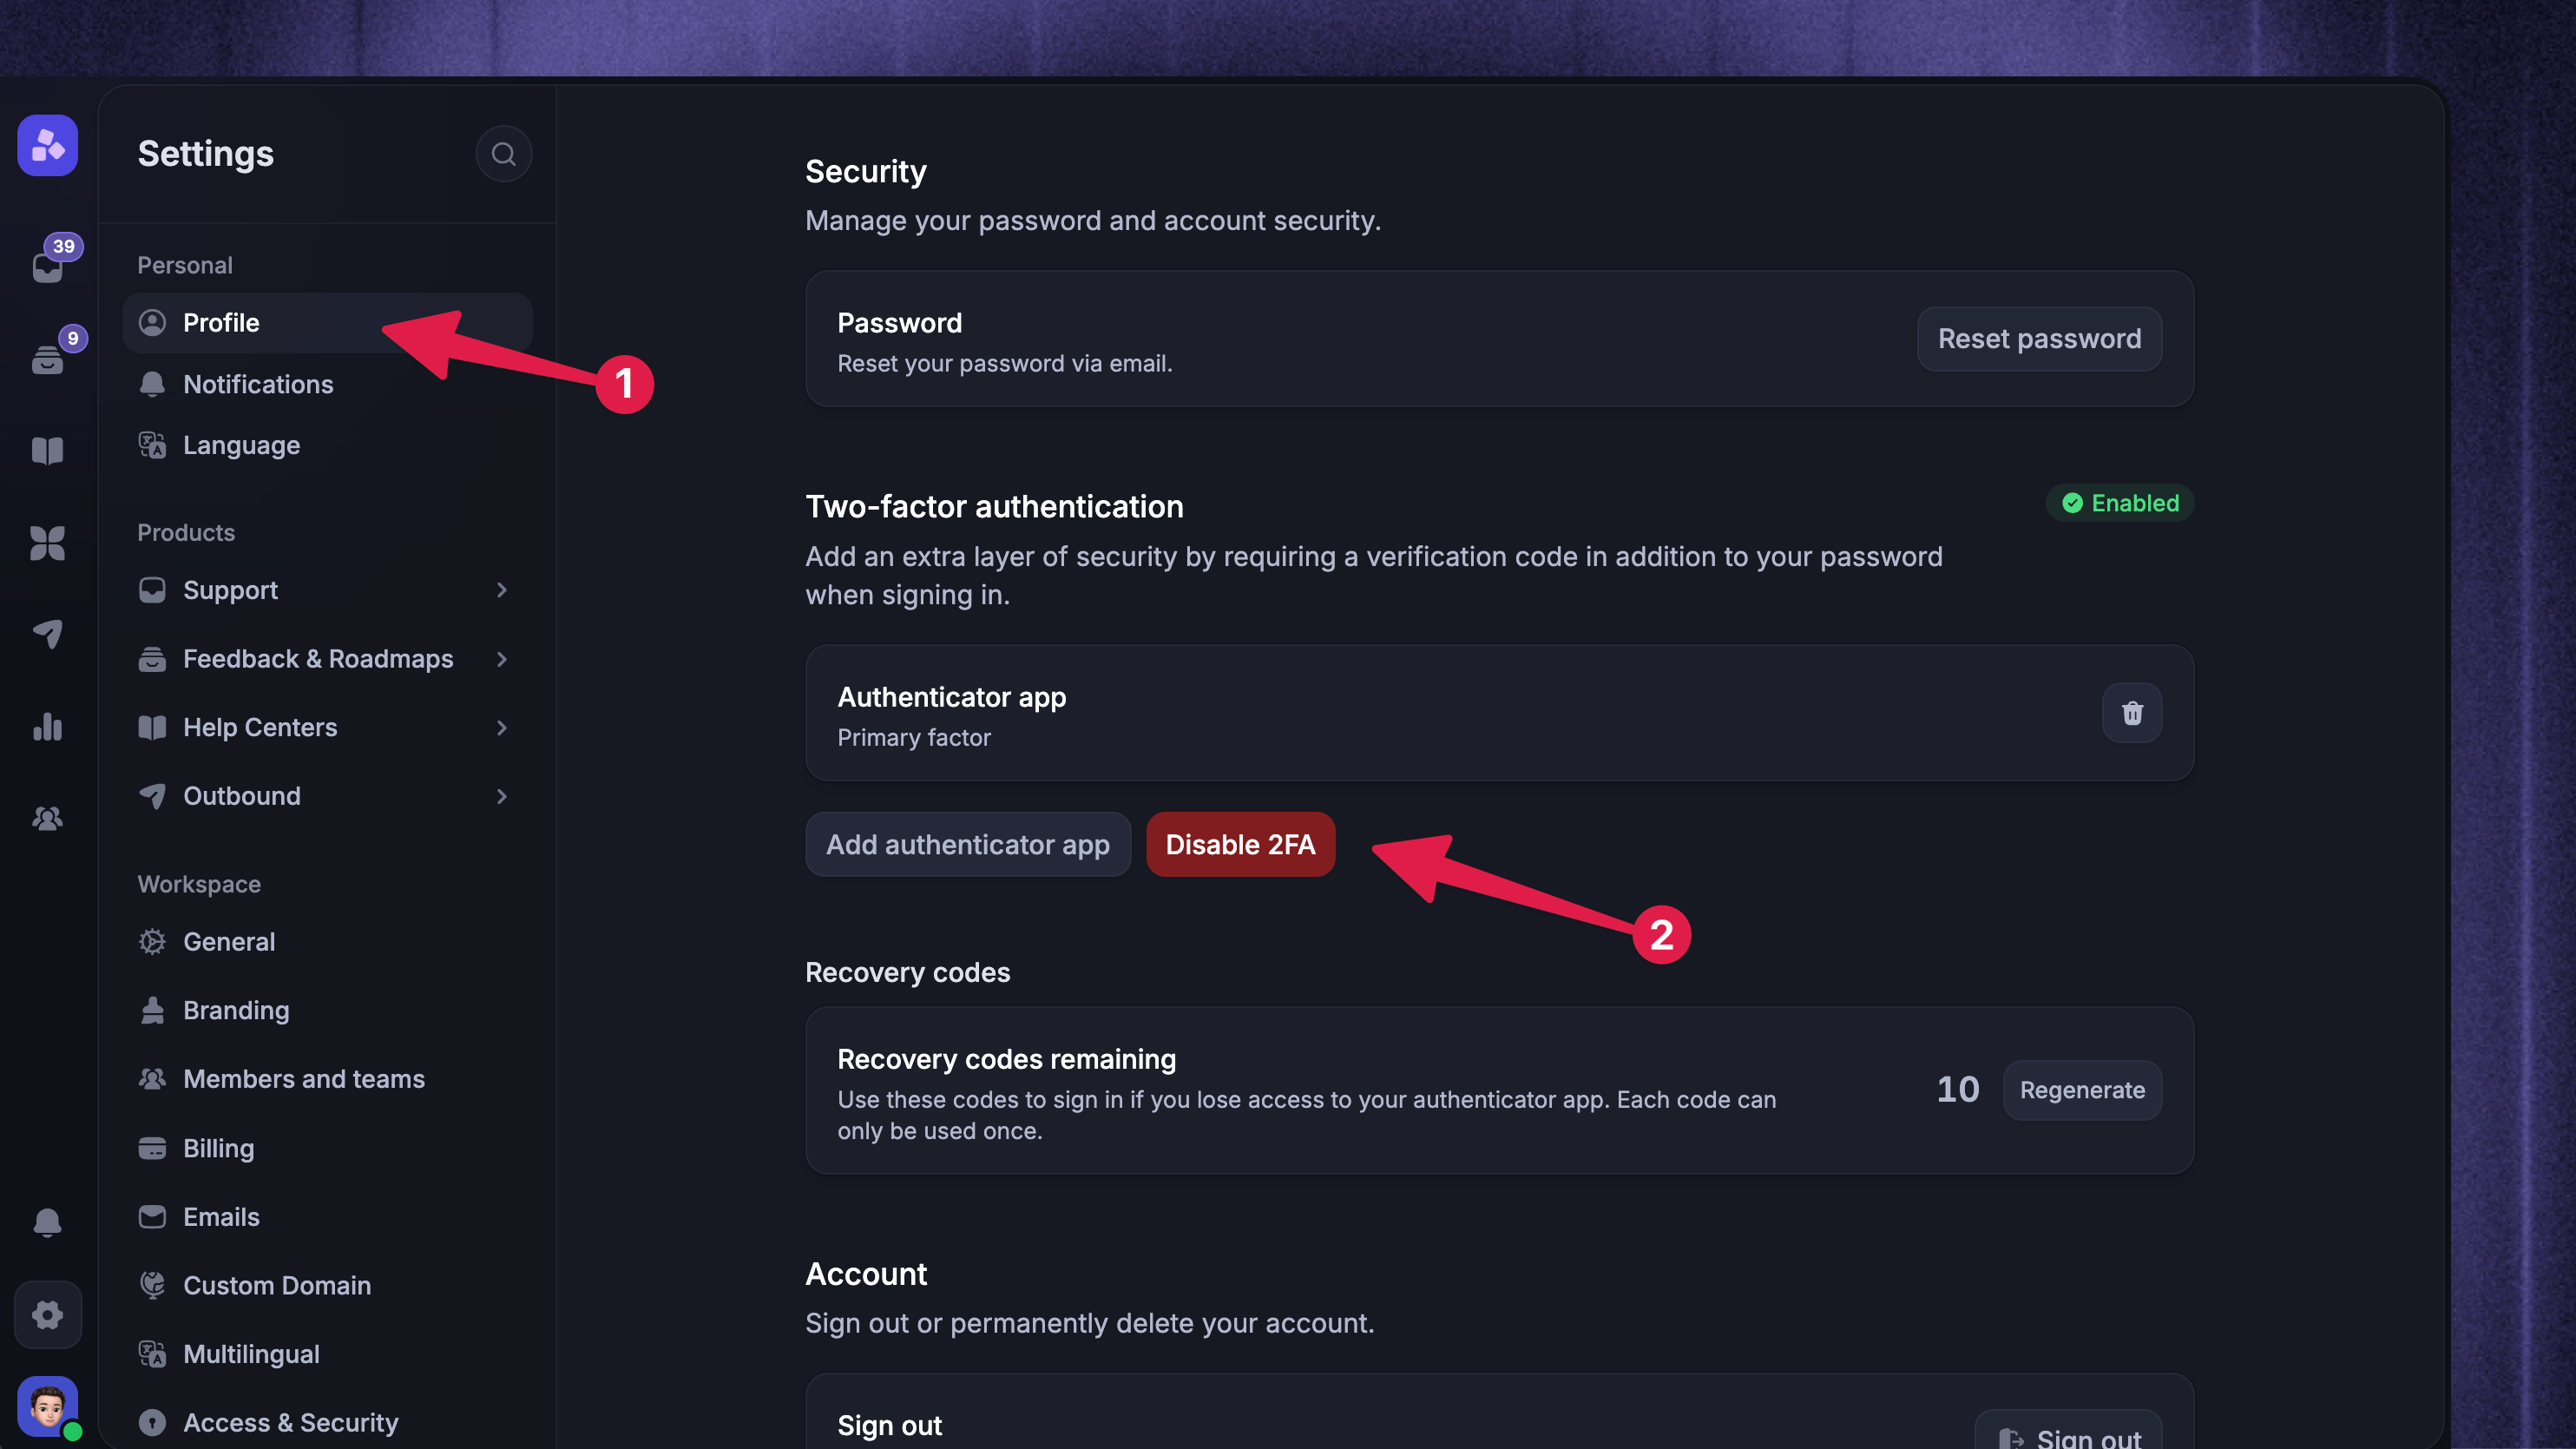
To disable 2FA:
Go to Settings → Profile
Click Disable 2FA
Enter the code from your authenticator app
Confirm by clicking Disable 2FA
Disabling 2FA removes all connected authenticator apps and recovery codes.
Note: You cannot disable 2FA while any Workspace you belong to requires it.
Require 2FA for all admins
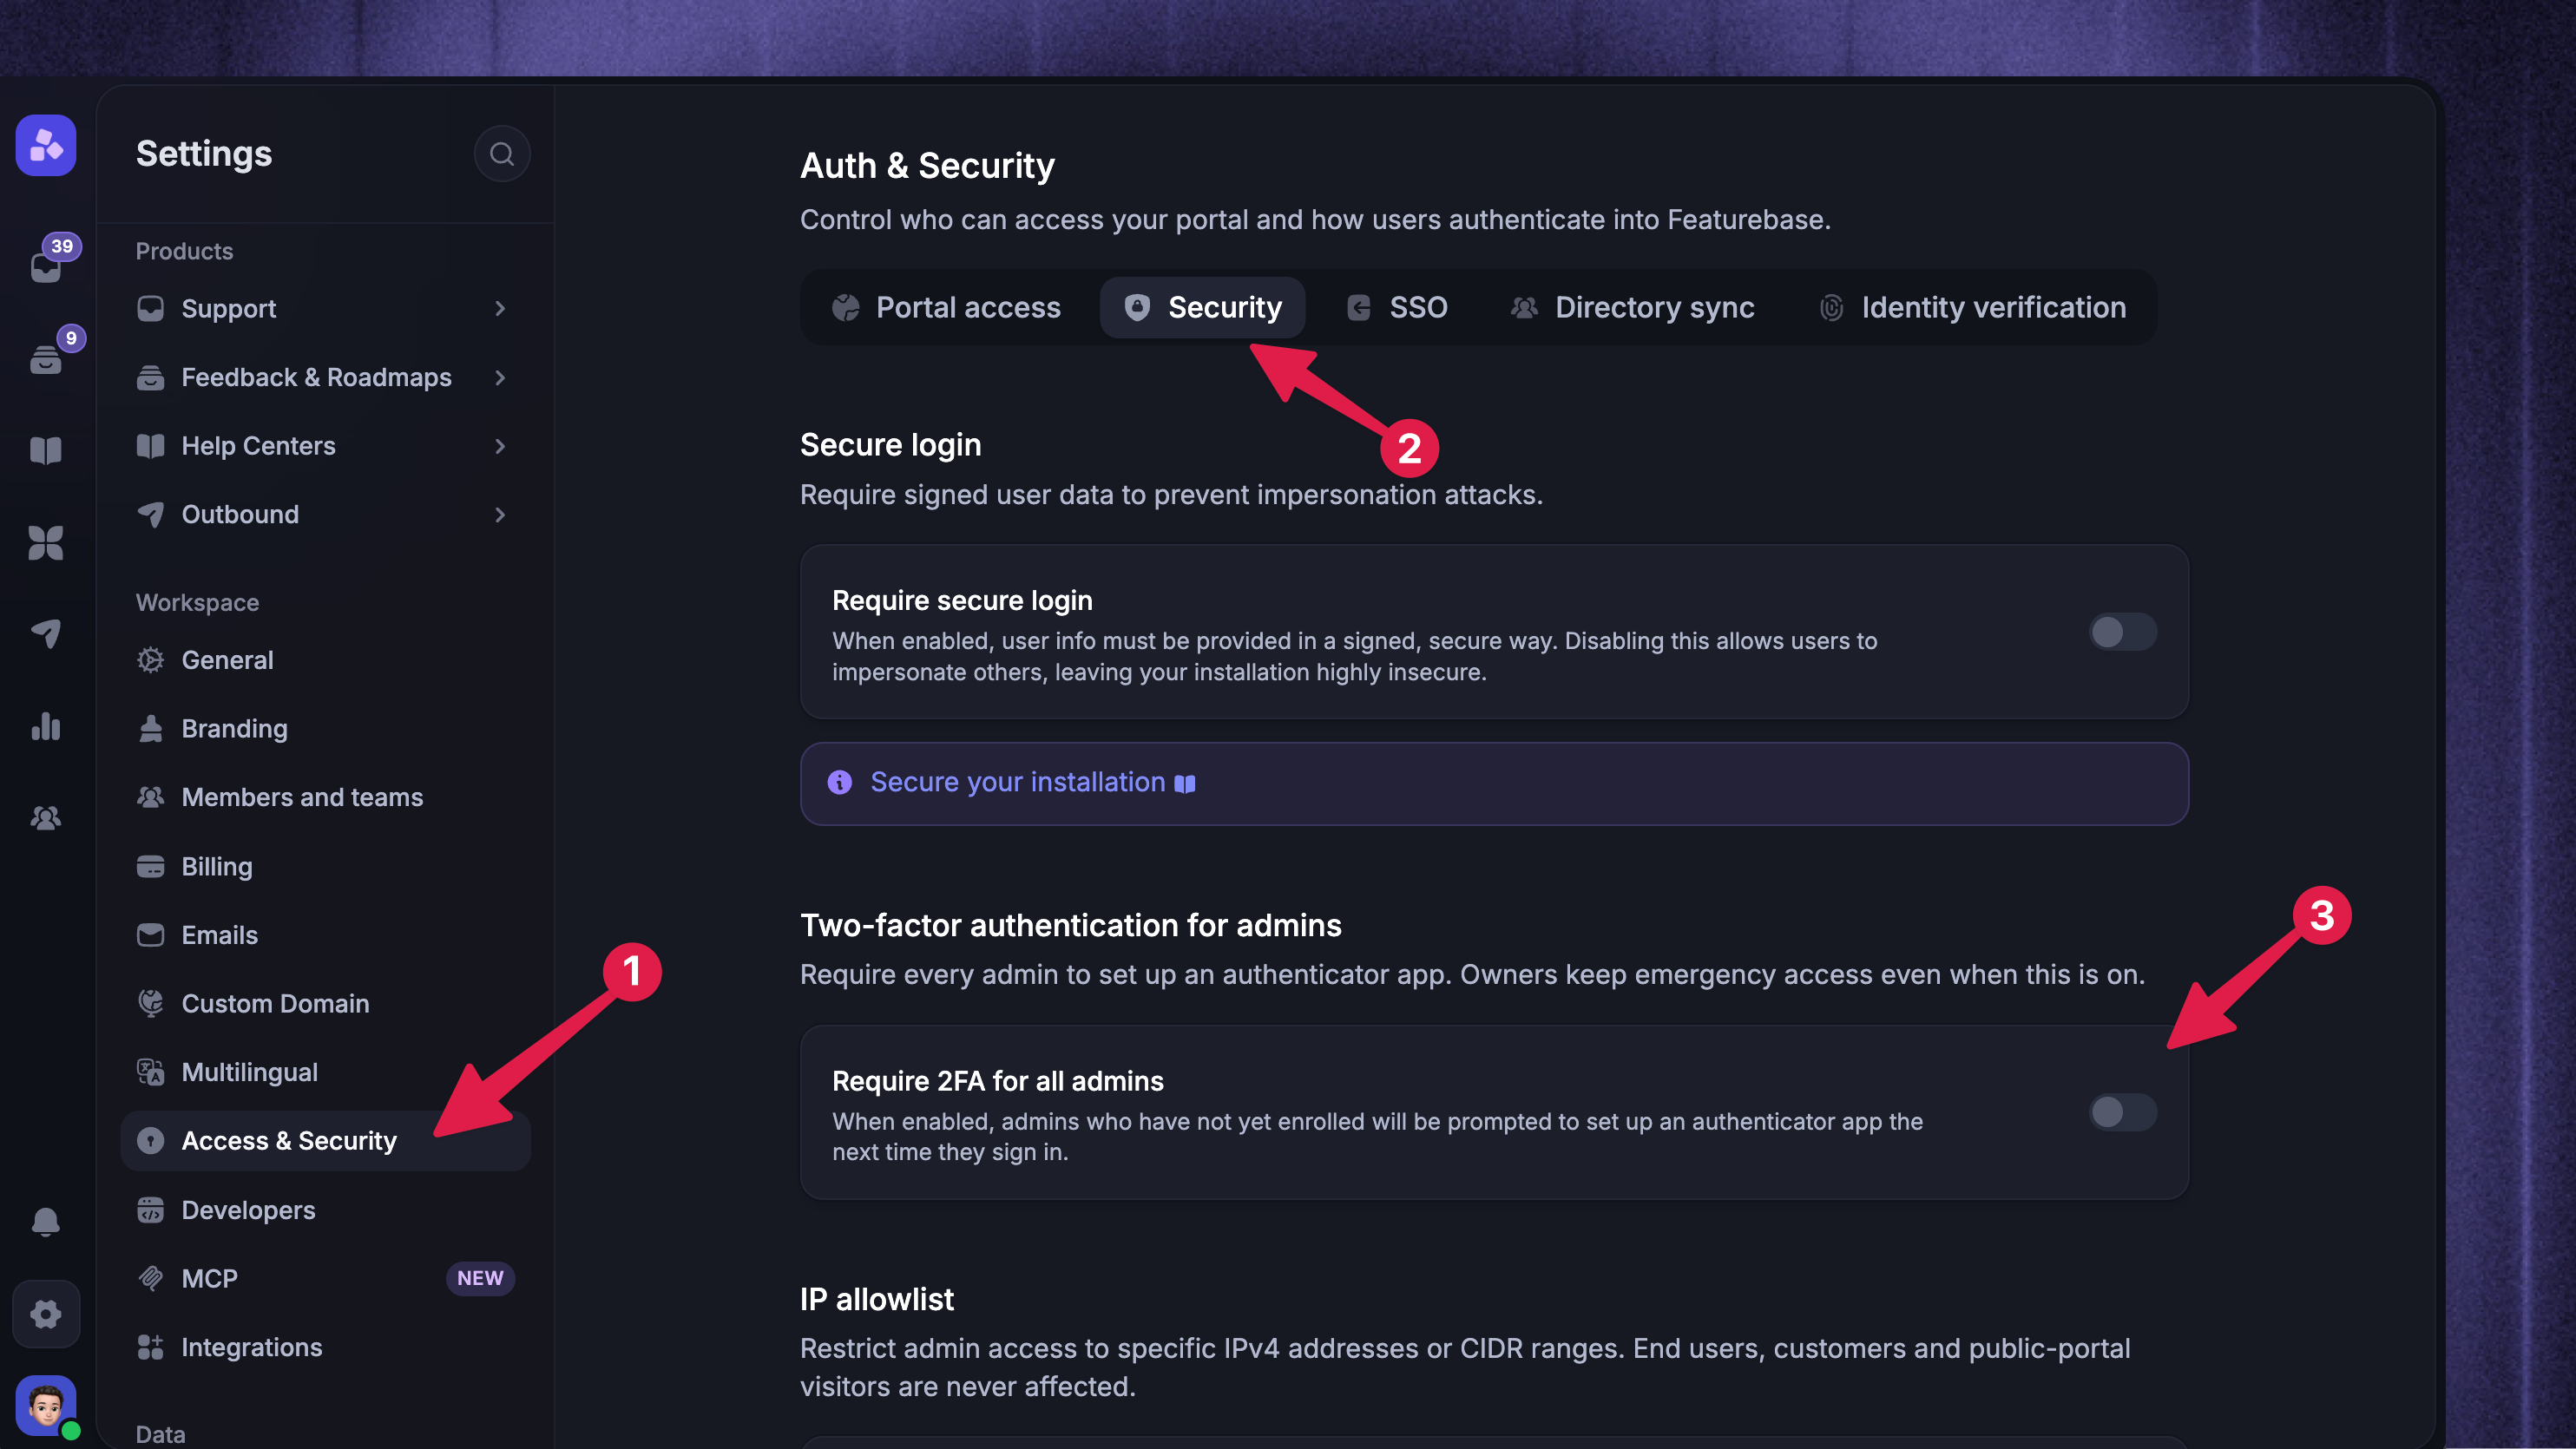
To require 2FA from all of your team members:
Find Admin security
Turn on Require 2FA for all admins
Admins who have not enabled 2FA must set up an authenticator app before they can continue using or join the Workspace. This also applies to admins who are already signed in. They may be asked to sign in again before setup.
Admins who already use 2FA keep their existing authenticator app. If their current session has not completed 2FA, they must verify with their authenticator app or a recovery code before continuing.
Turning off the Workspace requirement does not disable 2FA for teammates who enabled it on their own accounts.
Note: Your role needs the Manage SSO permission to change the Workspace-wide 2FA requirement.
FAQs
What if I lose access to my authenticator app?
What if I lose access to my authenticator app?
Sign in with an unused recovery code. Immediately go to Settings → Profile, select 'Replace authenticator app', and follow the setup steps. You can then remove the lost authenticator using a code from the new app.
If you do not see 'Replace authenticator app', sign in again with another unused recovery code. If you have no unused recovery codes, contact us through live chat or email support@featurebase.app.
Why can’t I disable 2FA?
Why can’t I disable 2FA?
At least one Workspace you belong to requires 2FA for all admins. An admin with the Manage SSO permission must remove that requirement before you can disable 2FA for your account.
Was this helpful?
Still need help? Ask the team