Create outbound Banner messages
Create targeted Outbound Banner messages that show persistent notices on your website or app.
Written By Markus Palm
Last updated 3 days ago
Overview
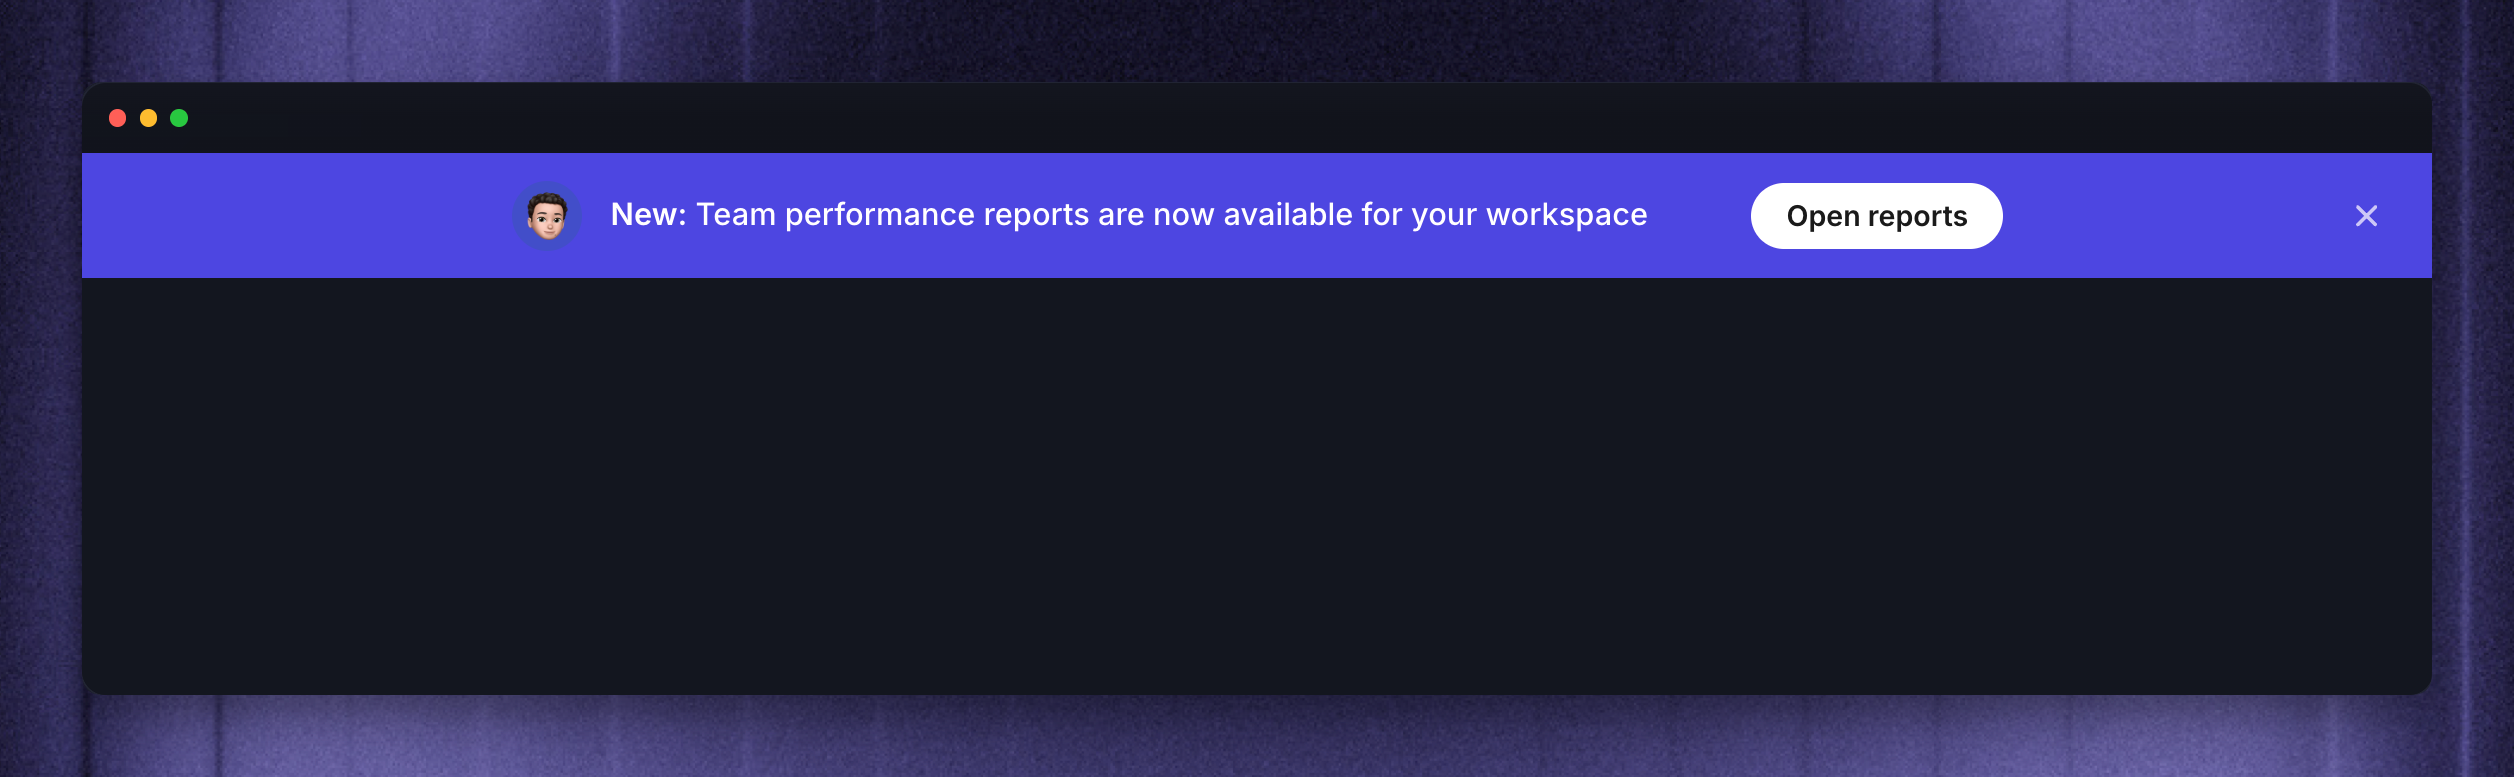
Banner messages let you show a persistent in-app or website notice to people who match your Outbound rules. Use them for announcements, maintenance notices, onboarding prompts, upgrade nudges, or time-sensitive reminders that should stay visible at the top or bottom of the page.
Banners use dynamic audiences only. This means people can start or stop seeing the banner as their attributes, page activity, or matching rules change.
Common Banner use cases:
Announce planned maintenance or temporary service notices
Promote a time-sensitive offer or upgrade path
Remind customers about unfinished setup steps
Link people to a relevant guide, page, or workflow
Create a Banner message
To create a new Outbound Banner message:
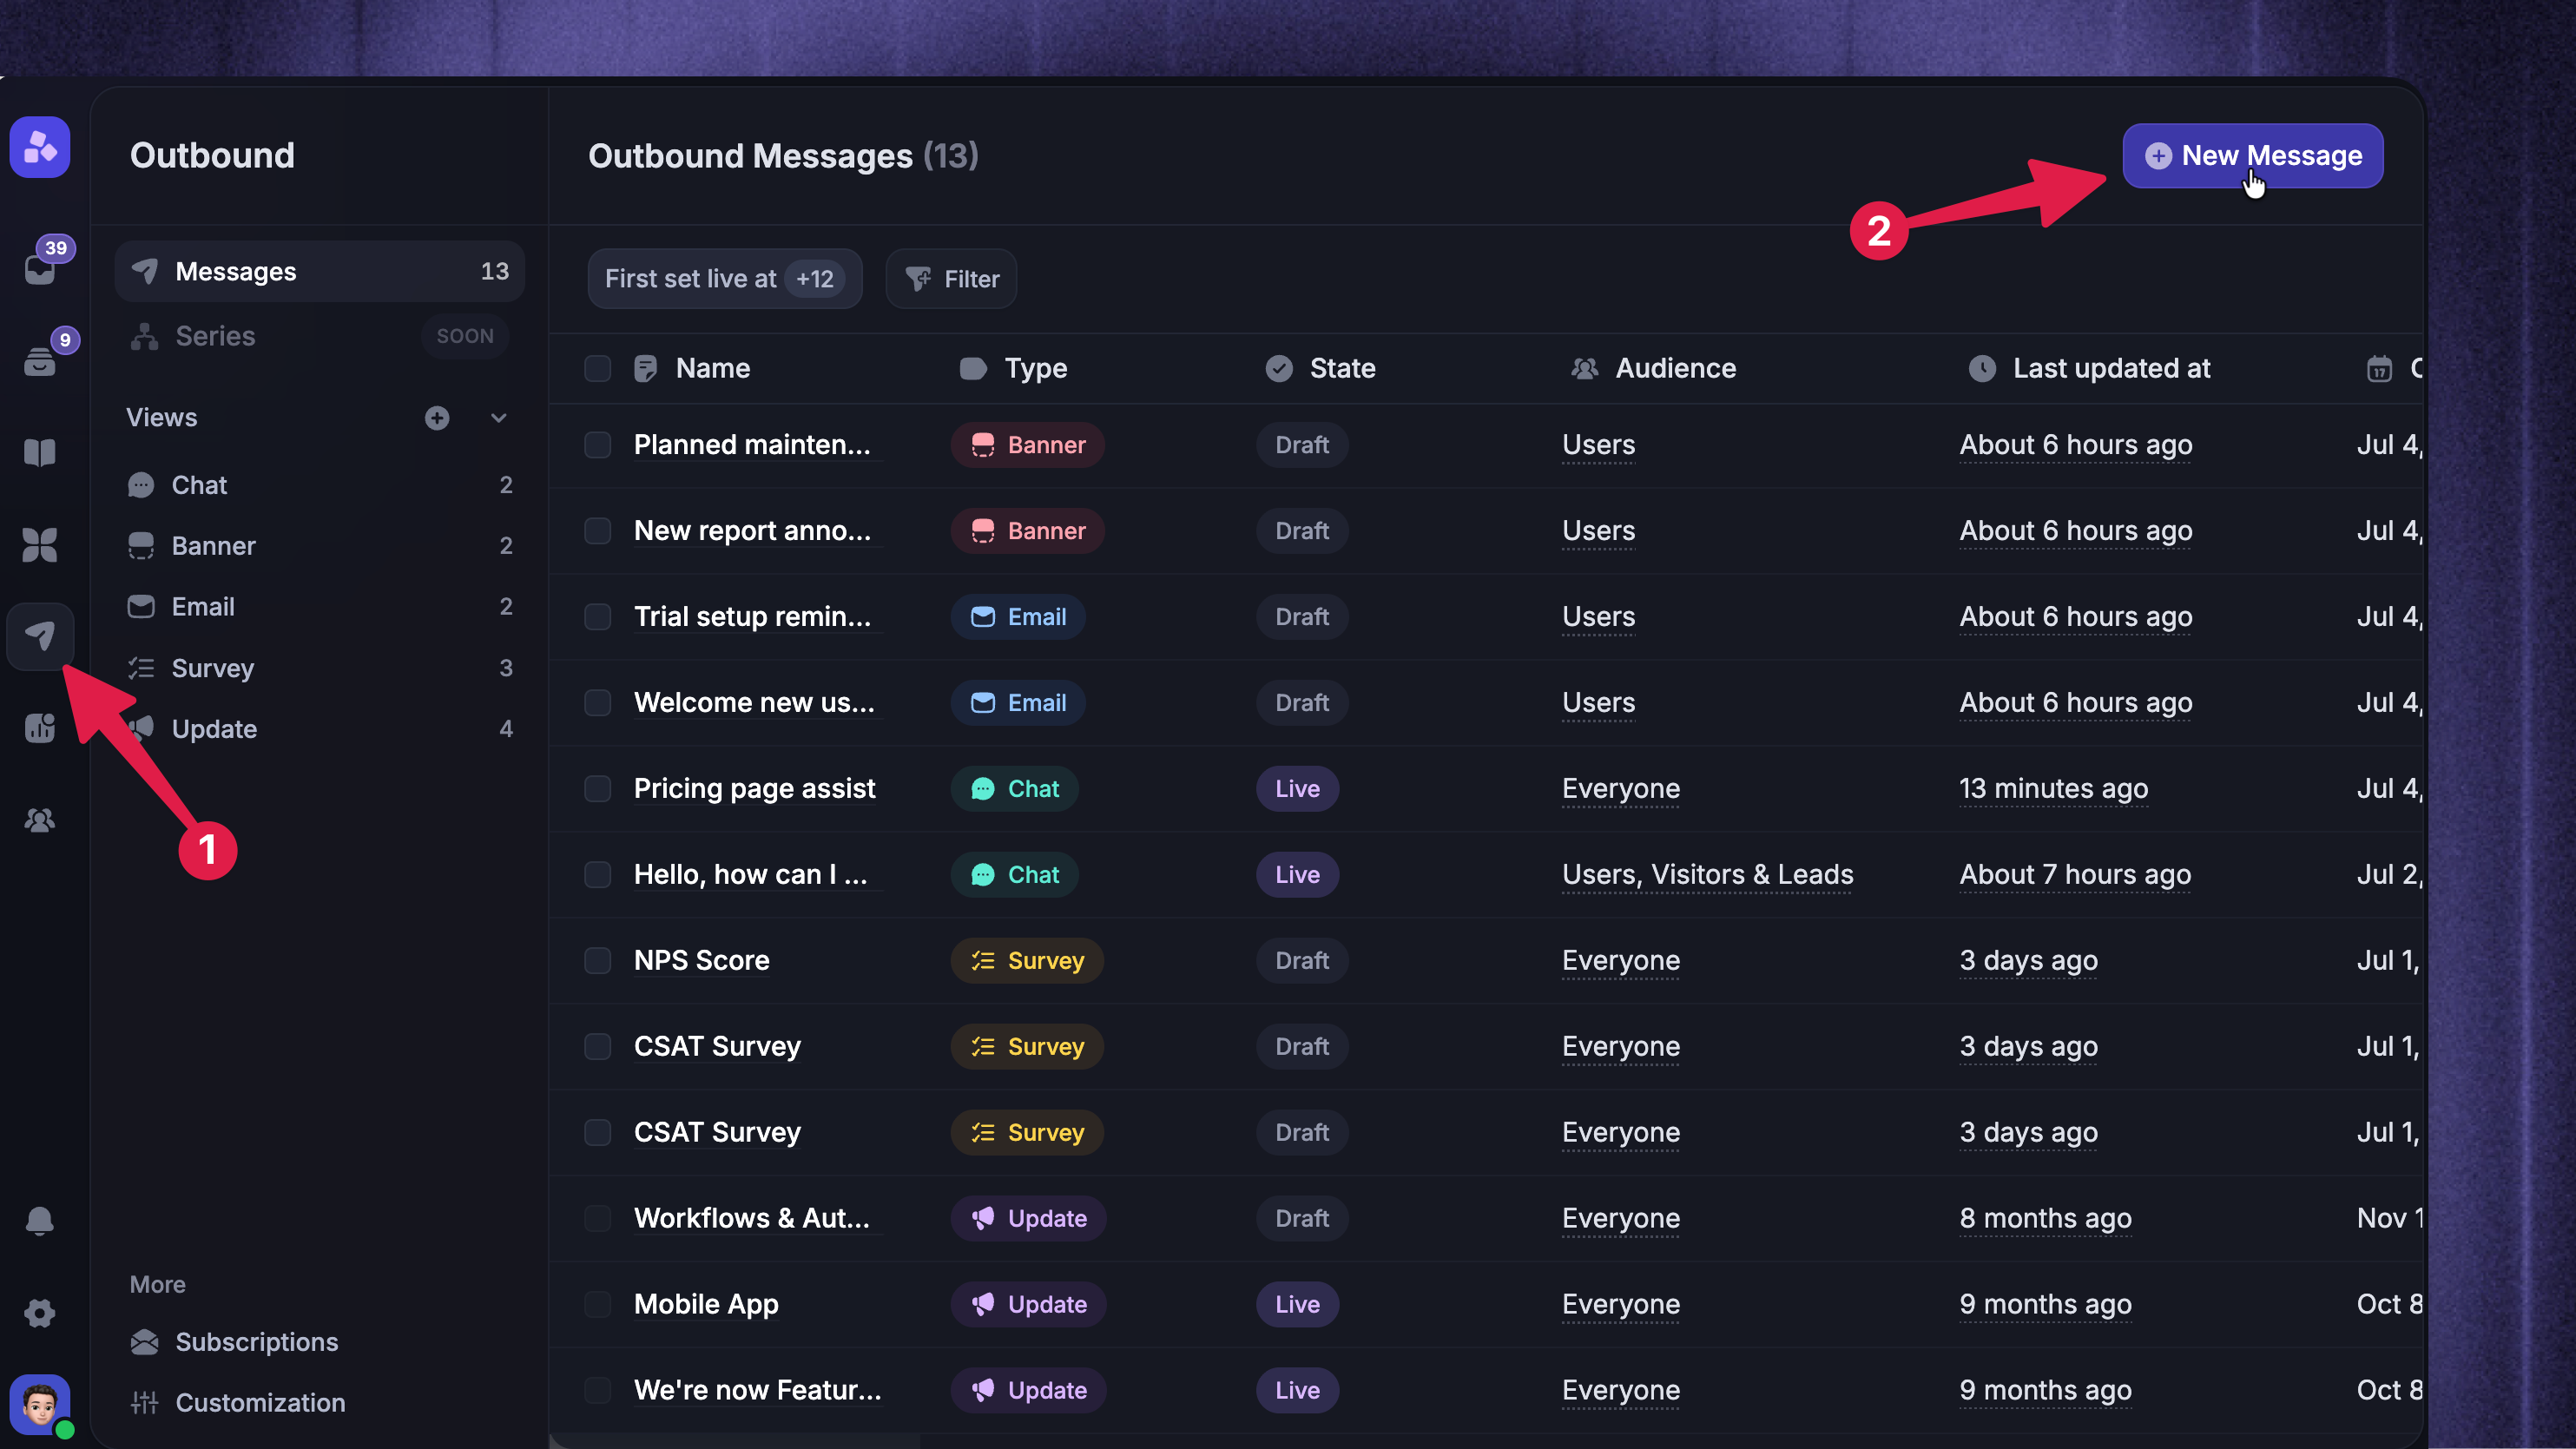
Go to Dashboard → Outbound
Click New Message
Select Banner
Choose Start from scratch or use a Banner template
Give the message an internal name in the header
Click Save at any time to save the message as a draft.
Tip: Browse templates in the left sidebar while creating a new message for quick starters covering common use cases like upgrade prompts, announcements, and reminders.
Configure the Content section
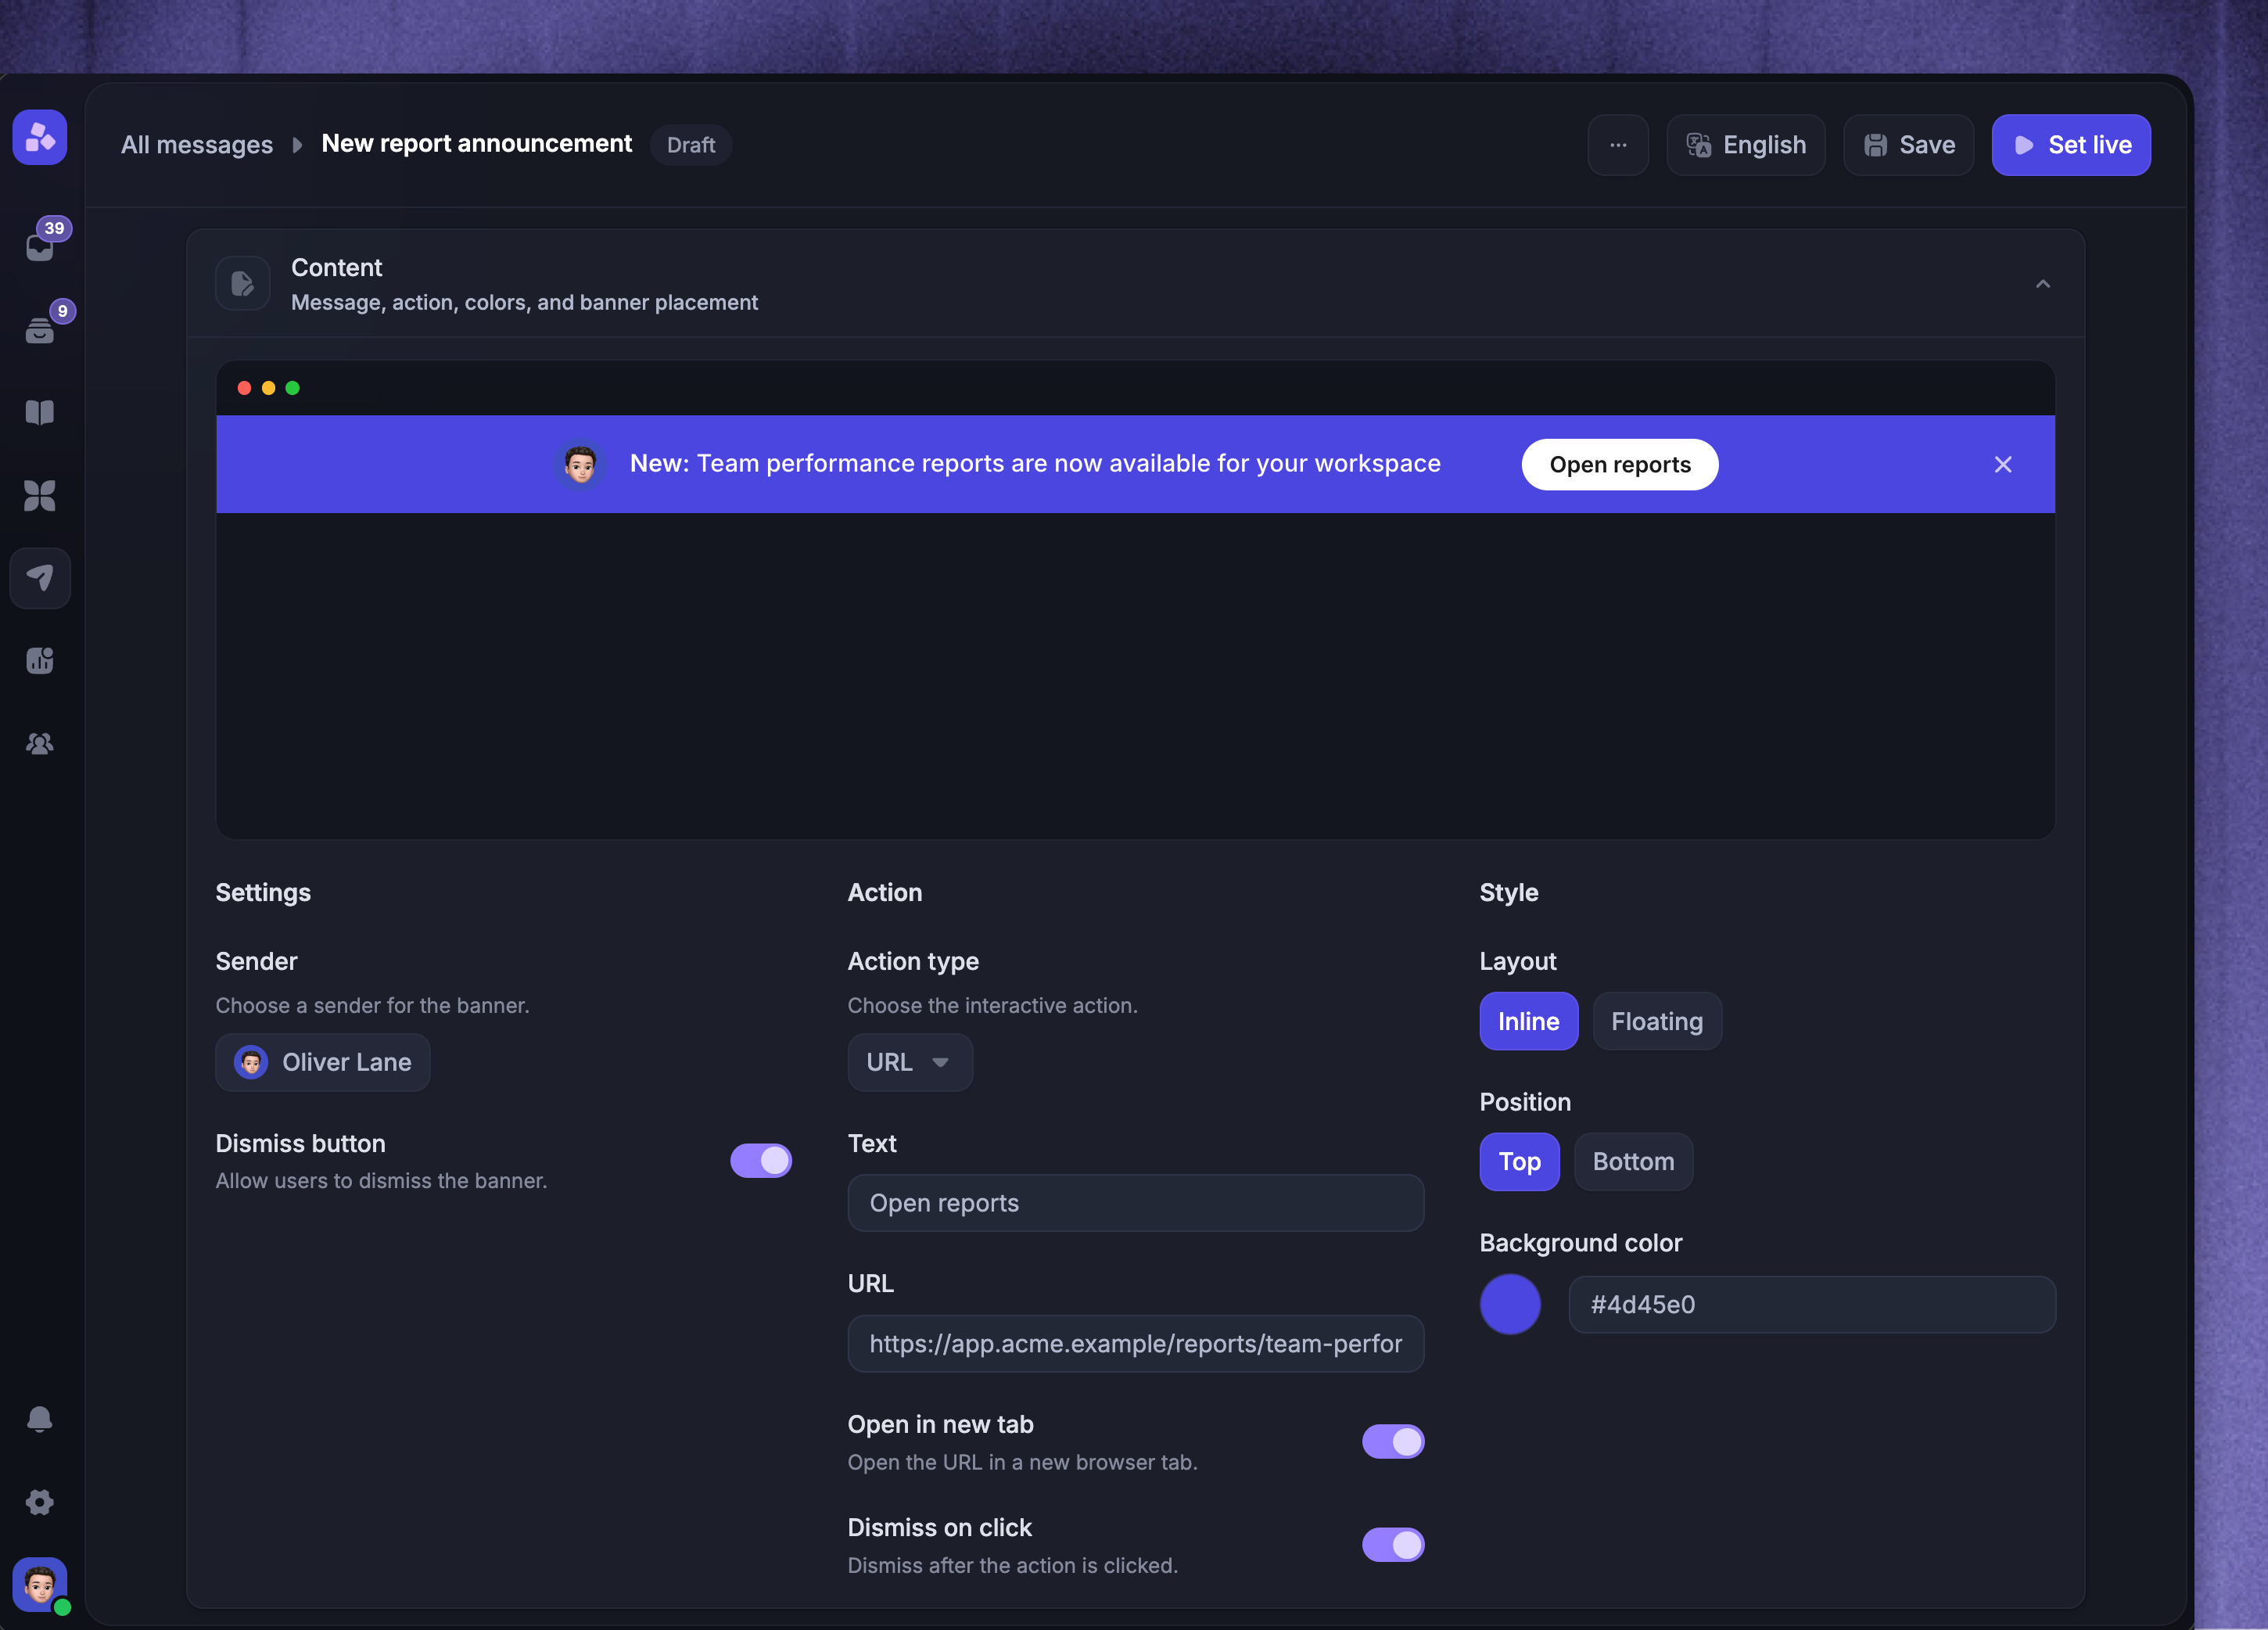
Use Content to write the Banner, choose who it appears from, add an action, and style how it looks.
Write the banner text
Add the message you want to show in the Banner. Keep the message short and action-oriented. You can personalize the Banner with dynamic variables, emojis, and add translated content for multiple languages.
Choose a sender
Under Sender, choose the teammate whose avatar should appear in the Banner. Select No sender to display the Banner without a teammate avatar.
Set dismissal behavior
Turn on Dismiss button to let people close the Banner manually.
If you leave Dismiss button off, people continue to see the Banner until one of these happens:
The message is paused
They stop matching the audience or trigger rules
They click an action that has Dismiss on click enabled
Tip: For most non-urgent banners, keep the Dismiss button enabled so customers can clear the message after reading it.
Choose an action
Under Action type, choose how people can interact with the Banner:
No action - the Banner only displays text
Open a URL - adds a call-to-action button that opens a link
When you choose Open a URL, configure the button text, destination URL, whether the URL opens in a new tab, and whether clicking the action dismisses the Banner.
Style the Banner
Use the style controls in Content to choose how the Banner appears:
Layout - choose Inline or Floating
Position - choose Top or Bottom
Background color - choose a color or enter a HEX Color code
Inline banners sit inside the page layout. Floating banners appear above the page content. Make sure the Banner does not cover important UI elements on your website or app.
Configure Rules
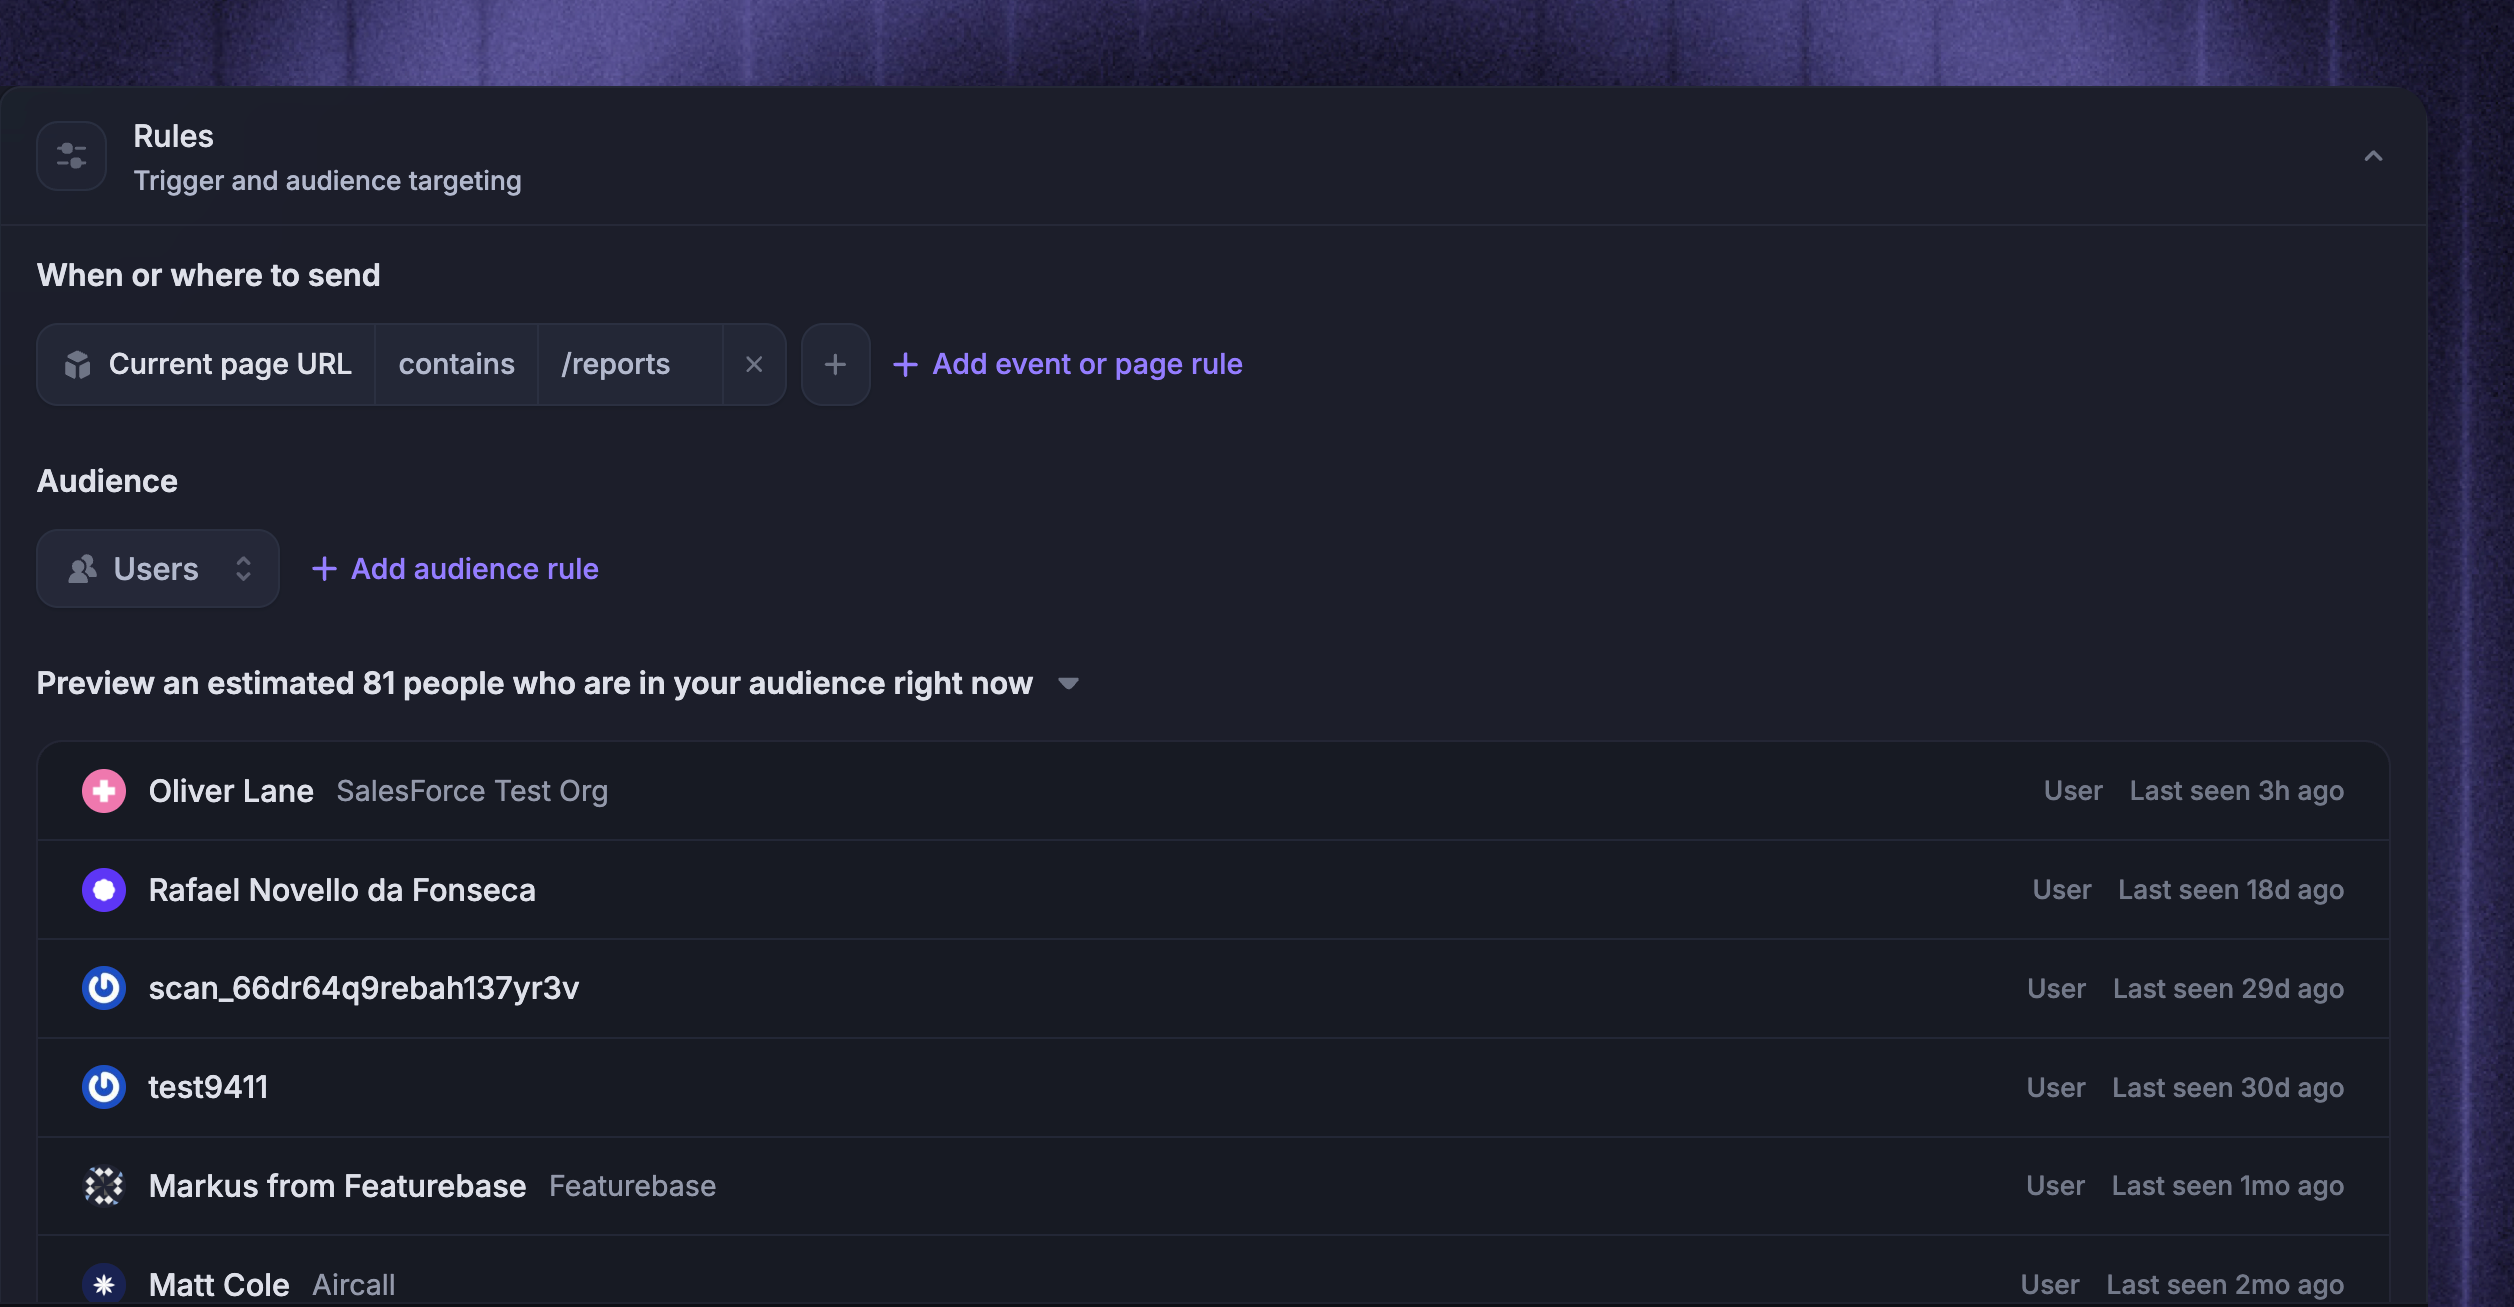
In the Rules section, define on which page, when, and to whom your Banner is shown. Audience rules are evaluated dynamically, so customers who no longer match the rules will no longer see the Banner.
Here, you can define:
When to send
Where to send
Audience
For example, if you're announcing a discount on your Pro plan, you might target all customers currently on your Free plan.
Tips:
Use Preview audience to estimate who matches your current rules before you set the message live.
When targeting a URL, it's a good idea to copy and paste it directly from your app or site, as this will capture any characters hidden in your browser's address bar, such as trailing slashes.
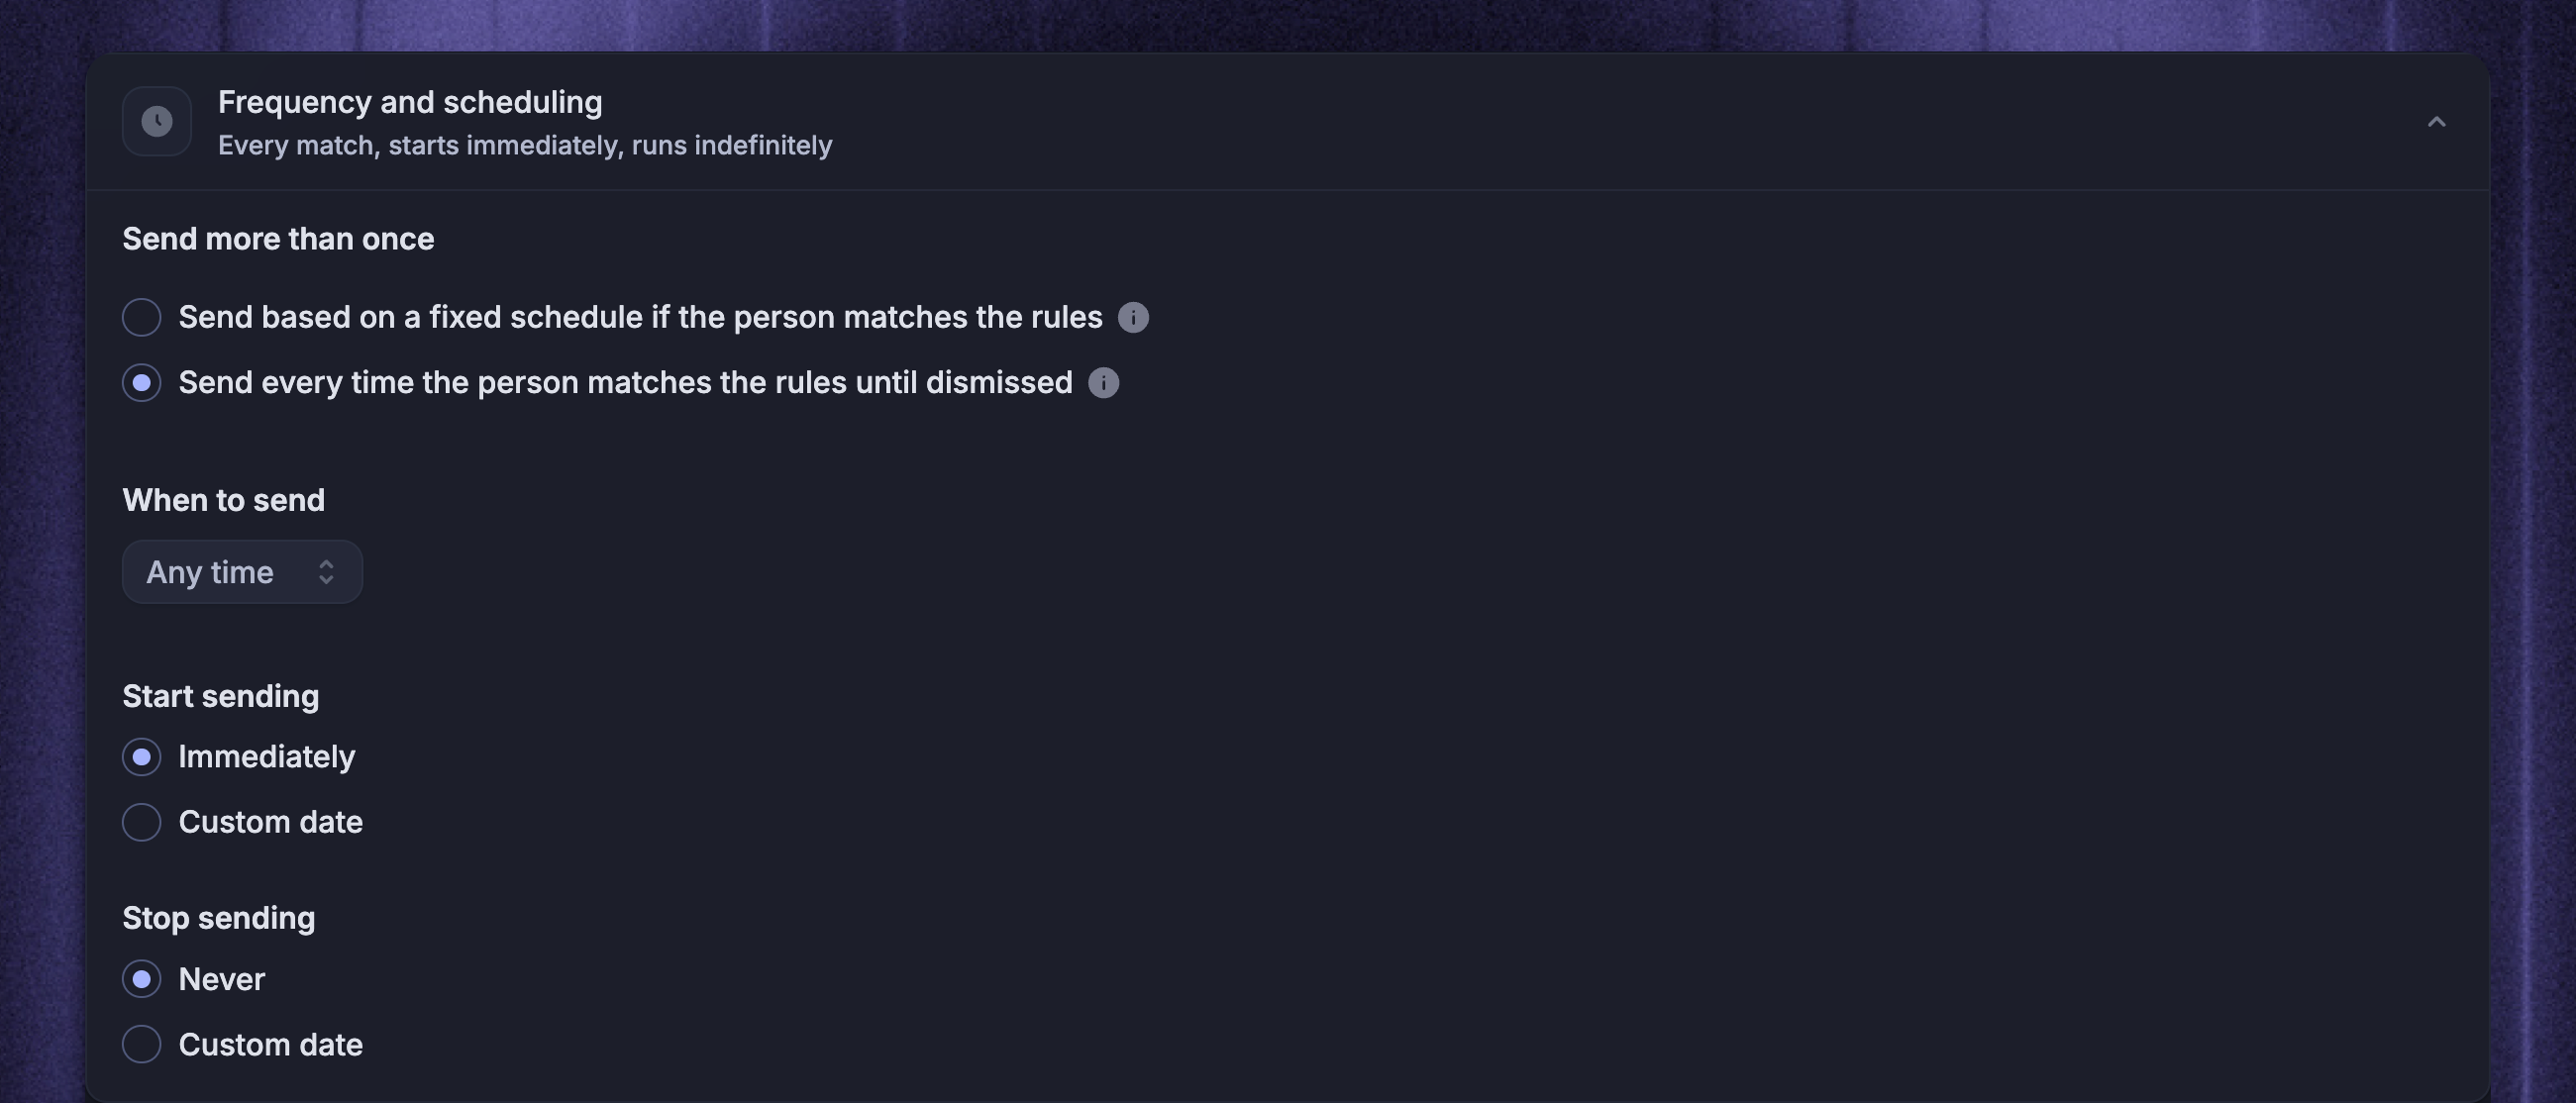
Configure Frequency and scheduling
Under Frequency and scheduling, you can schedule your banner to only display during a specific date range or at specific times of day.
Banners can:
Show based on a fixed schedule if the person matches the rules
Show every time the person matches the rules until dismissed
Run any time, during office hours, outside office hours, or during custom times
Start sending
Immediately
On a custom date
Stop sending:
Never
On a custom date
Banners do not support Send once, match limits, or maximum send limits.
Publish the Banner message
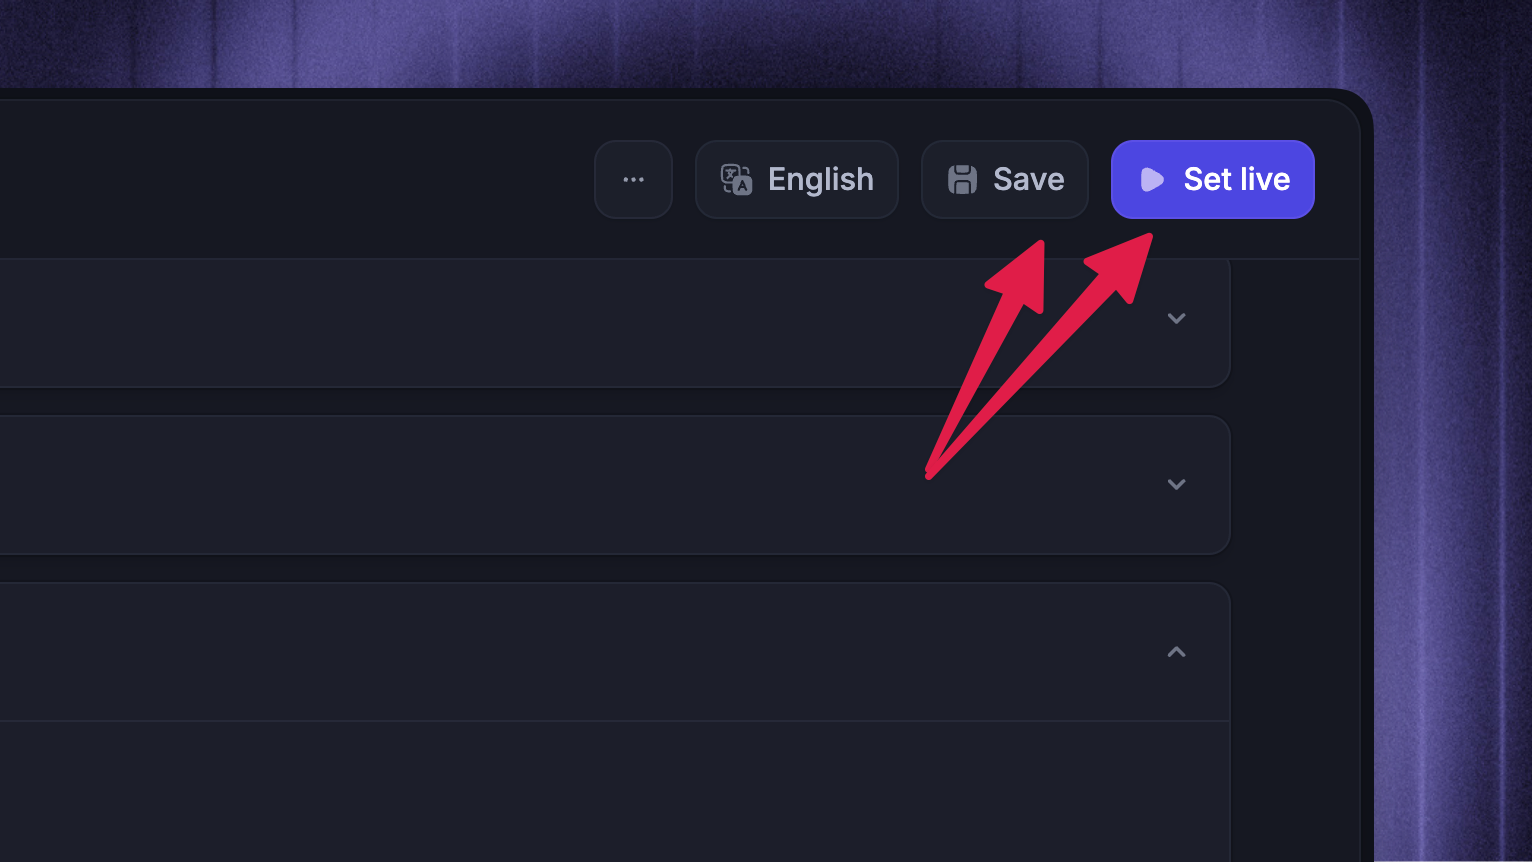
When the message content, rules, and schedule are ready, use the action button in the header:
Set live - activates a Banner that starts immediately
Schedule - schedules the Banner for a custom start date (only available if “Start sending” is a date in the future)
After publishing your message, you can pause or unschedule it at any time from the message editor or the Dashboard → Outbound messages list.
How Banner delivery works
When someone matches the Banner rules, Featurebase displays the Banner on your website or app if the Messenger widget is installed.
If the person dismisses the Banner, Featurebase treats it as dismissed for that person. If the Banner is not dismissible, it remains visible as long as the person still matches the audience, trigger, and scheduling rules.
Use Outbound analytics to review Banner views and customer interactions.
FAQs
Can I use a Locked audience for a Banner?
Can I use a Locked audience for a Banner?
No. Banners use dynamic audiences only. People can enter or leave the Banner audience as their attributes, page visit, trigger, and schedule eligibility change.
Can people reply to a Banner?
Can people reply to a Banner?
No. Banner is one-way. Use an Outbound Chat message when you want people to respond in Messenger.
Can I create a Banner without a URL action?
Can I create a Banner without a URL action?
Yes. Choose No action under Action type if the Banner is only meant to share information.
Was this helpful?
Still need help? Ask the team