Configure Workflow trigger settings
Choose who will receive your workflow and when and where it triggers.
Written By Markus Palm
Last updated 4 days ago
Overview
When building a workflow, the first step is selecting a Trigger. After that, you’ll configure the trigger settings to define where, who, and when the workflow runs.
To get started, select the first Trigger block in your workflow builder to open its settings.
Manage workflow channels
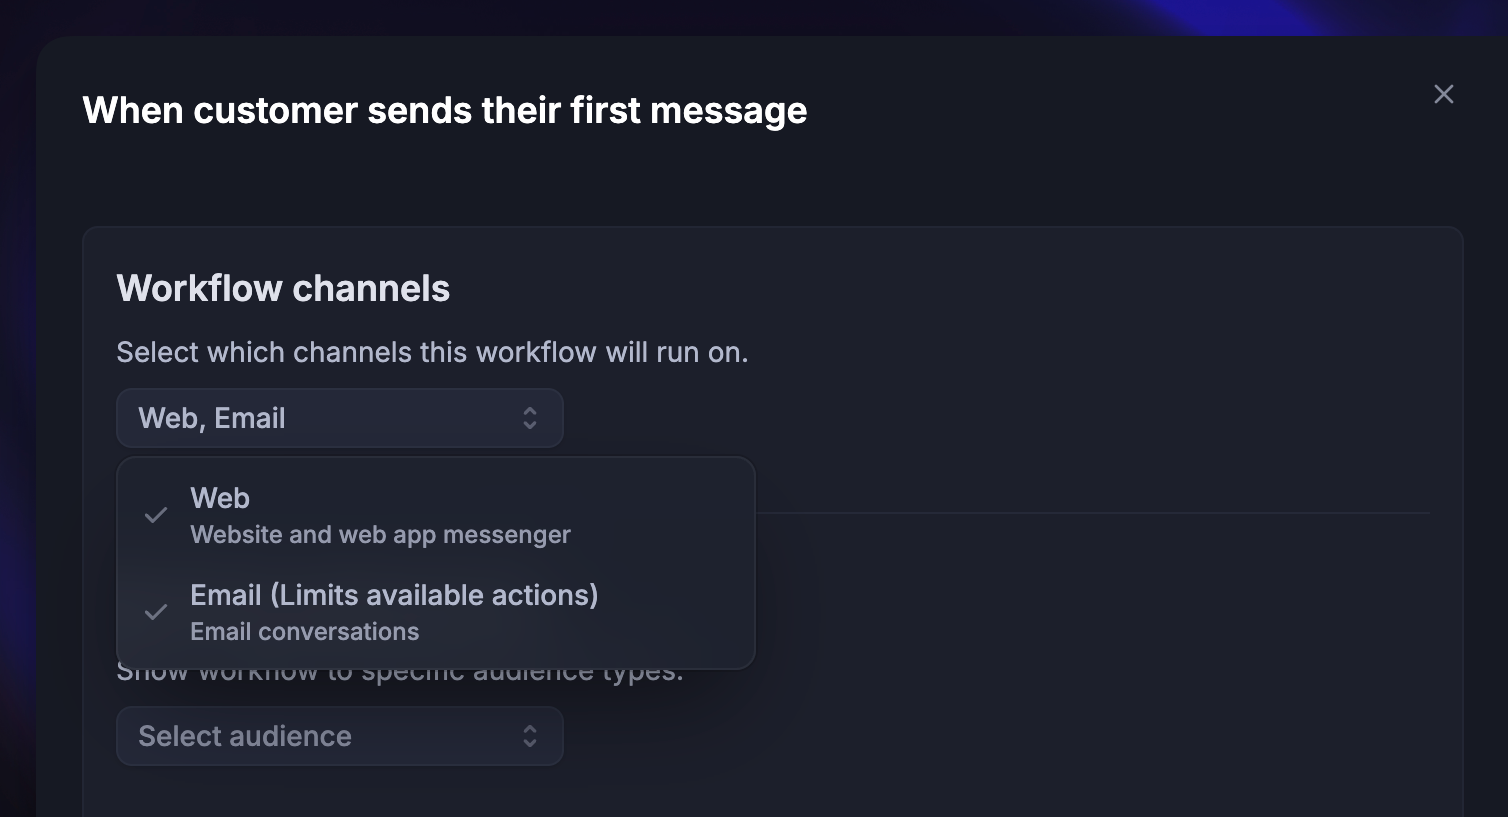
Open the first Trigger block in your Workflow and expand Channels. The available channels depend on the trigger:
Web - Conversations through the Messenger on your website or web app
Email - Email Conversations
Slack - Conversations in connected Slack channels
The page-visit and new-Messenger-Conversation triggers use Web. Other Conversation triggers support Web, Email, and Slack. Ticket triggers support Web and Email.
Note: Every action must support every selected channel. Selecting multiple channels can reduce the actions available in your Workflow.
Manage where a workflow is sent
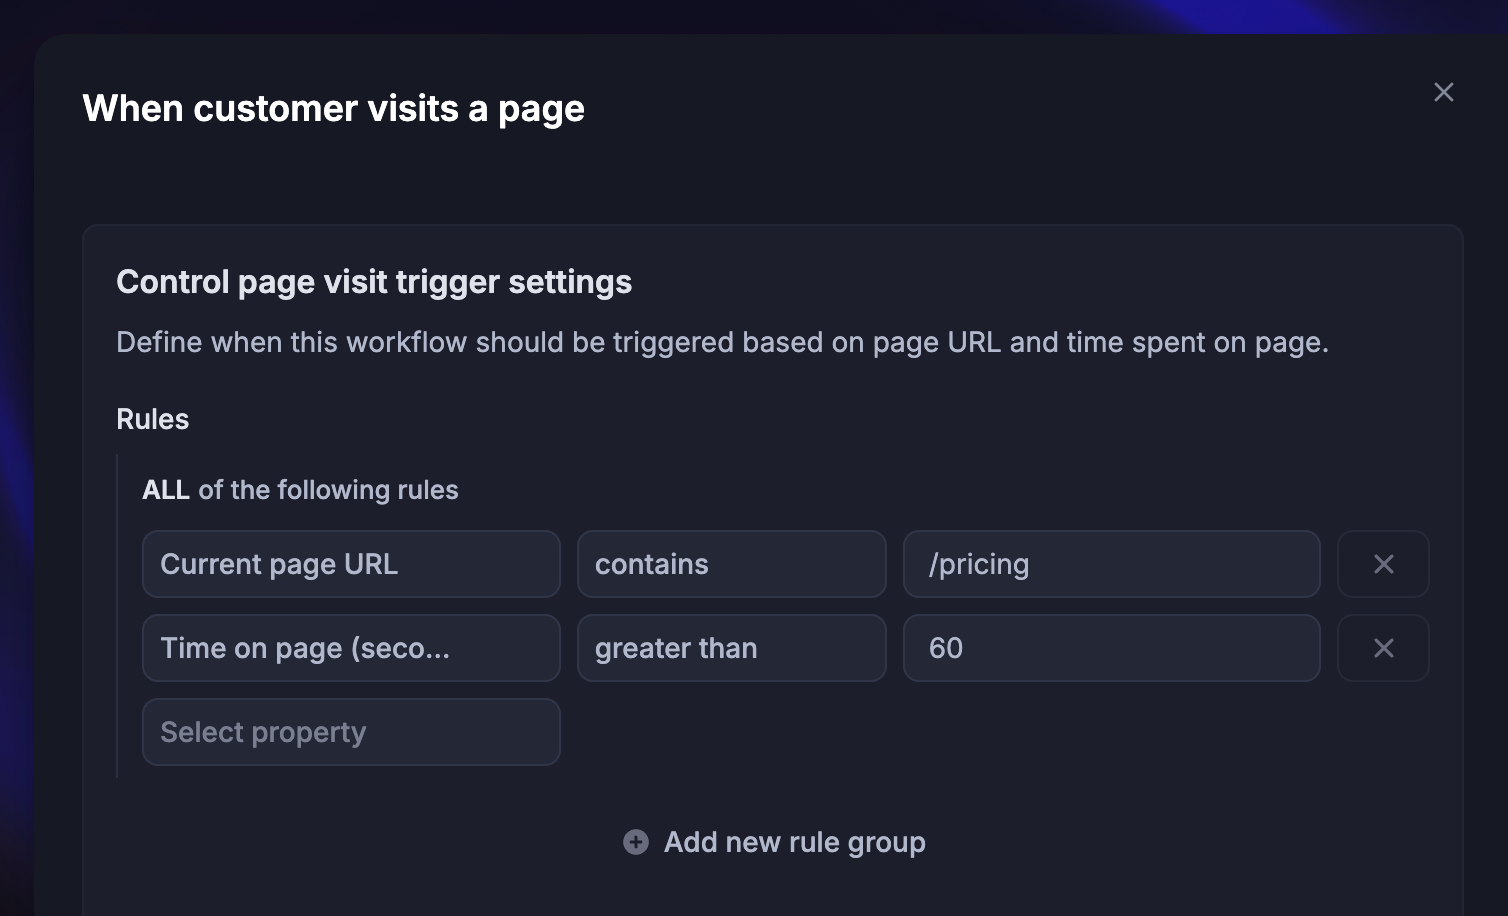
For Customer visits a page, use rules such as Time on page and URL to choose where the Workflow starts. It runs only when those conditions match.
When targeting a specific URL, copy and paste it directly from your browser to avoid hidden characters like trailing slashes.
Example: You can trigger an outbound workflow whenever a customer spends 60 seconds on your pricing page.
Manage workflow audience
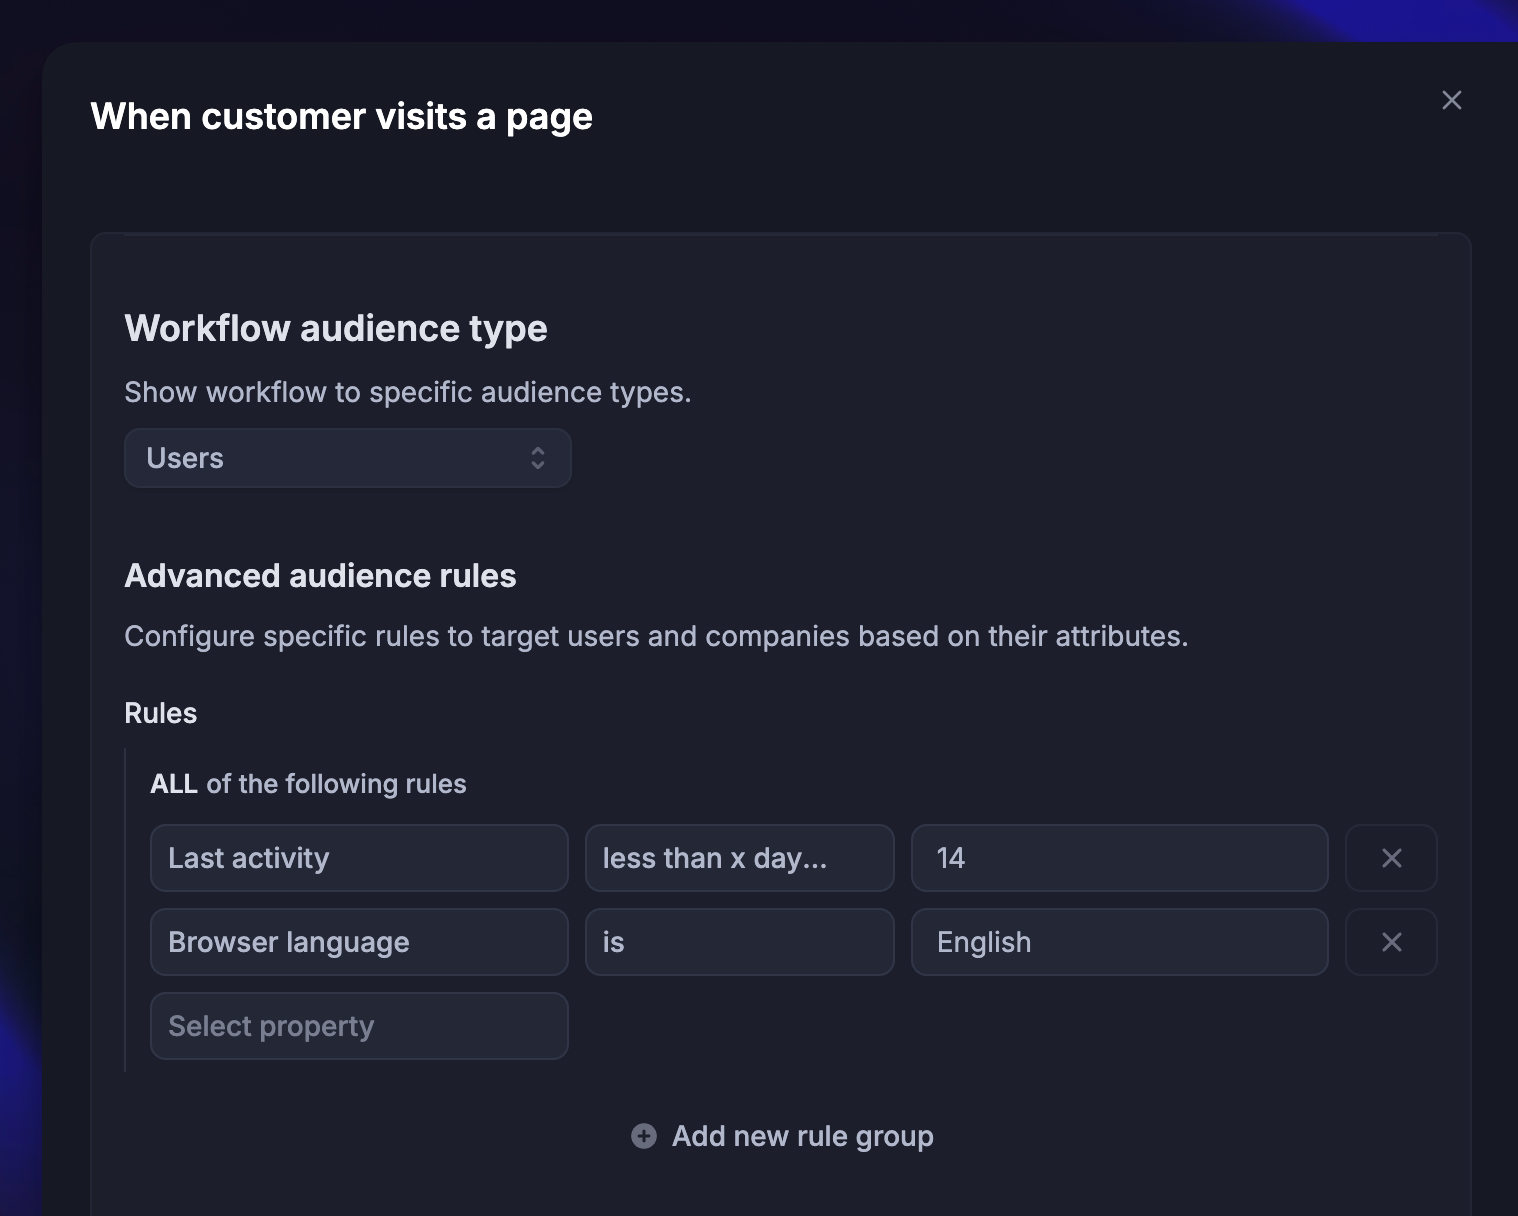
Use Audience rules to choose which customers can enter the Workflow. The available filters depend on the trigger.
Conversation attributes are available for Conversation-based triggers. They are not available for Customer visits a page, because no Conversation exists yet.
Example use cases:
Create one workflow in French and one in English, triggering based on the user’s browser language
Target trial users who signed up 15 days ago (using the data you track about them)
Tip: You can add multiple filters to target the right audience. For example, you could add:
Last activityis less than 14 days ago, so you only target active users.Browser languageis English, so you target users who speak the language of your message.
Schedule your Workflow
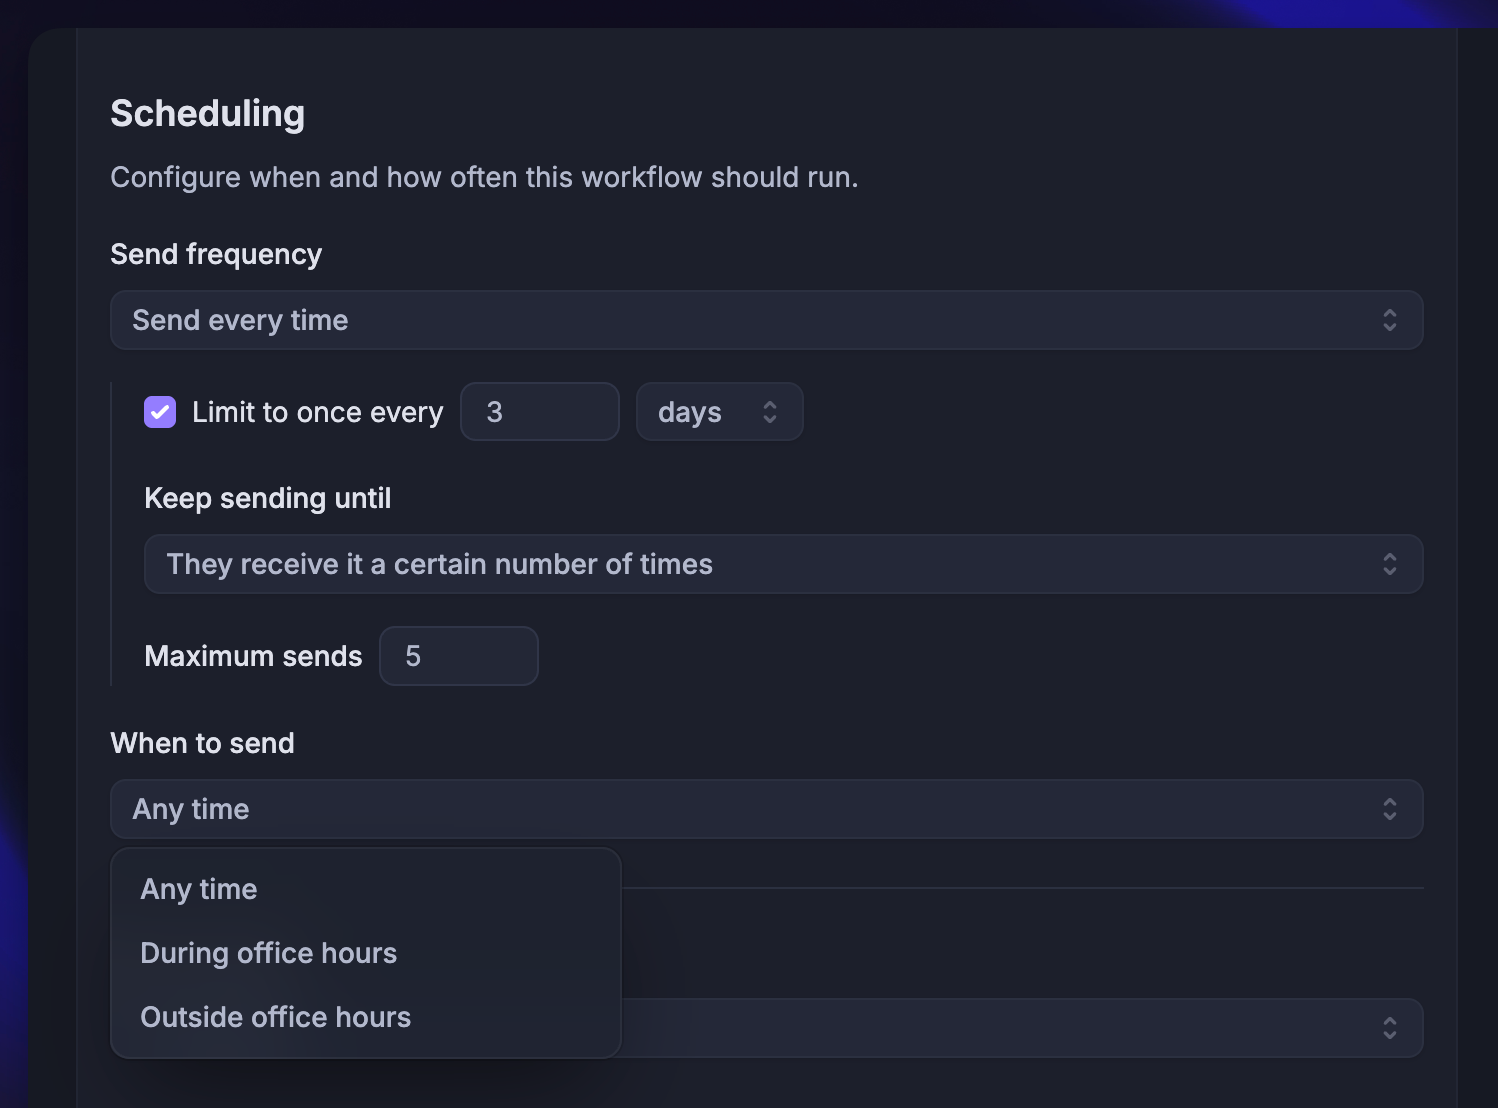
Open Scheduling in the Trigger block. The available controls depend on the trigger.
Page-visit frequency
For Customer visits a page, choose Send frequency:
Send once - Run the first time a customer matches
Send on a schedule - Run on a weekly, monthly, or yearly schedule when the customer matches
Send every time - Run whenever the conditions match, with an optional limit between runs
When the Workflow can run
Use the available start, stop, and time controls to choose when the Workflow is active. Office-hour options use your configured office hours.
For a Conversation state-change trigger, you can start immediately or on a set date, stop on a set date, and choose any time, office hours, outside office hours, or custom times.
These controls do not limit CSAT to one request per Conversation. Configure repeat prevention in your CSAT Workflow when needed.
Was this helpful?
Still need help? Ask the team