Conversation data attributes (CvDAs) in the Inbox
Learn how to create & use conversation data attributes for advanced inbox management.
Written By Markus from Featurebase
Last updated 8 days ago
Overview
Conversation data attributes (CvDAs) let you store structured information about each support conversation, such as product area, issue type, or urgency.
Once in place, CvDAs help you organize, route, and track conversations through custom inbox views, automation rules, and detailed reporting – so your team can work faster, stay consistent, and make better decisions.
With CvDAs, you can:
Collect context automatically from customers
Use attributes to organize and filter conversations in the Inbox
Build automations and reports that adapt to different support processes
This helps your team handle complex workflows at scale while maintaining fast, consistent, and personal support.
If you’ve switched to Featurebase from a traditional ticketing system, "conversation data attributes" are comparable to "custom ticket fields".
Creating conversation data attributes (CvDAs)
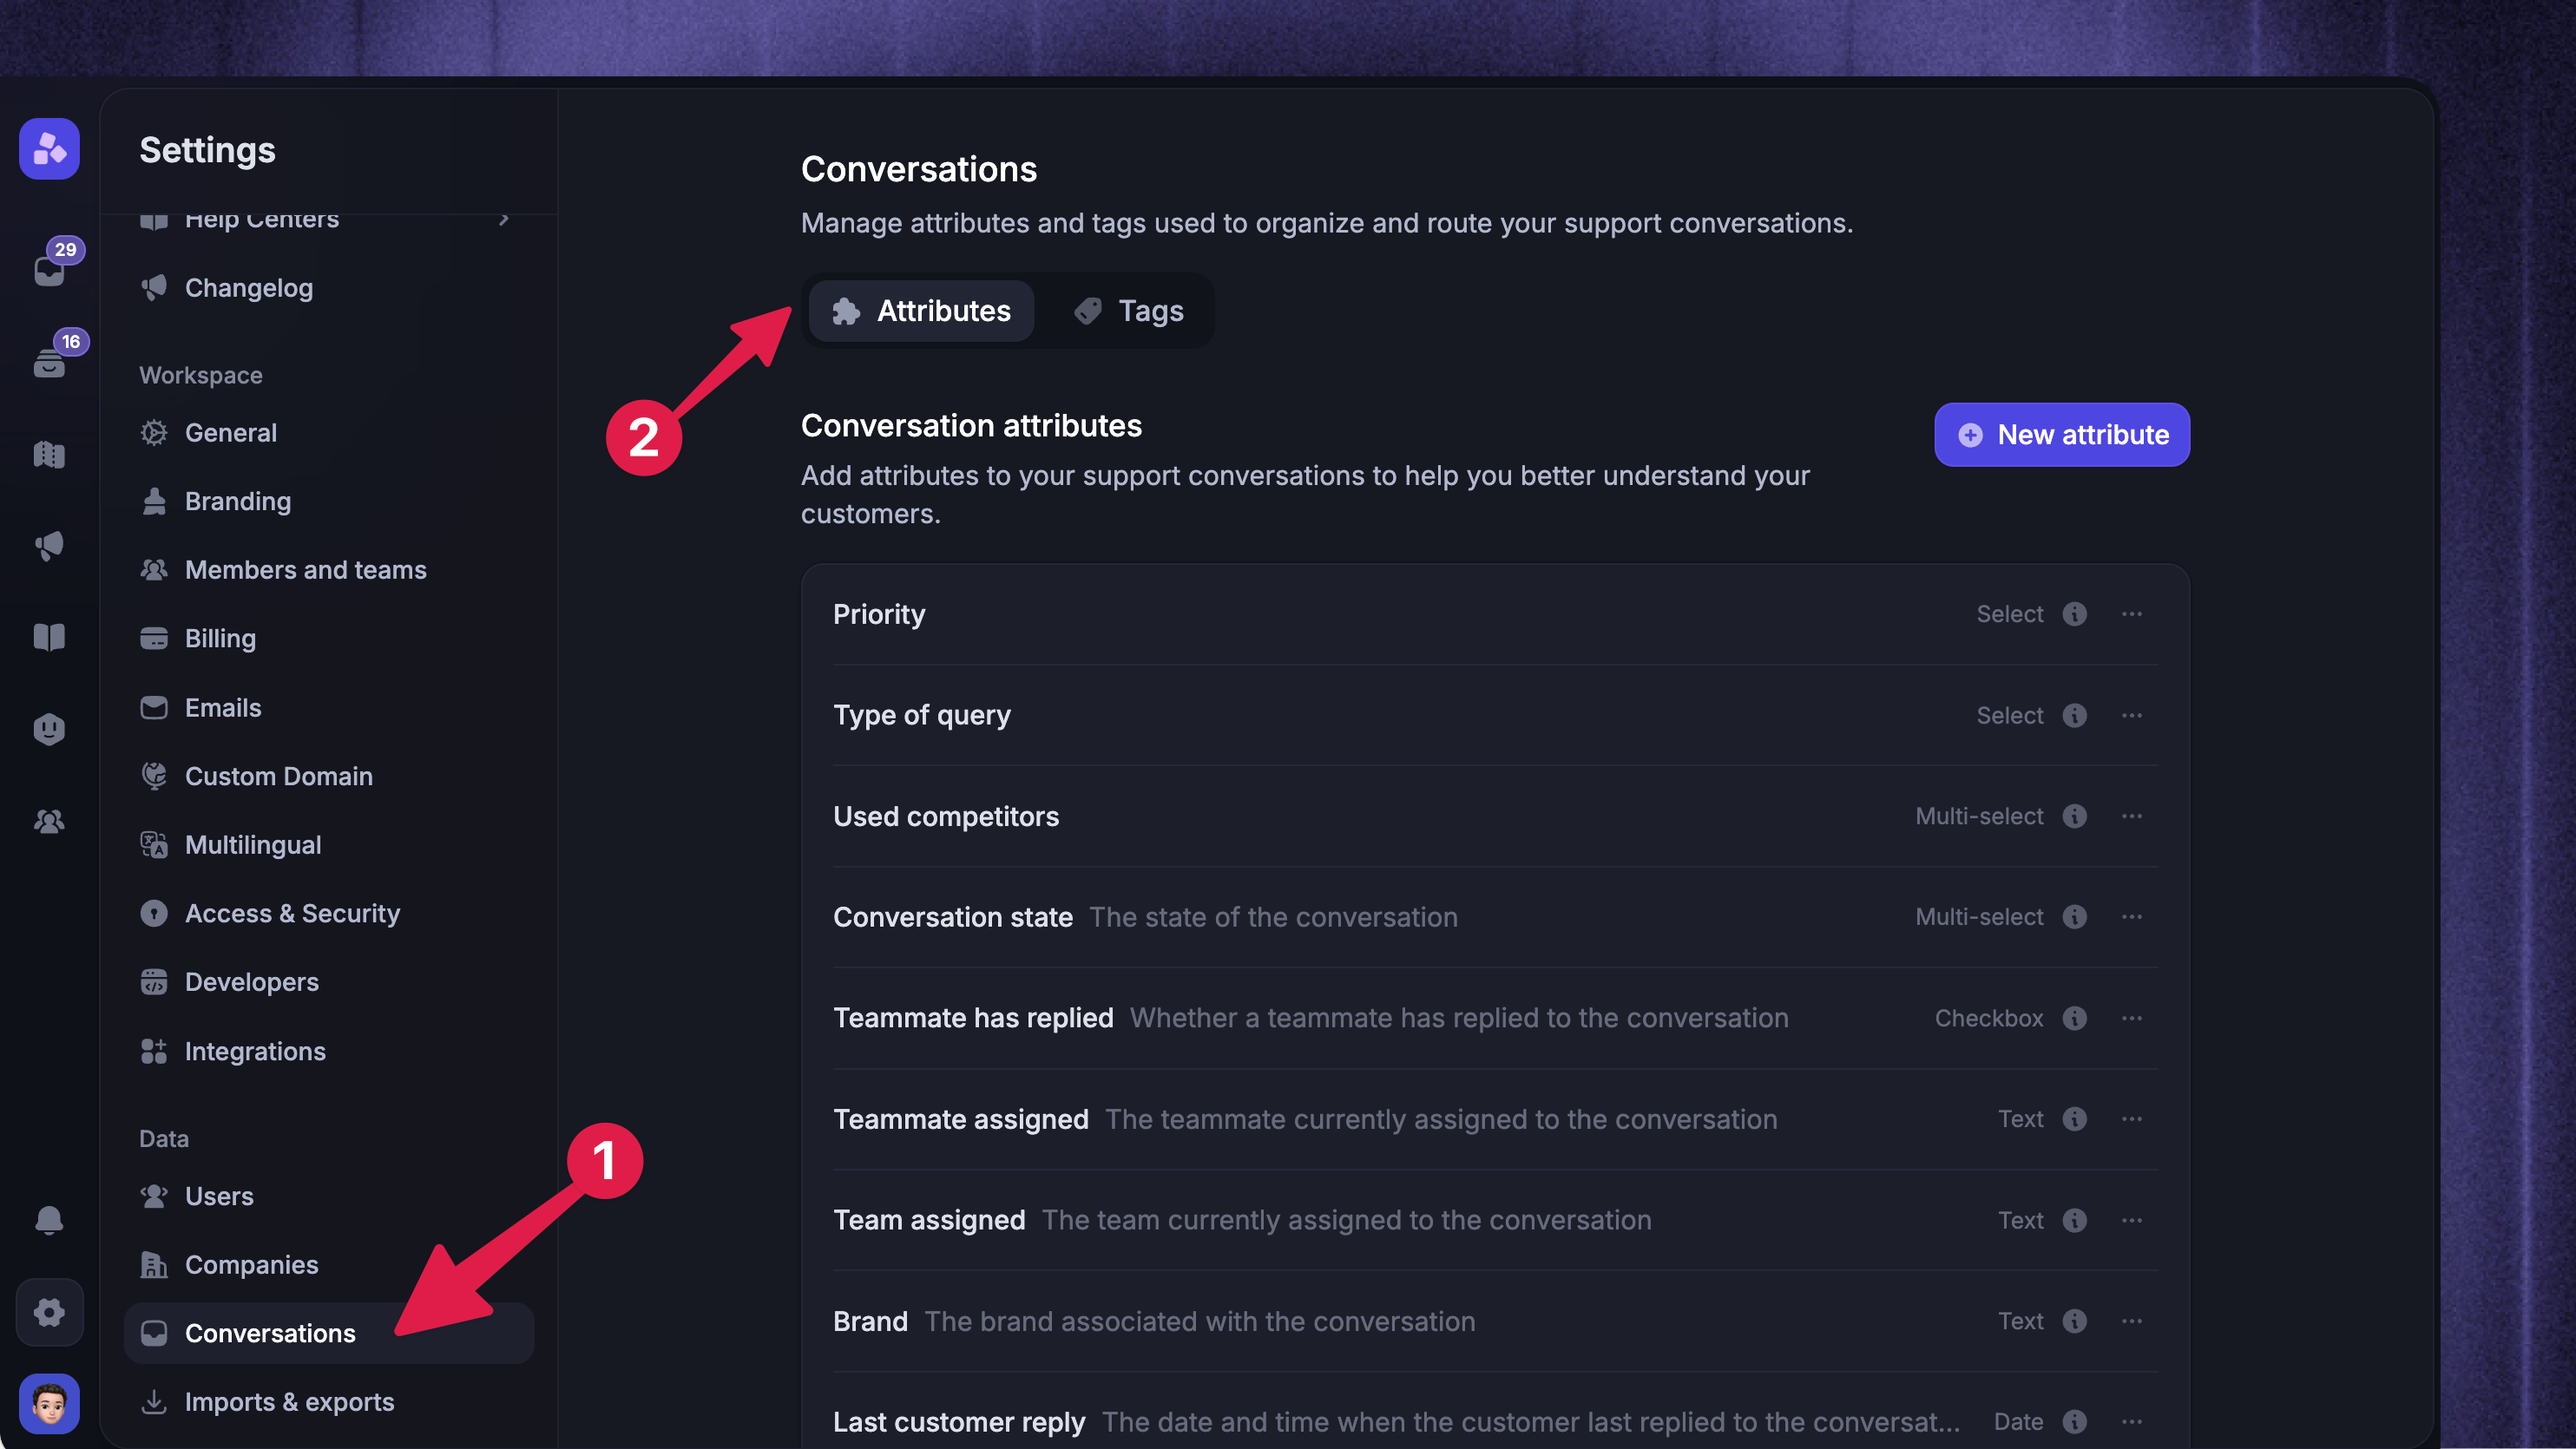
To create a new conversation data attribute (CvDA):
Click + New attribute
Add the Name and Description
Choose the field type
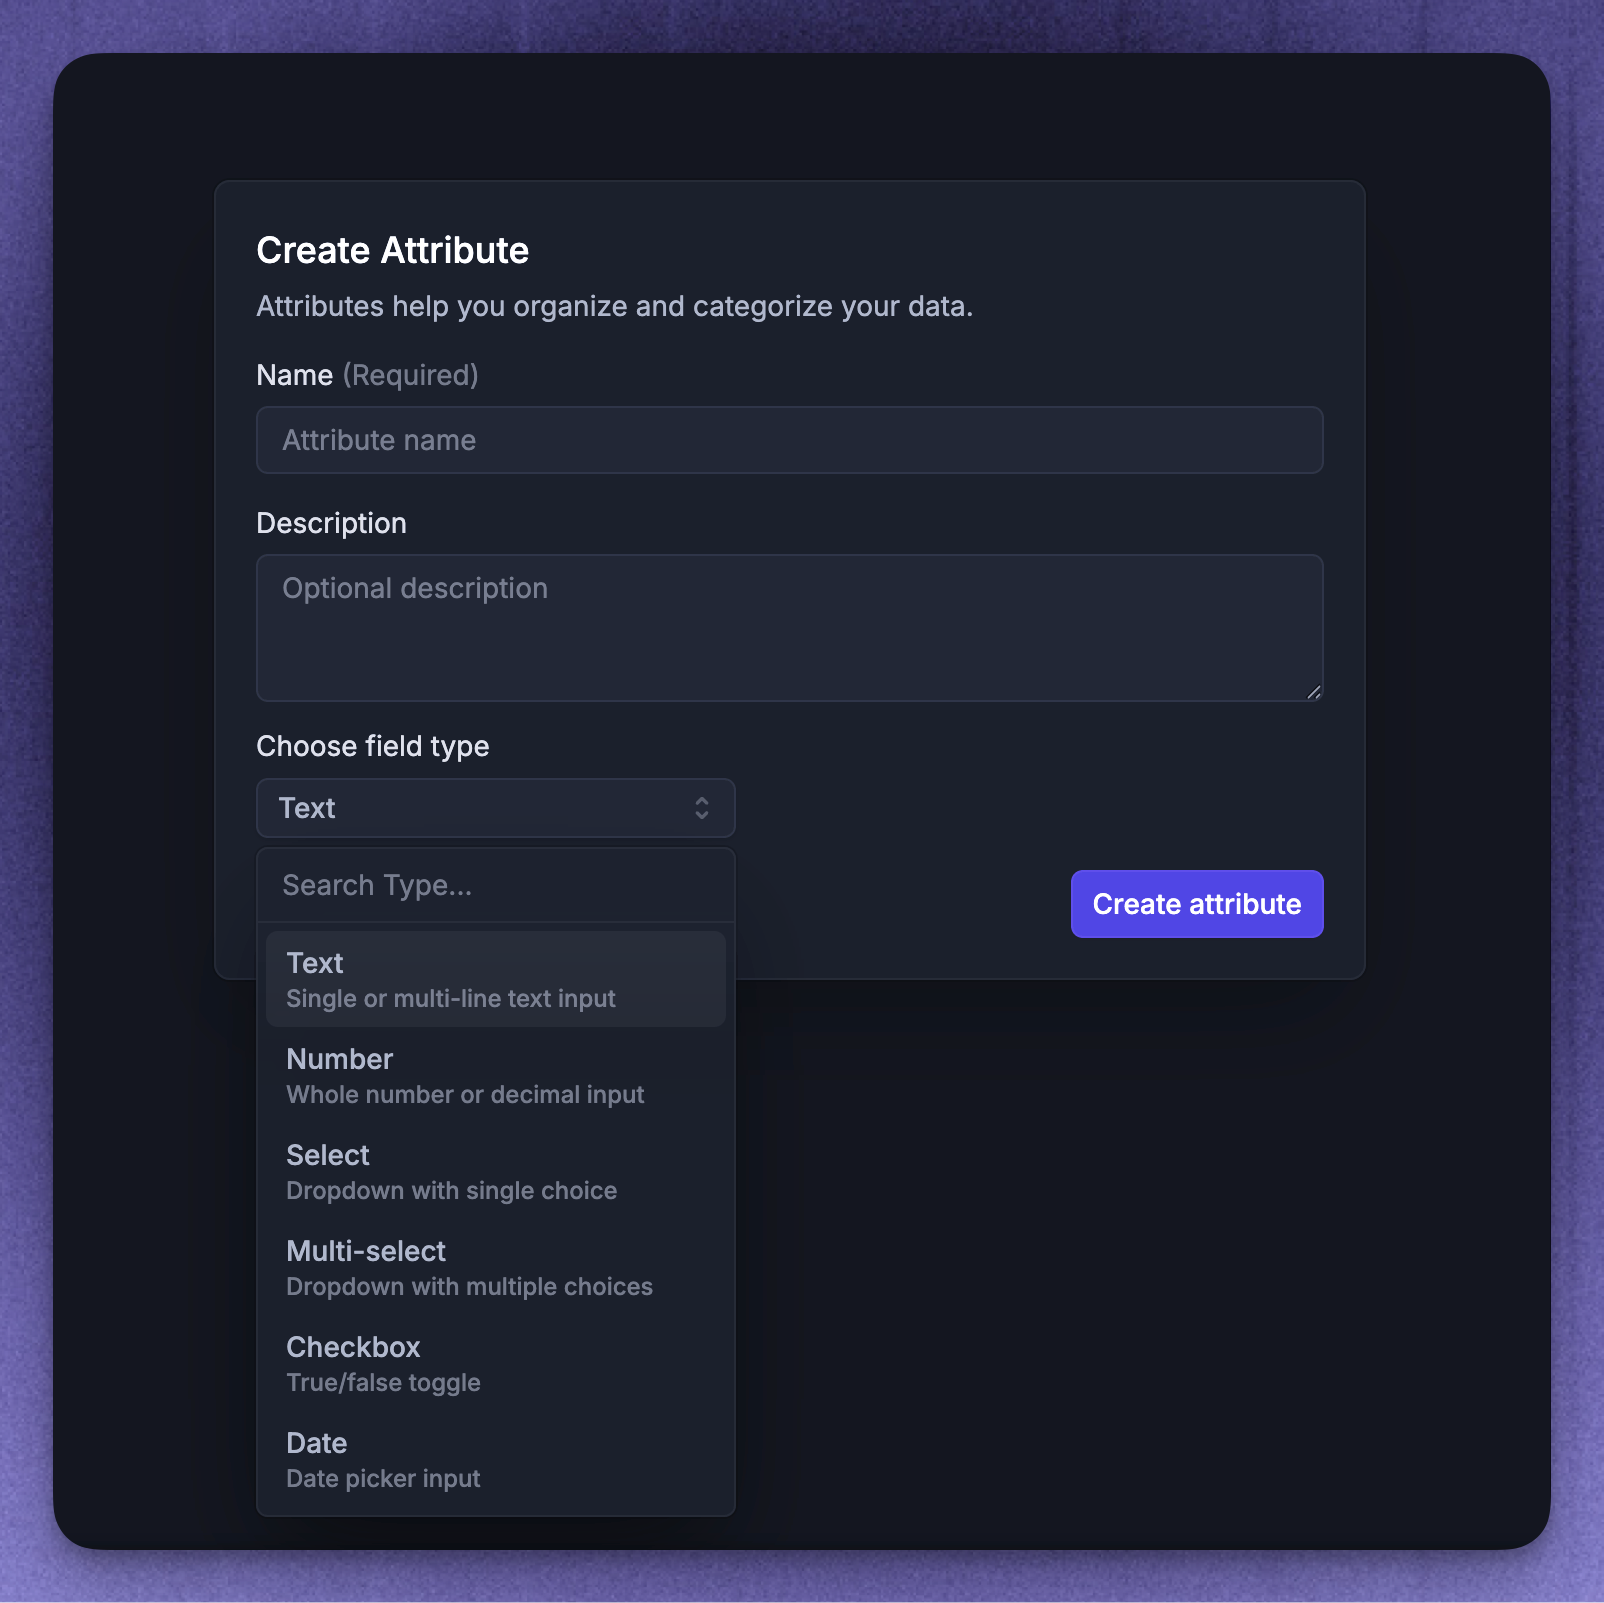
You can select different formats for your CvDAs including:
Text - single or multi-line text input
Number - whole number or decimal input
Select - dropdown with a single choice
Multi-select - dropdown with multiple choices
Checkbox - True/false toggle
Date - Date picker input
Note: Conversation attributes can only be populated when a conversation is created. When a teammate is drafting a new conversation, the conversation does not exist until they press the Send button. Once they press ‘Send’ and a conversation gets created, the attributes and their values will appear automatically.
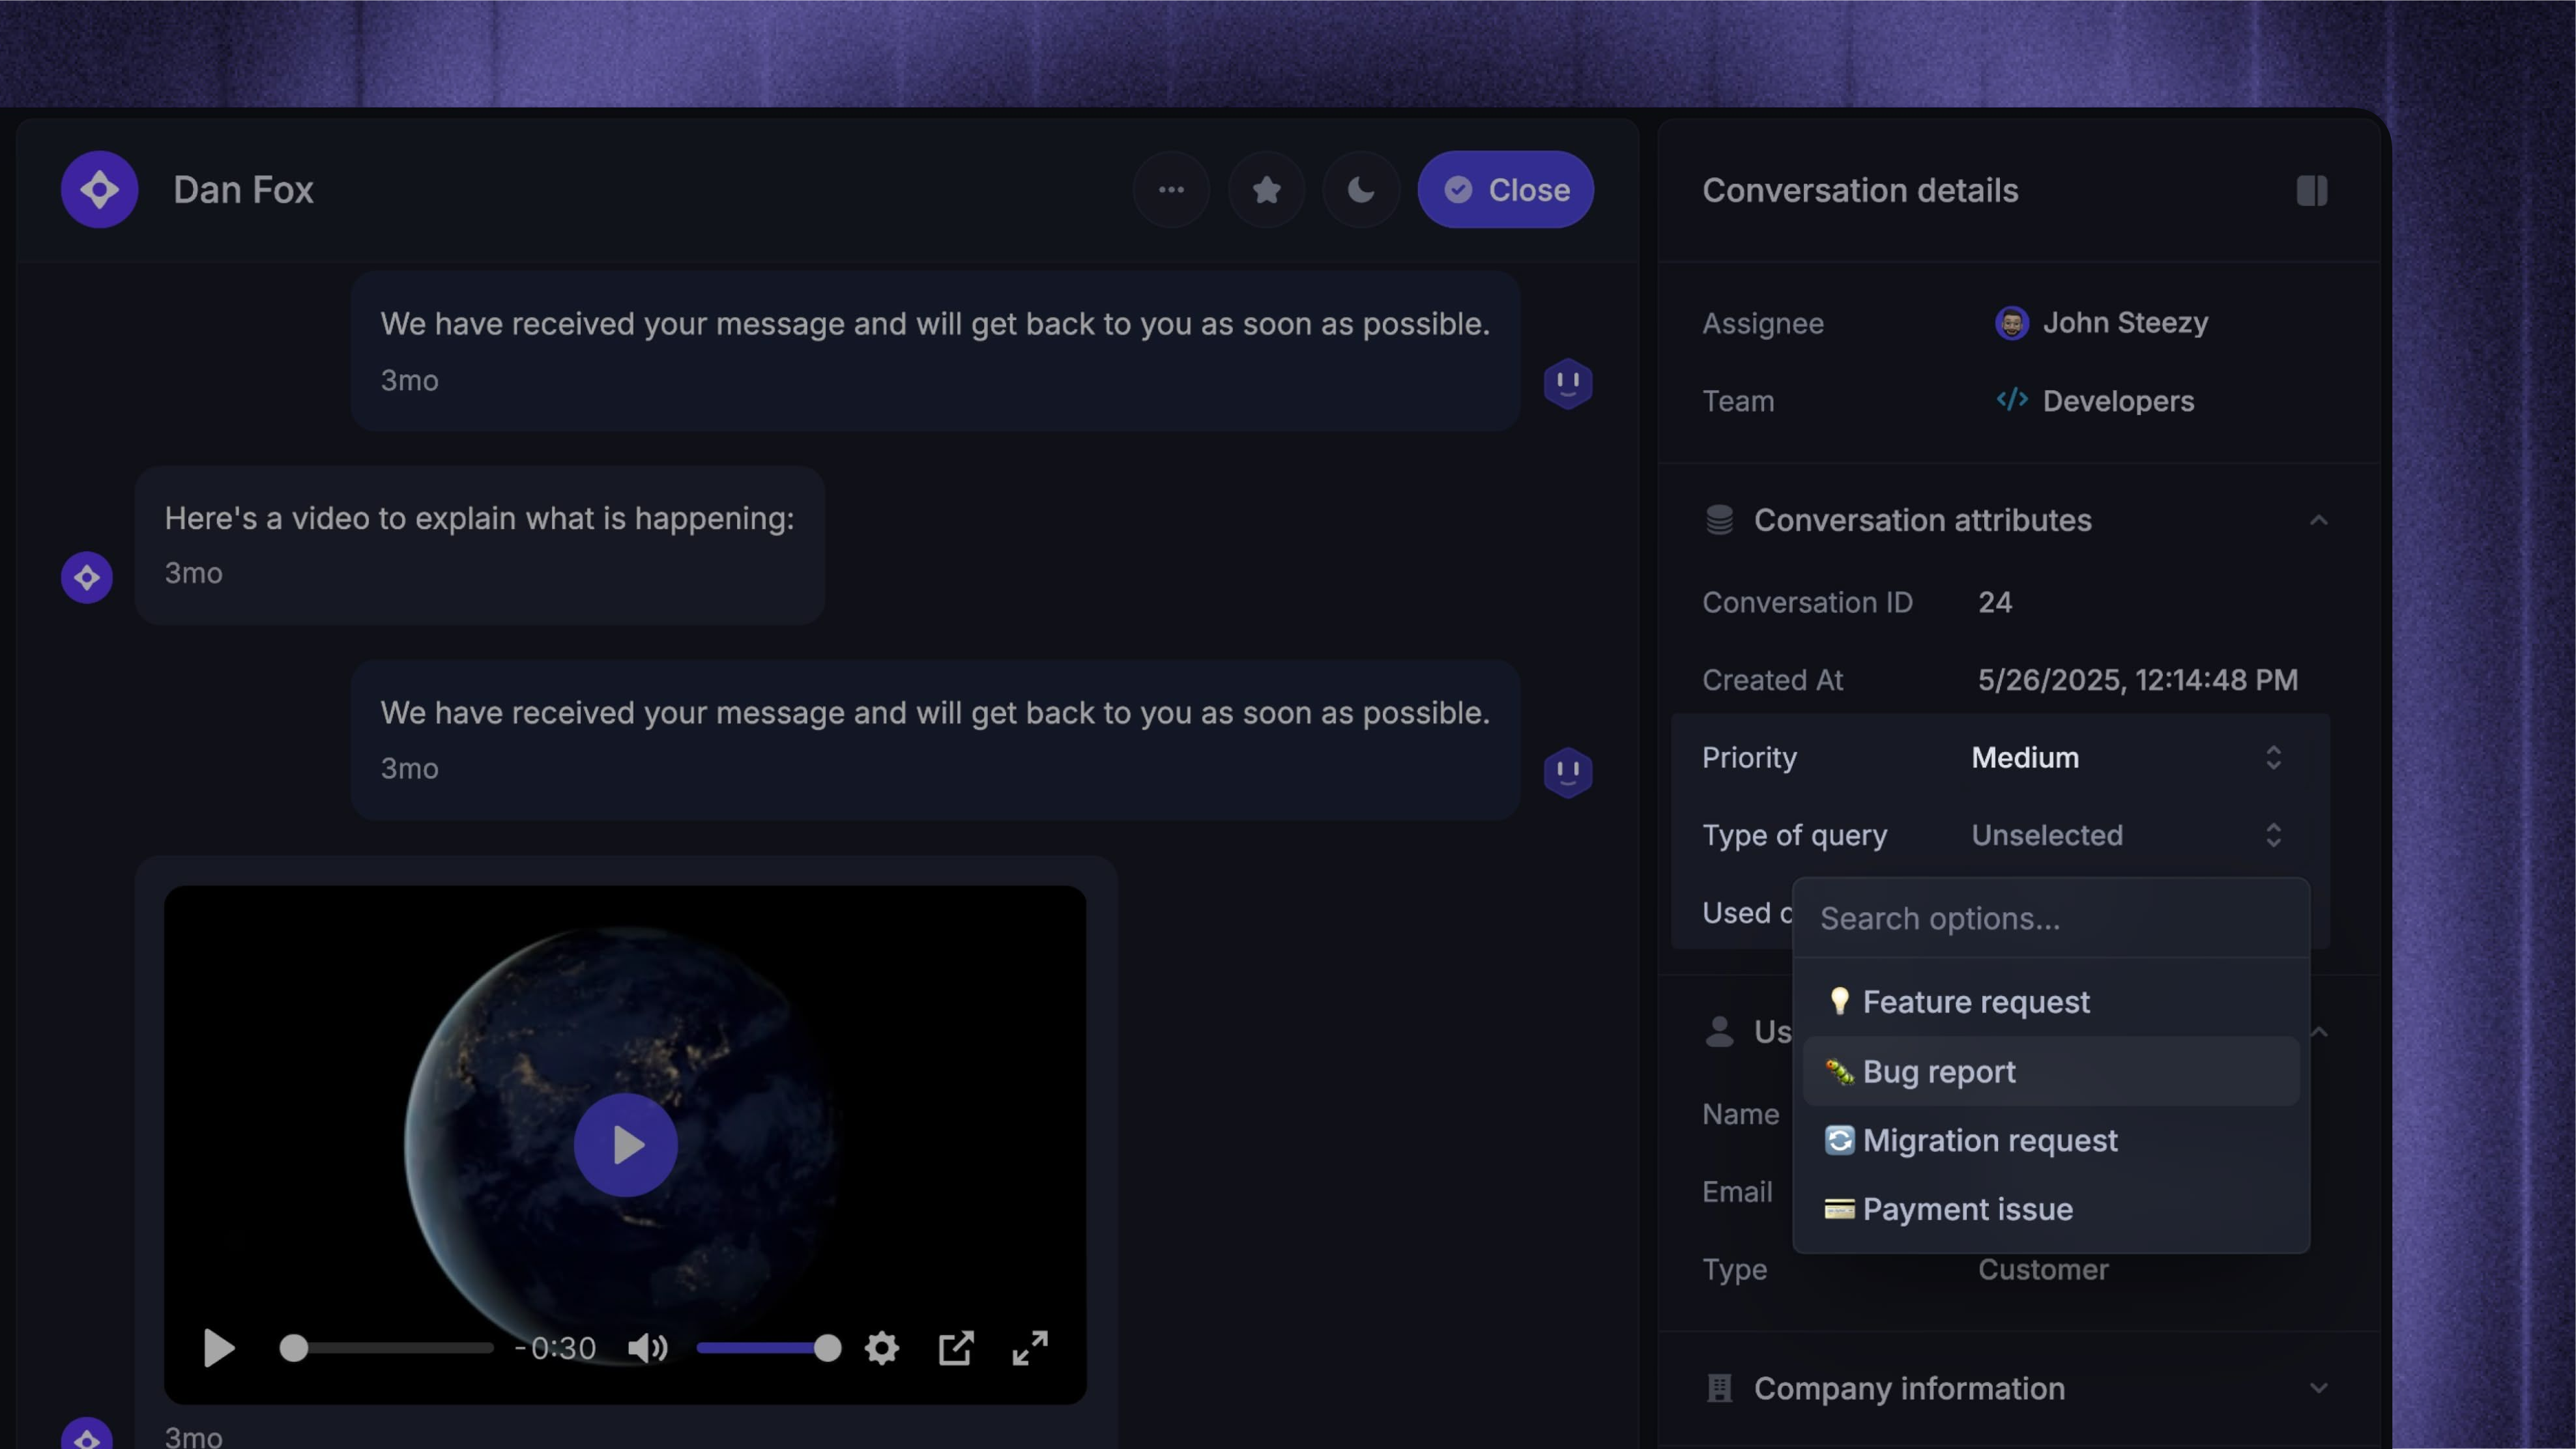
Using CvDAs in the Inbox
You can assign or update CvDAs directly in the conversation details panel while viewing a conversation. This lets you capture important context as you chat with the customer, without leaving the conversation.
You can also surface attributes across the rest of the Inbox:
Add attributes as columns in the conversation list using the column picker, so you can scan values without opening each conversation
Filter and group conversations by attribute values when building custom inbox views
Collect conversation data up front from your customers
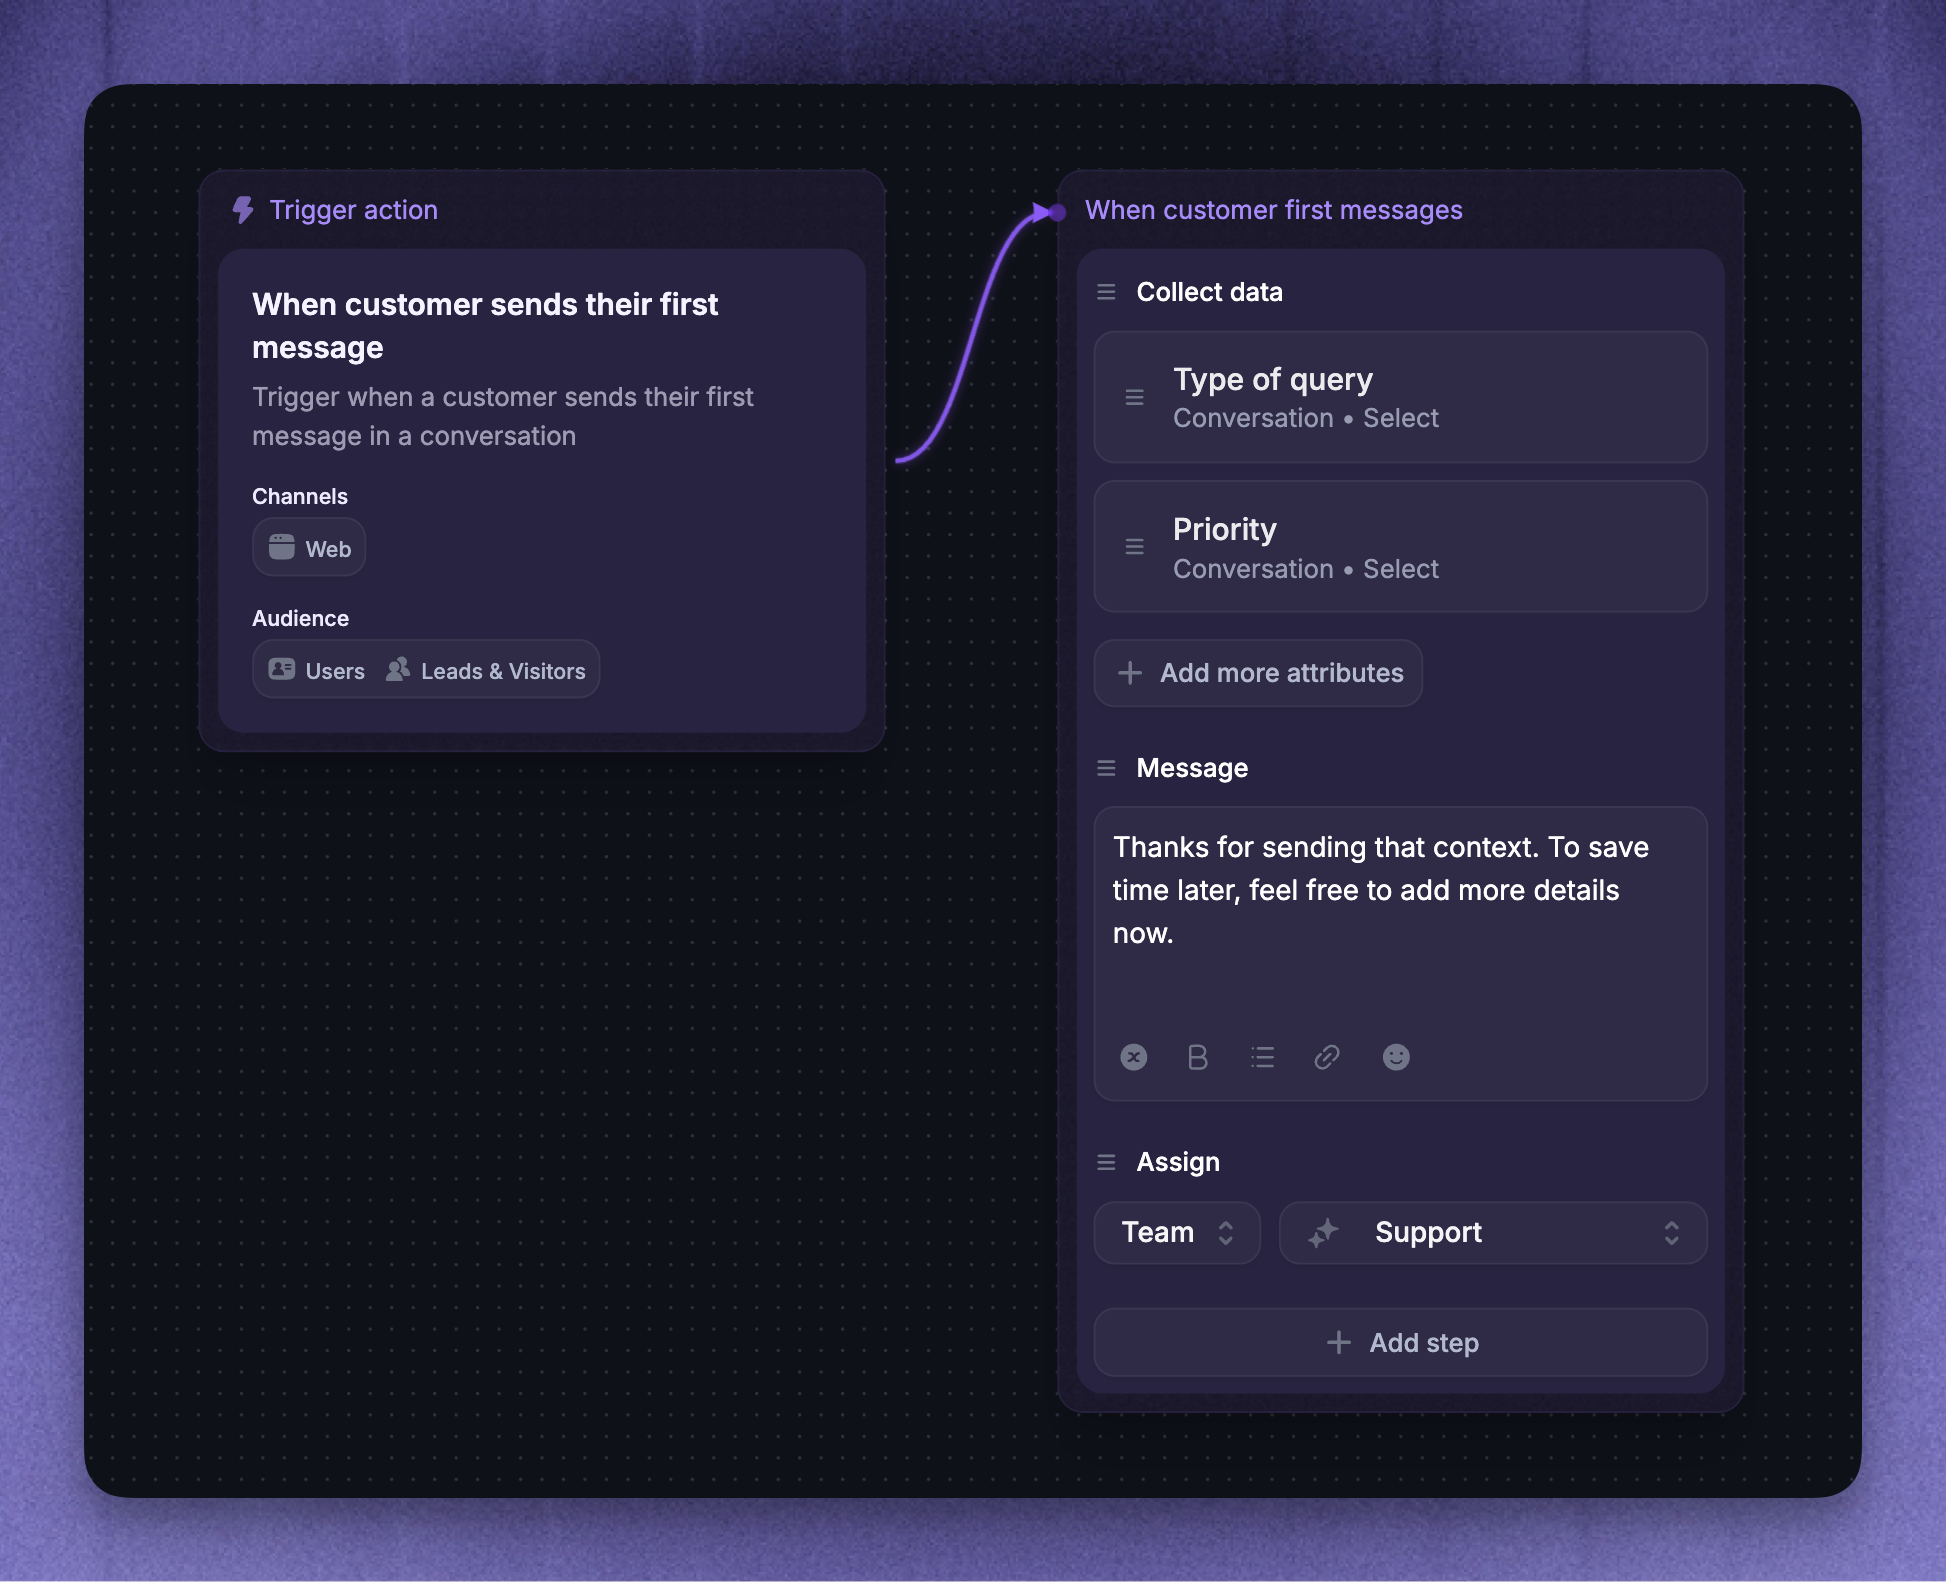
Instead of relying on teammates to fill in attributes manually, you can collect them from customers before a conversation reaches your team.
Use a Workflow with a “Collect data” action to ask the customer for information at the start of a conversation, then store their answers as CvDAs.
Go to Automations → Workflows
Click + New Workflow (select a template or start from scratch)
Add a “Collect data” action
Select the conversation attributes you want to collect
Save and turn on the workflow
This lets you automatically route conversations to the right team with the right priority, based on what the customer shares up front.
Set conversation data attributes automatically with Workflows
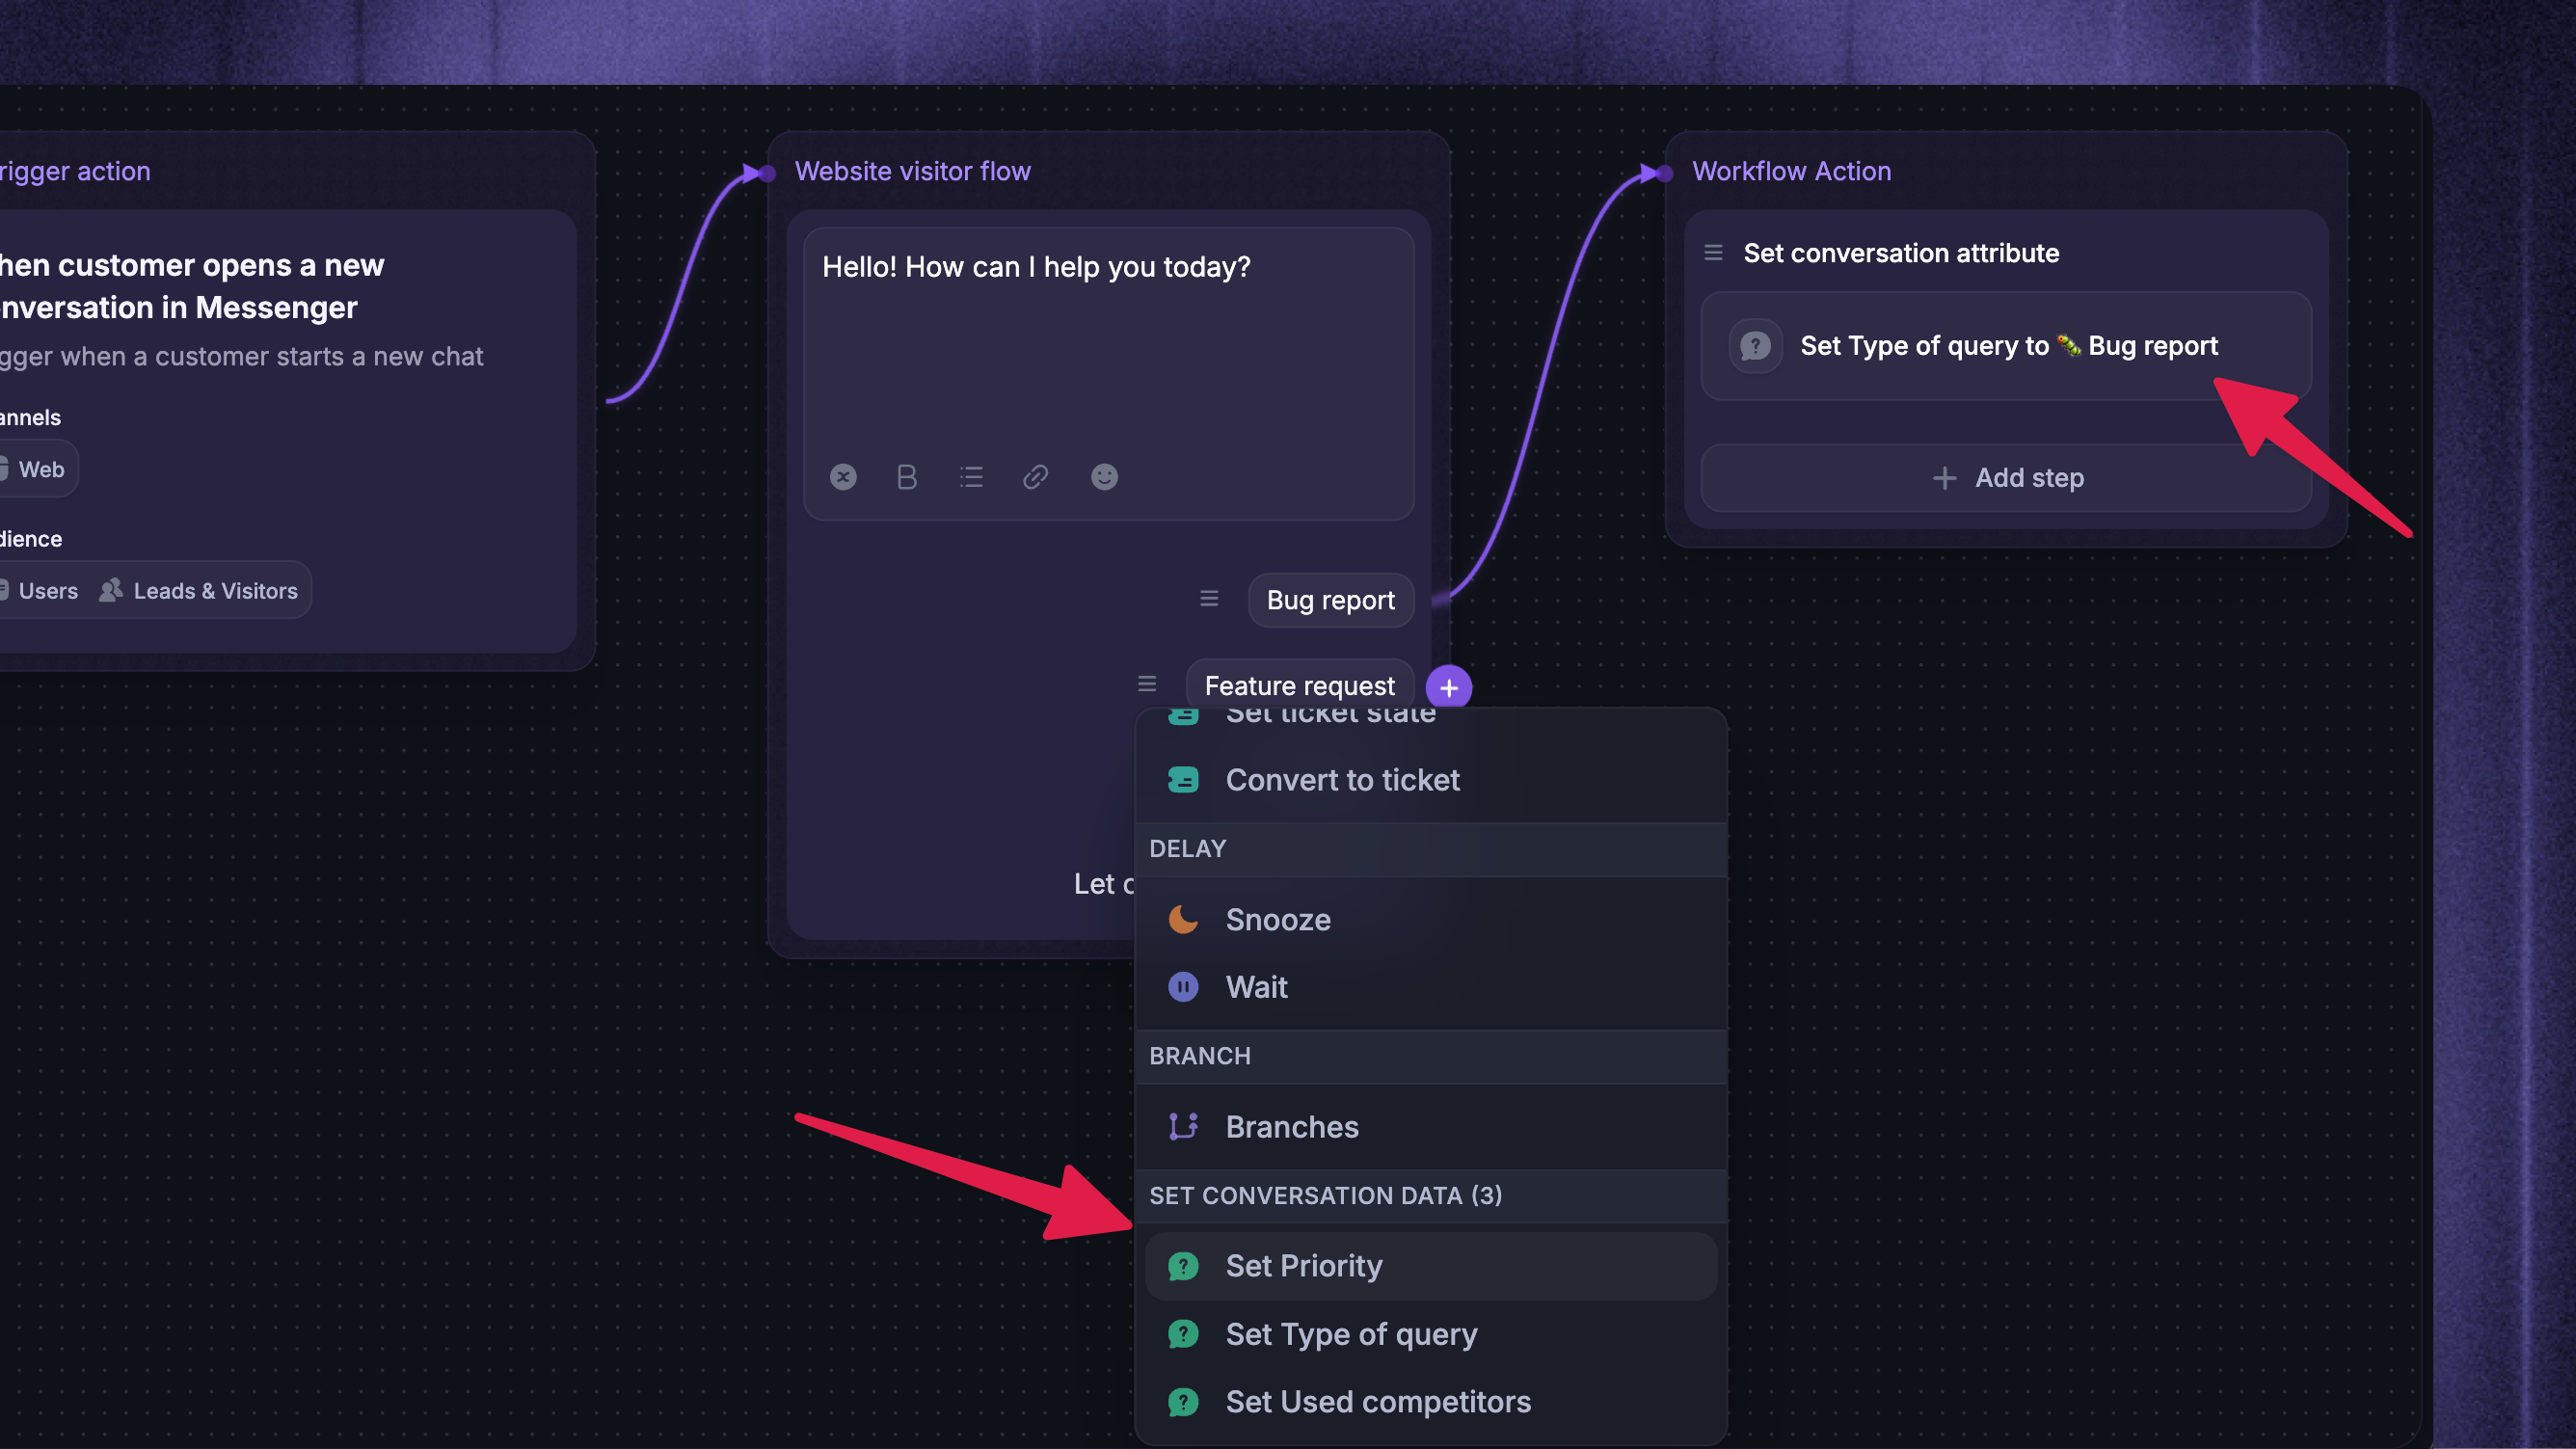
CvDAs can also be set or updated automatically with a Workflow, so your data stays consistent without manual work.
Add a “Set conversation attribute” action to set a CvDA to a specific value – for example, setting Type to "Bug report" when an incoming message matches a condition.
Go to Automations → Workflows
Click + New Workflow (select a template or start from scratch)
Start adding the next step and choose the desired Attribute under the “Set conversation data” category
Save and turn on the workflow
Use conversation attributes in Branch conditions or Apply rules to route conversations and keep values updated as the conversation progresses.
Example use cases
Product area routing – Assign conversations to the right team based on which part of your product the question is about.
Issue categorization – Tag conversations as bugs, feature requests, or general questions to track trends over time.
Urgency management – Mark urgent cases so they get handled first, like reports from VIP customers or service outages.
Launch monitoring – Create a view showing all bug reports or questions related to a new feature release.
Priority reporting – Filter reports by category, urgency, or product area to see performance in specific areas.