Using ticket triggers with Workflows
Build powerful ticket automations and automate repetitive processes by selecting the right ticket category using Workflows.
Written By Markus from Featurebase
Last updated 4 months ago
Overview
Featurebase Workflows include 2 triggers designed specifically for tickets, letting you automate actions whenever a ticket is created or its state changes. Combined with the ability to target specific ticket types, you can build automations tailored to your team's exact process.
This enables you to:
Target a specific ticket type – create automations that only apply to Customer tickets, Back-office tickets, or Tracker tickets. For example, route all Back-office tickets to a specific team on creation
Target multiple ticket types – create a single Workflow that applies to two or more ticket types at once. For example, mark all tickets as priority when their state changes to a specific status
Ticket triggers
When creating a Workflow, you have access to two ticket-specific triggers:
Ticket is created - fires every time a new ticket is created across your workspace
Teammate changes the state of a ticket - Fires every time a teammate manually changes a ticket's state
Note: The "If teammate changes the state of a ticket" trigger only fires when a human teammate changes the state. Automated state changes from other Workflows do not trigger it.
Setting up a ticket Workflow
Go to Automations → Workflows
Click + New Workflow in the top-right corner.
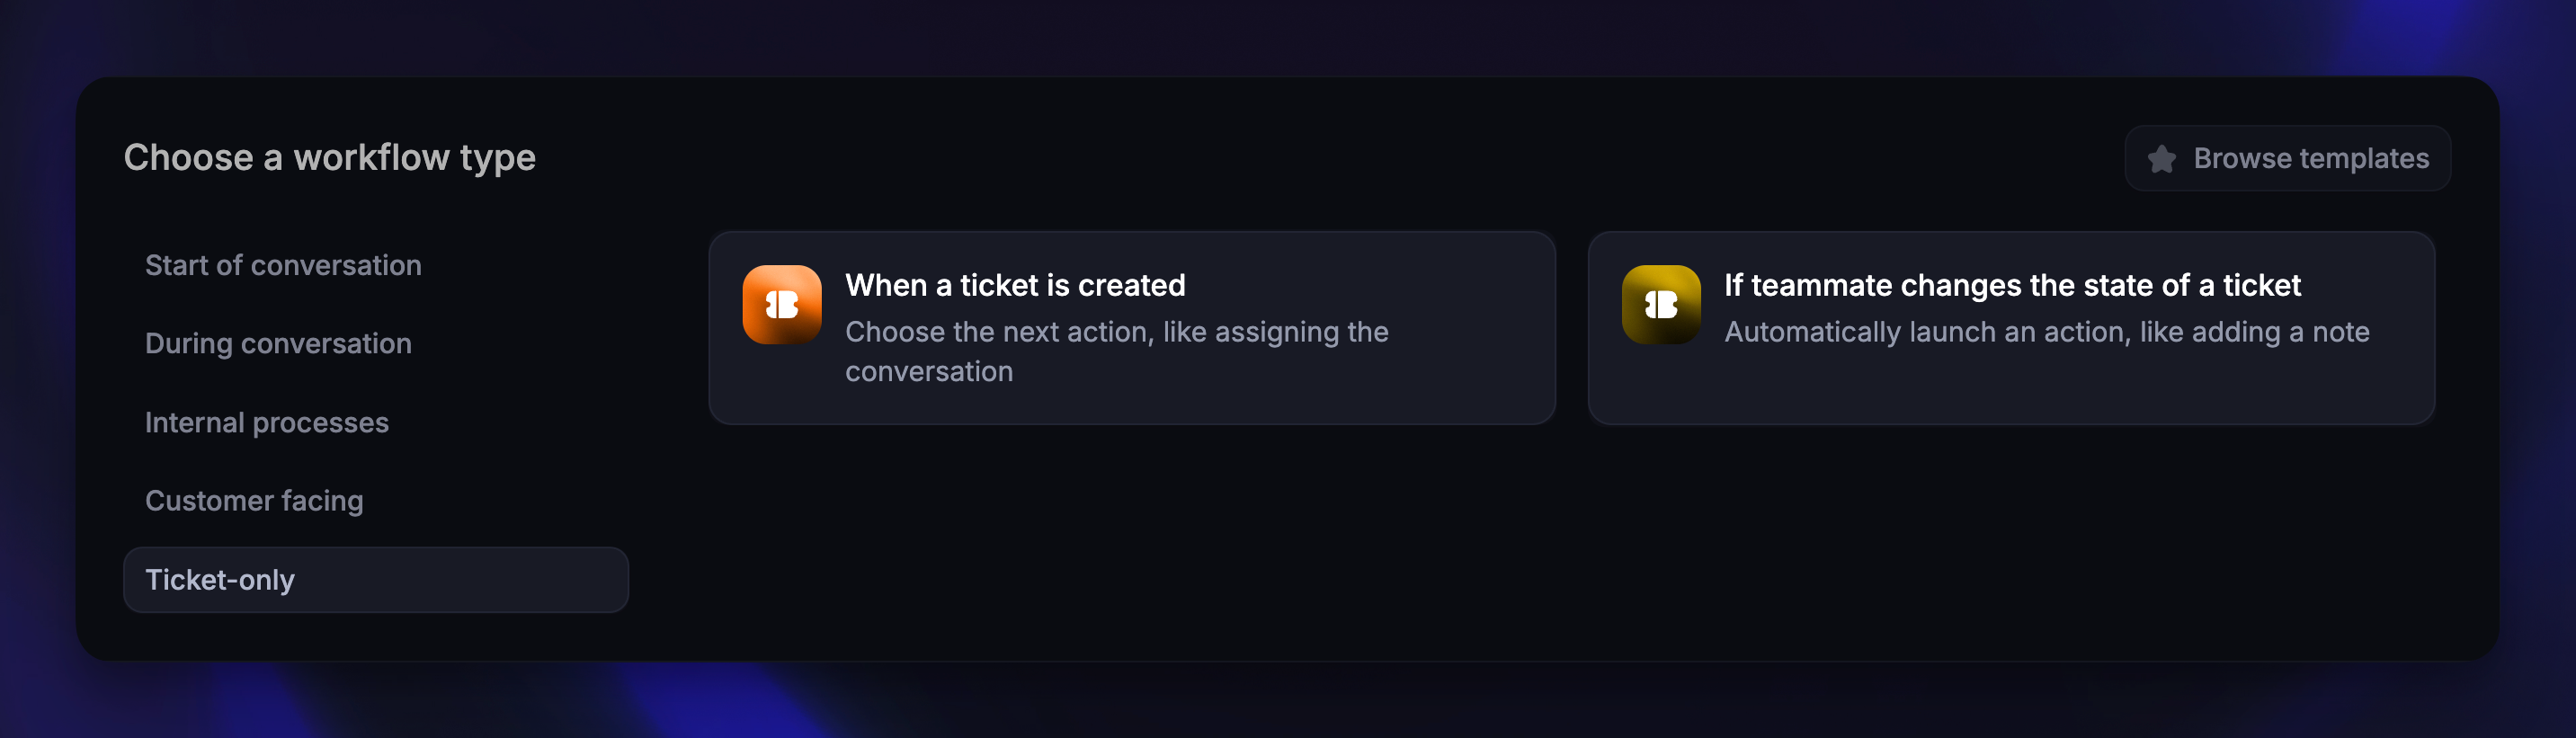
Select Create from scratch and choose one of the two ticket triggers:
Ticket is created
Teammate changes the state of a ticket
1. Configure trigger settings
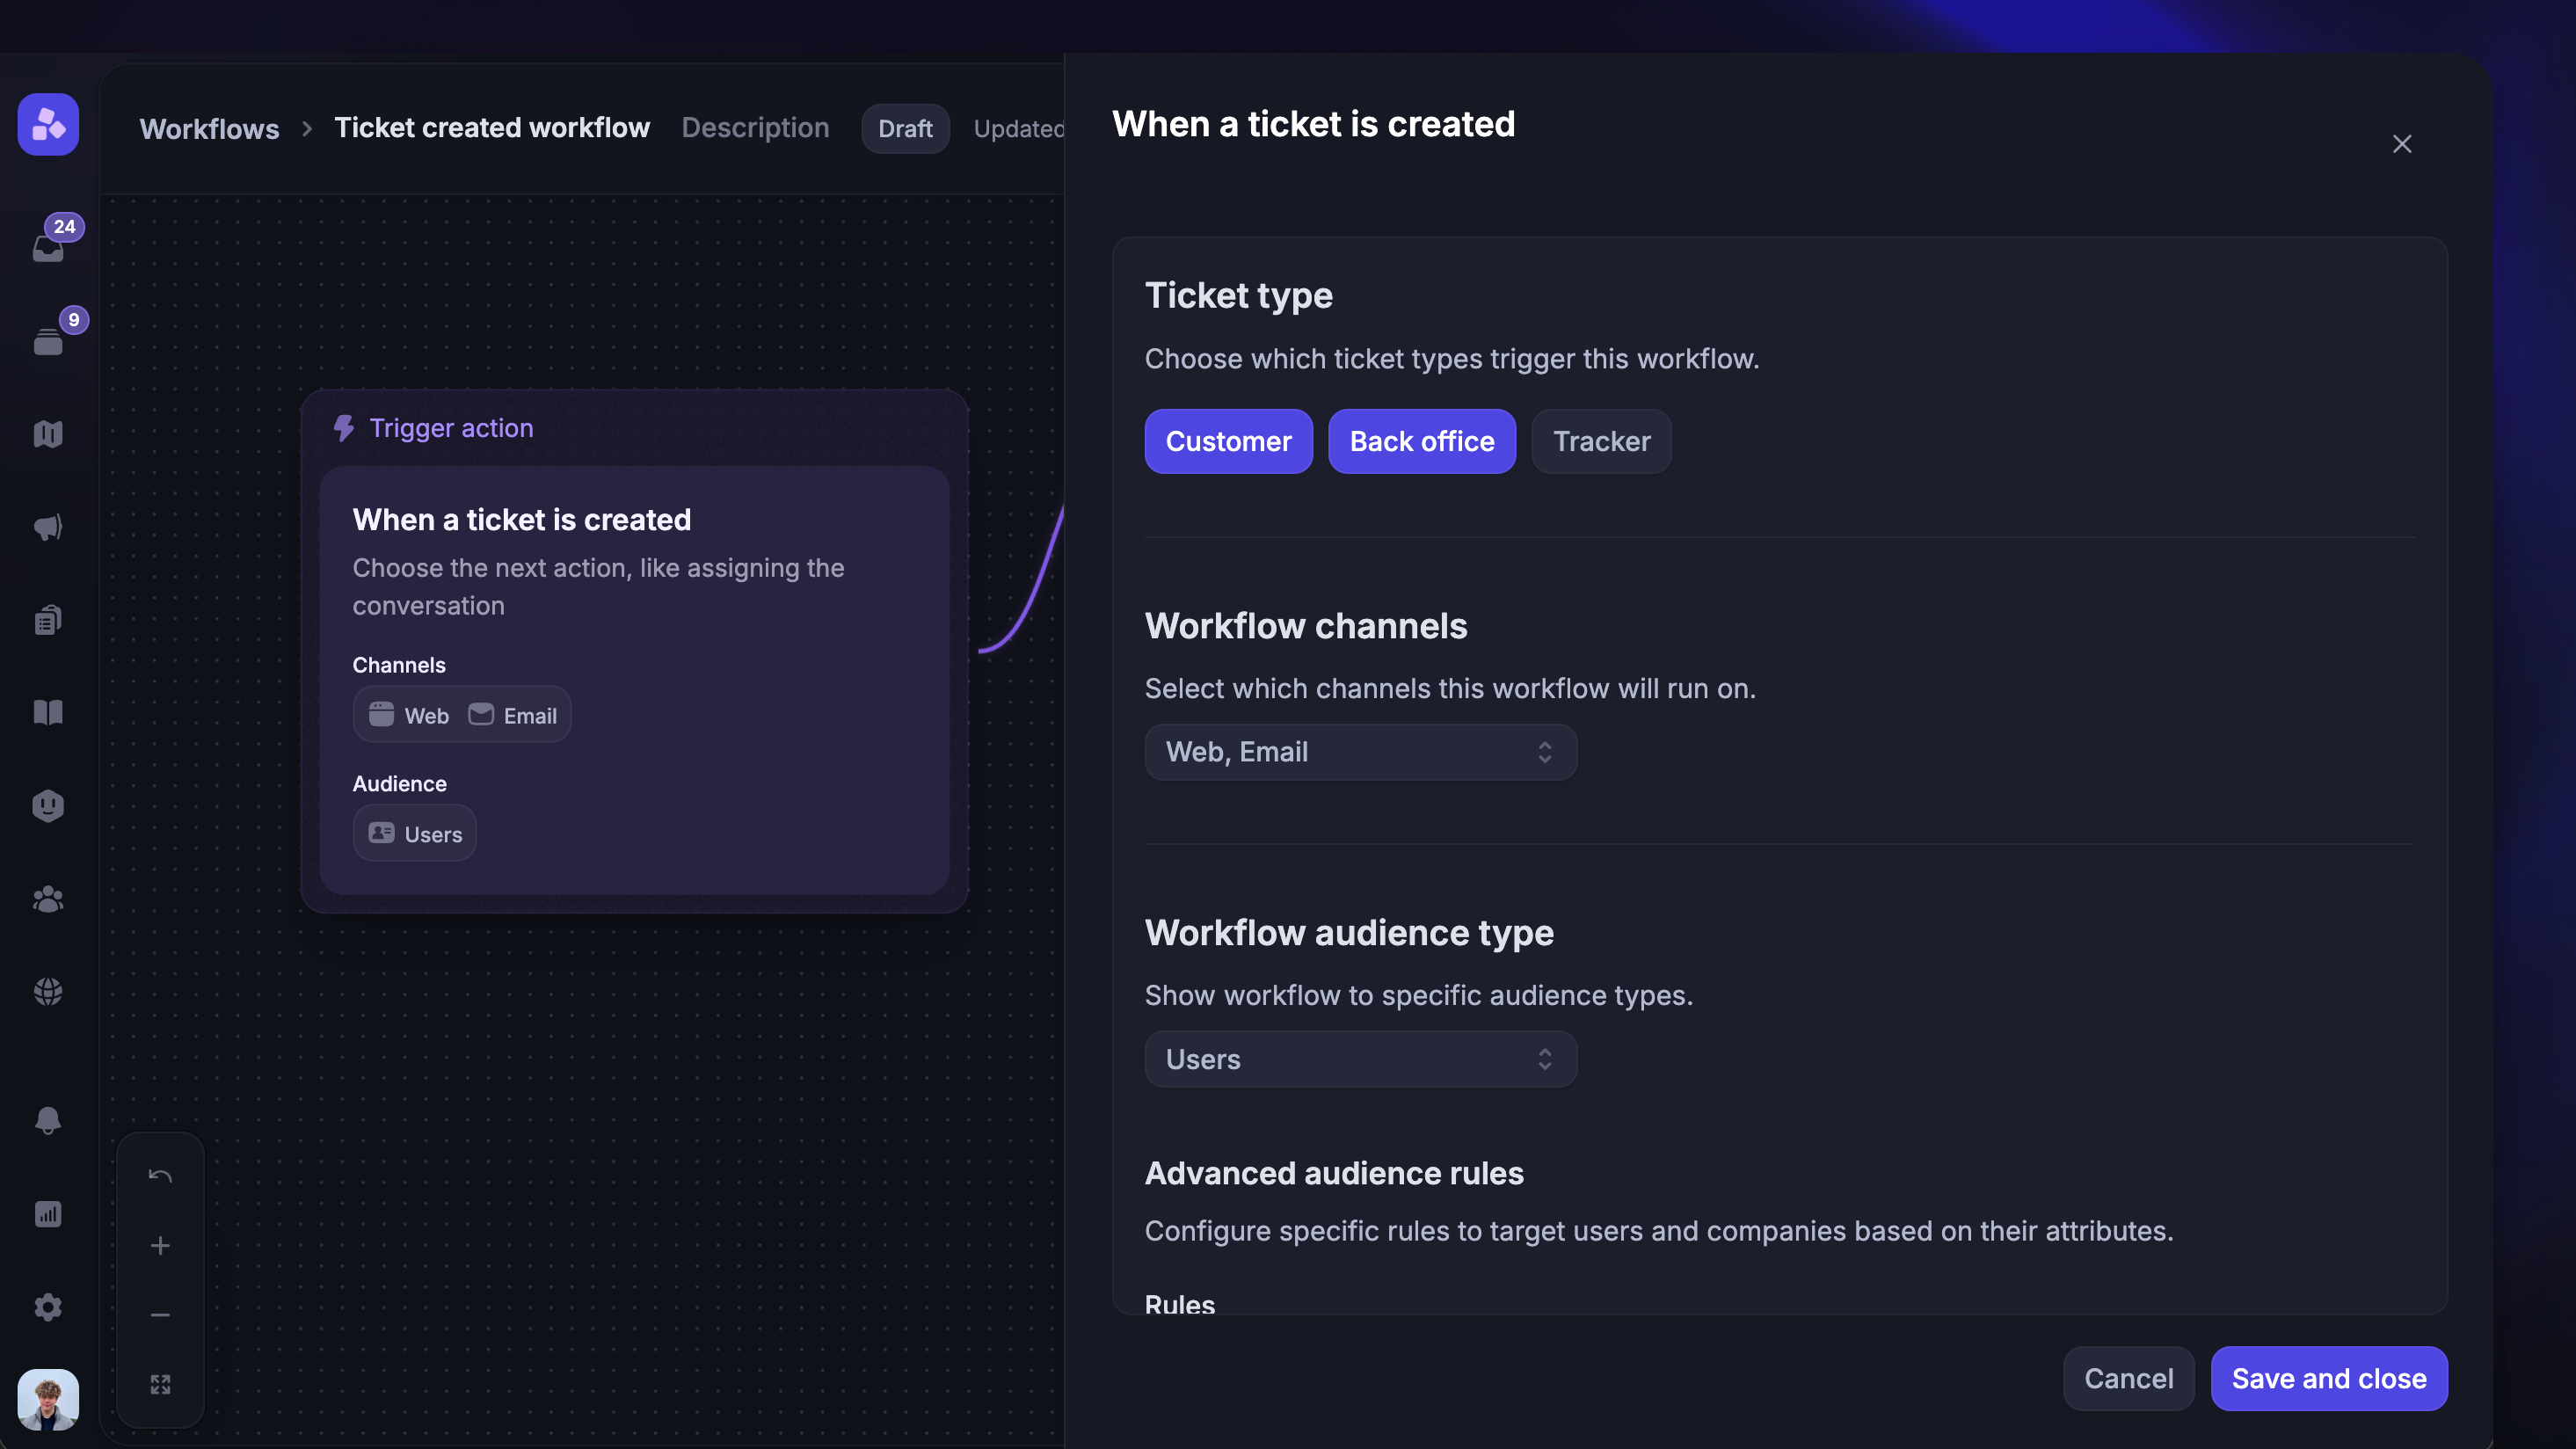
In the trigger configuration, choose which ticket types the Workflow should target – Customer, Back-office, and/or Tracker. You can select one or more.
Your selection determines which actions are available in the Workflow:
Customer tickets – Use customer tickets when your team needs additional time to address issues. These tickets are always shared with the customer and allow customer-facing replies. You can create Workflows that gather customer data or deliver content to them, similar to conversations.
Back-office tickets – These come into play when a teammate needs to collaborate with Back-office teams to resolve an issue. These tickets are optionally shared with users and only allow internal notes. While you can't send customer-facing content, you can still create Workflows to assign tickets to teams, set a ticket priority, or add an internal note to a ticket automatically.
Tracker tickets – Tracker tickets are designed to streamline the resolution of widespread problems affecting numerous customers, such as bugs and feature requests. These tickets are never shared with the customer and only allow internal notes. While you can't send customer-facing content, you can still create workflows to assign tickets to teams, set ticket priorities, or add internal notes to tickets automatically.
You can also select multiple ticket categories if you want to build automations that target these categories simultaneously. E.g., you might want all your tickets to move to an inbox once their status changes to “Waiting on customer” or you may wish to route all newly created tickets across all categories to a specific inbox.
Tip: If you need both customer-facing and internal actions, create separate Workflows – one targeting Customer tickets and another targeting Back-office or Tracker tickets.
2. Build your workflow
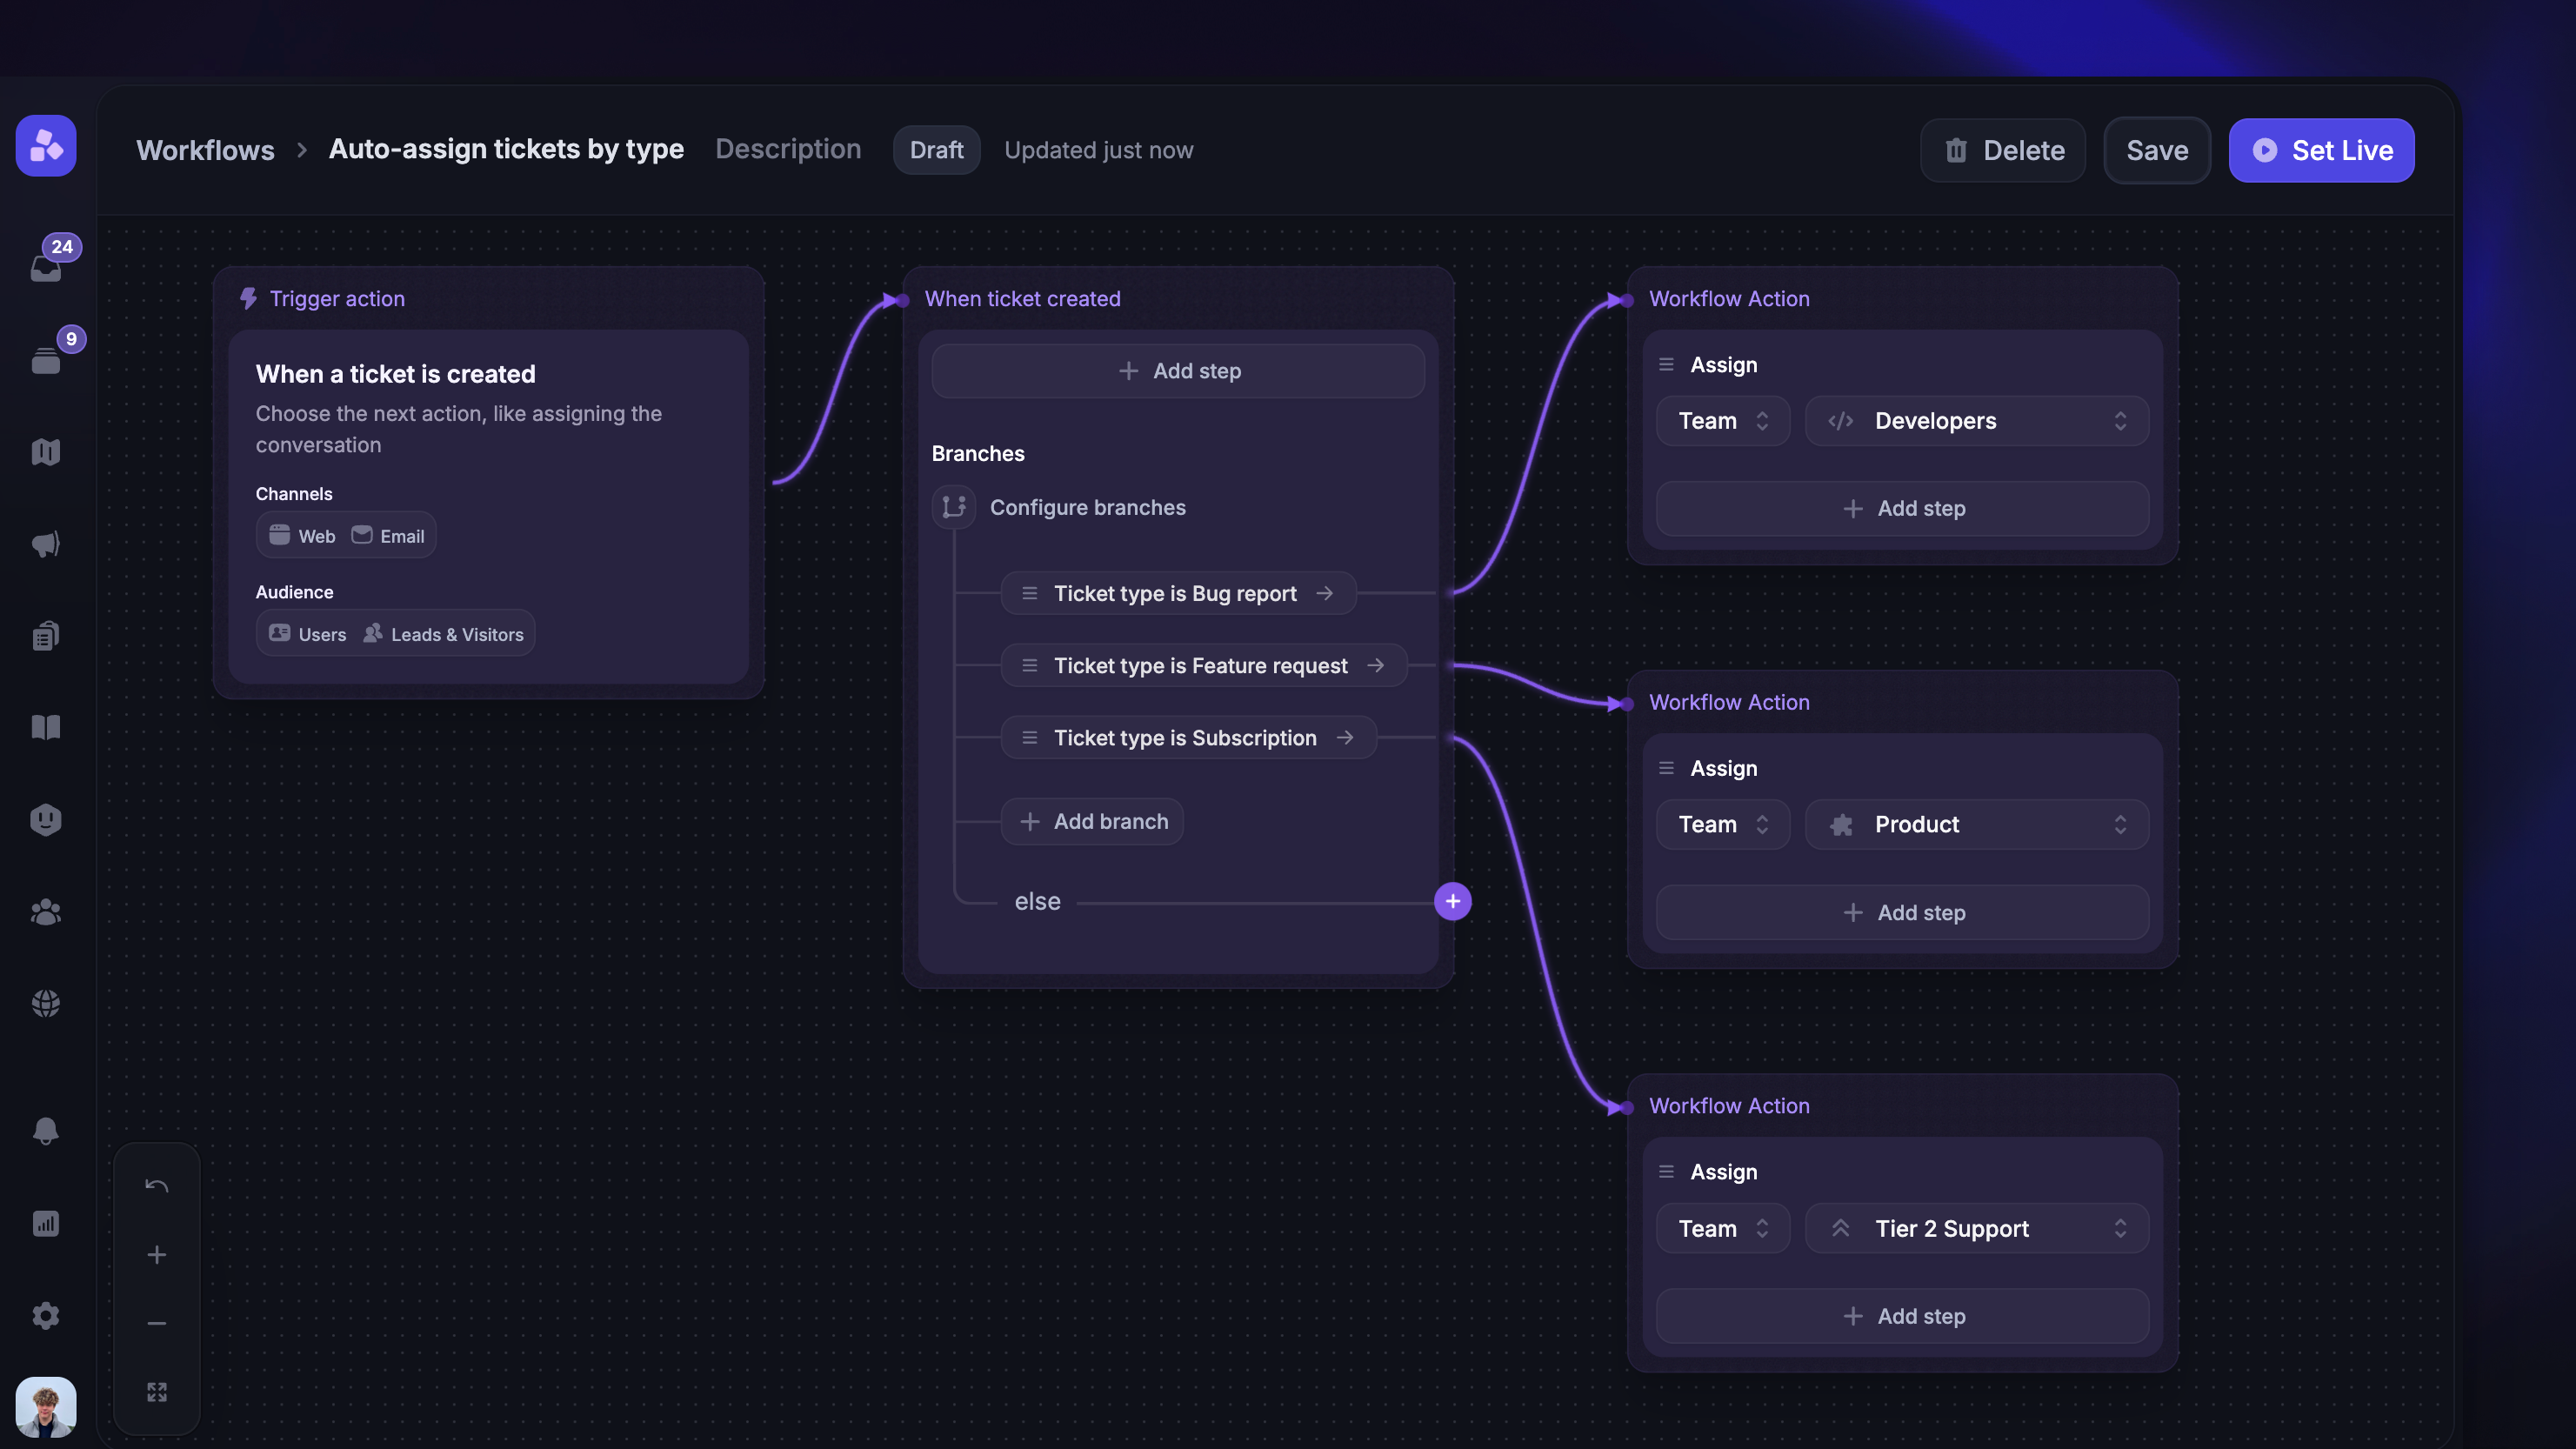
Use the Workflow builder to add actions, branches, and conditions. You can branch on ticket-specific attributes like:
Ticket type – Customer, Tracker, or Back-office
Ticket state – the specific status name (e.g. "In Review", "Resolved")
Ticket state category – the broader category (Reviewing, Unstarted, Active, Completed, Canceled)
Ticket category – the specific ticket type configuration
Ticket assignee – the assigned teammate
These can be combined with all other branch conditions, like user attributes, company attributes, and conversation properties.
Example Workflows
Here are some examples of relevant Workflows used for tickets: