Using branches in Workflows
How to route your Workflows to the right paths using conditional branching.
Written By Markus from Featurebase
Last updated 8 days ago
Overview
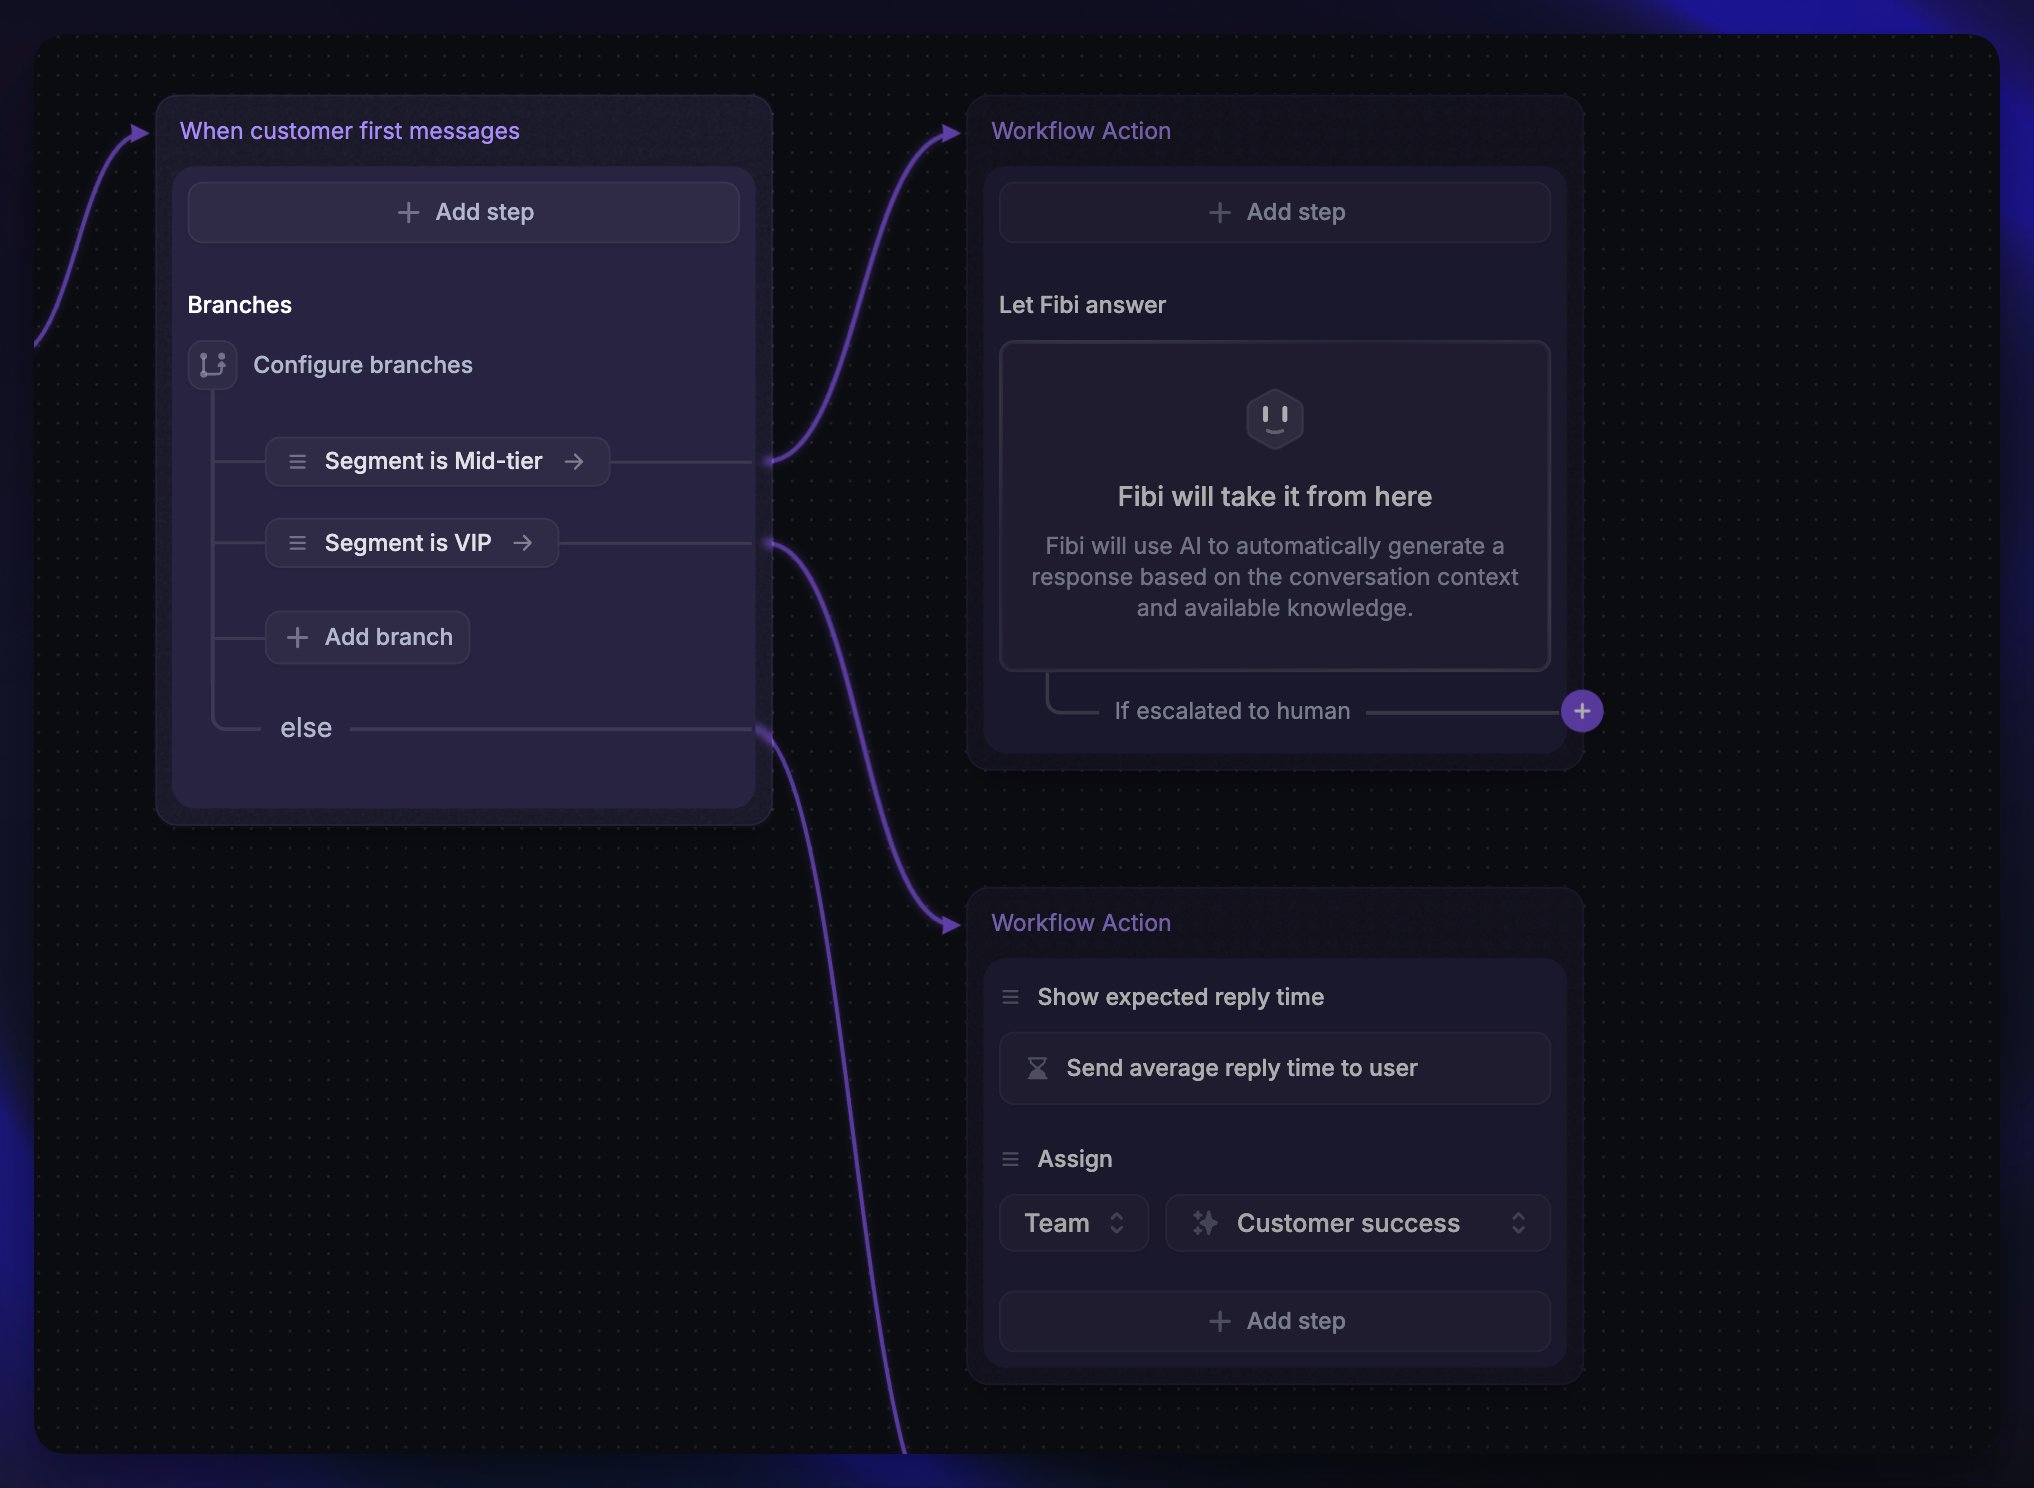
When building a Workflow, you can continue to the next path by using Reply Buttons (where a customer selects a Button to choose the route) or Branches.
Branches route through the Workflow by checking each condition. If a condition is met, the Workflow will move on to the path that is connected to this condition.
Note: If a conversation meets the conditions of multiple branches, it will only go through the first branch that meets the criteria, without checking the rest of the branches
Adding a condition to Branches
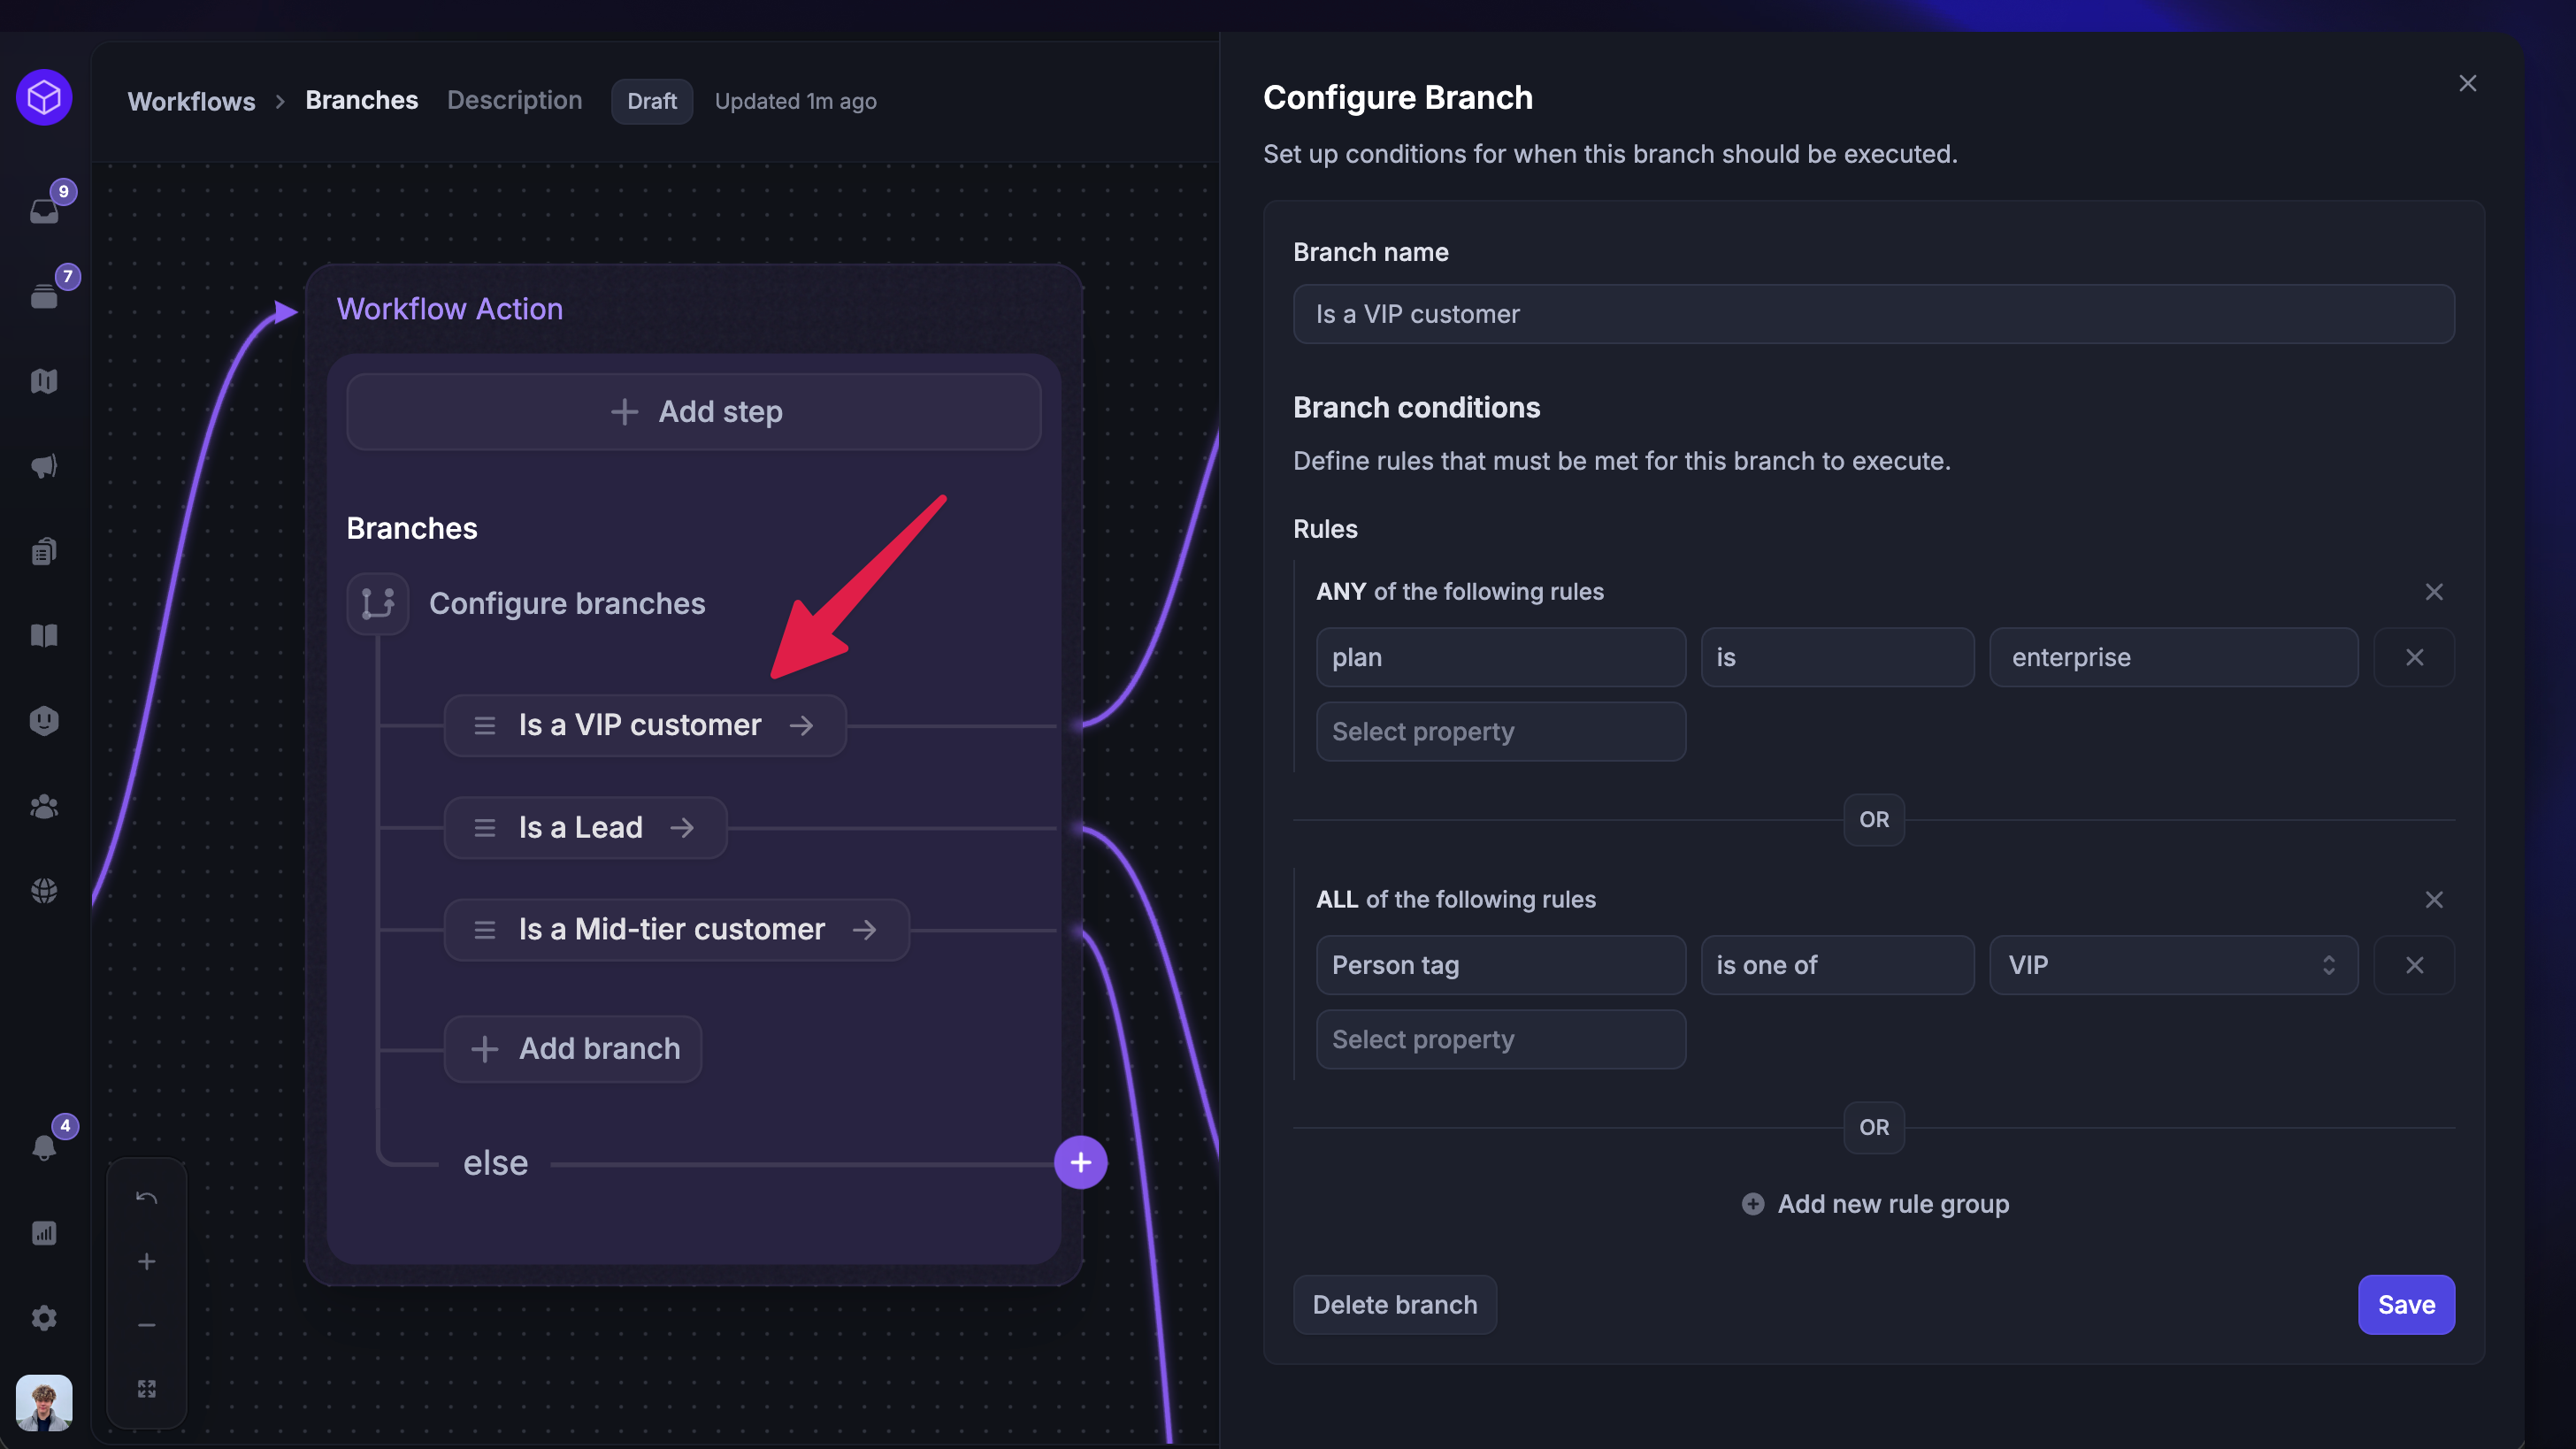
To add a branch (or Condition), click + Add branch which will insert a new branch at the end of the “If” branches. To choose the condition, click on Missing condition to open up the side panel.
Then you can select the data and construct the condition to apply to this branch.
Using data in Branches
Conditional branching in Workflows supports all standard data attributes and custom data attributes within Featurebase - that is Person Data, Company Data, Message Data, conversation data attributes or Availability.
Use conversation attributes in Branches to route conversations by values like issue type, urgency, or product area.
Here are some tips:
Use Conversation Topics within Branches, to route users according to the topic which the conversation has been labeled with.
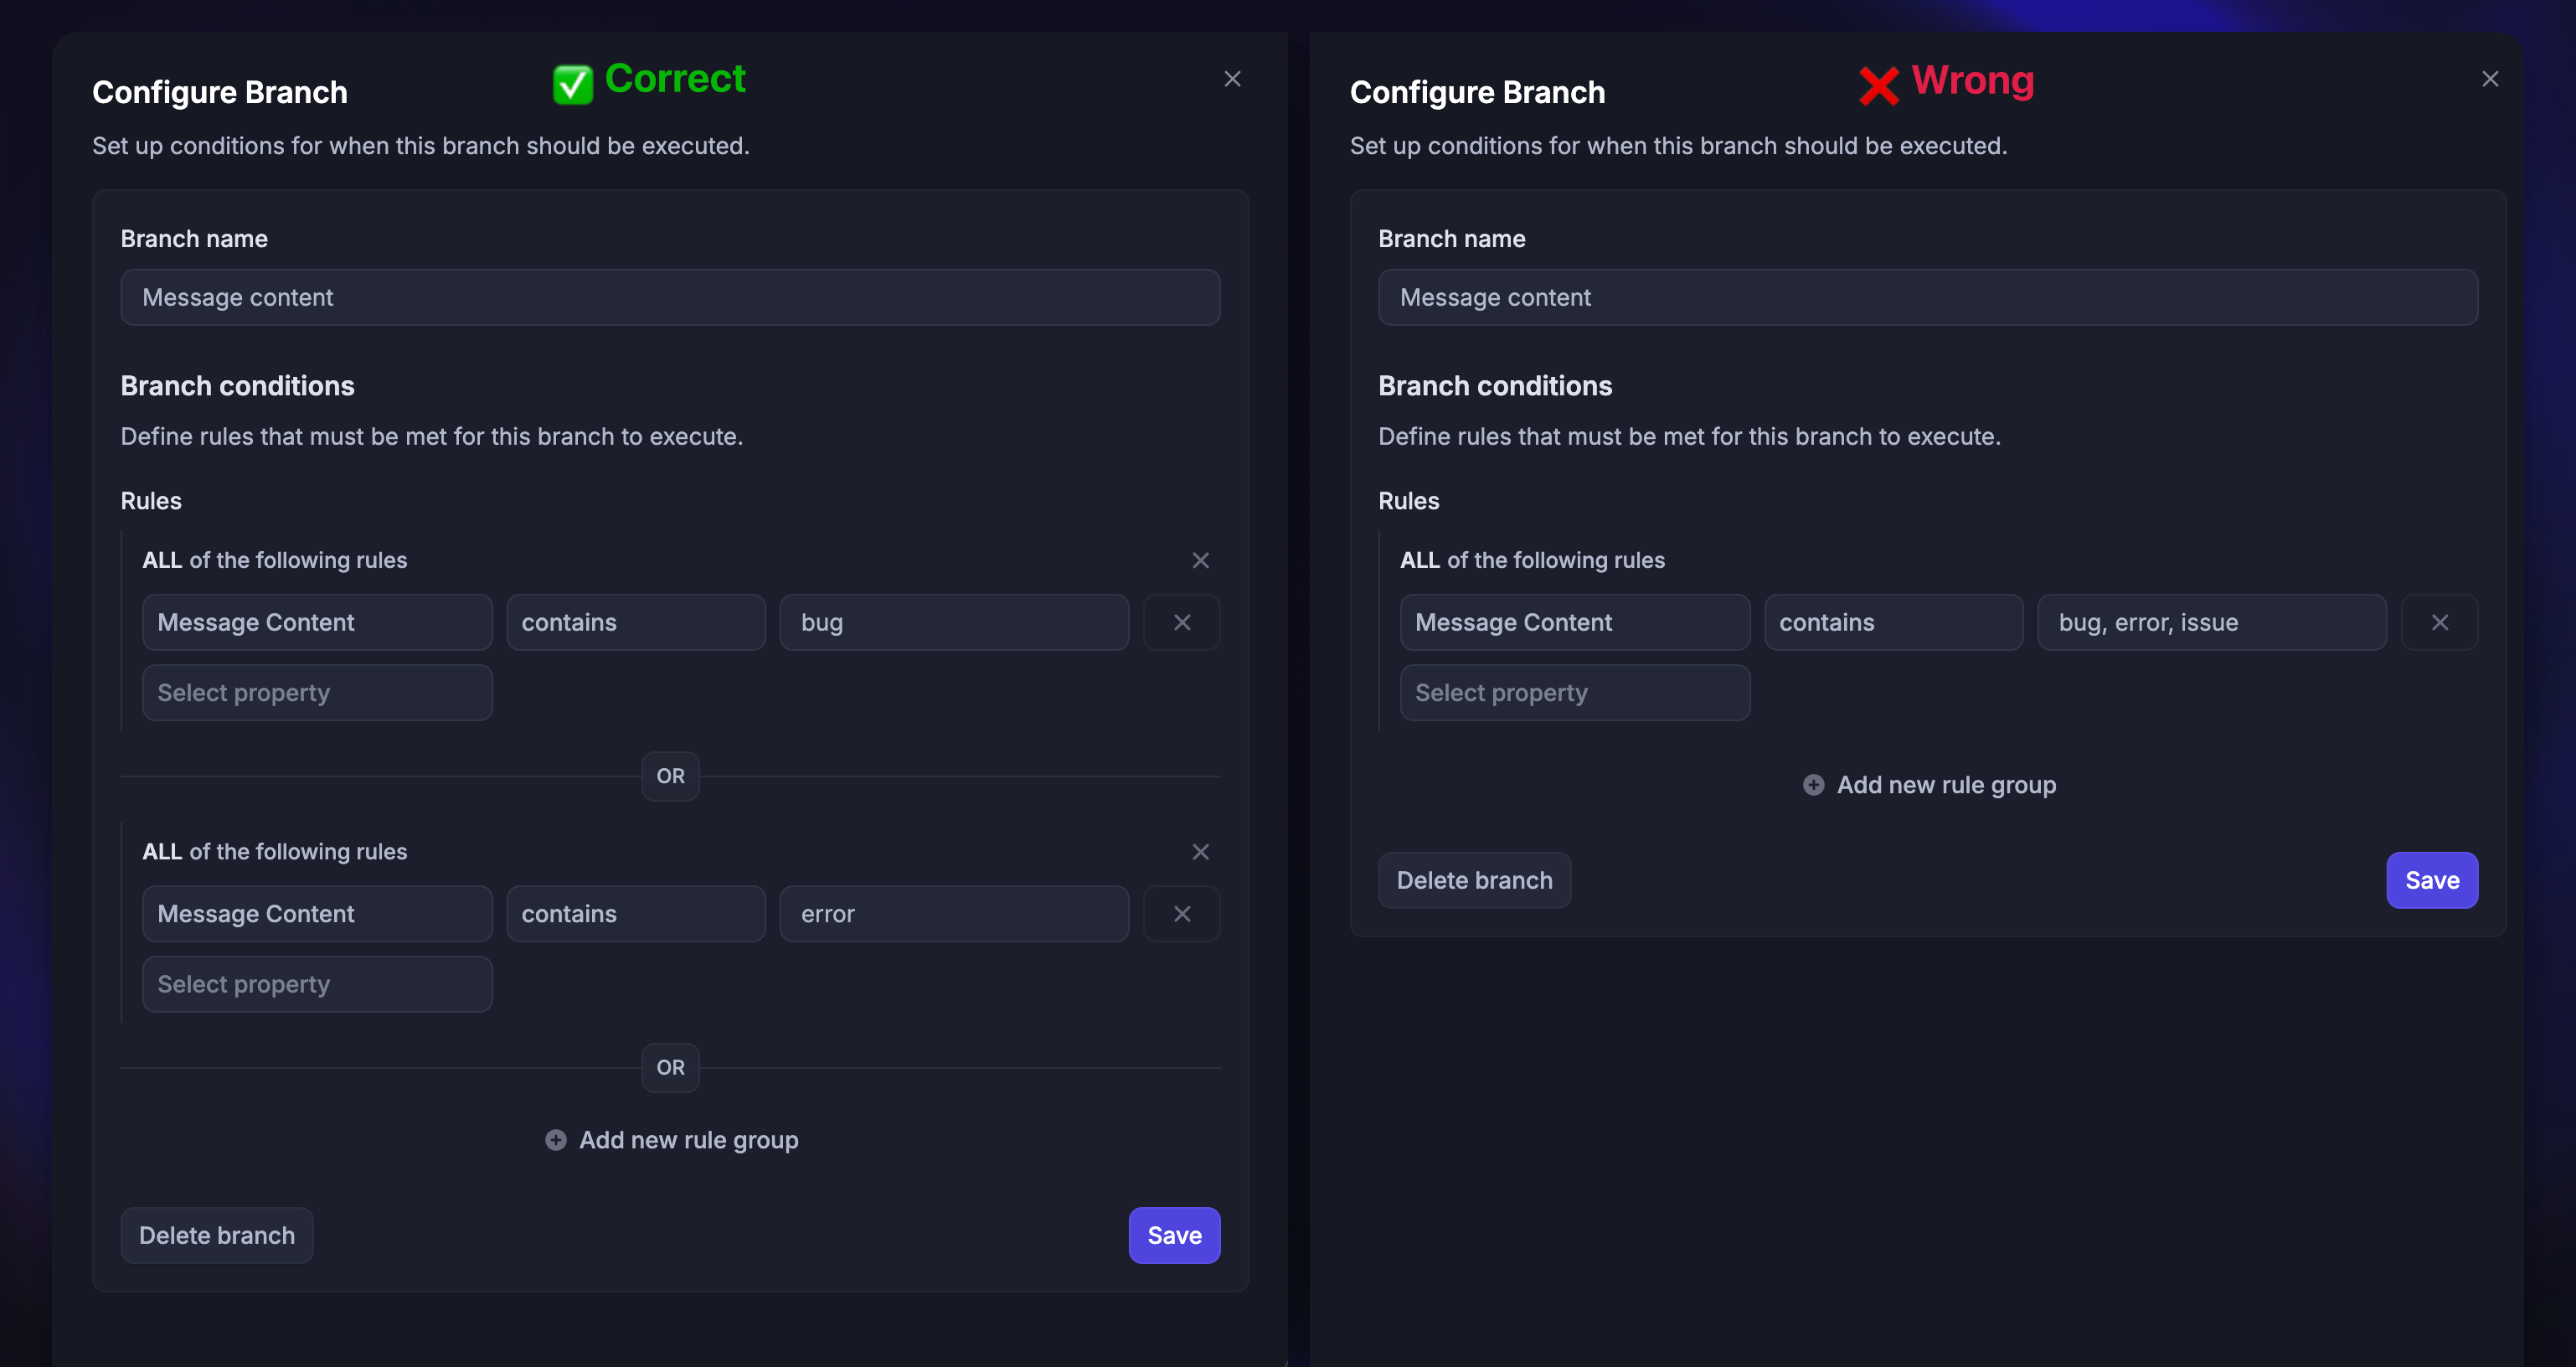
If you want to trigger the branch based on message content, then enter multiple trigger words with a separator
ORDo not enter multiple trigger words in one field like shown above