Use Fibi AI Agent in Workflows
How to add Fibi to your Workflows for advanced customization and triaging.
Written By Markus from Featurebase
Last updated 2 days ago
Overview
You can integrate Fibi AI Agent directly into your Workflows to automate replies, collect context, and route conversations more intelligently.
Fibi works seamlessly with all your Workflows - you can either pass conversations to Fibi or have Workflows hand back to your team once Fibi completes its part.
Add Fibi to a Workflow
Go to Automations → Workflows
Click + New Workflow and choose Create from scratch or From a template
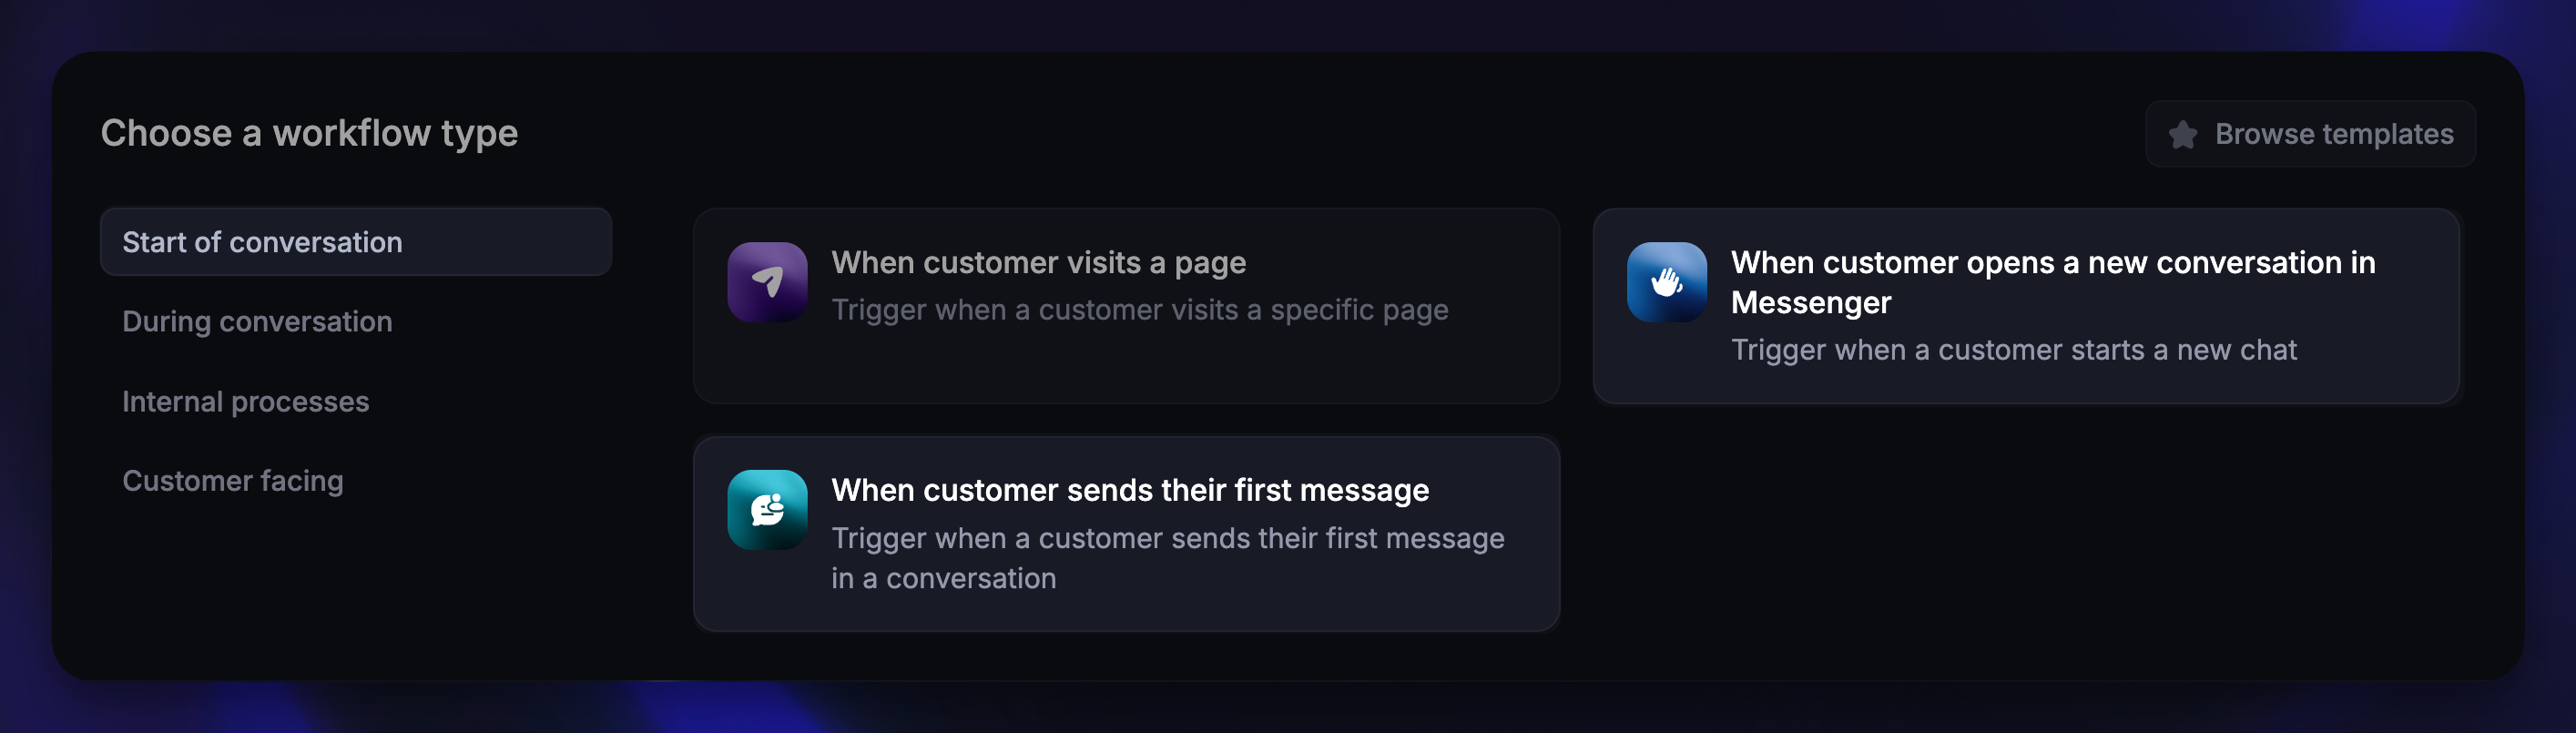
The best triggers to use with Fibi are:
Customer opens a new conversation in the Messenger – Fibi introduces itself immediately and replies to new inbound messages.
Customer sends their first message – Ideal if you want Fibi to respond to questions across other channels like email or WhatsApp.
1. Choose workflow channels for Fibi
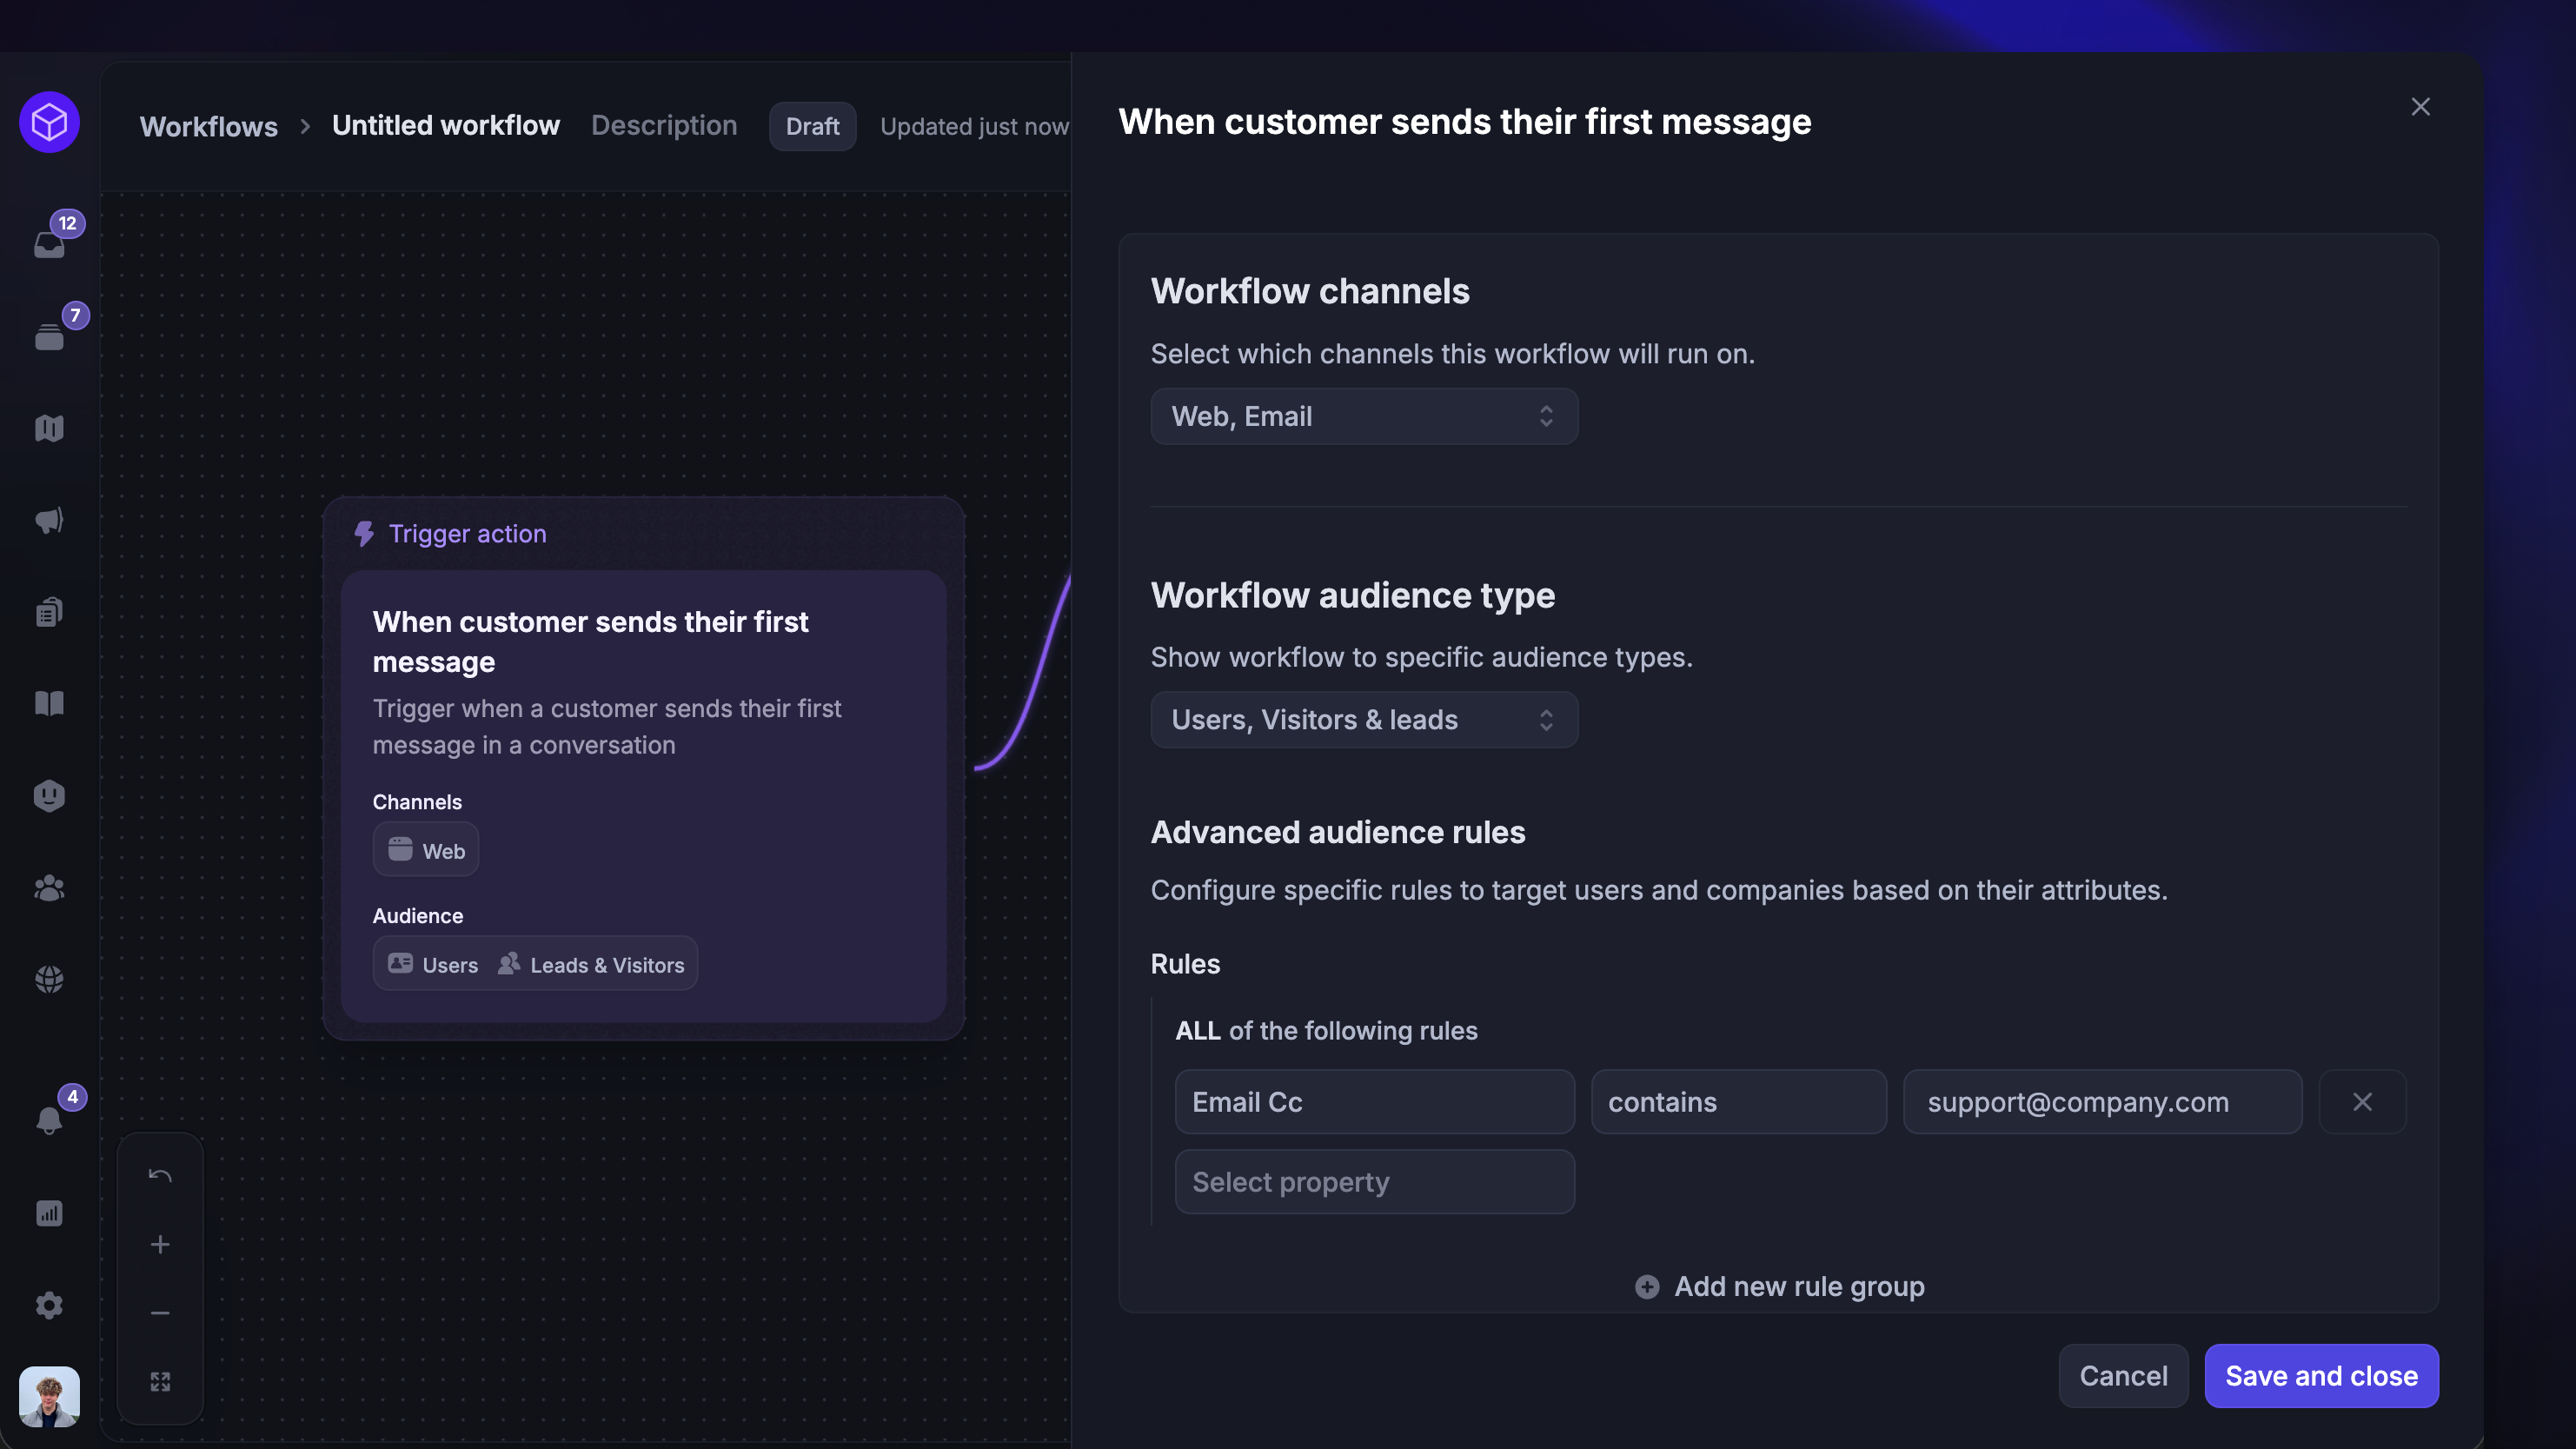
To enable Fibi on particular channels or for a specific audience, click on the workflow trigger settings (first block in the Workflows builder).
Notes:
Channel selection is only available with triggers such as “Customer sends their first message” or “Customer sends any message”.
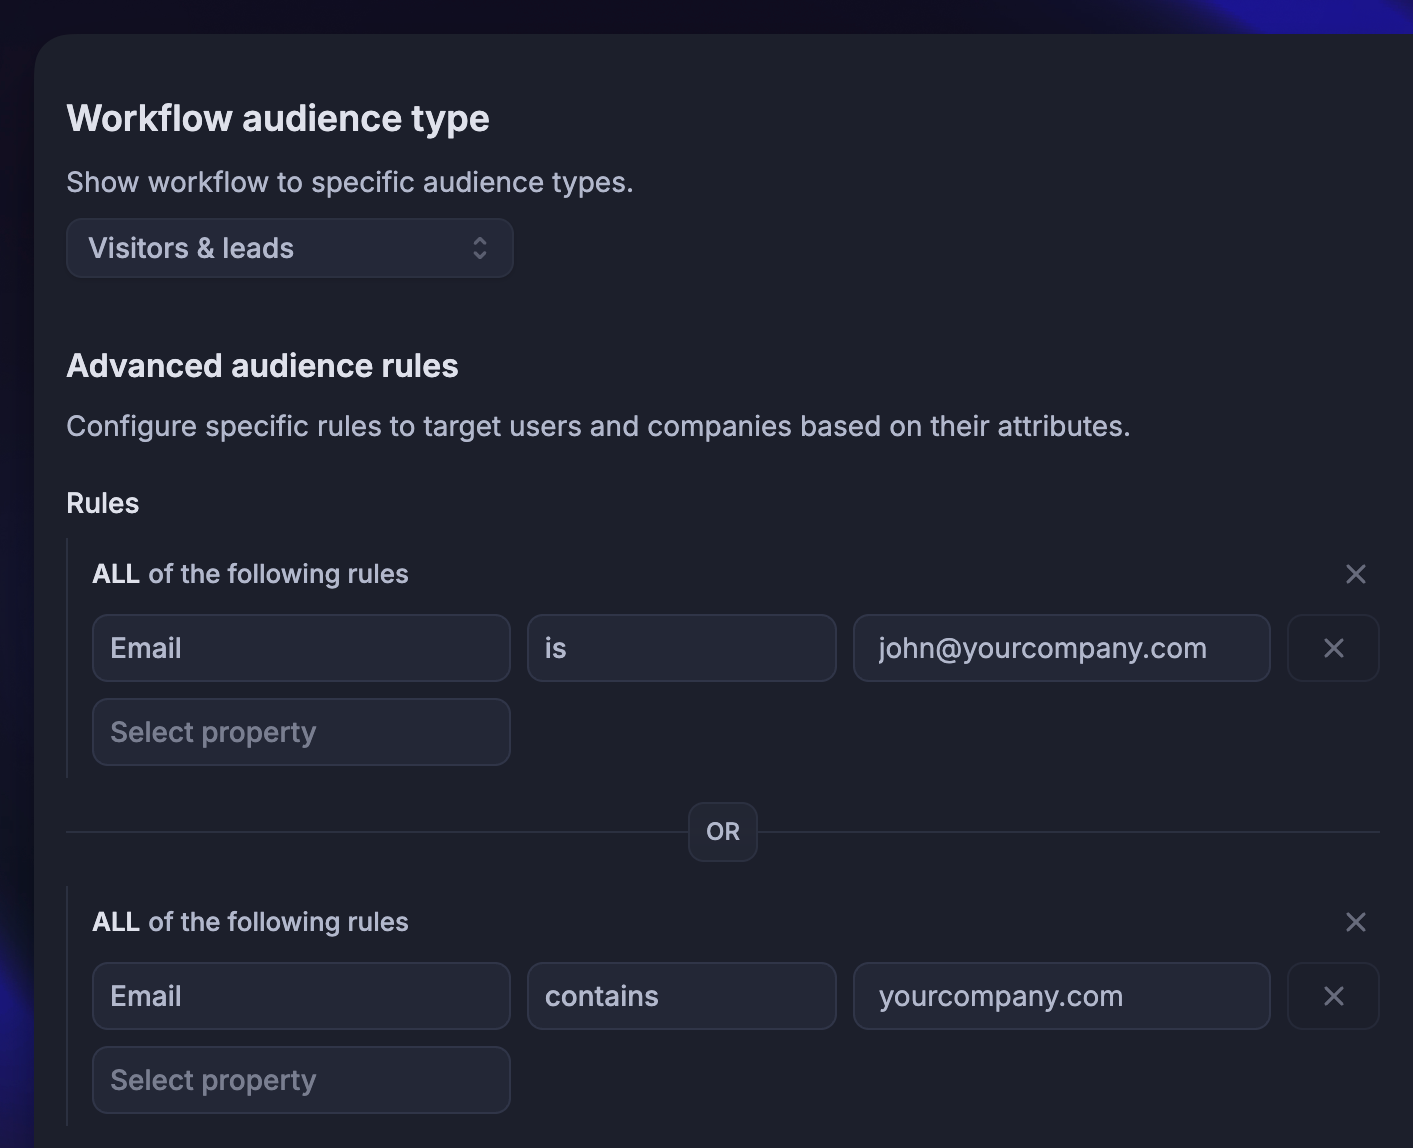
When adding Fibi to email Workflows, use the “Customer sends their first message” trigger. You can also add audience rules using email predicates (e.g. only when the email is
CcorBcc.We recommend creating separate workflows for Fibi over email.
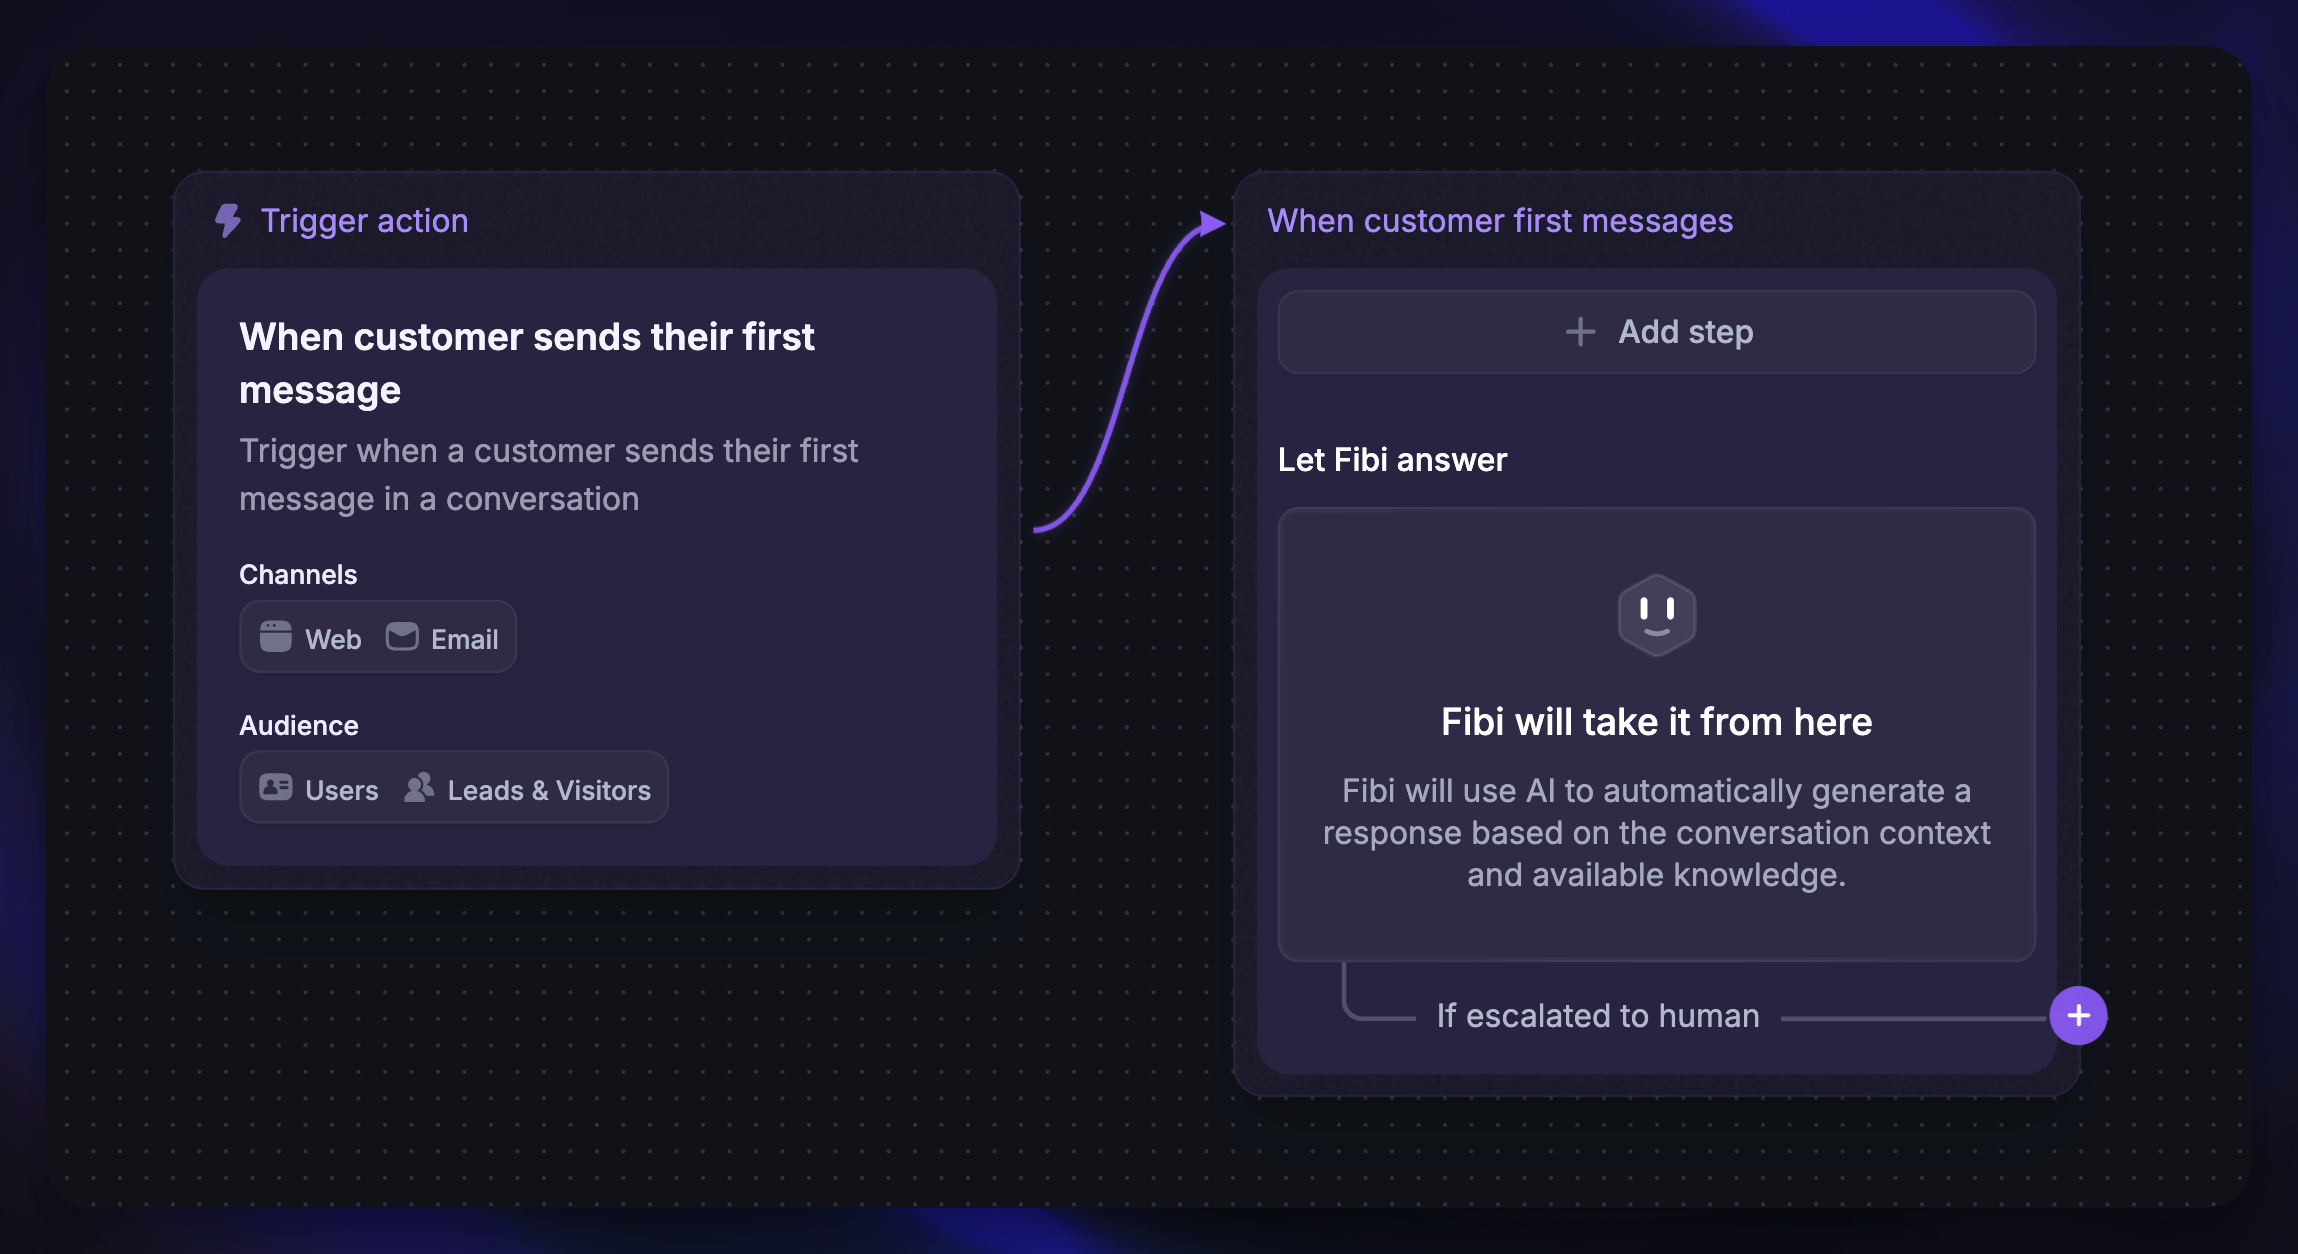
2. Add the “Let Fibi answer” step
Then add Fibi to your workflow by creating a path and selecting “Let Fibi answer”. This inserts a Let Fibi answer step, which can then be configured to control the behavior and handover.
This step will trigger an answer after a customer has sent a message in the conversation. If you’d like a ‘Reply button’ block to lead to a ‘Let Fibi answer’ step, add a ‘Message’ block that encourages the customer to ask a question.
Good to know: Fibi always respects your workspace office hours during handover.
3. Create different experiences for different audiences
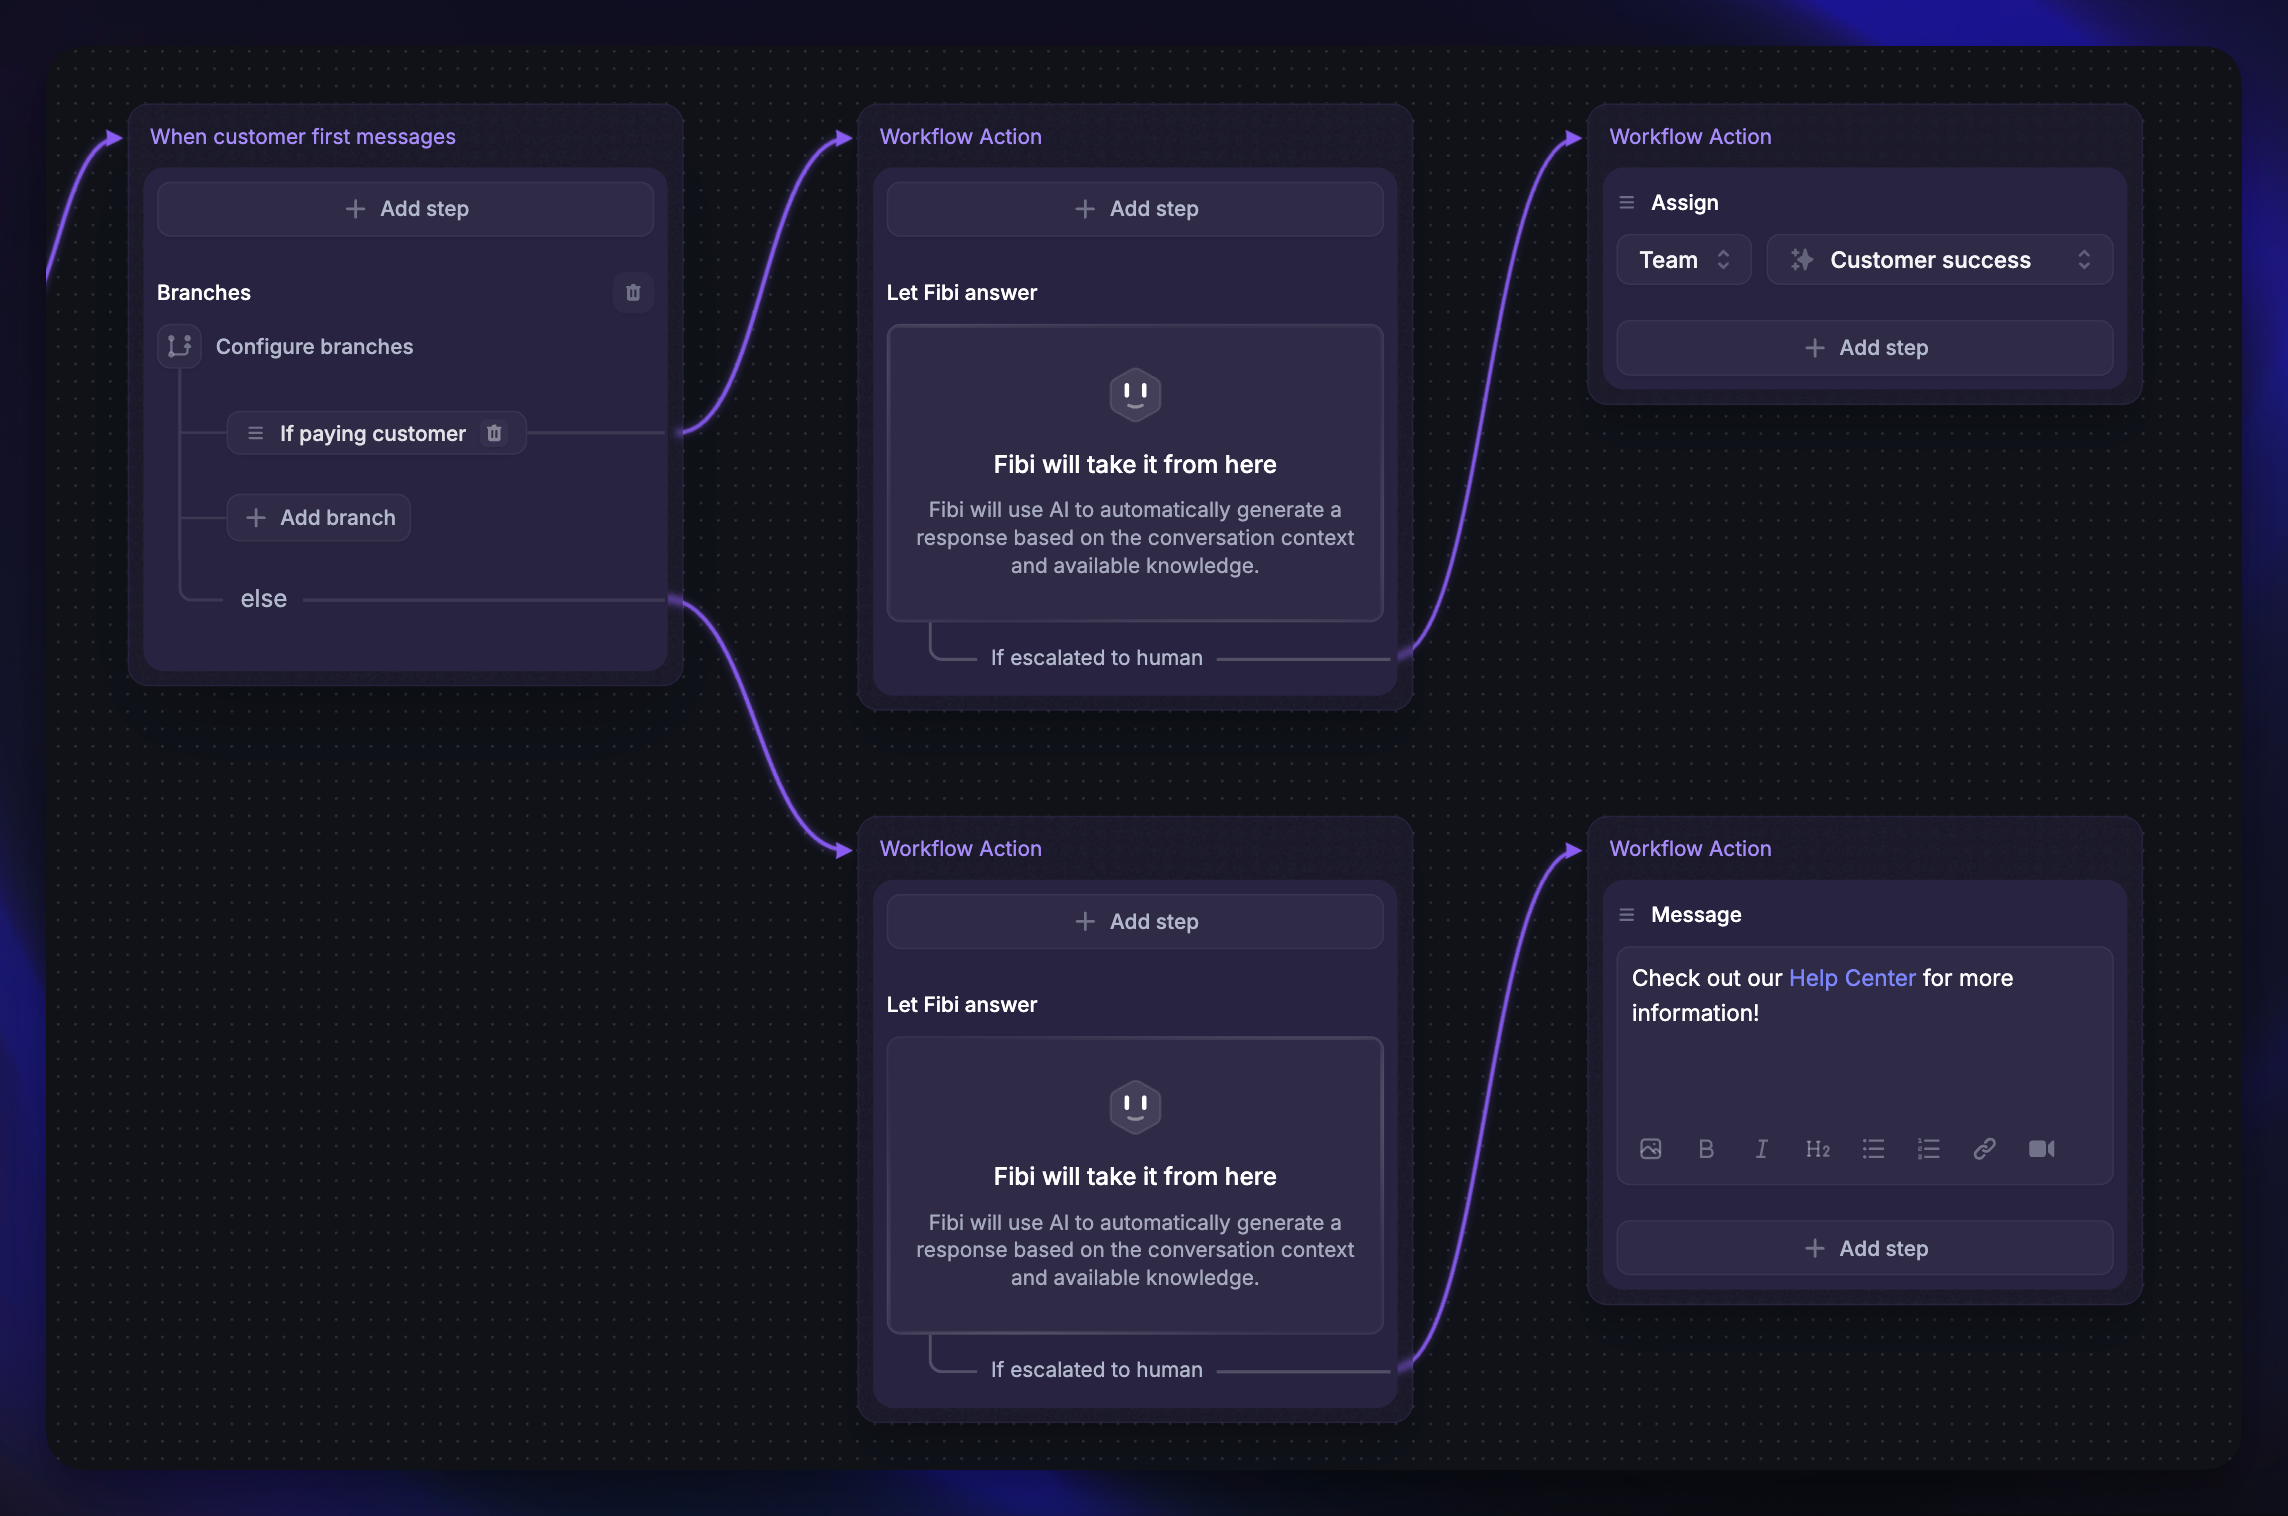
You can use Branches to give customers personalized experiences with Fibi.
For example:
Paying customers → If Fibi can’t answer, hand over to a teammate.
Free users or visitors → Redirect to your Help Center or self-service resources.
For email workflows, you can also use Email To, CC, or BCC rules to customize responses depending on which inbox the message was sent to.
4. Customize Fibi’s behavior, CSAT & auto-close settings
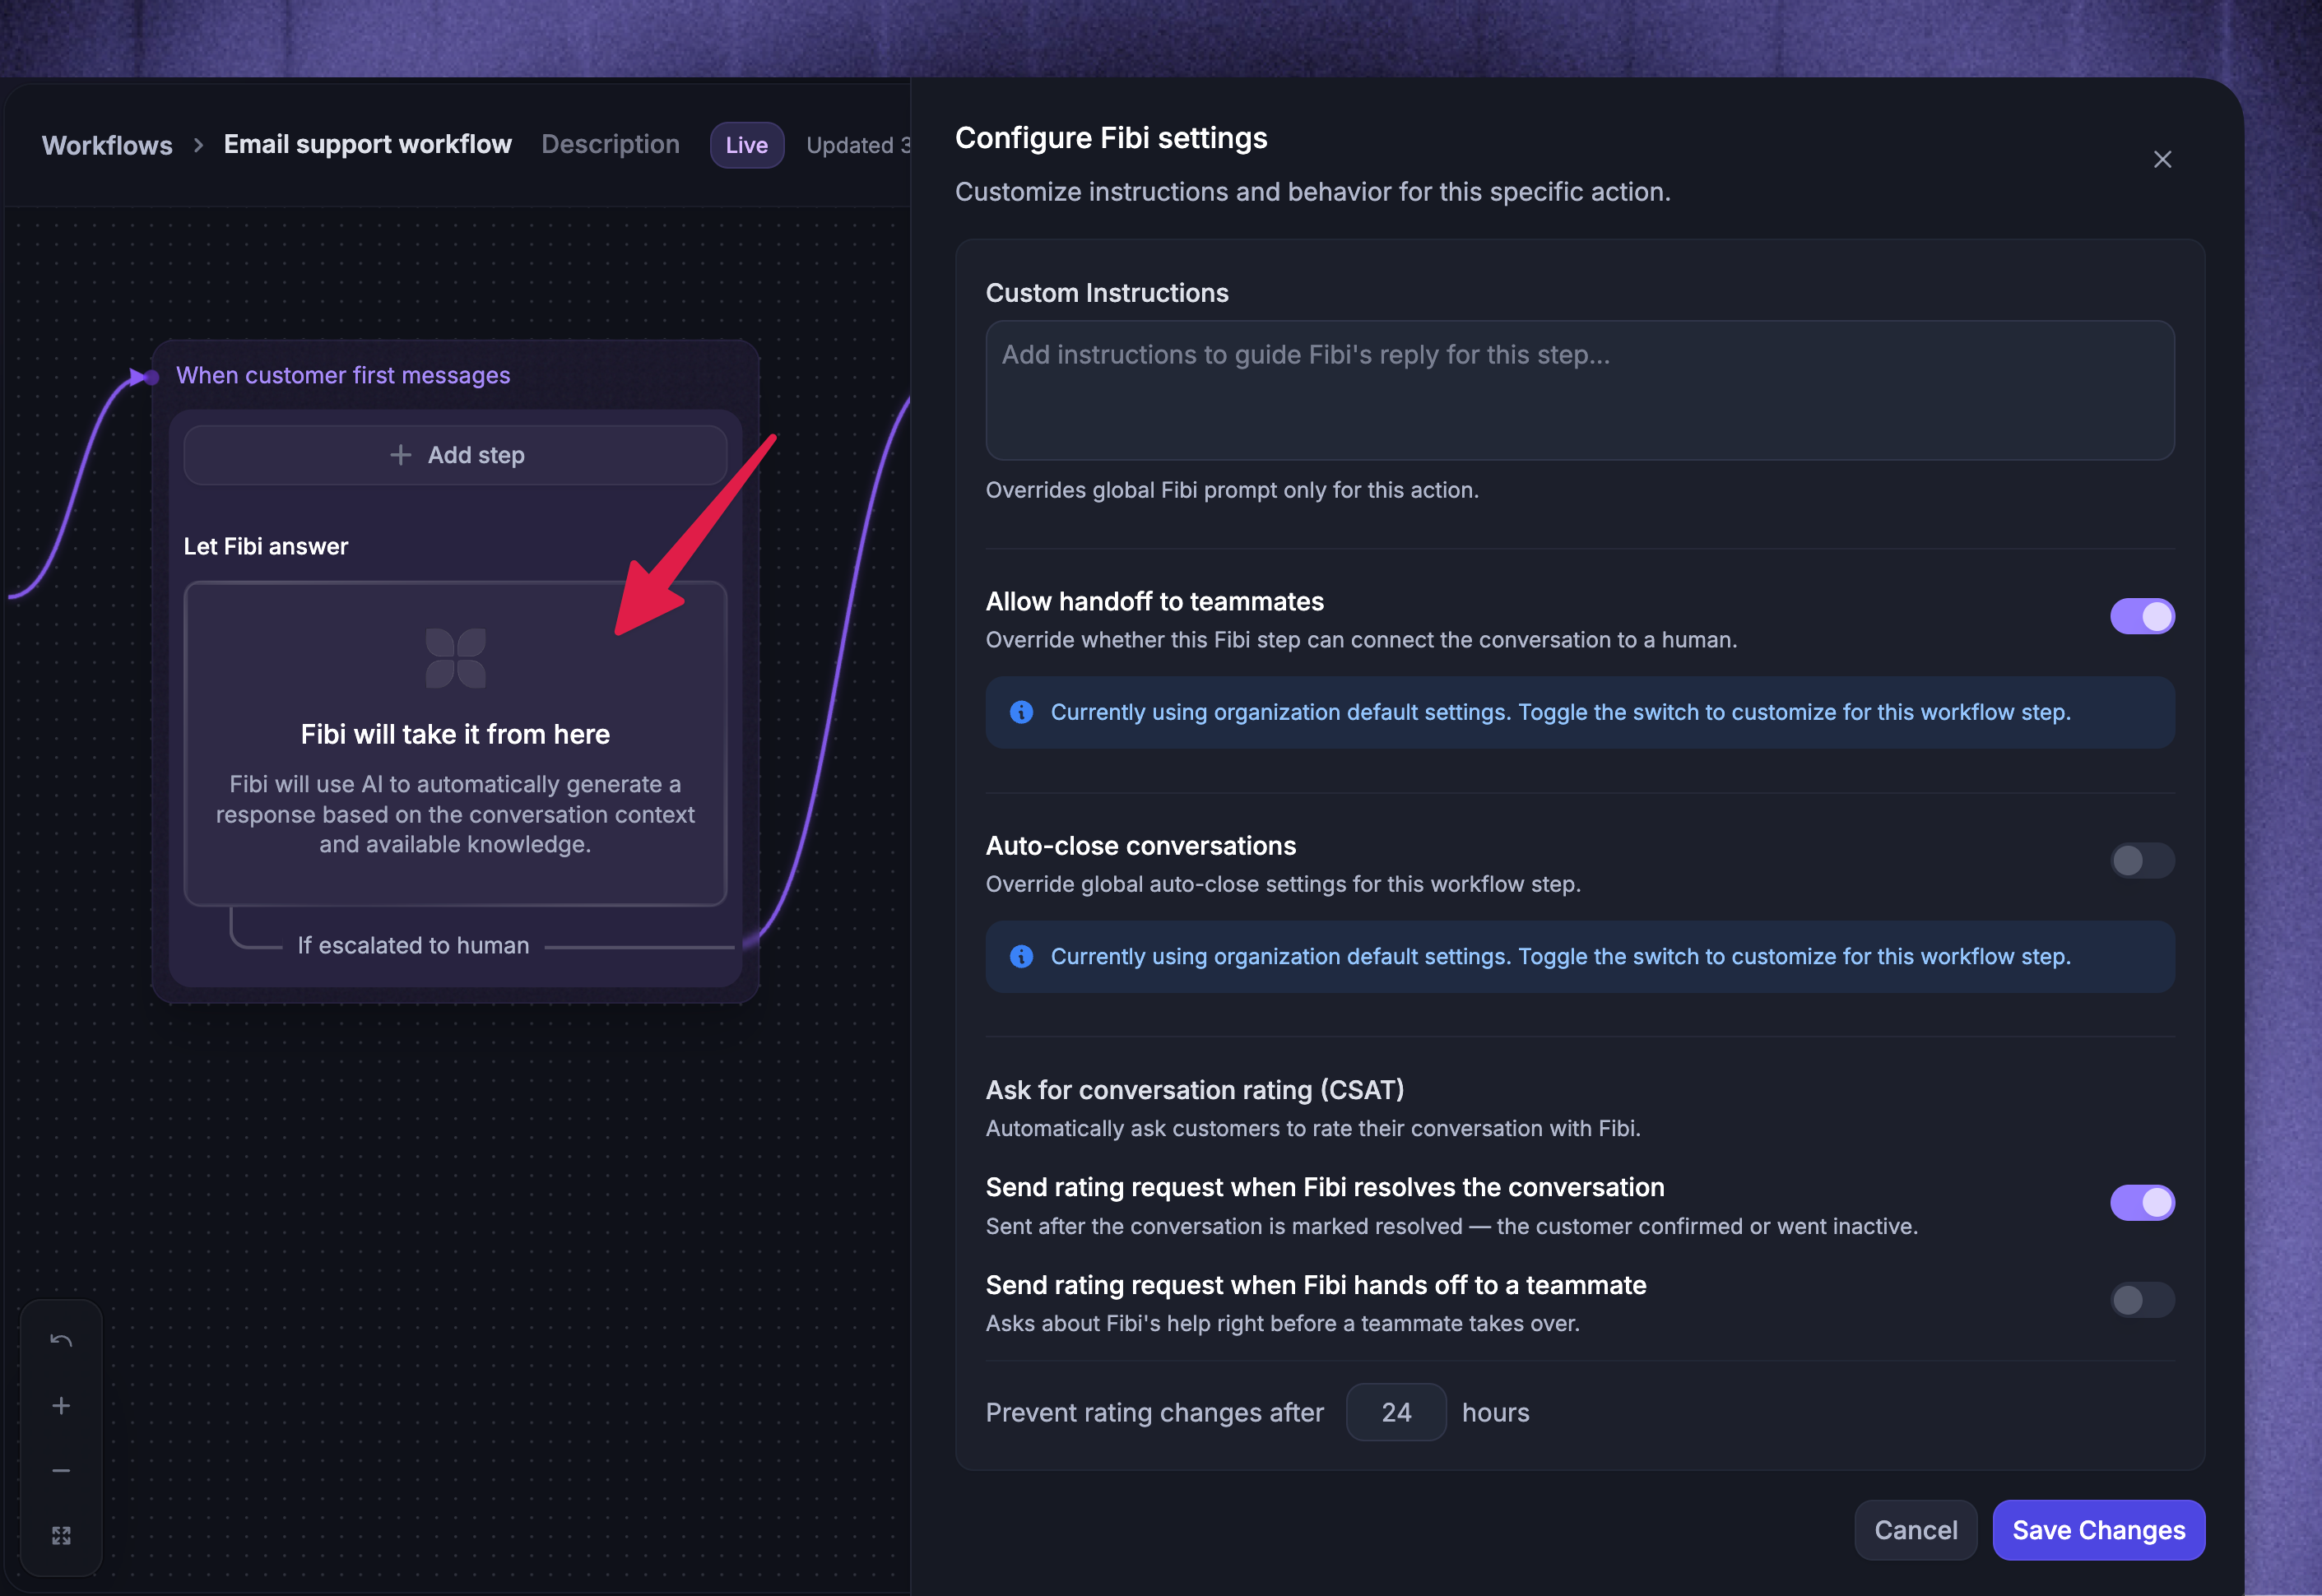
Click on the “Let Fibi answer” step to configure how Fibi should behave in your Workflow:
Custom instructions: Add any custom instructions how Fibi should behave or answer to customers
For example, you can prompt Fibi to gather additional context before passing a conversation to your team. This helps make the transition as smooth as possible and can save teammates' time and effort when picking up the conversation.
Conversation rating (CSAT): Choose when Fibi asks for a rating – after it resolves the conversation, before it hands the conversation to a teammate, or in both situations.
Auto-close settings: Override the global Fibi auto-close settings for that Workflow step.
For example, you can leave the conversations in specific workflows open for longer than usual, so your team can fact-check the answers or hop in to clarify.
Test a Fibi workflow
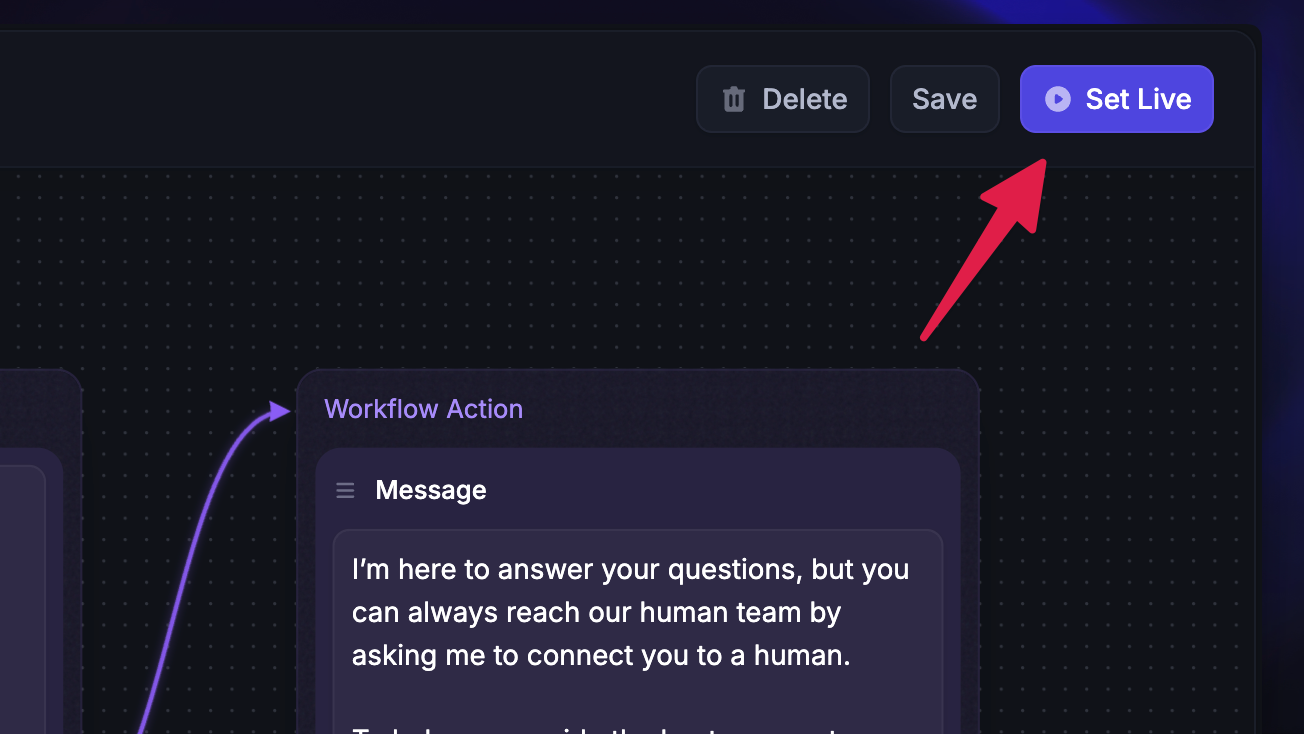
Once you’re happy with the Workflow, you can test it:
Only target yourself or teammates from the Trigger settings by email
Save your Workflow and Set it Live from the top right
You can then test the Fibi experience in several ways:
From any website with the Messenger installed
By sending an email to your support address configured in Settings → Emails
Fibi must be live, and Messenger must be installed to preview website interactions.