Set up & customize the Messenger
Your one-stop guide to customizing, previewing, and managing the next generation Messenger.
Written By Markus from Featurebase
Last updated 13 days ago
Overview
Featurebase’s Messenger is one of the most customizable live chat widgets in the market. It supports custom themes and offers tons of other options to fit right into your brand. This is your one-stop guide to setting up and customizing your Messenger.
Terminology:
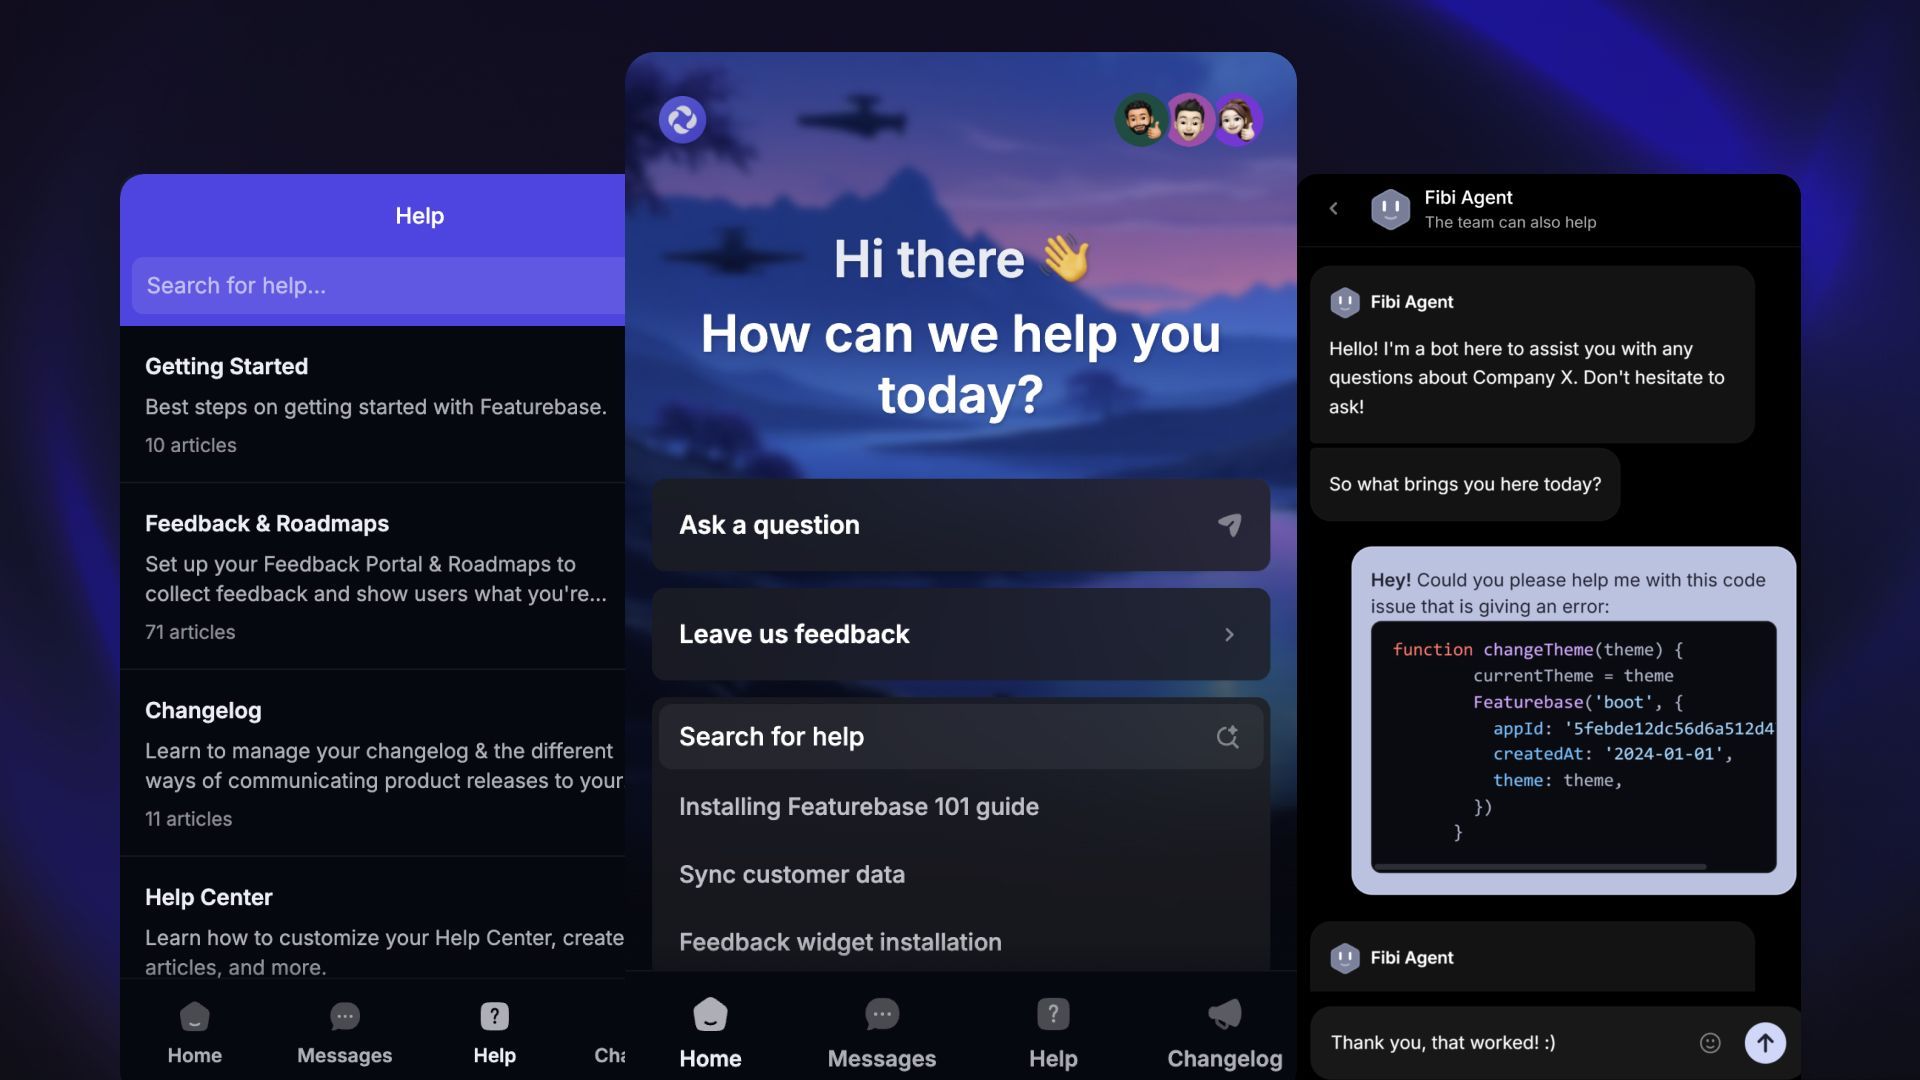
Messenger Home – the Home tab, which opens when customers click the Messenger Launcher for the first time.
Modules – modules are the parts of Featurebase (like Help Center, Updates, and Feedback portal), which you can have as separate tabs in the Messenger.
Messenger Launcher – the live chat bubble/circle (as you see at the bottom right of your screen now).
✨ Want to match your brand perfectly? You can remove the “Powered by Featurebase” tag from widgets and portals with a $69/mo add-on. Learn more →
Installing the Messenger
To use Messenger, you must first install it on your website or web app. This should take around 10 minutes to set up for an engineer. If you're uncomfortable with this, share this guide with a technical team member who can assist.
Learn more and get started here: Messenger Installation
Main content & layout settings
Set your welcome message, customize home cards, and select which modules should be visible in your Messenger widget from Settings → Support → Messenger → Customization.
Configuring modules
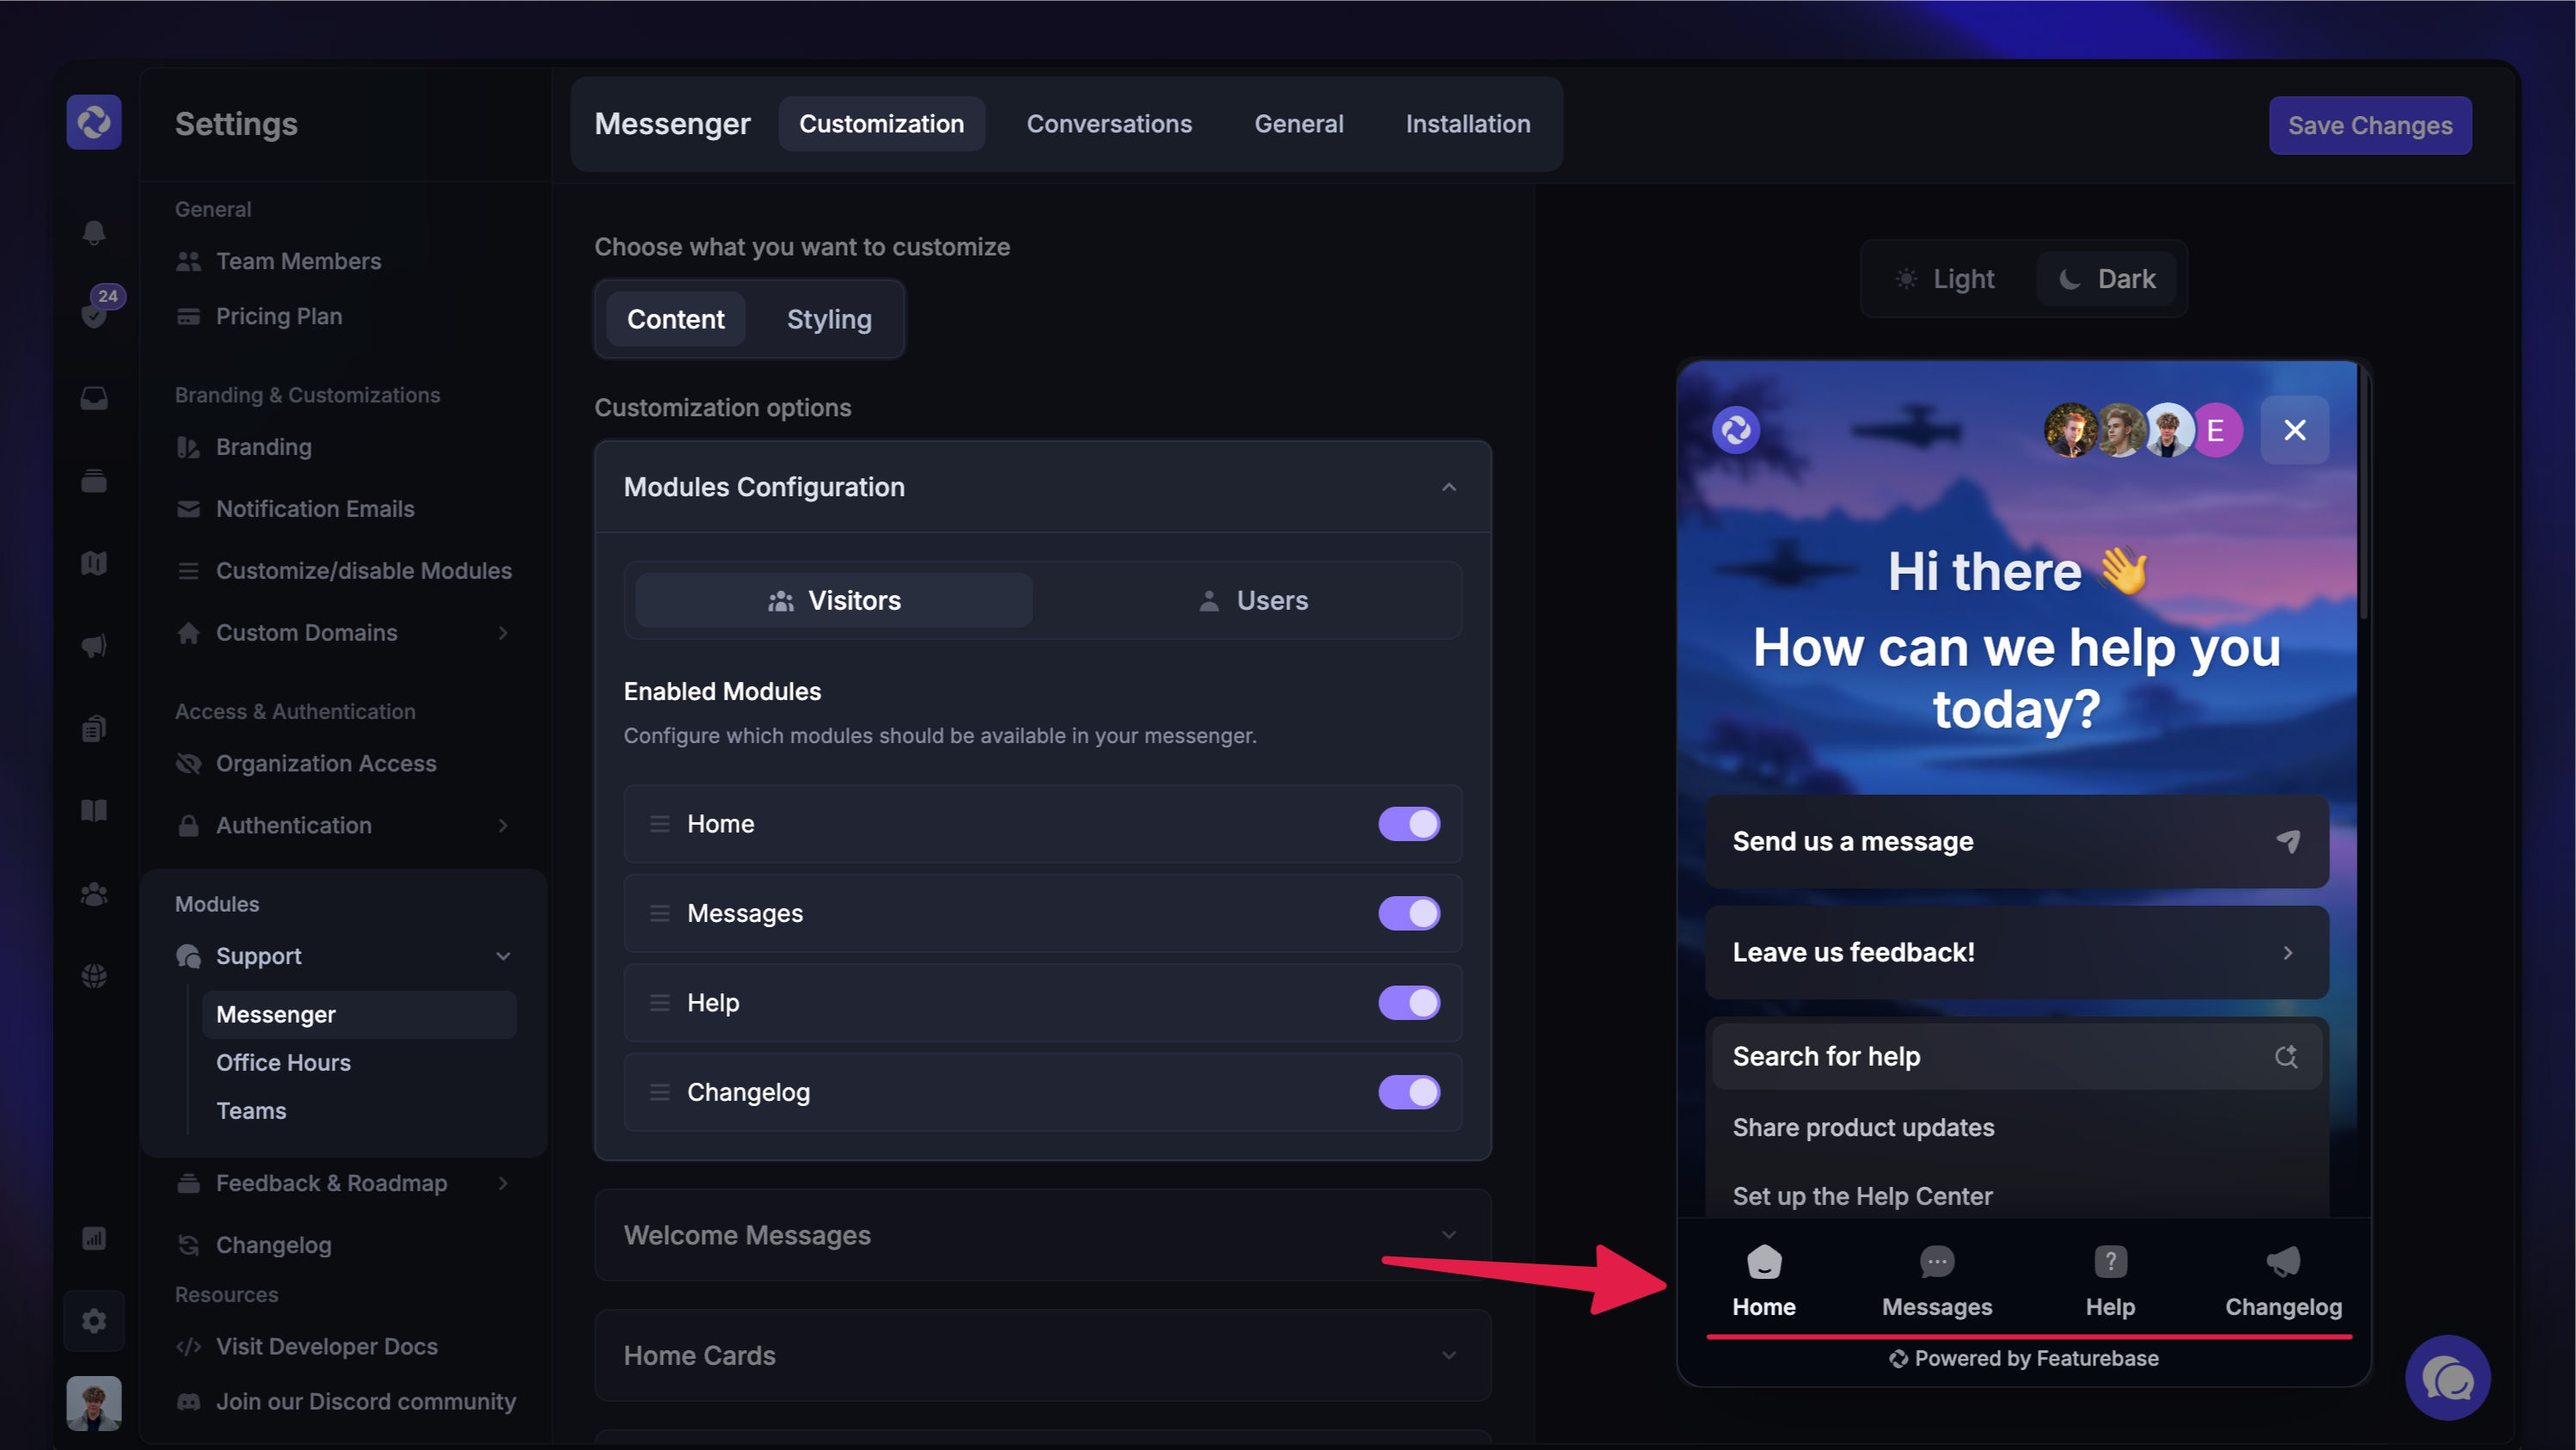
Select which modules you want to show your customers in the Messenger by turning them on or off:
Home – A welcome page that you can make your own by deciding exactly what you want to display to your customers.
Messages – A space for conversation management, where customers can find and start all their conversations in one place
Help – A space for customers to access your full Help Center from anywhere in your product
Updates – A space for your Updates to post any news and release notes
Tip: You can reorder how the modules appear by using the drag & drop on the left.
Set your welcome message
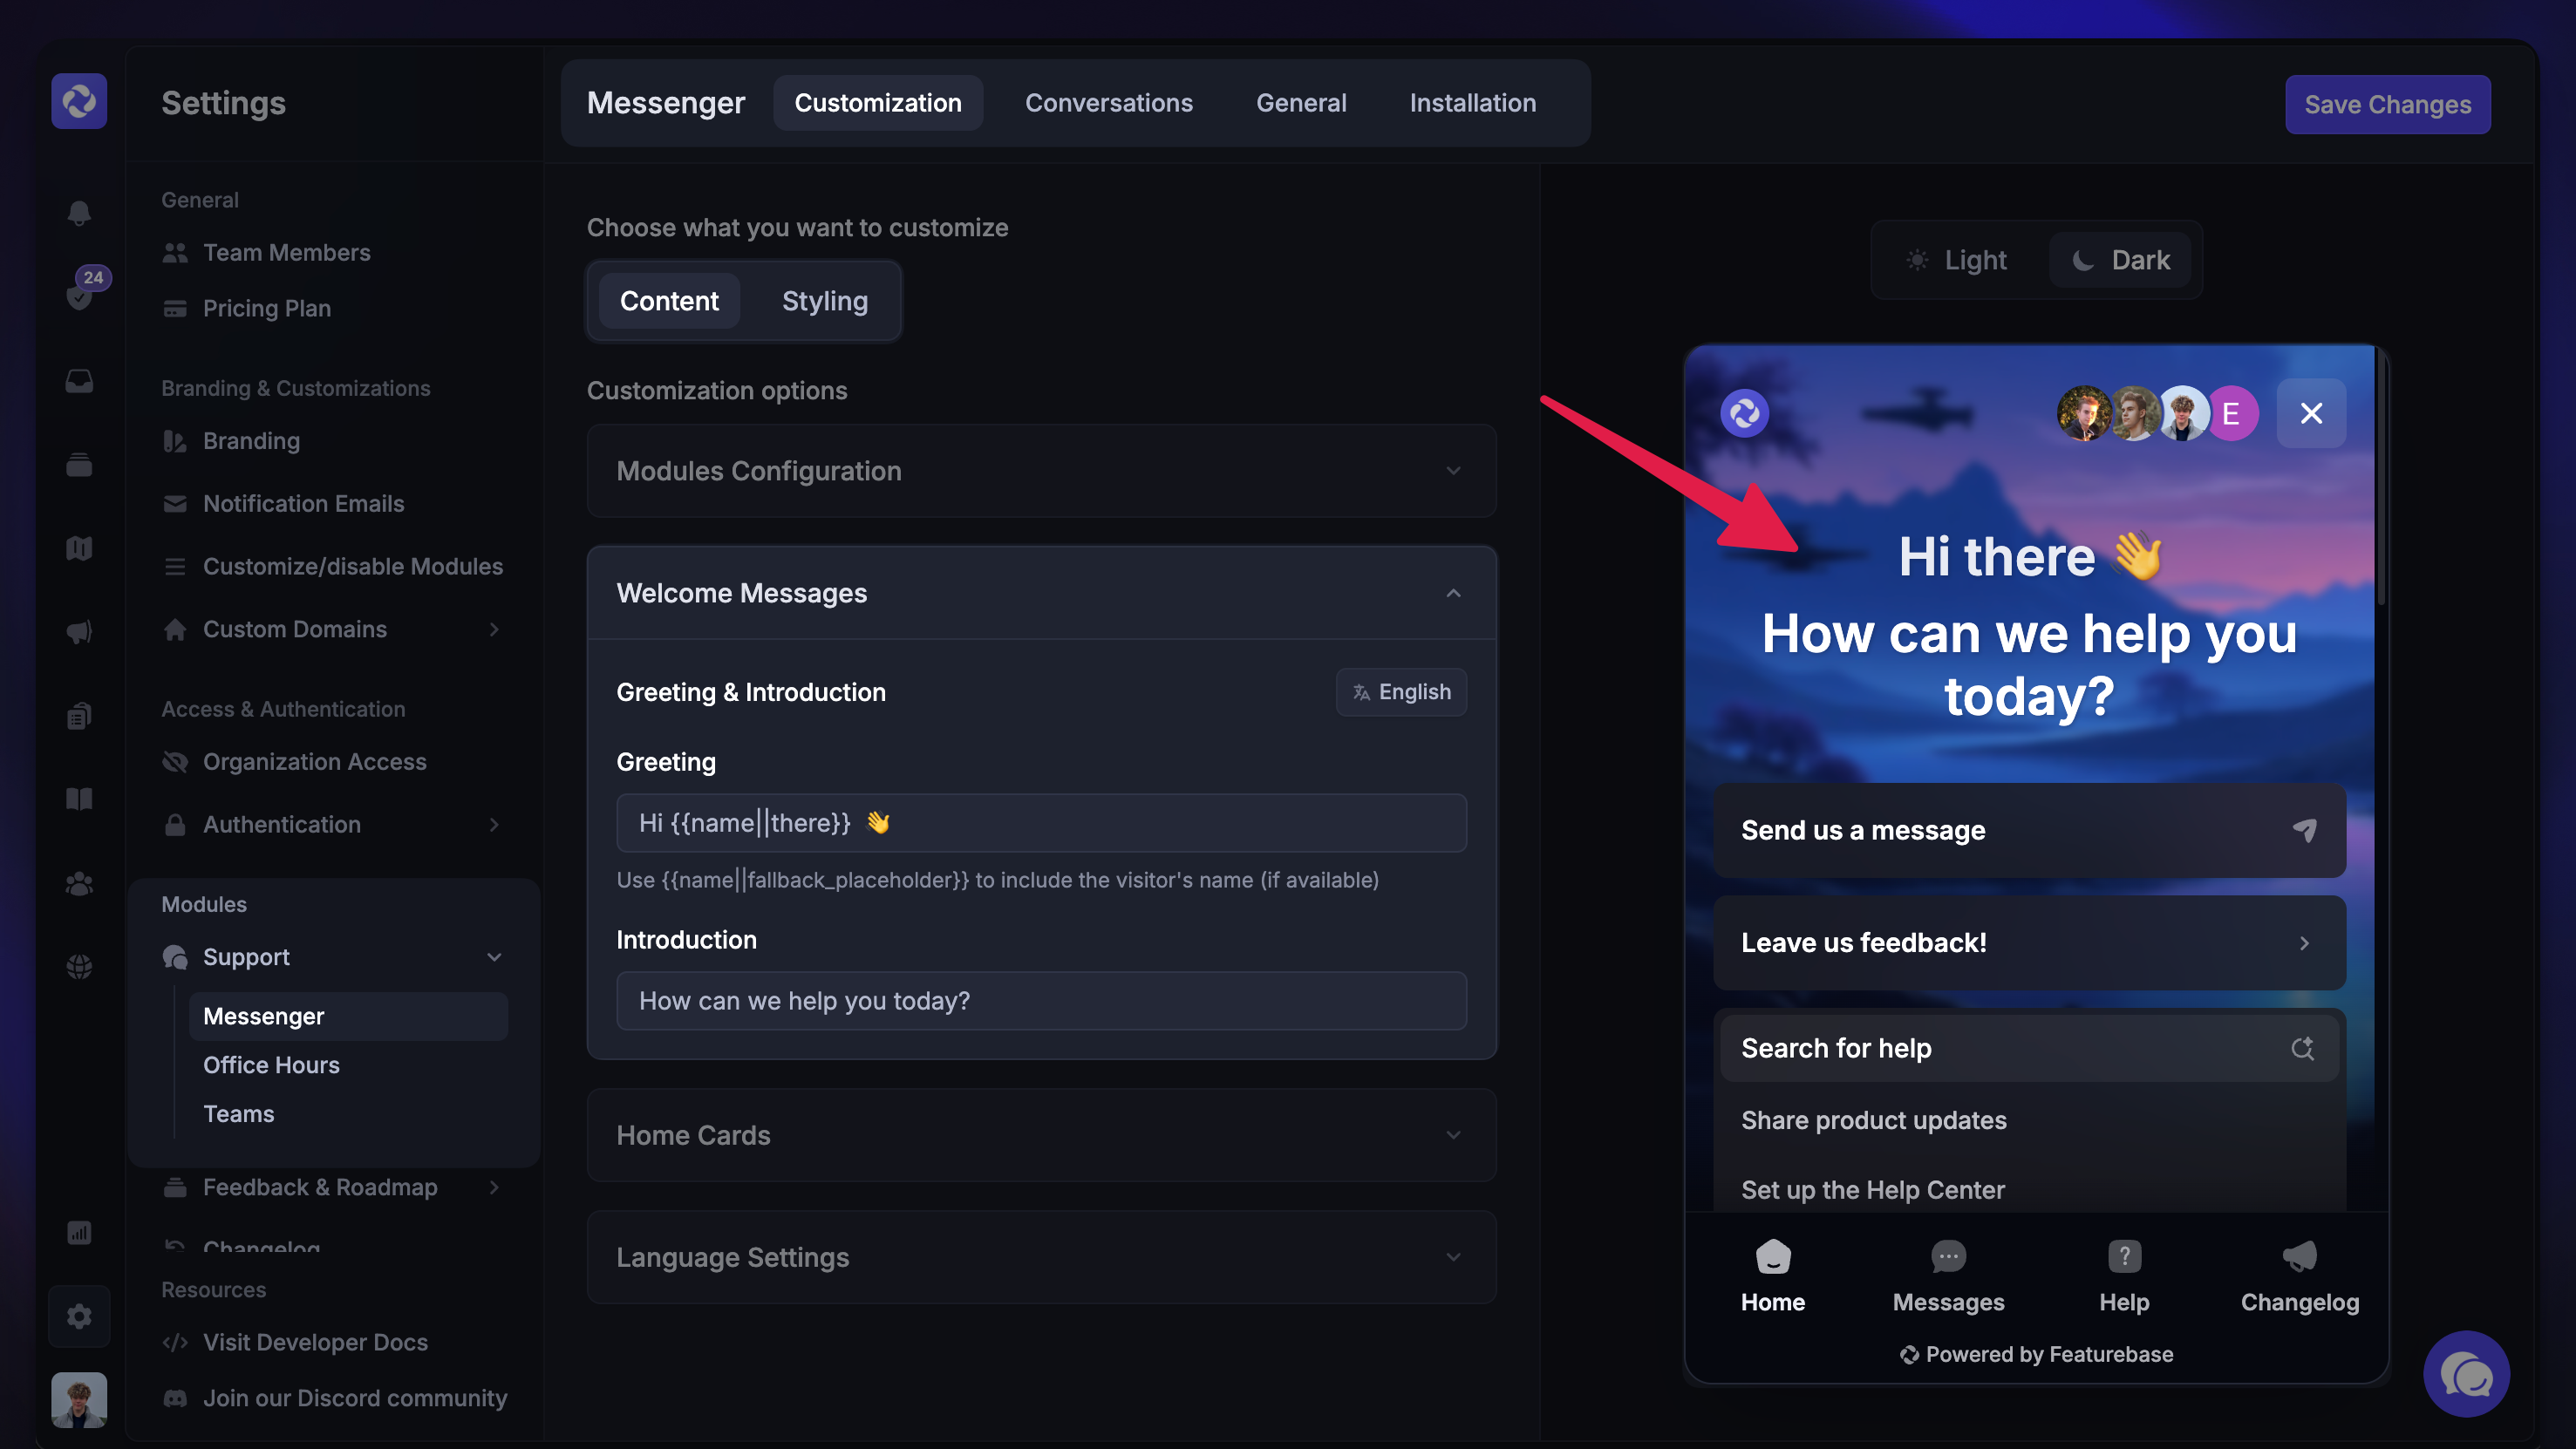
You can choose how you’d like to greet people and introduce yourself when they open the Messenger. This can be configured to support over 40 different languages.
Customize home cards
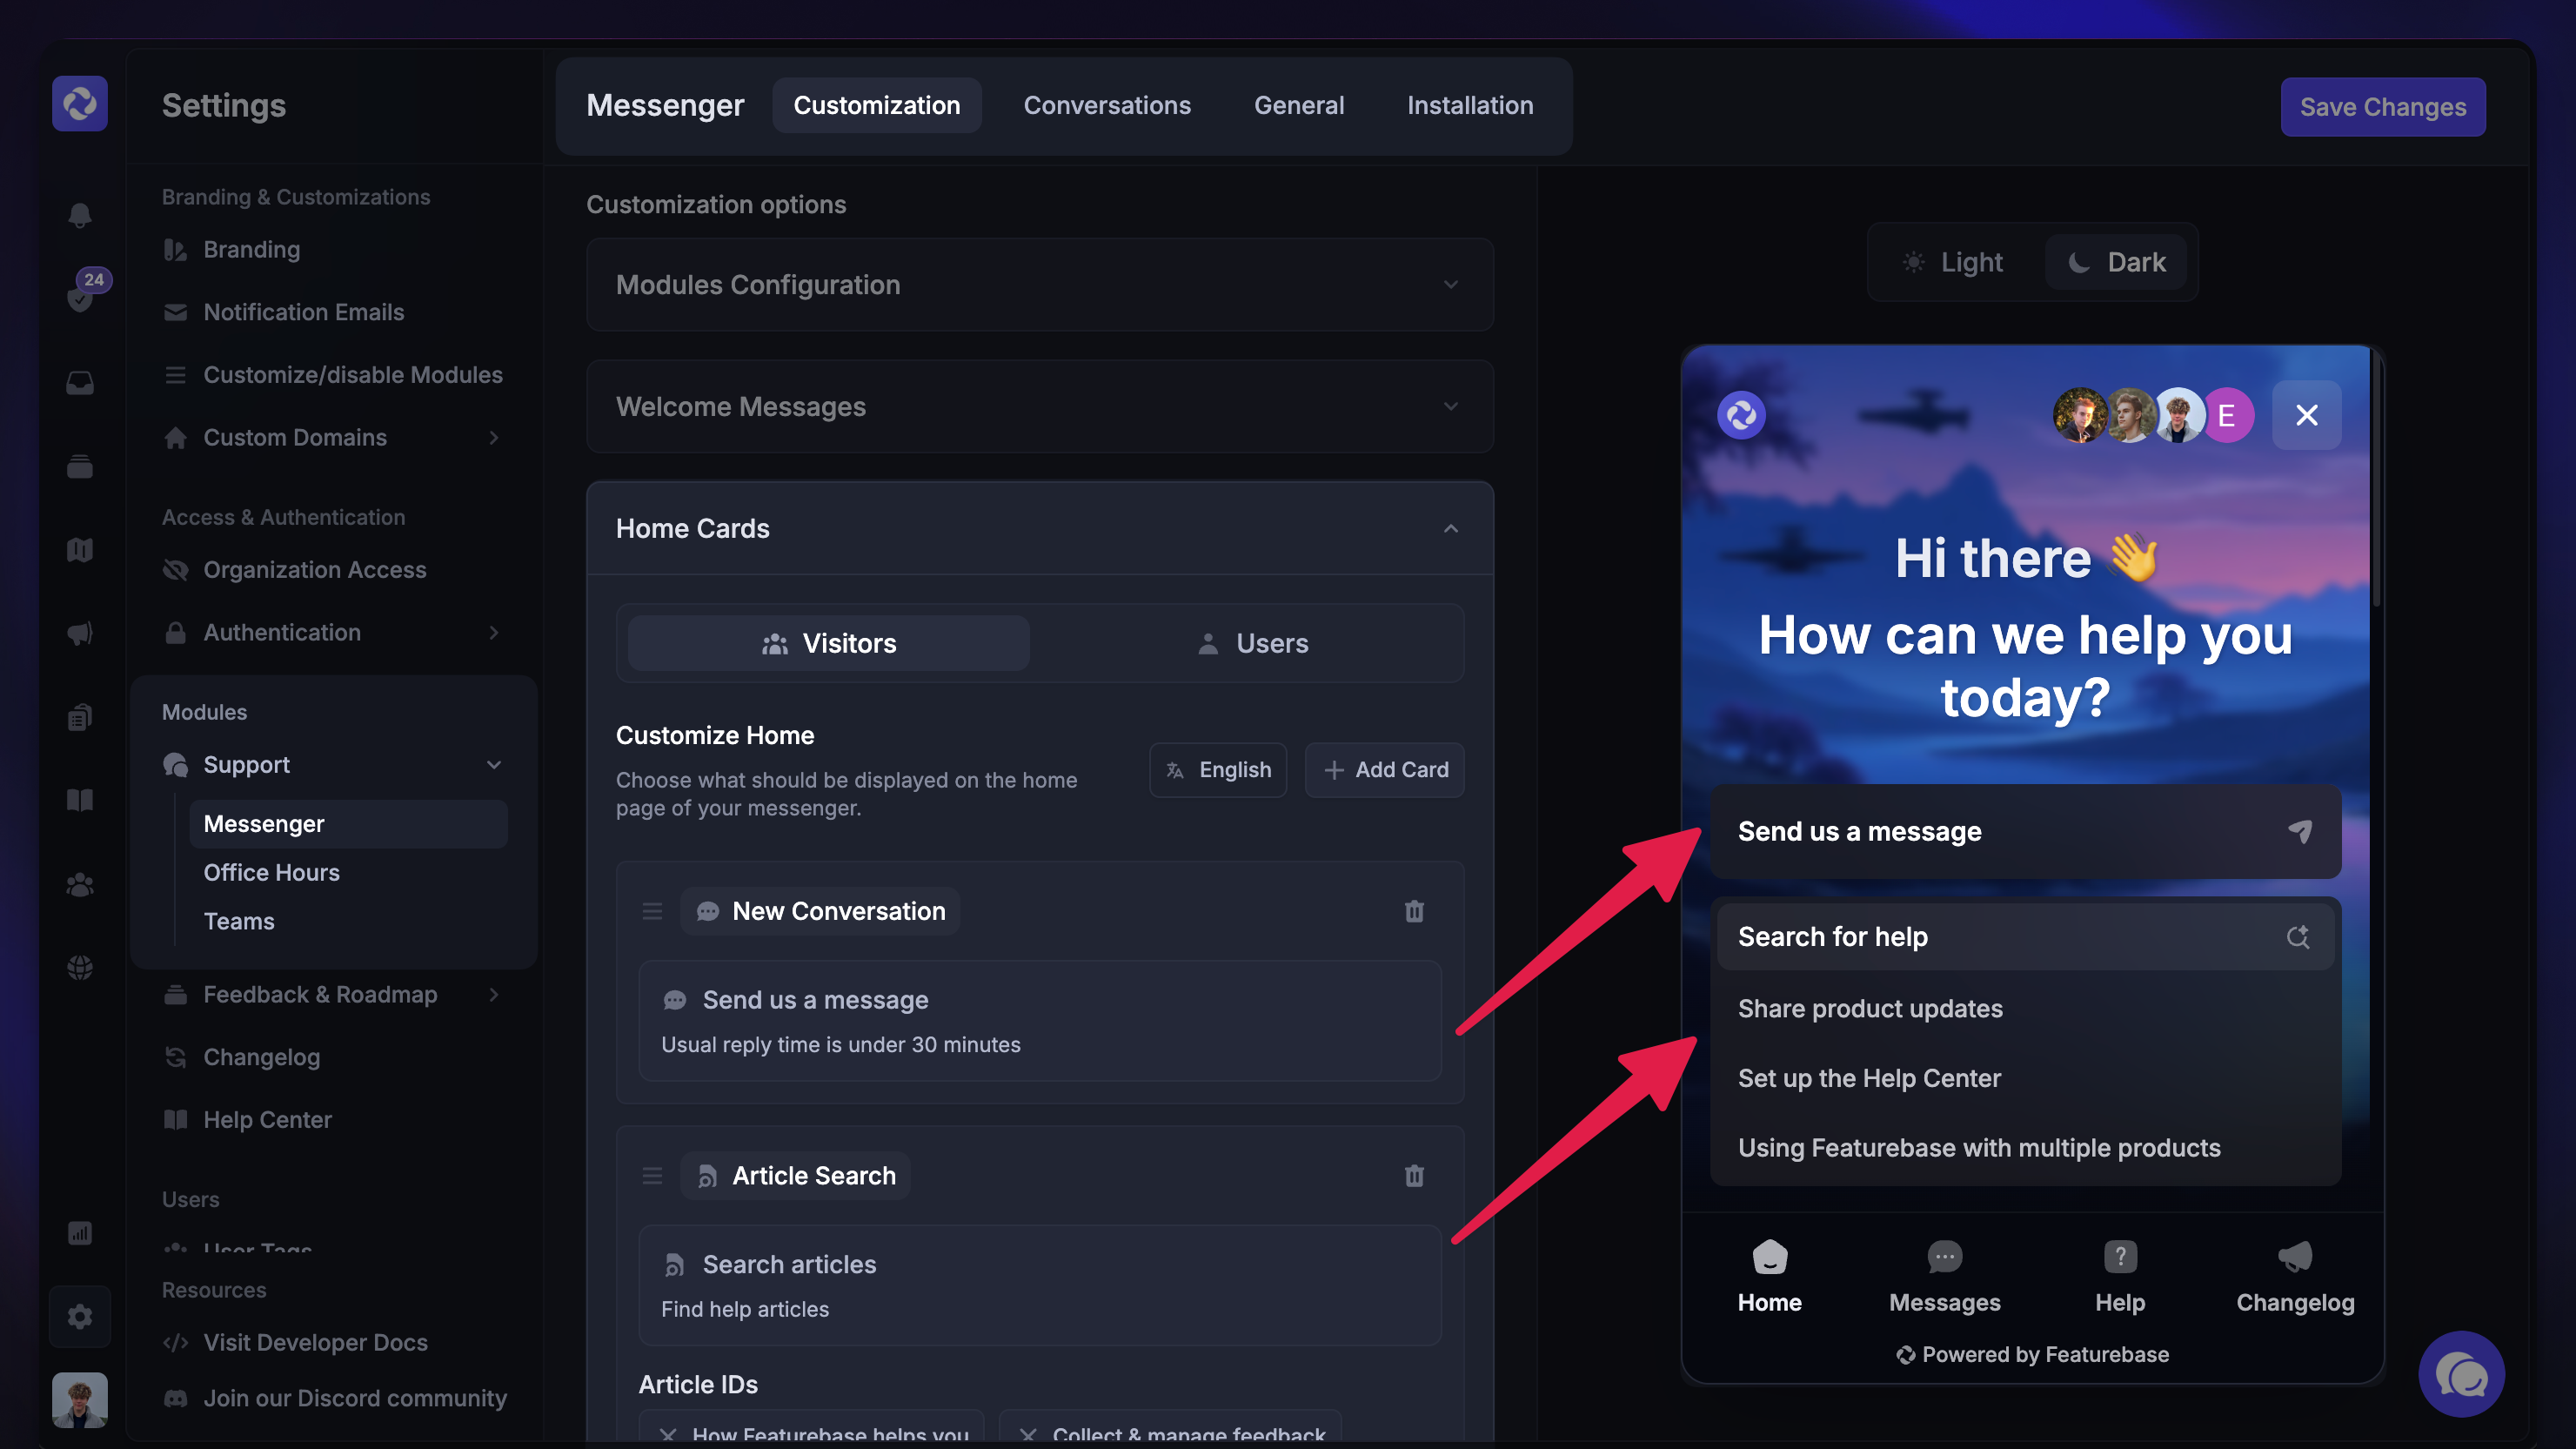
Customize the Messenger Home by adding and removing cards. Choose whether customers can start a conversation with you, search for articles in your Help Center, see featured news announcements, or click on external-linking cards.
Supporting multiple languages
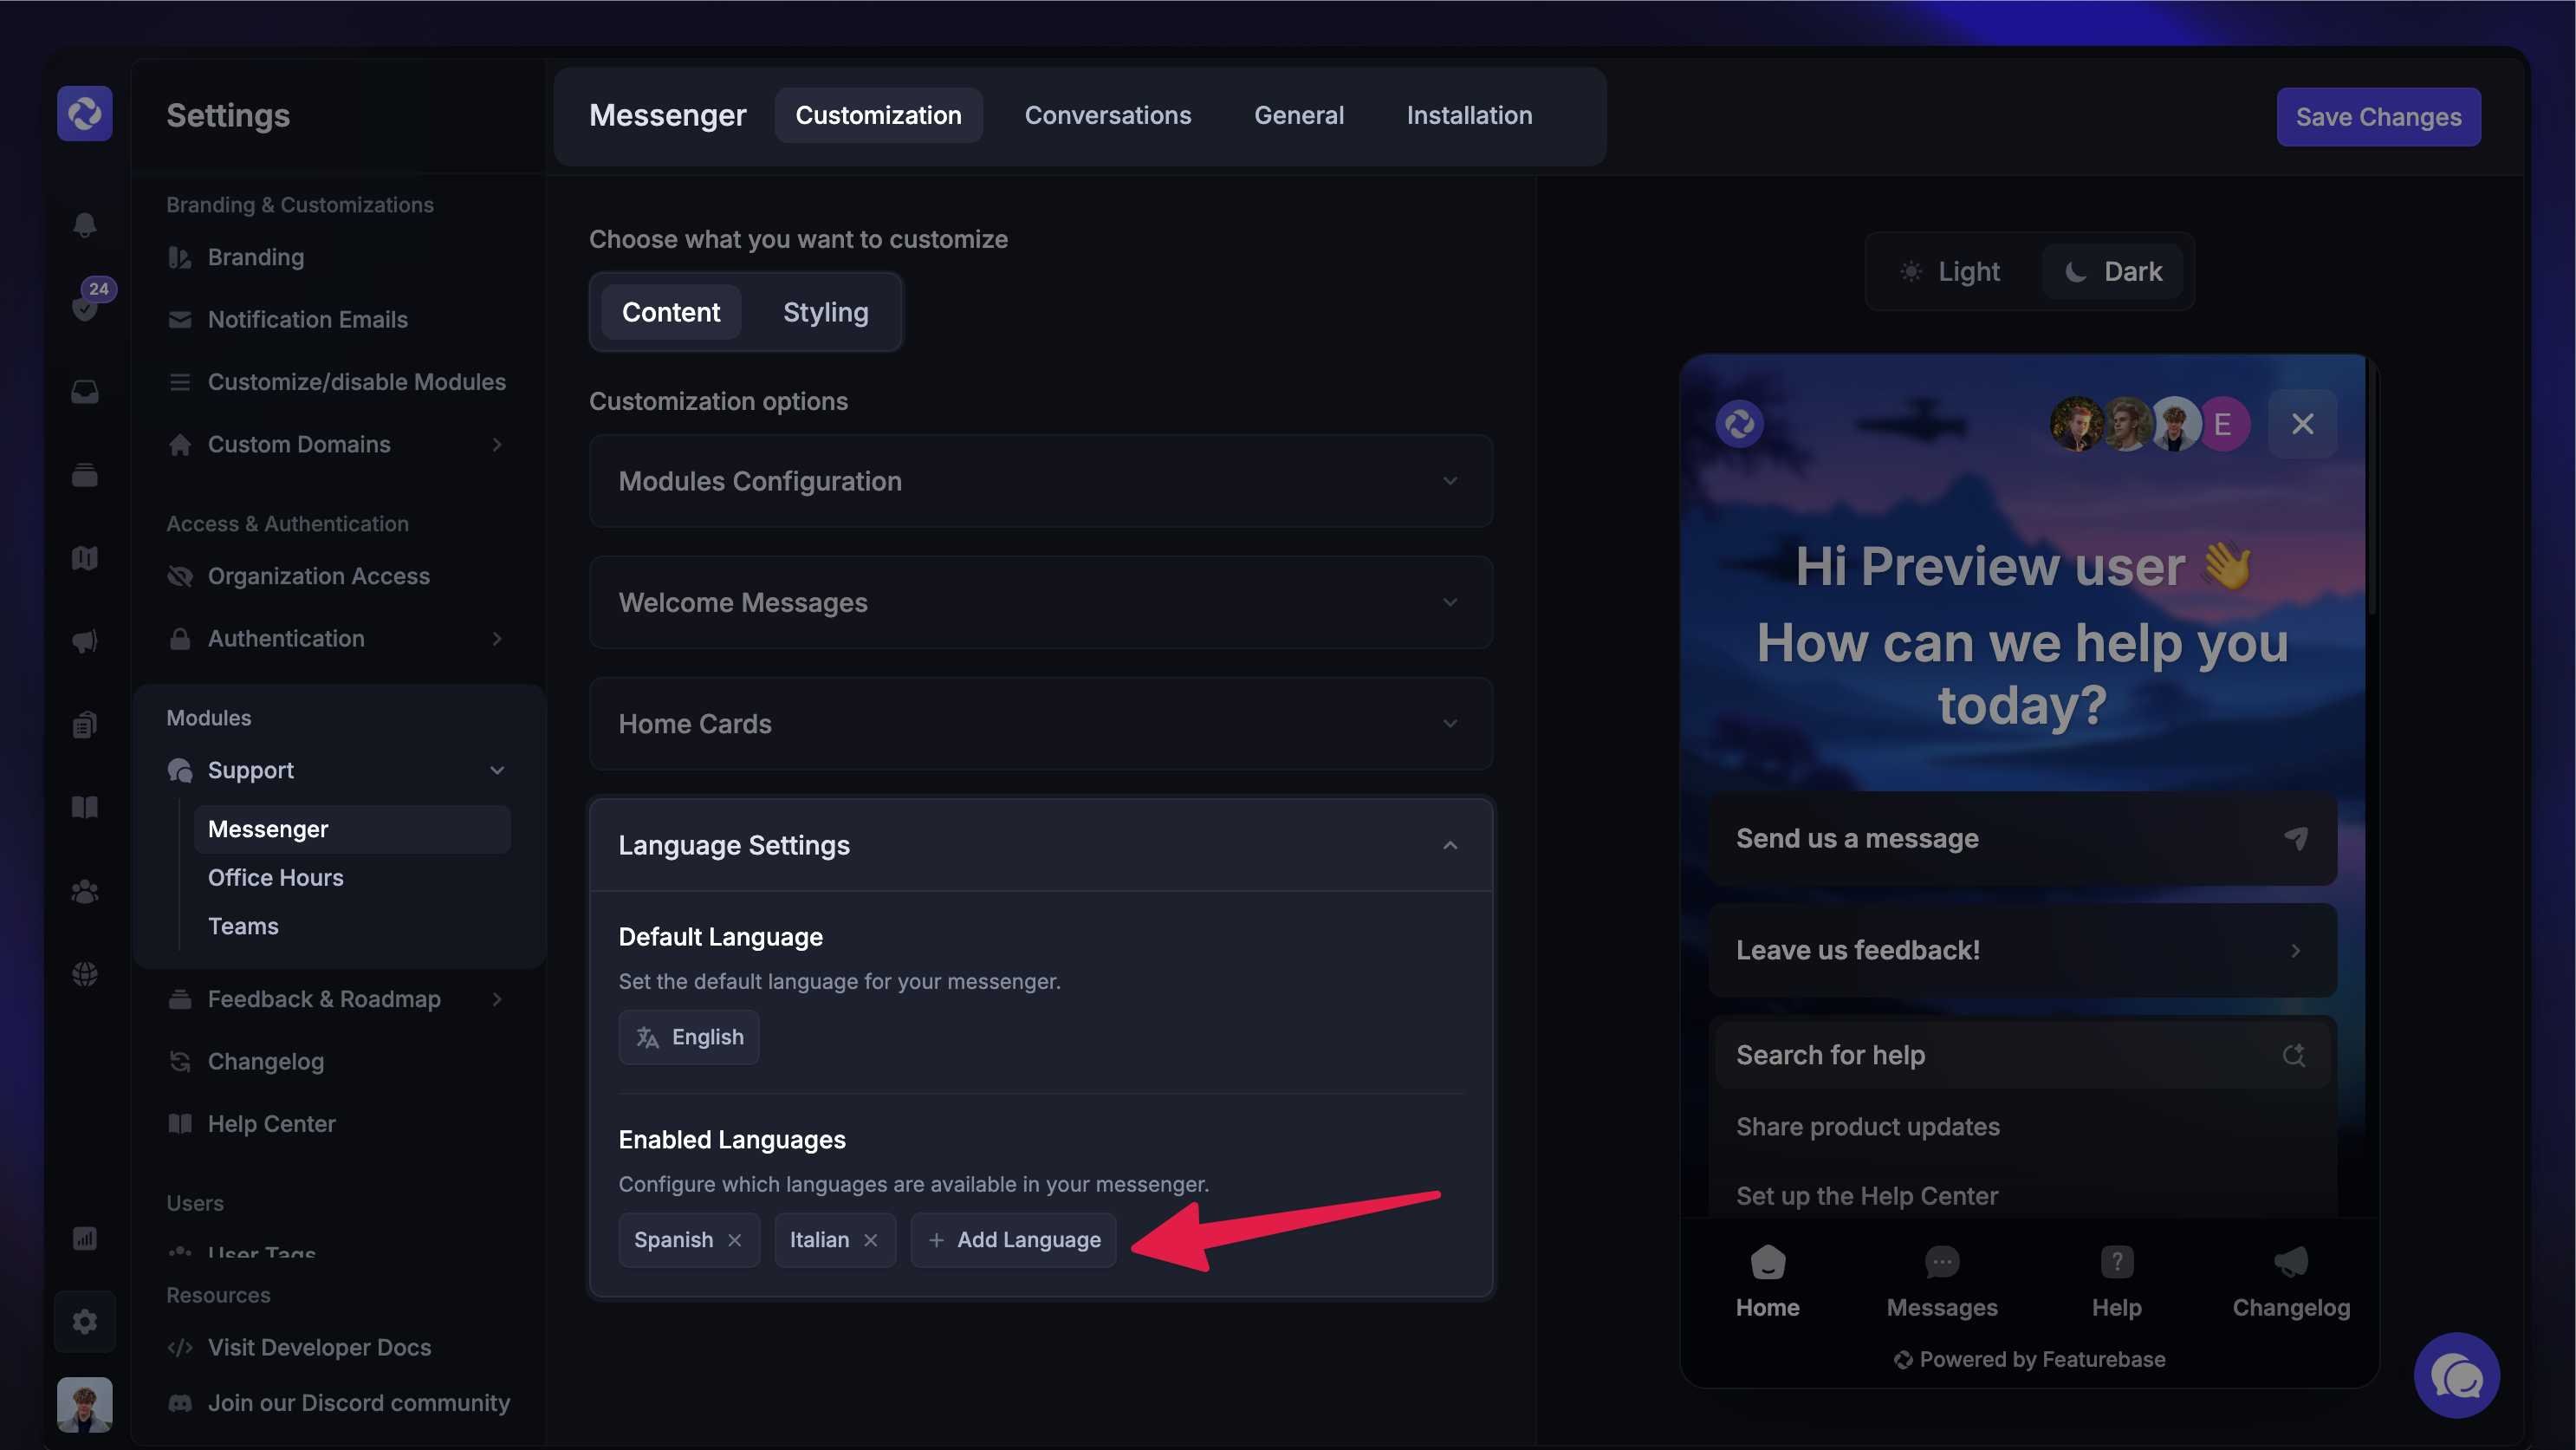
You can set up your Messenger to support multiple languages. It will automatically default to users’ language based on their browser’s language settings. If you don't enable their language, the portal will localize to the default language you've chosen.
Customizing where the Messenger is shown
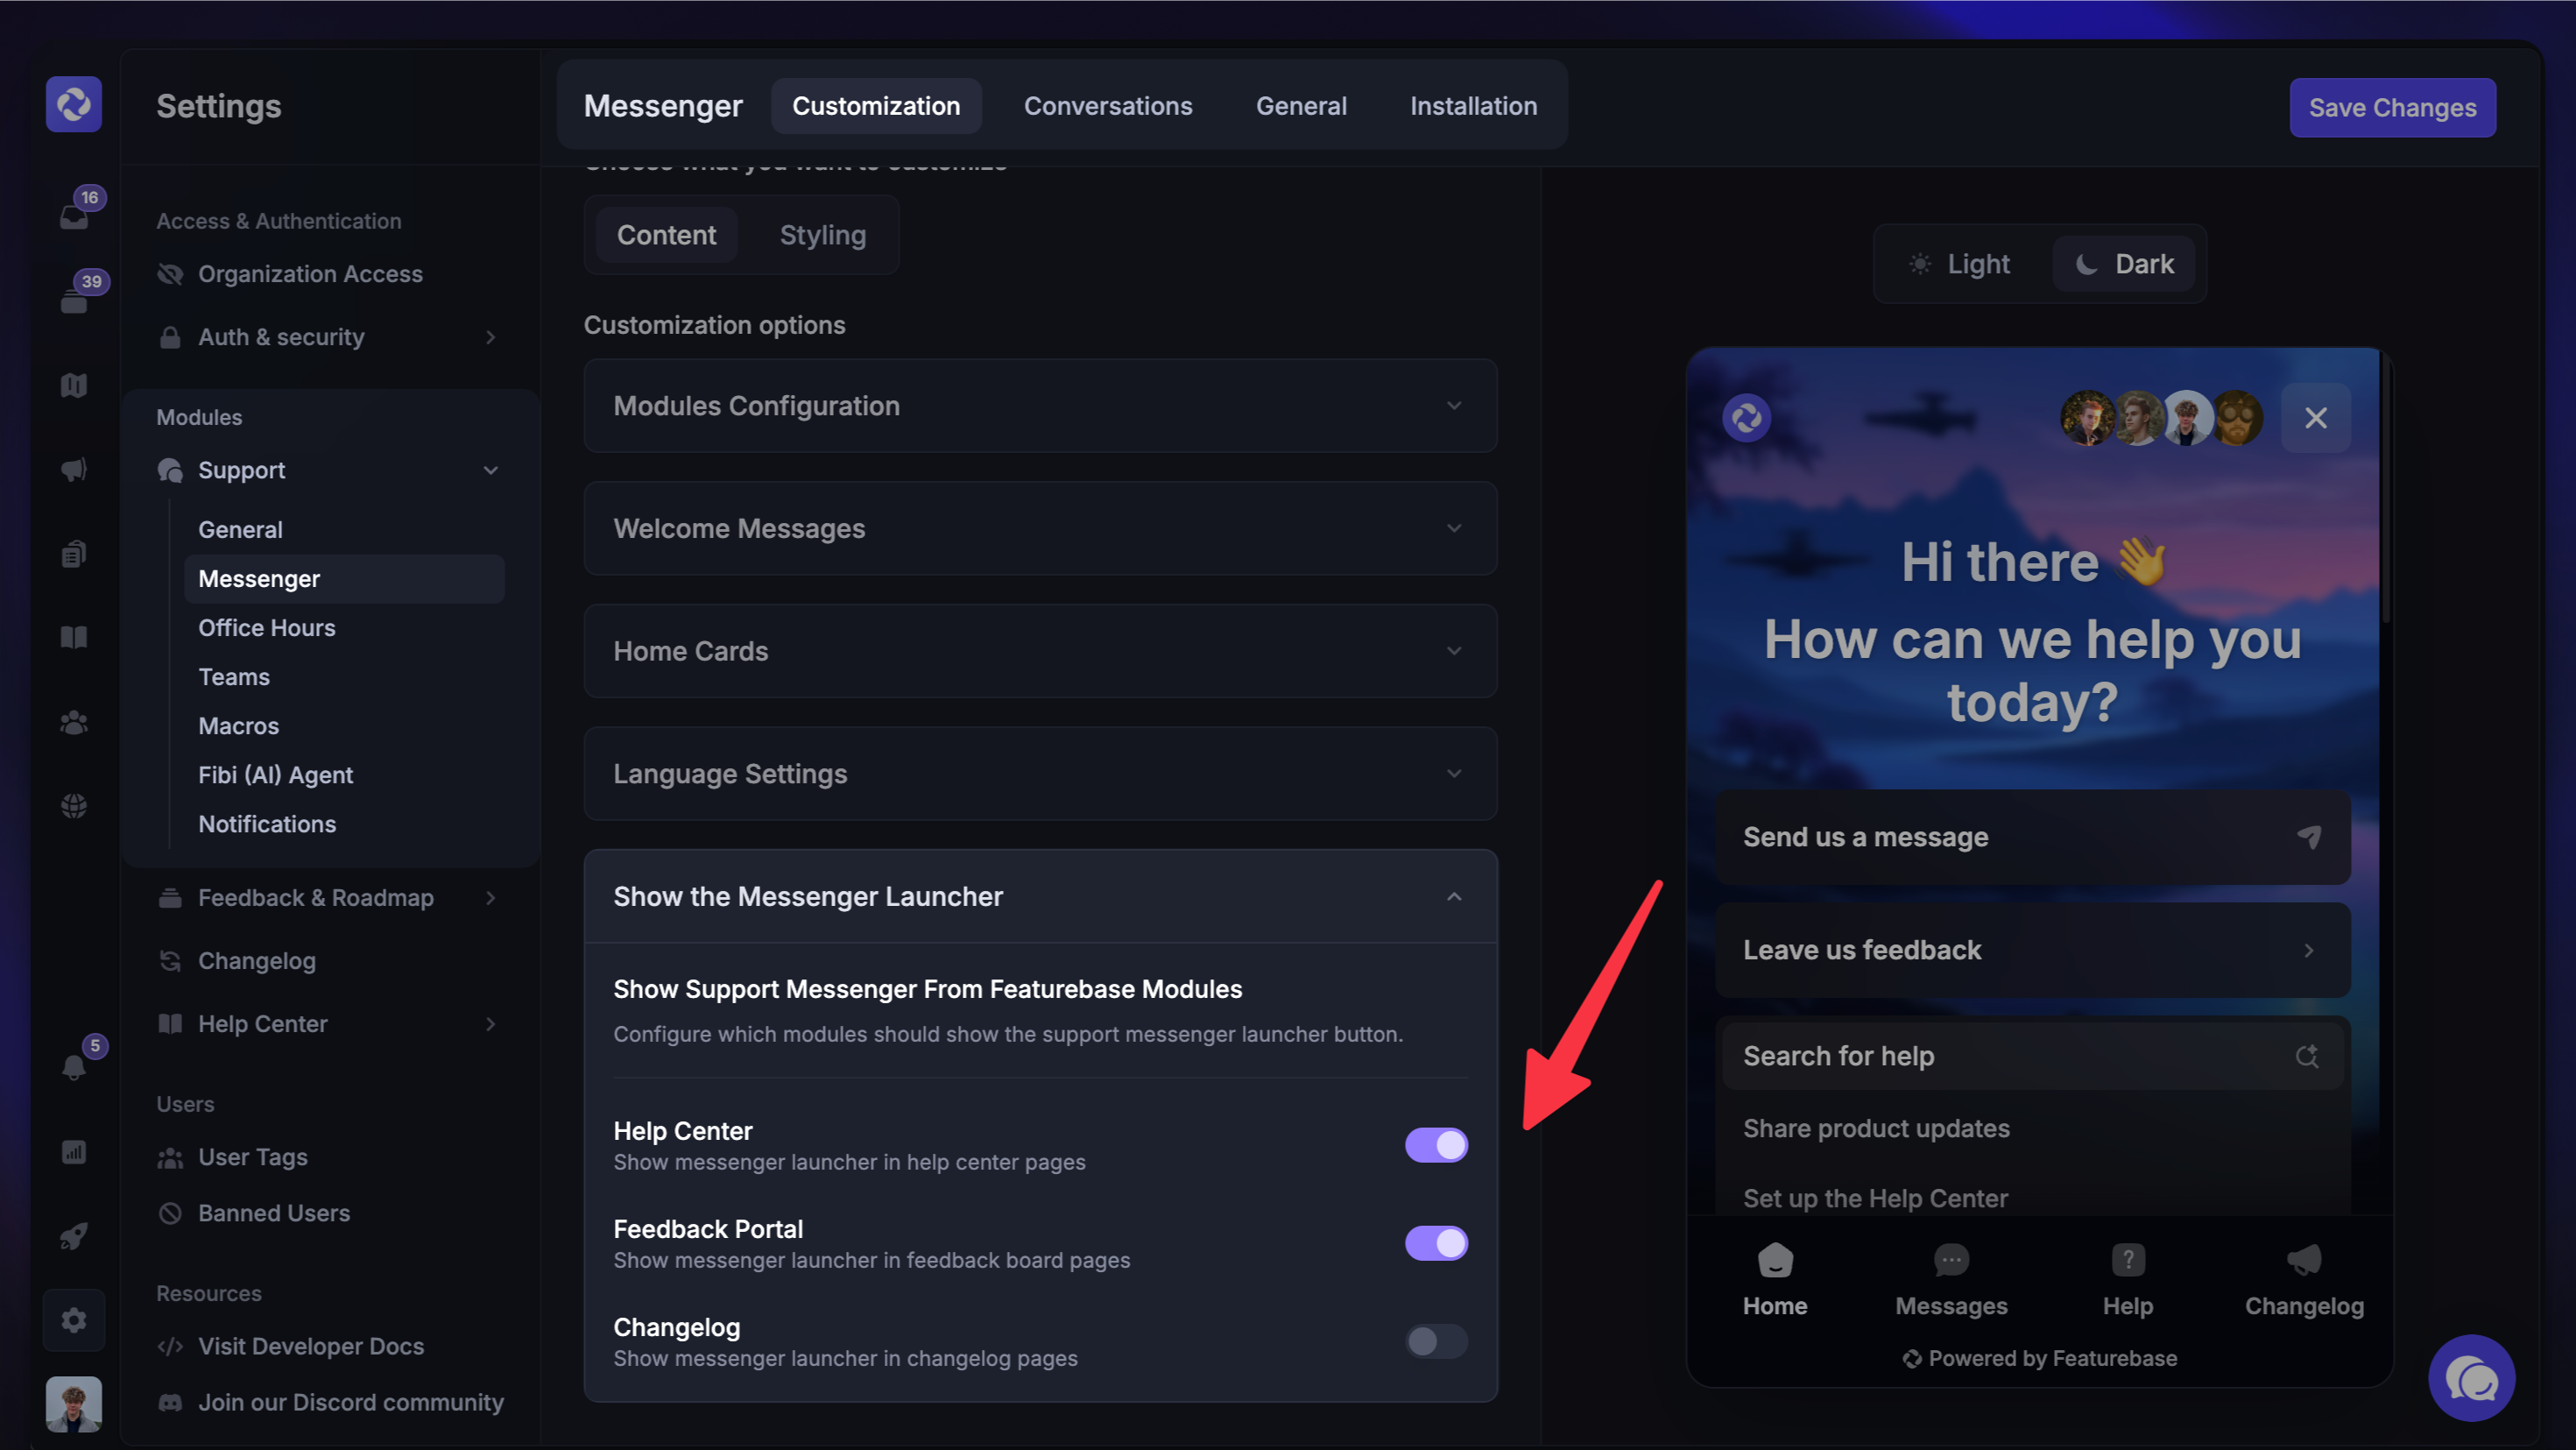
You can choose which Featurebase pages (Help Center, Feedback Portal, Updates) the Messenger should show up on or not. By default, when Messenger is enabled, it will show up on all Featurebase pages.
Messenger styling
Fully customize the Messenger widget to match your brand by editing the theme, colors, logo, and much more from Settings → Support → Messenger → Customization → Styling.
Note: You can create separate Messengers for different brands, products, or companies with unique logos, colors, and domains: Style your Messenger to support multiple brands
Colors & theme
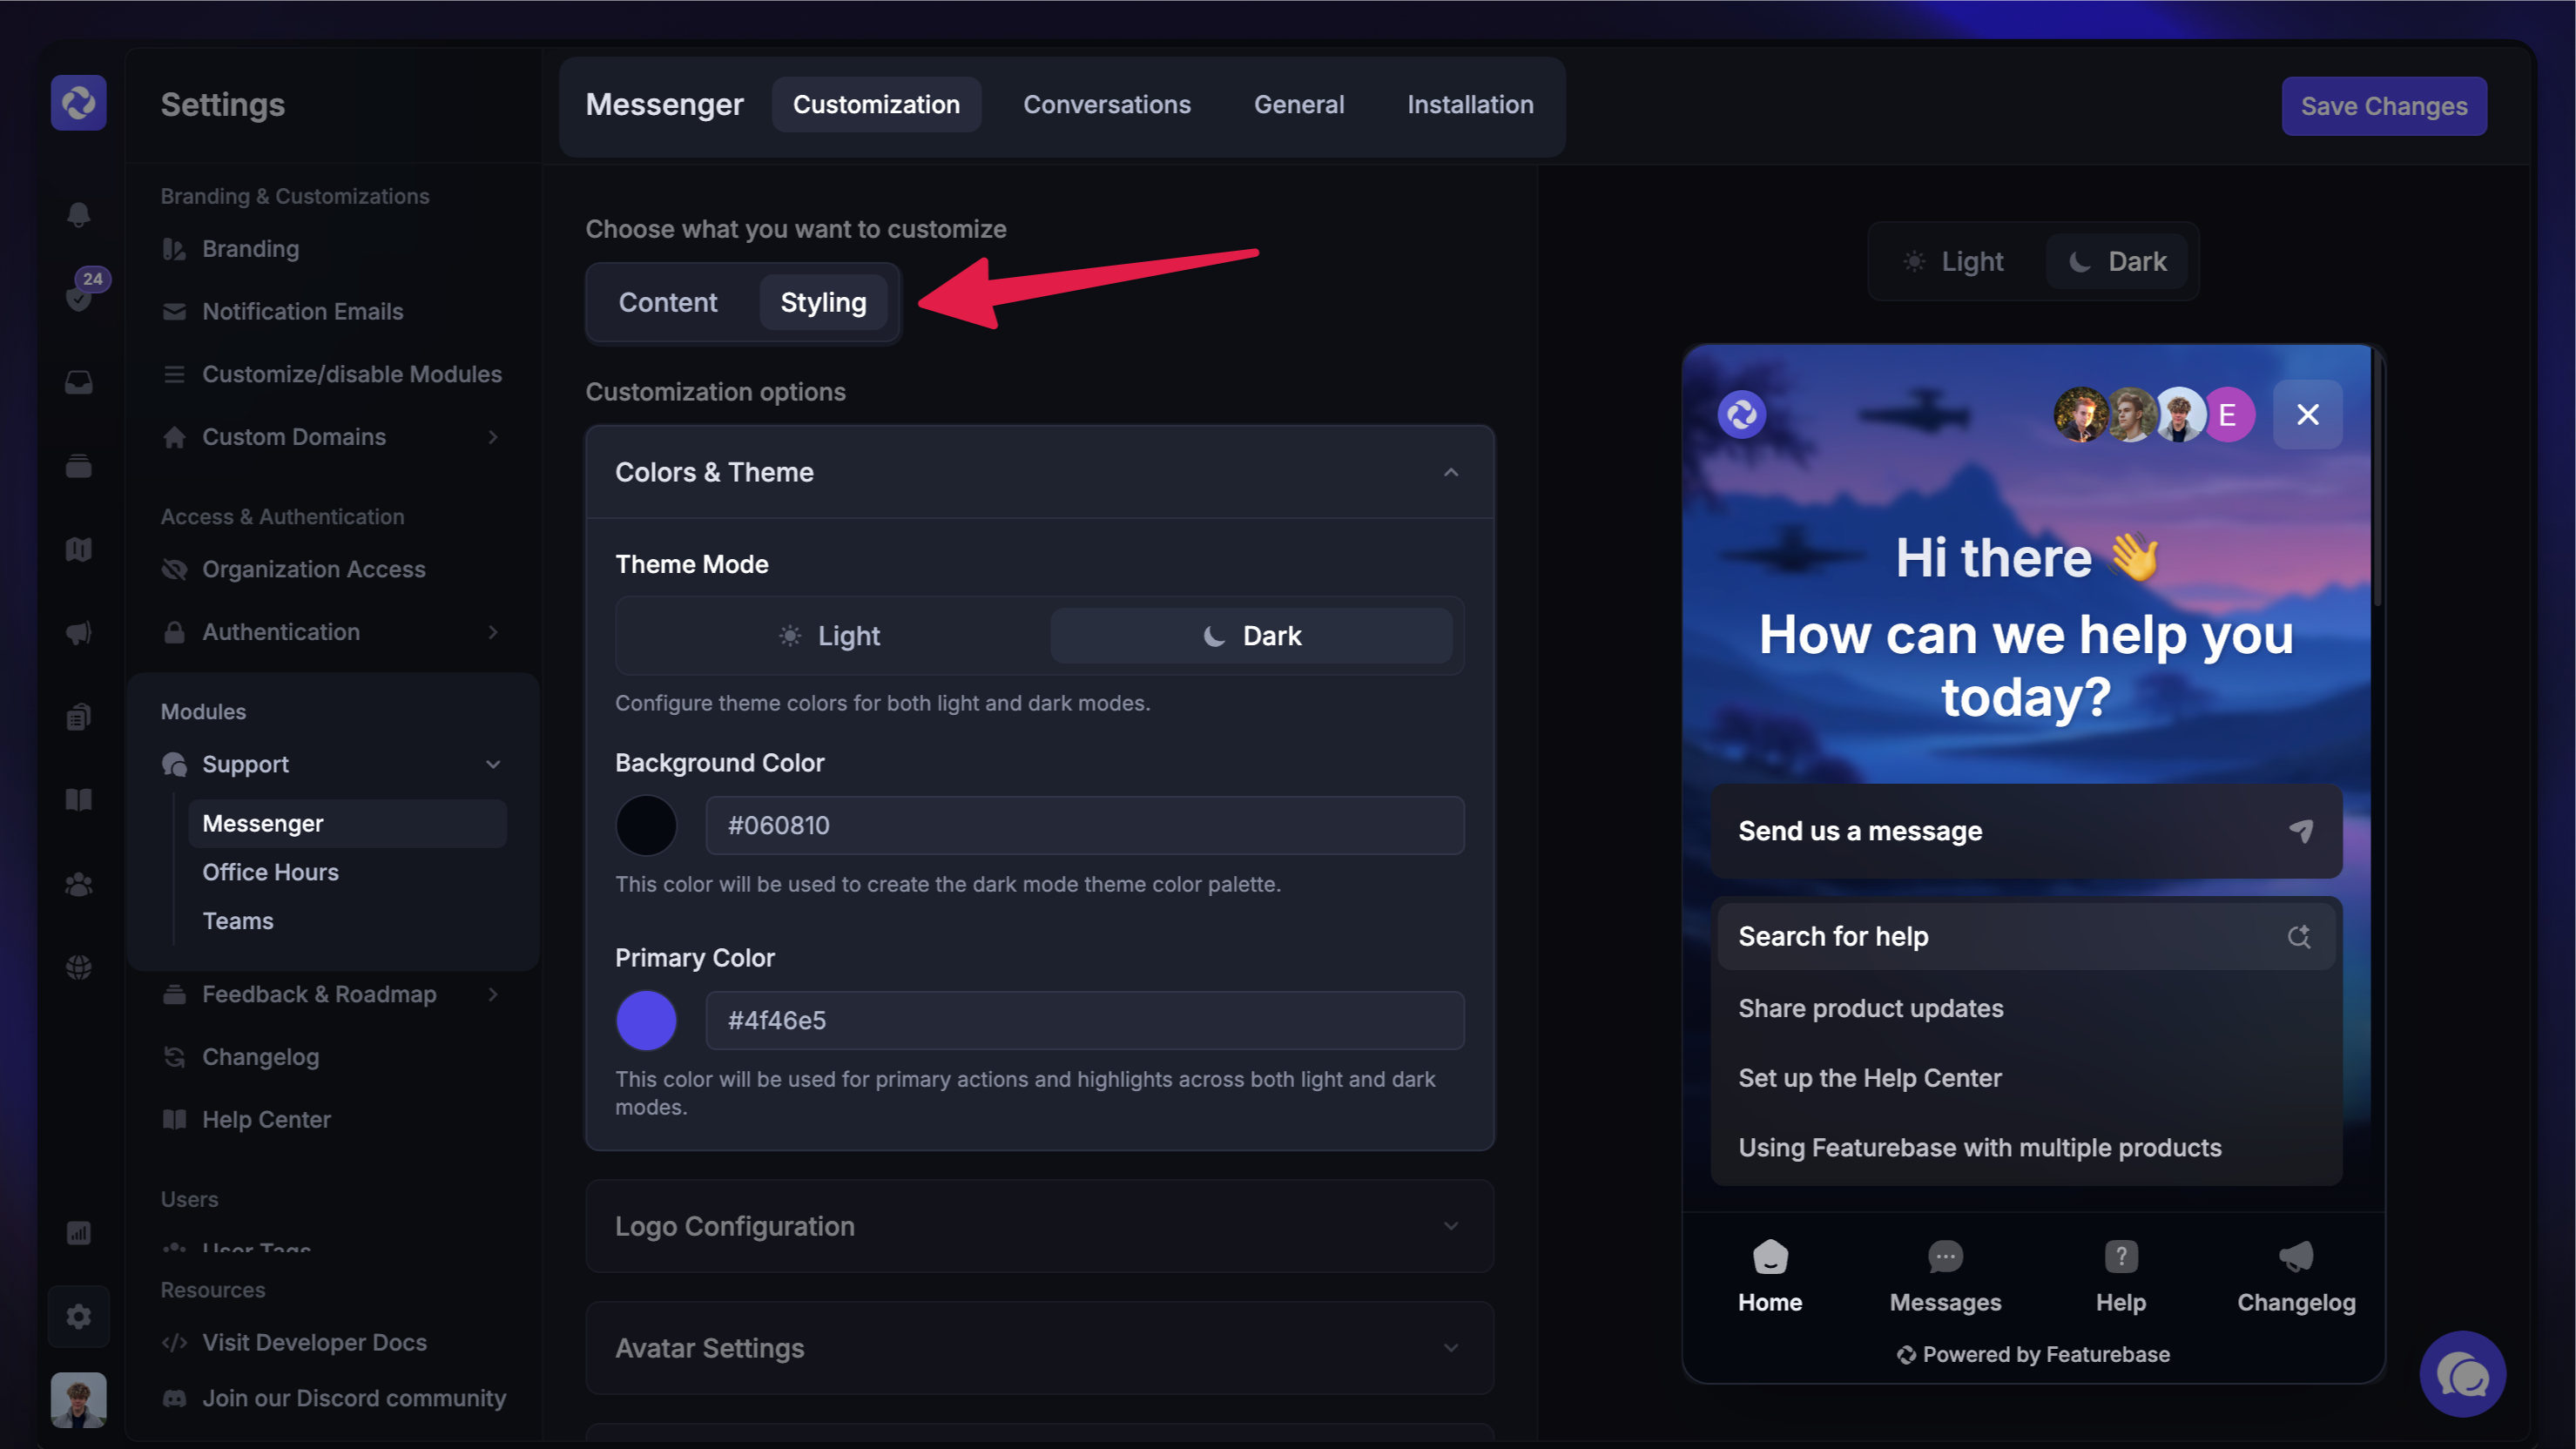
For both (light/dark) themes, select the Background color, which is used in the Messenger Home footer, and the Action color which is used in the header, buttons, links, and more, to highlight and emphasize.
Logo configuration
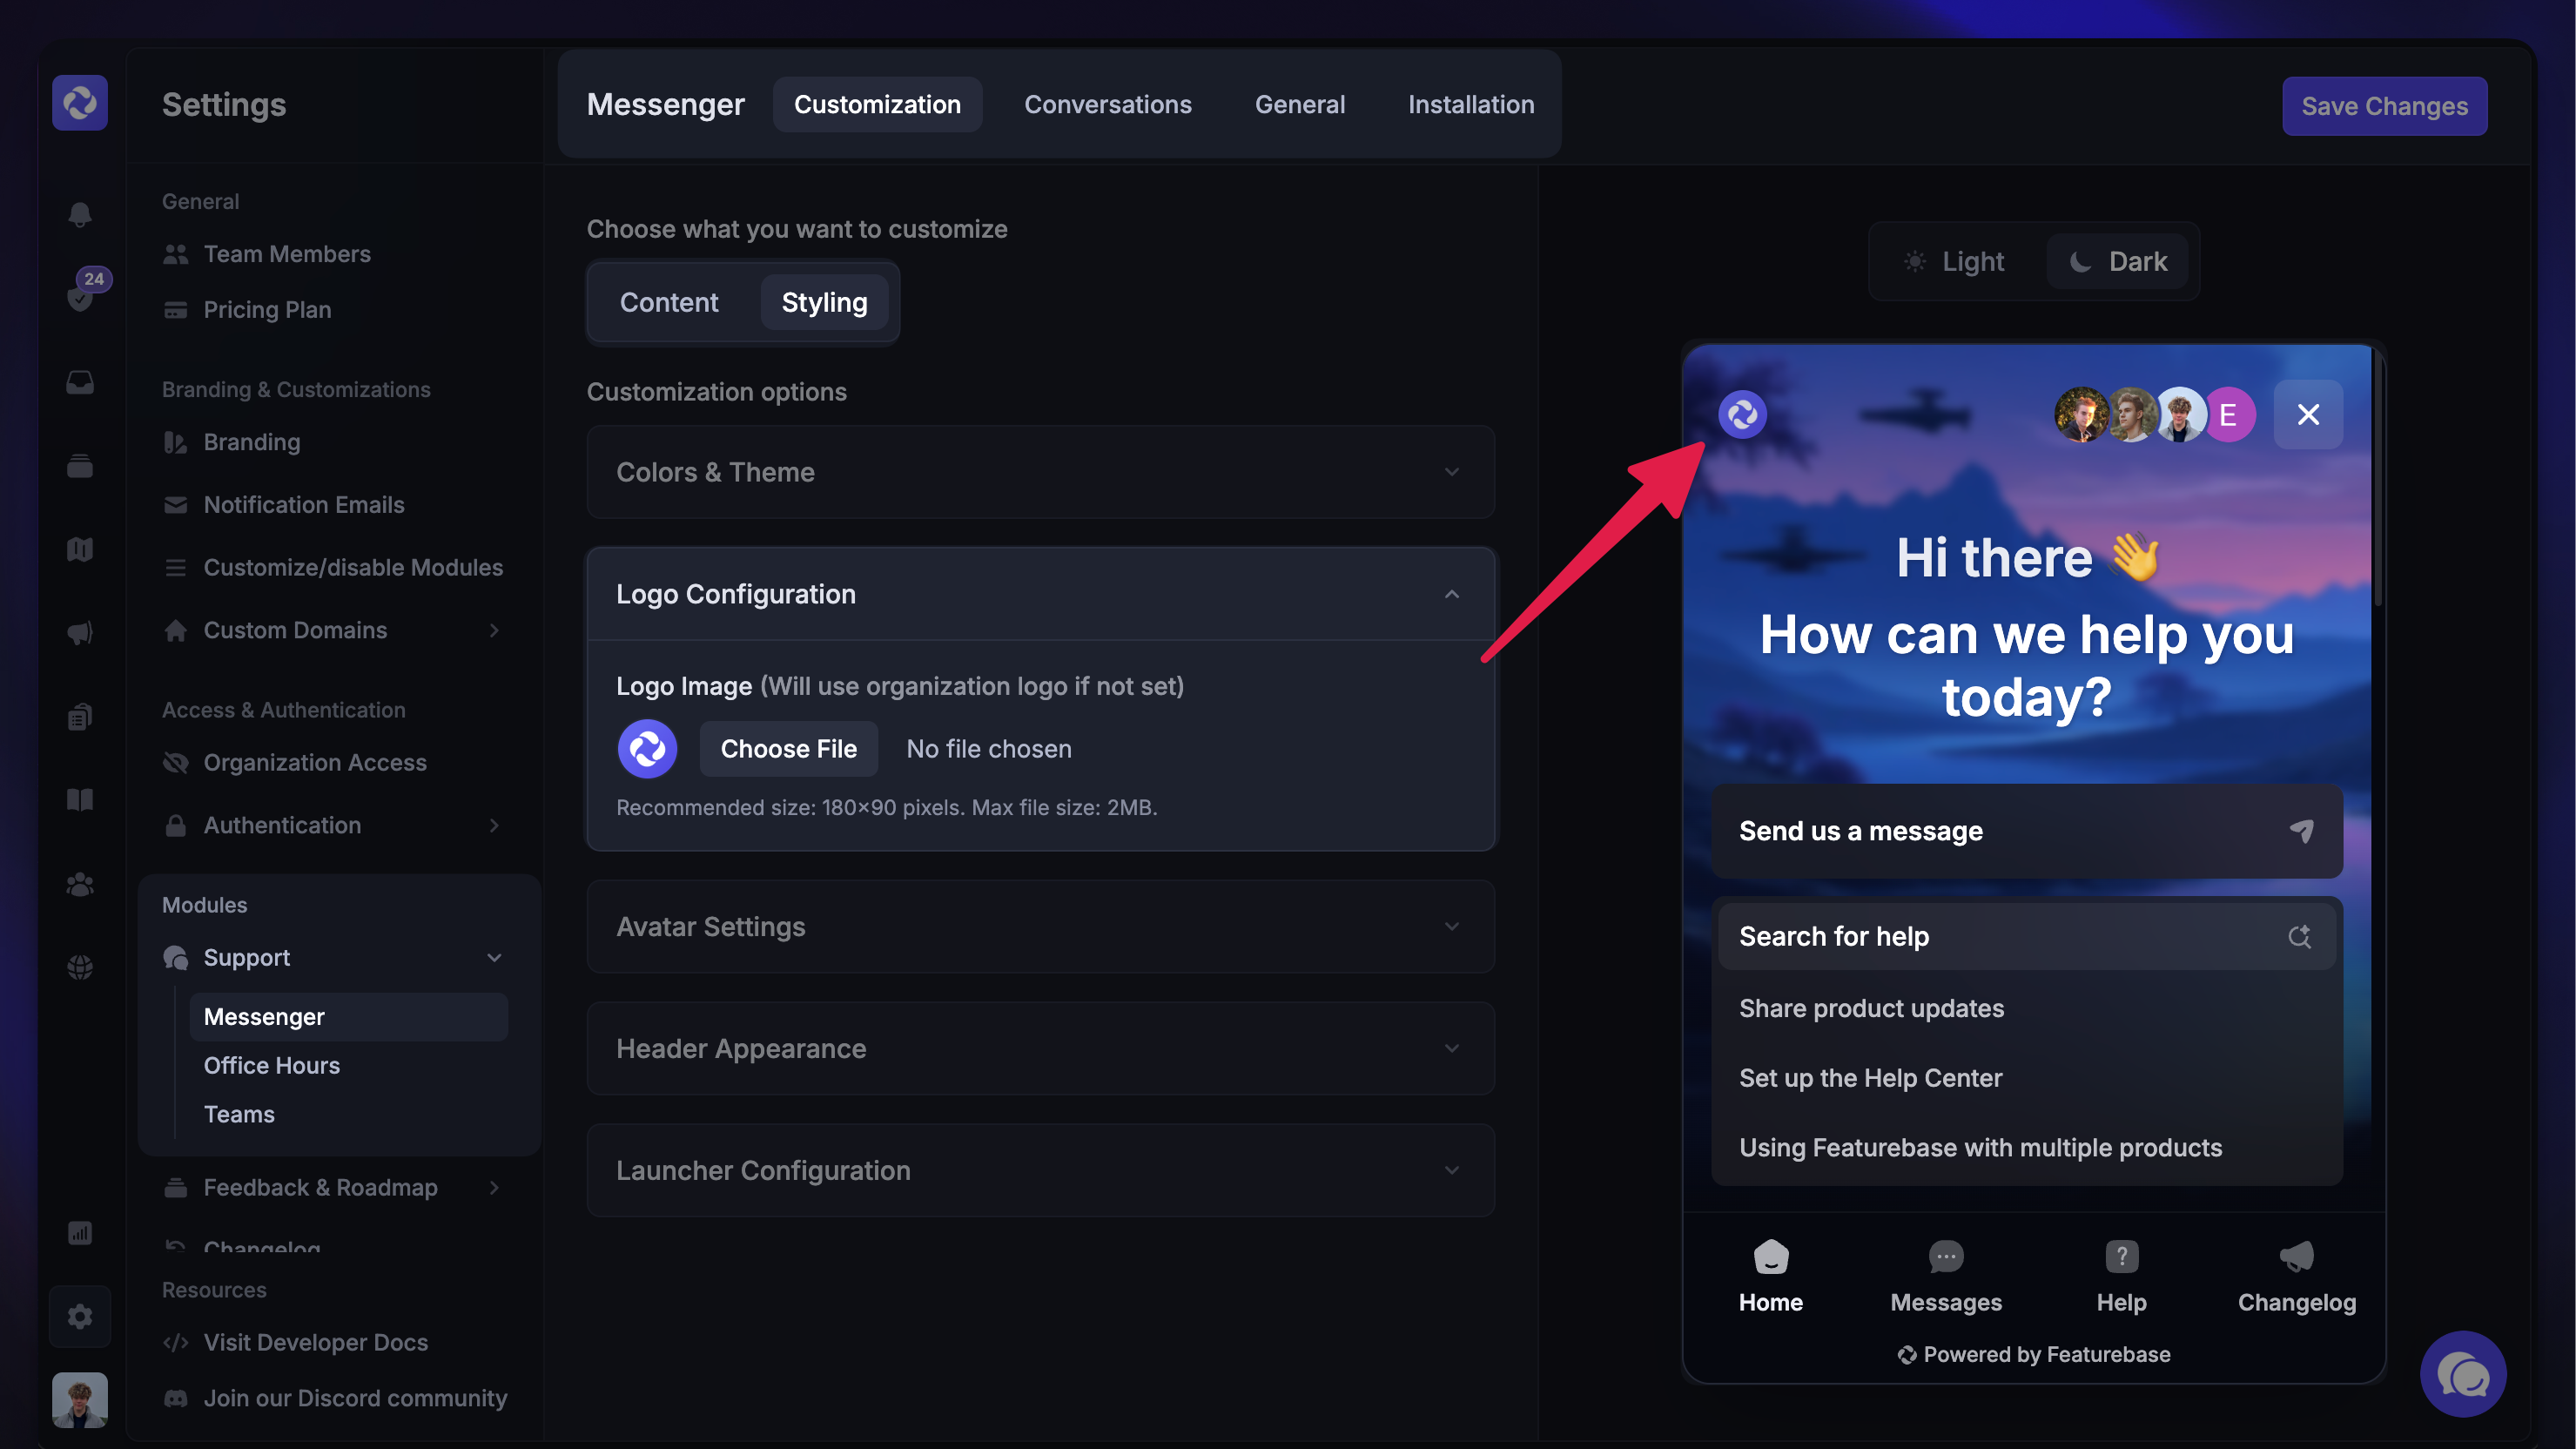
You can add a custom logo to your Messenger. Otherwise, it will use your organization’s default logo that you set up from Settings → Branding.
Display teammate avatars
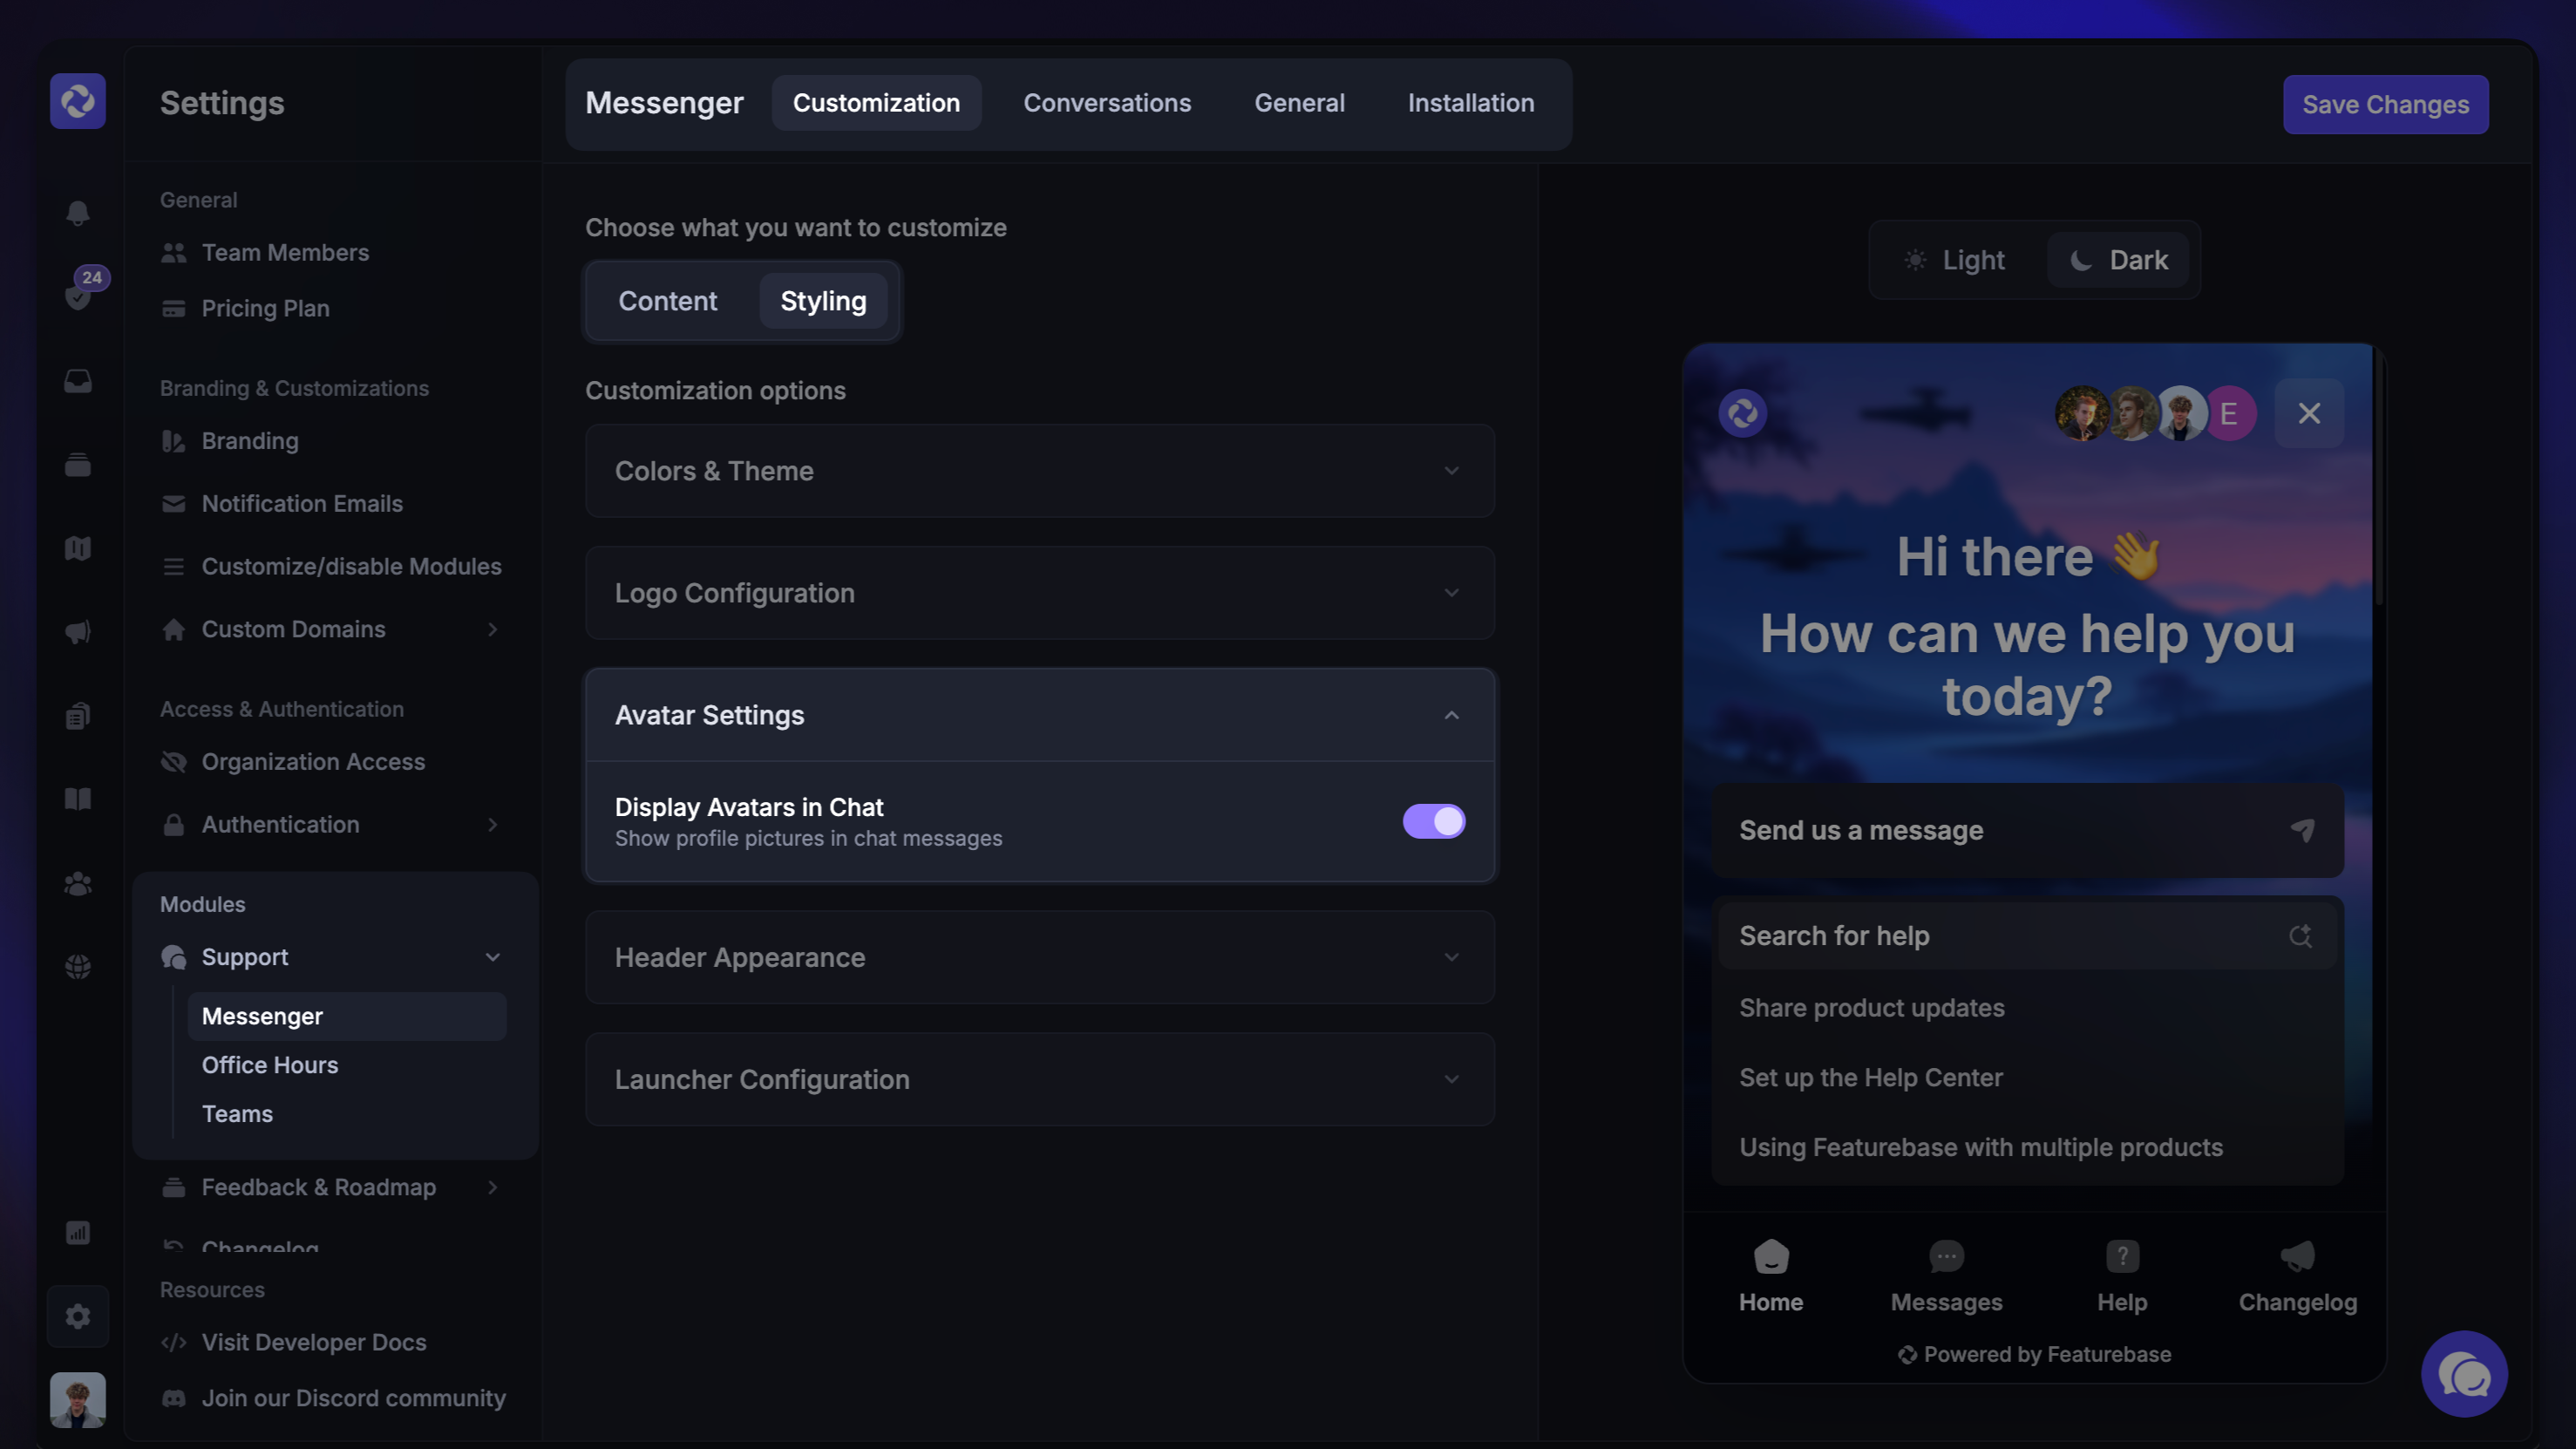
Choose whether you want to display your teammates’ avatars in chats for an added personal touch.
Header appearance
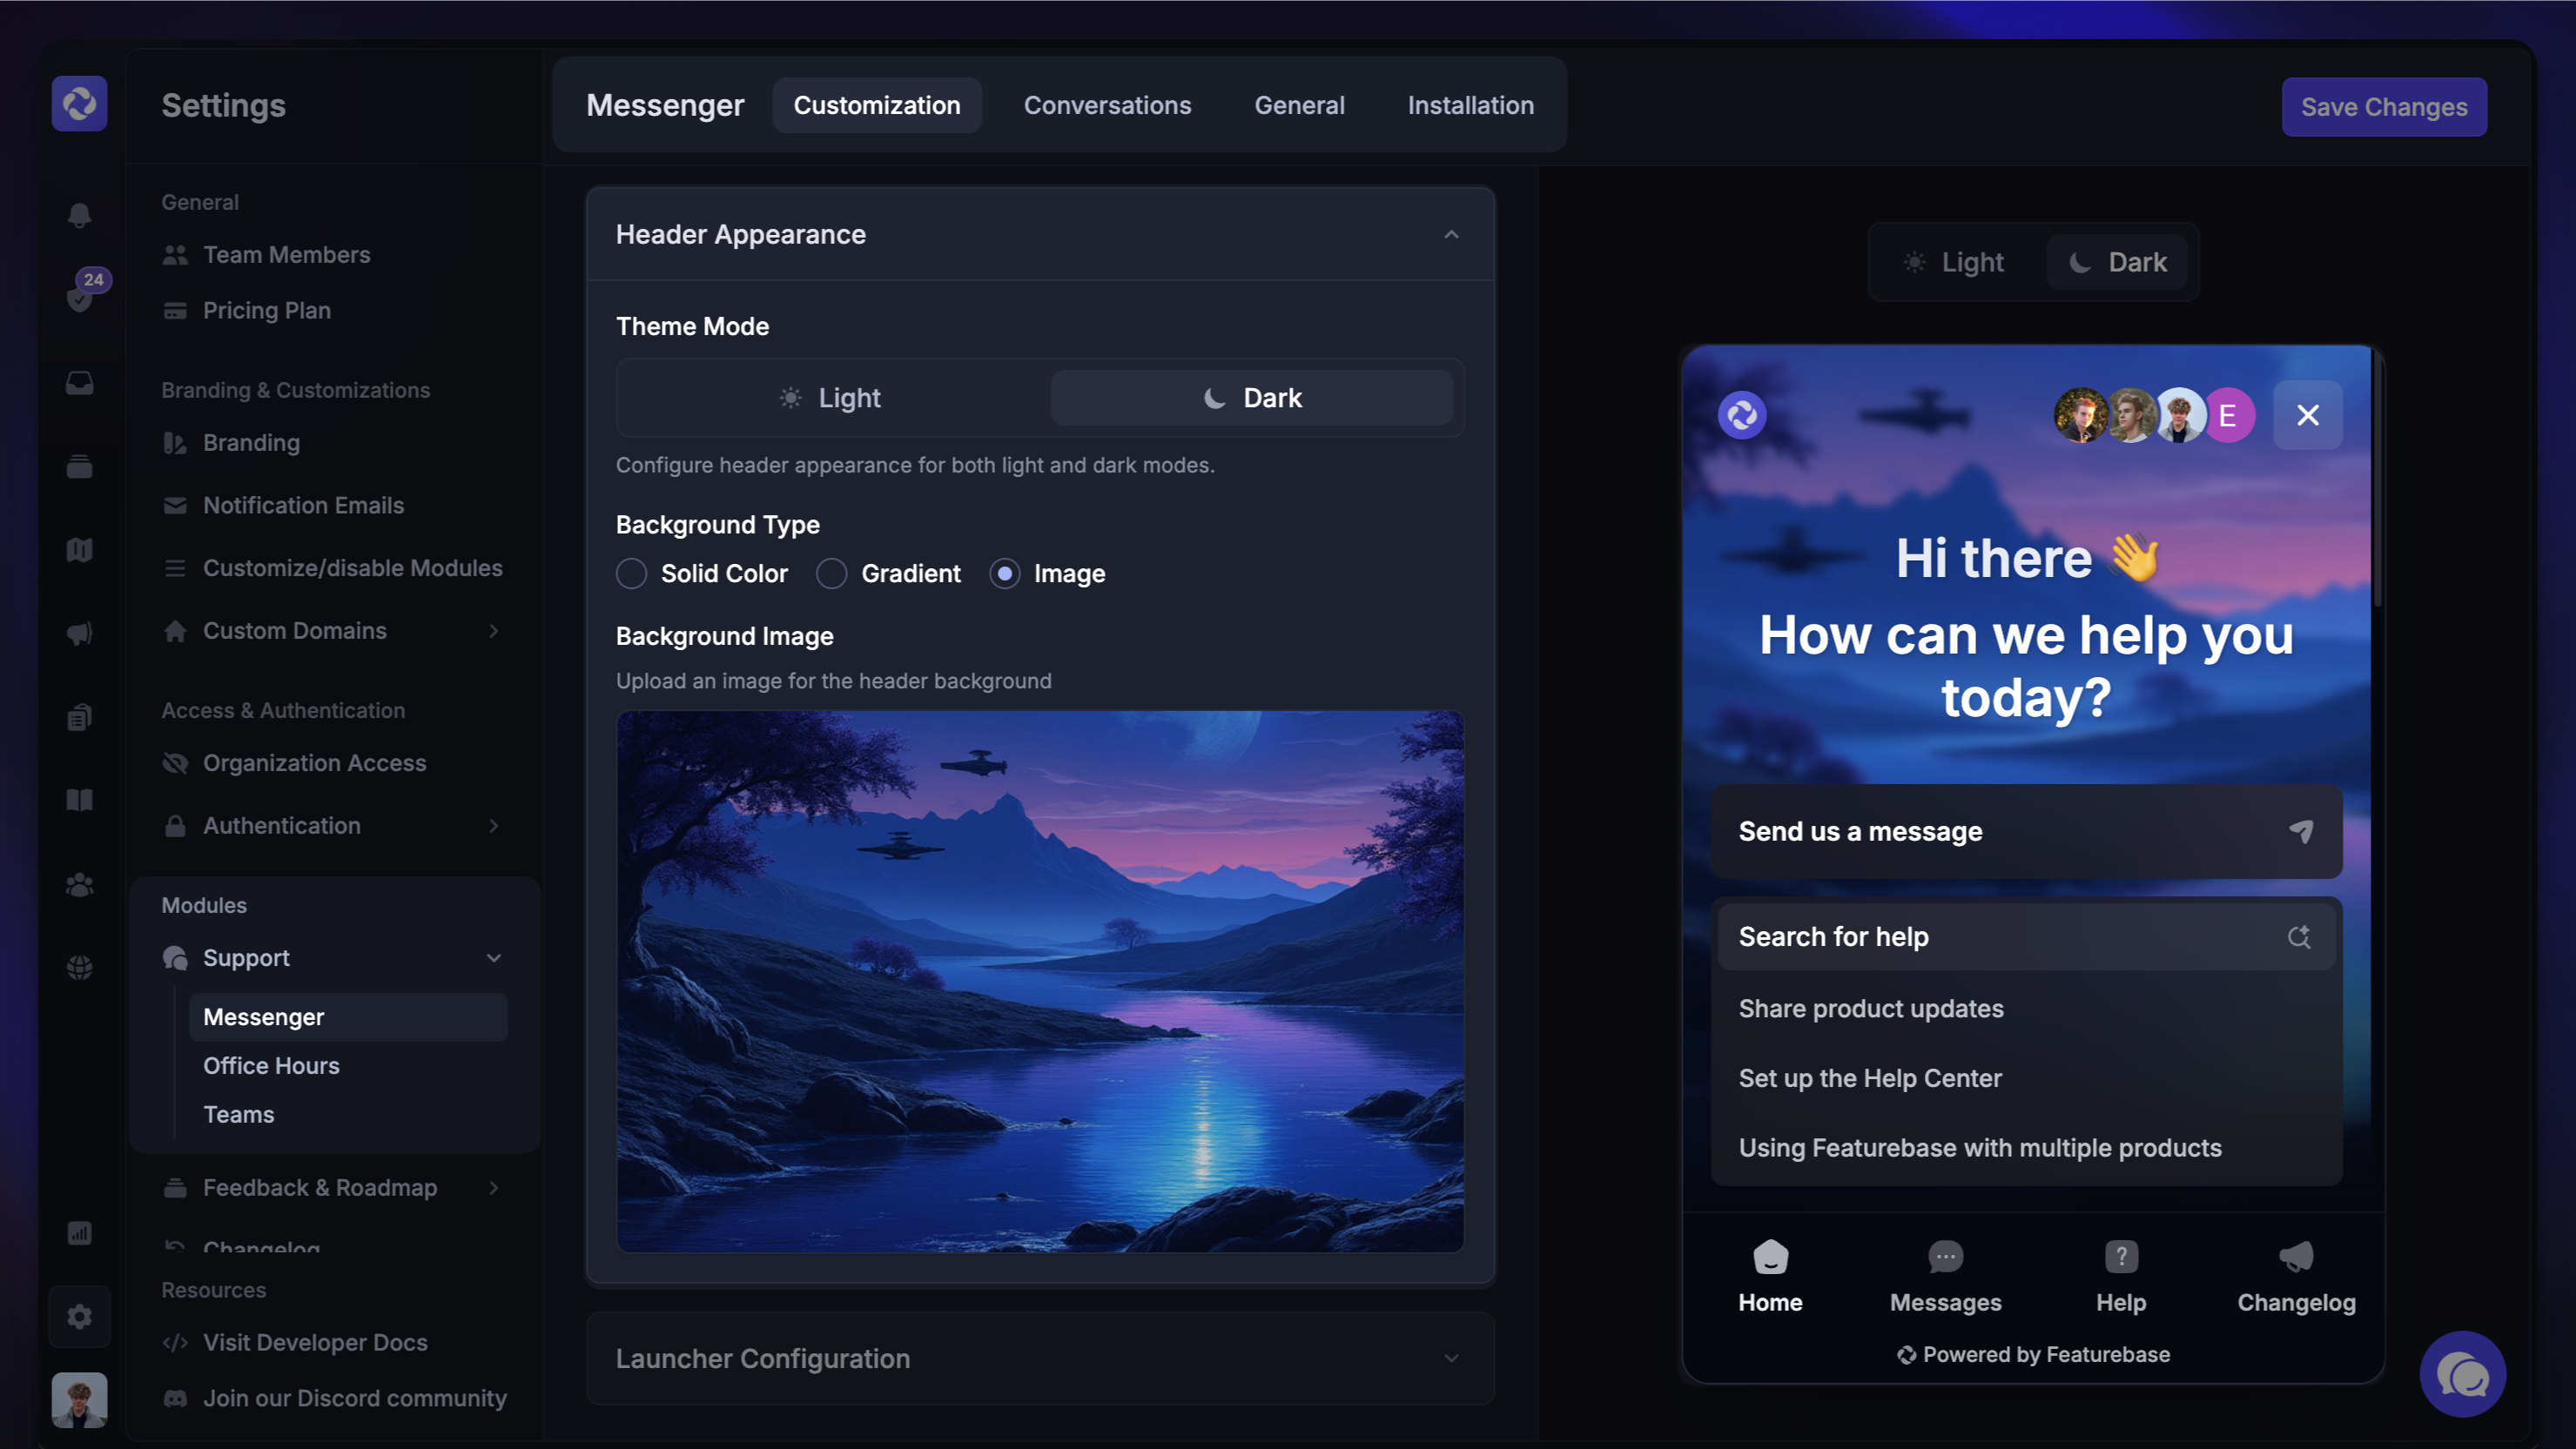
You can customize the Messenger header further with optional color gradients or a background image separately for both dark and light modes. Feel free to make your Messenger as close to home as possible!
Widget position
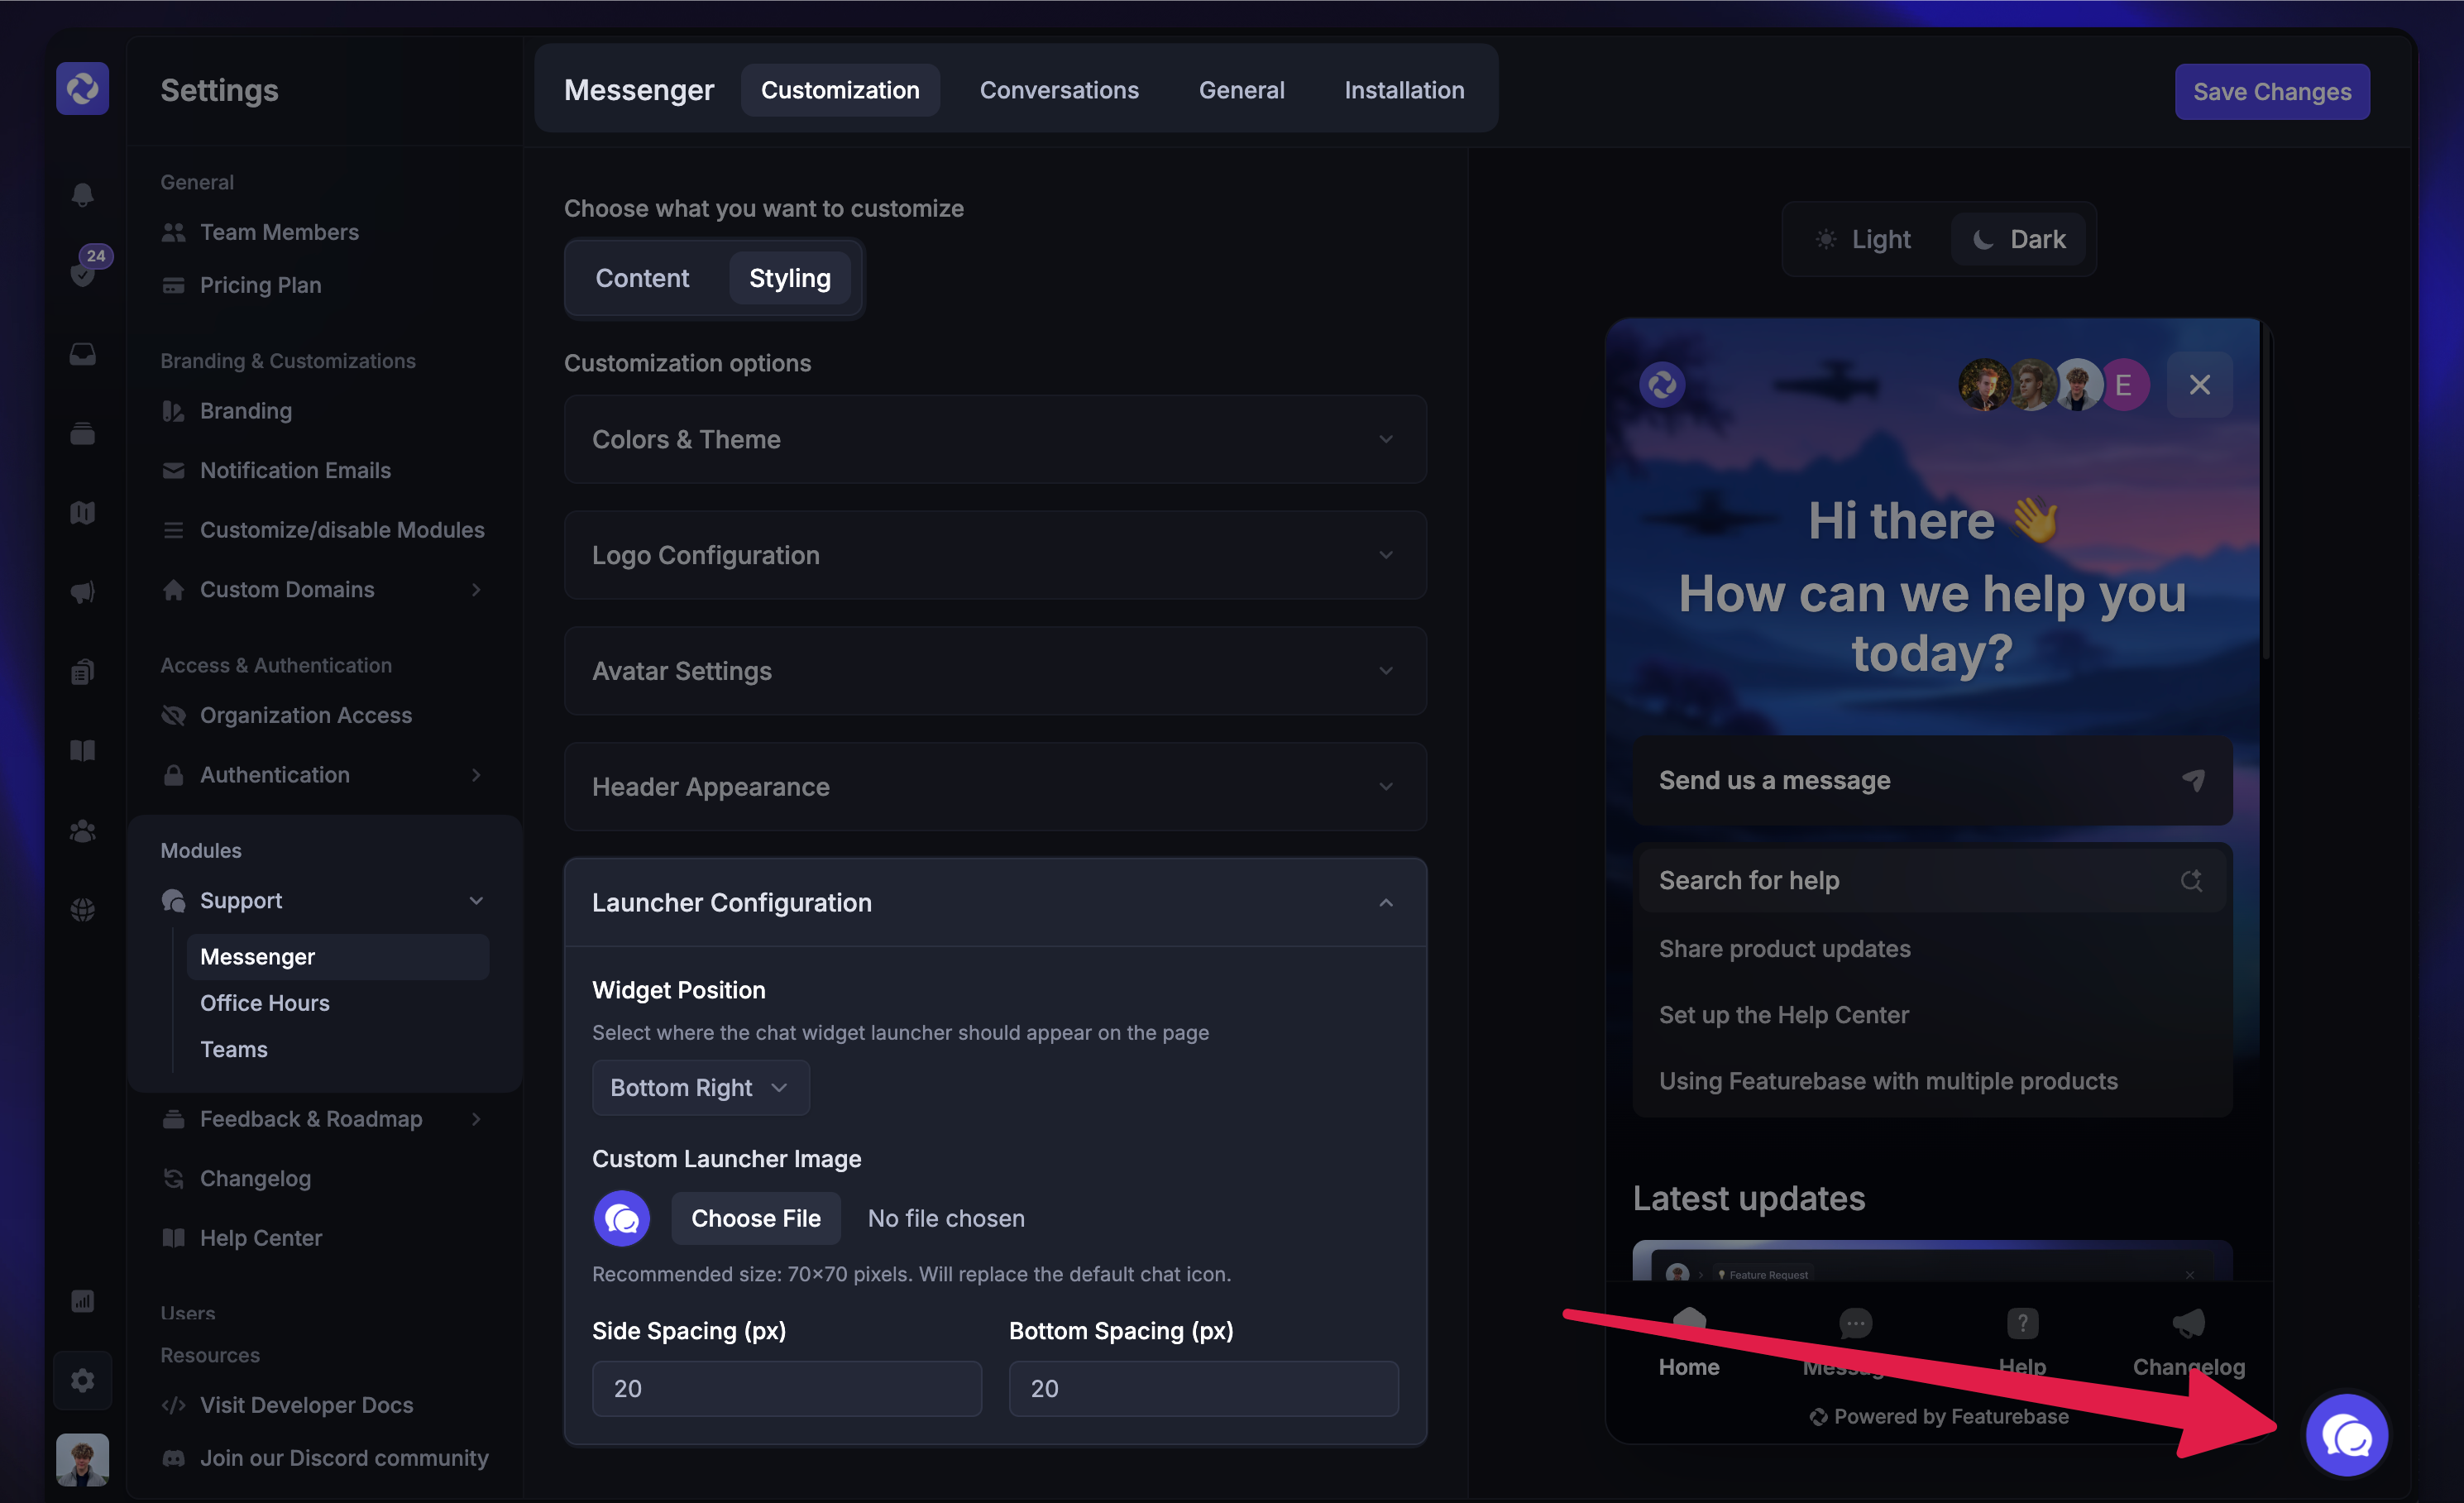
Decide where the Messenger Widget launcher sits on your site, upload a custom icon, and fine-tune its positioning with the Side Spacing (px) and Bottom Spacing (px) controls.
Note:
The Messenger Launcher uses the Primary color you selected for the Messenger.
You can only set the Messenger Launcher to one position on your site (it can’t appear in multiple positions across the same site).
You can position your launcher on either the left or right side of the screen, adjust its padding, and upload a custom image. However, it’s currently not possible to enlarge the launcher symbol or move it dynamically based on page content. For offsets larger than 100px, set
horizontalPaddingandverticalPaddingin your Messenger installation.
Conversations settings
Choose how customers can start conversations in the Messenger, introduce your team, and add special notices from Settings → Support → Messenger → Conversations.
Start conversation button text
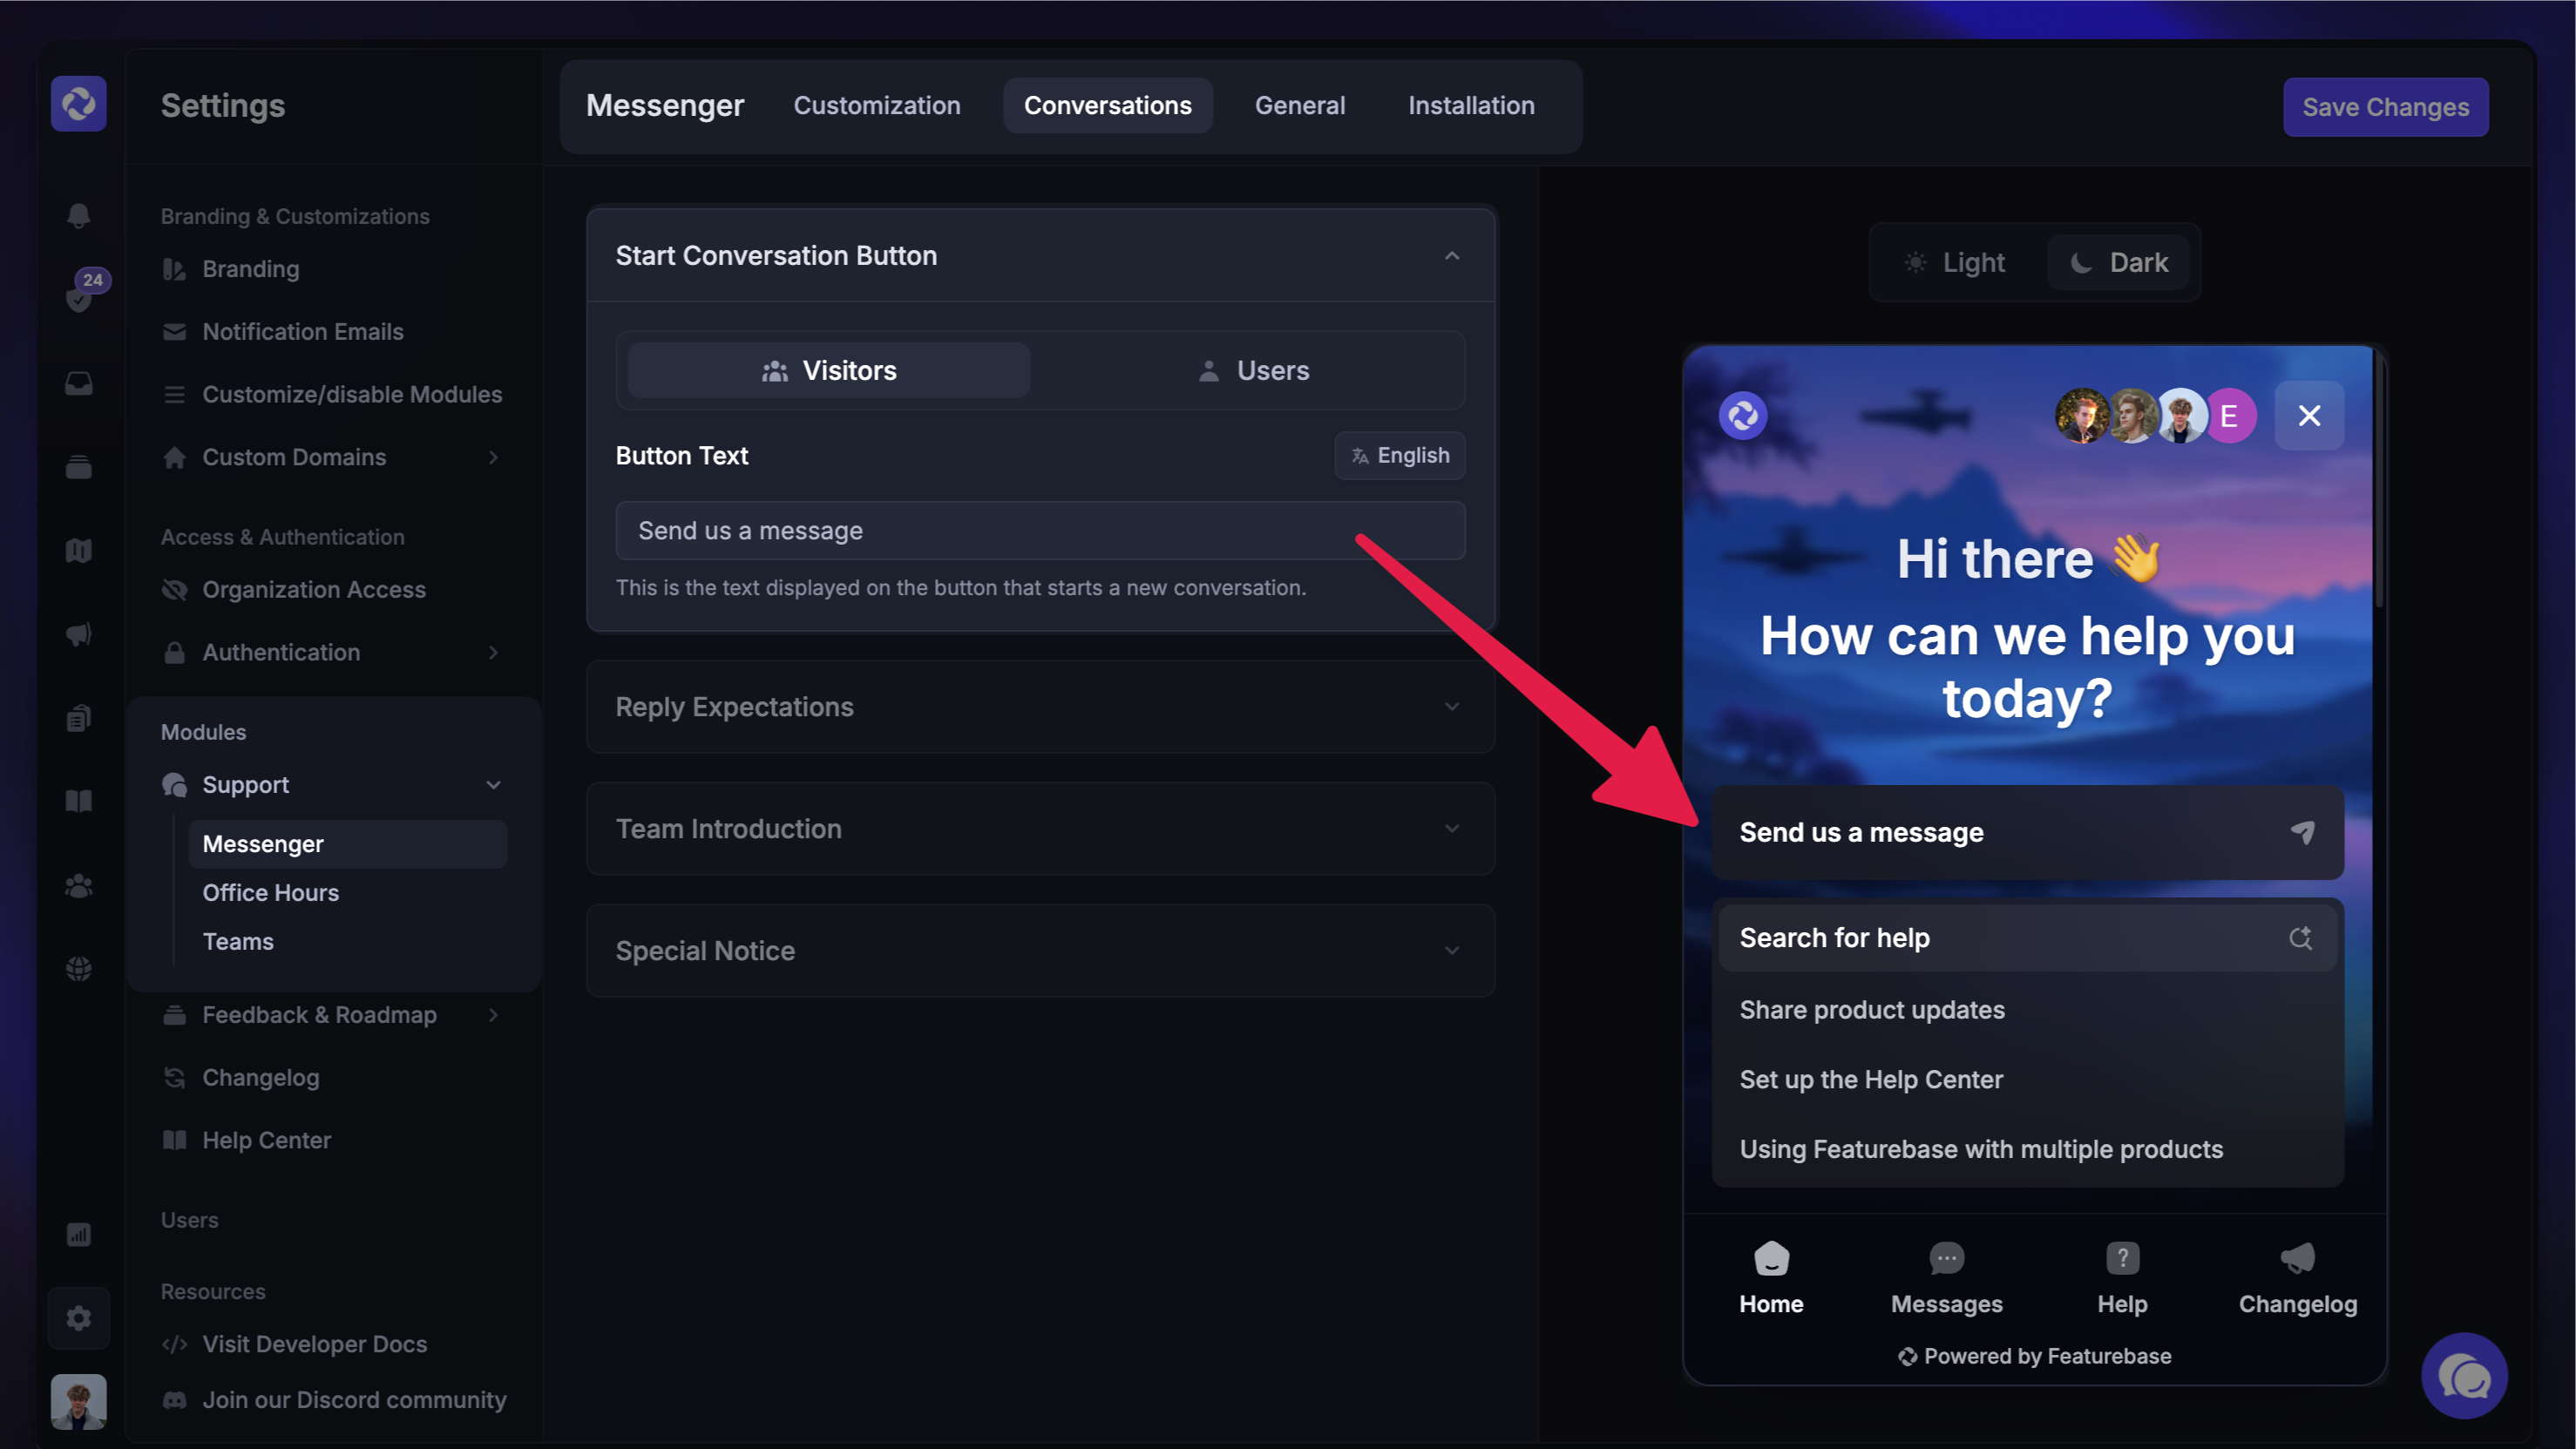
The ‘Start conversation button’ text or call-to-action (CTA) can be configured separately for visitors and users. Customers will see this CTA on the Home and Messages modules to start a conversation. This can also be localized.
Reply expectations
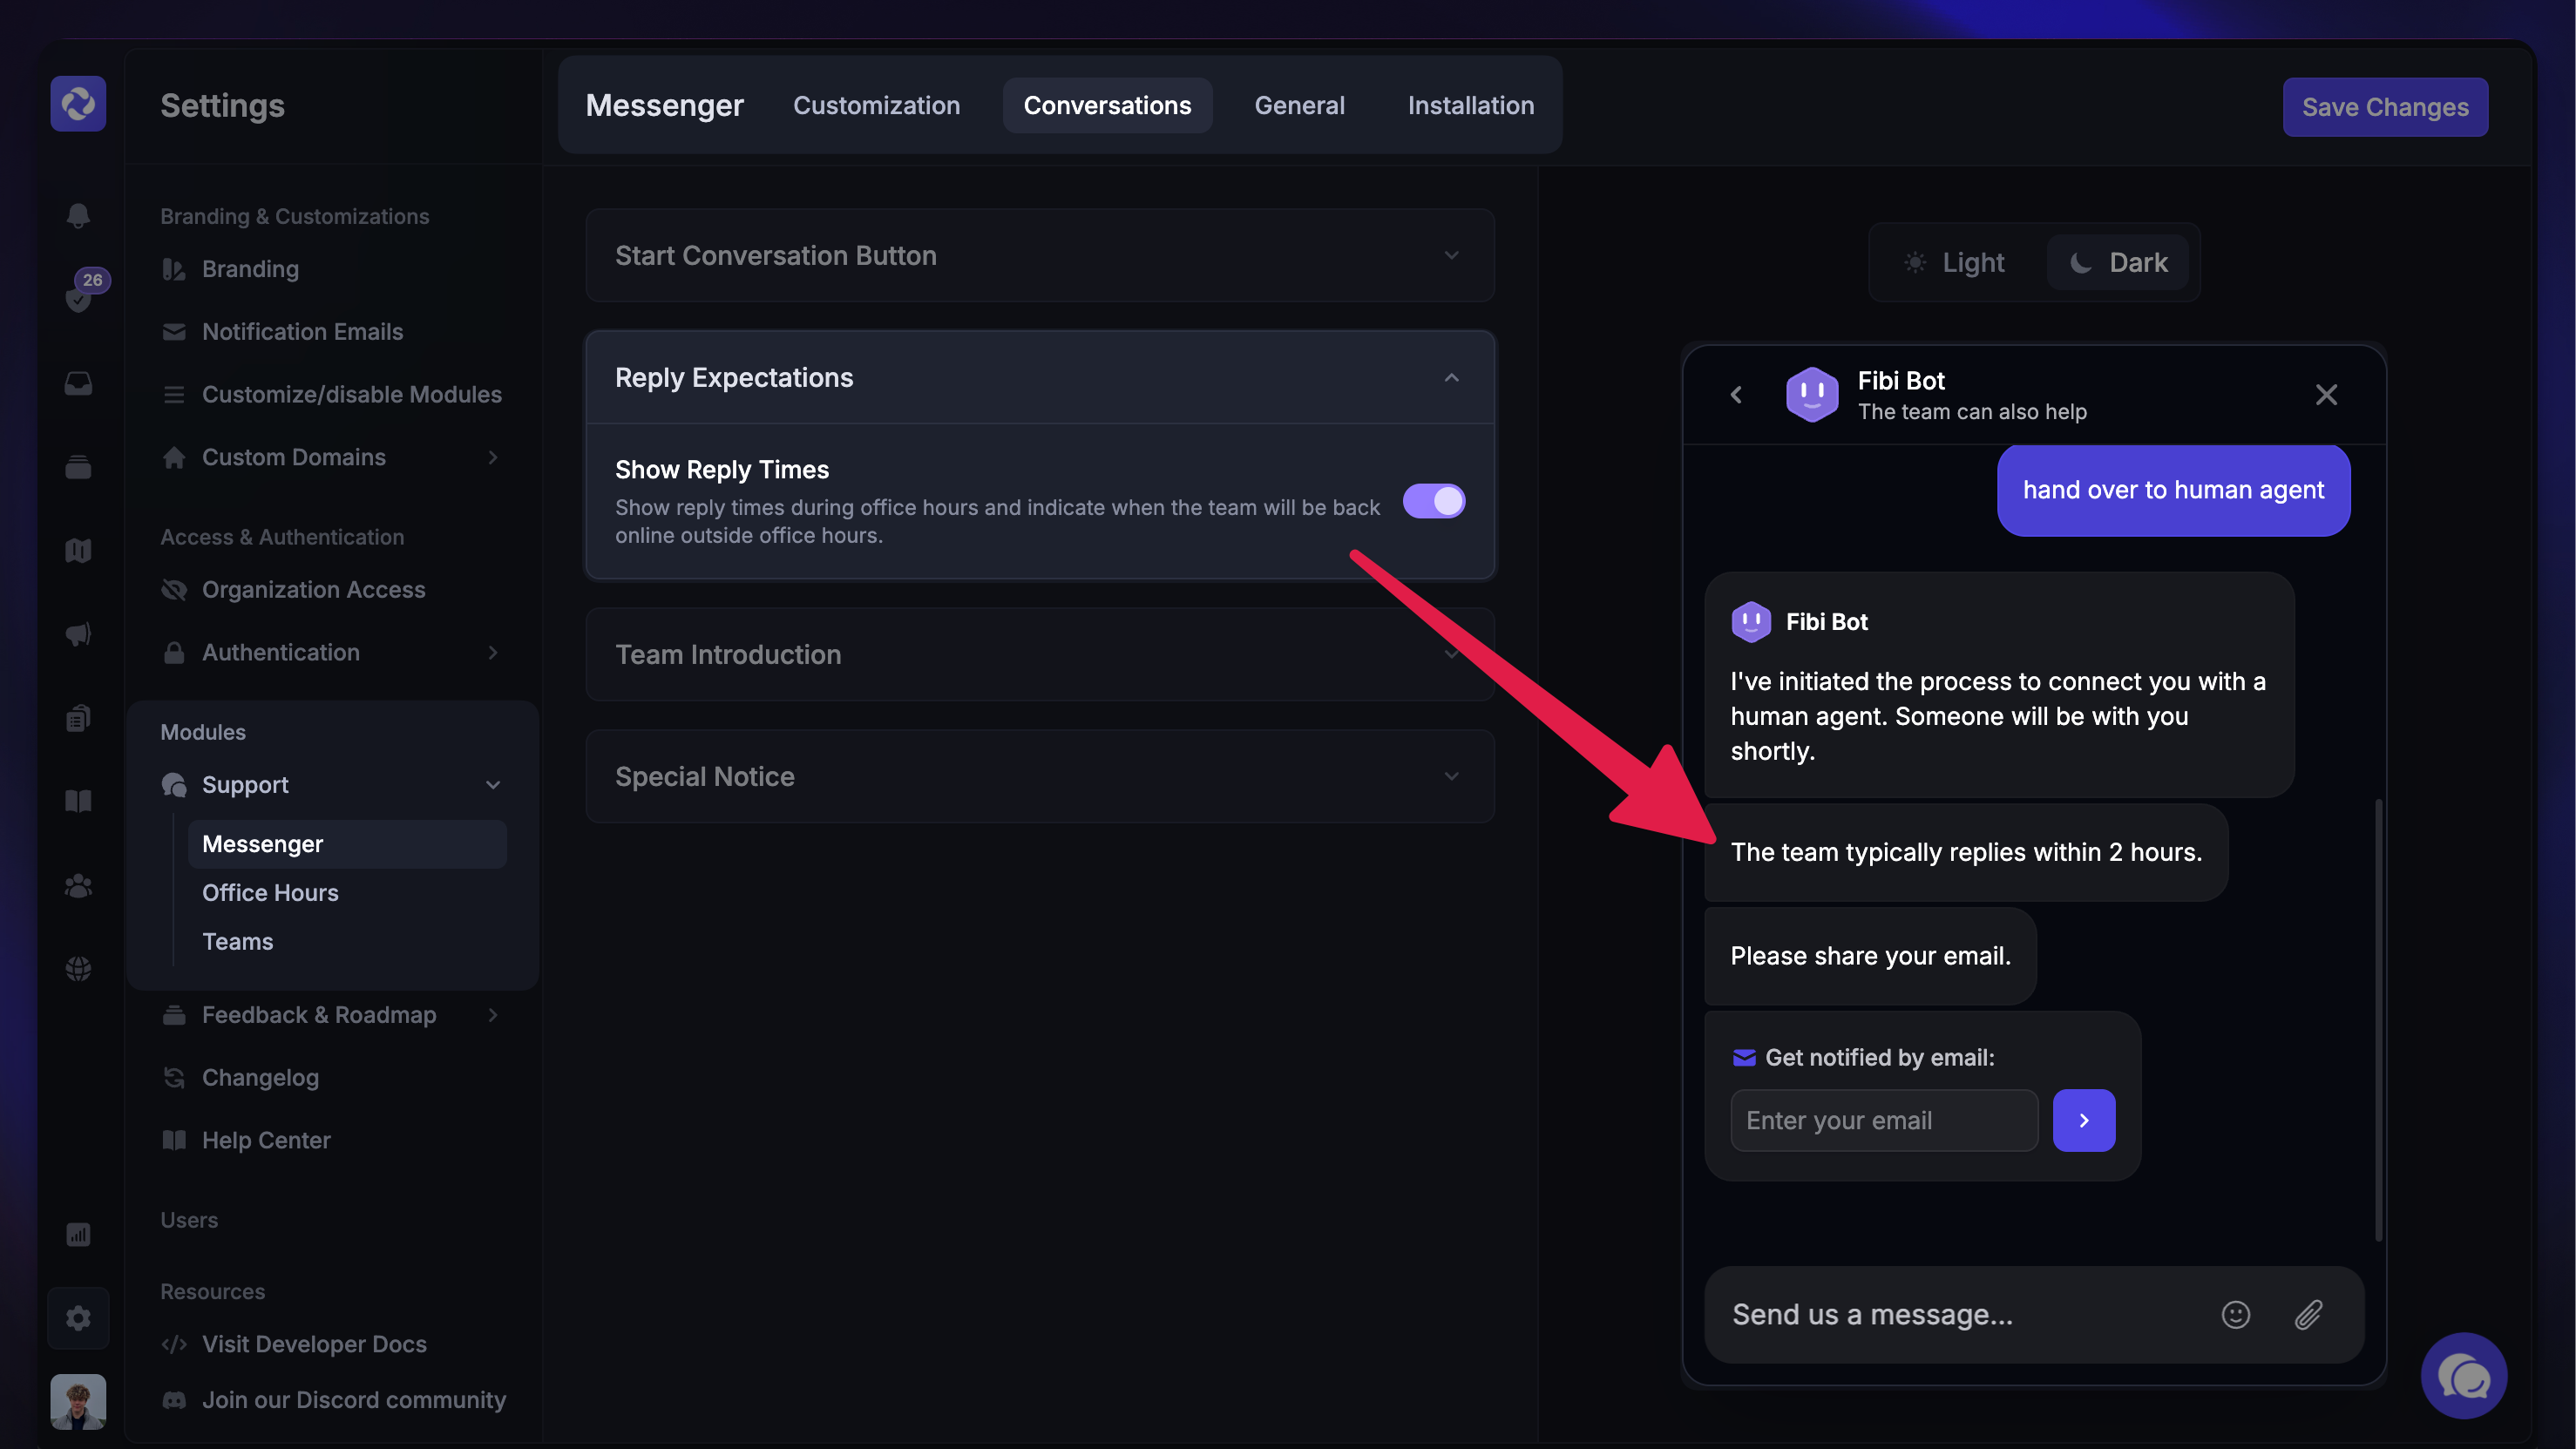
Show reply times during office hours and indicate when your team will be back online outside office hours to manage expectations. This option is enabled by default. If disabled, no reply time will be shown to users.
Team introduction
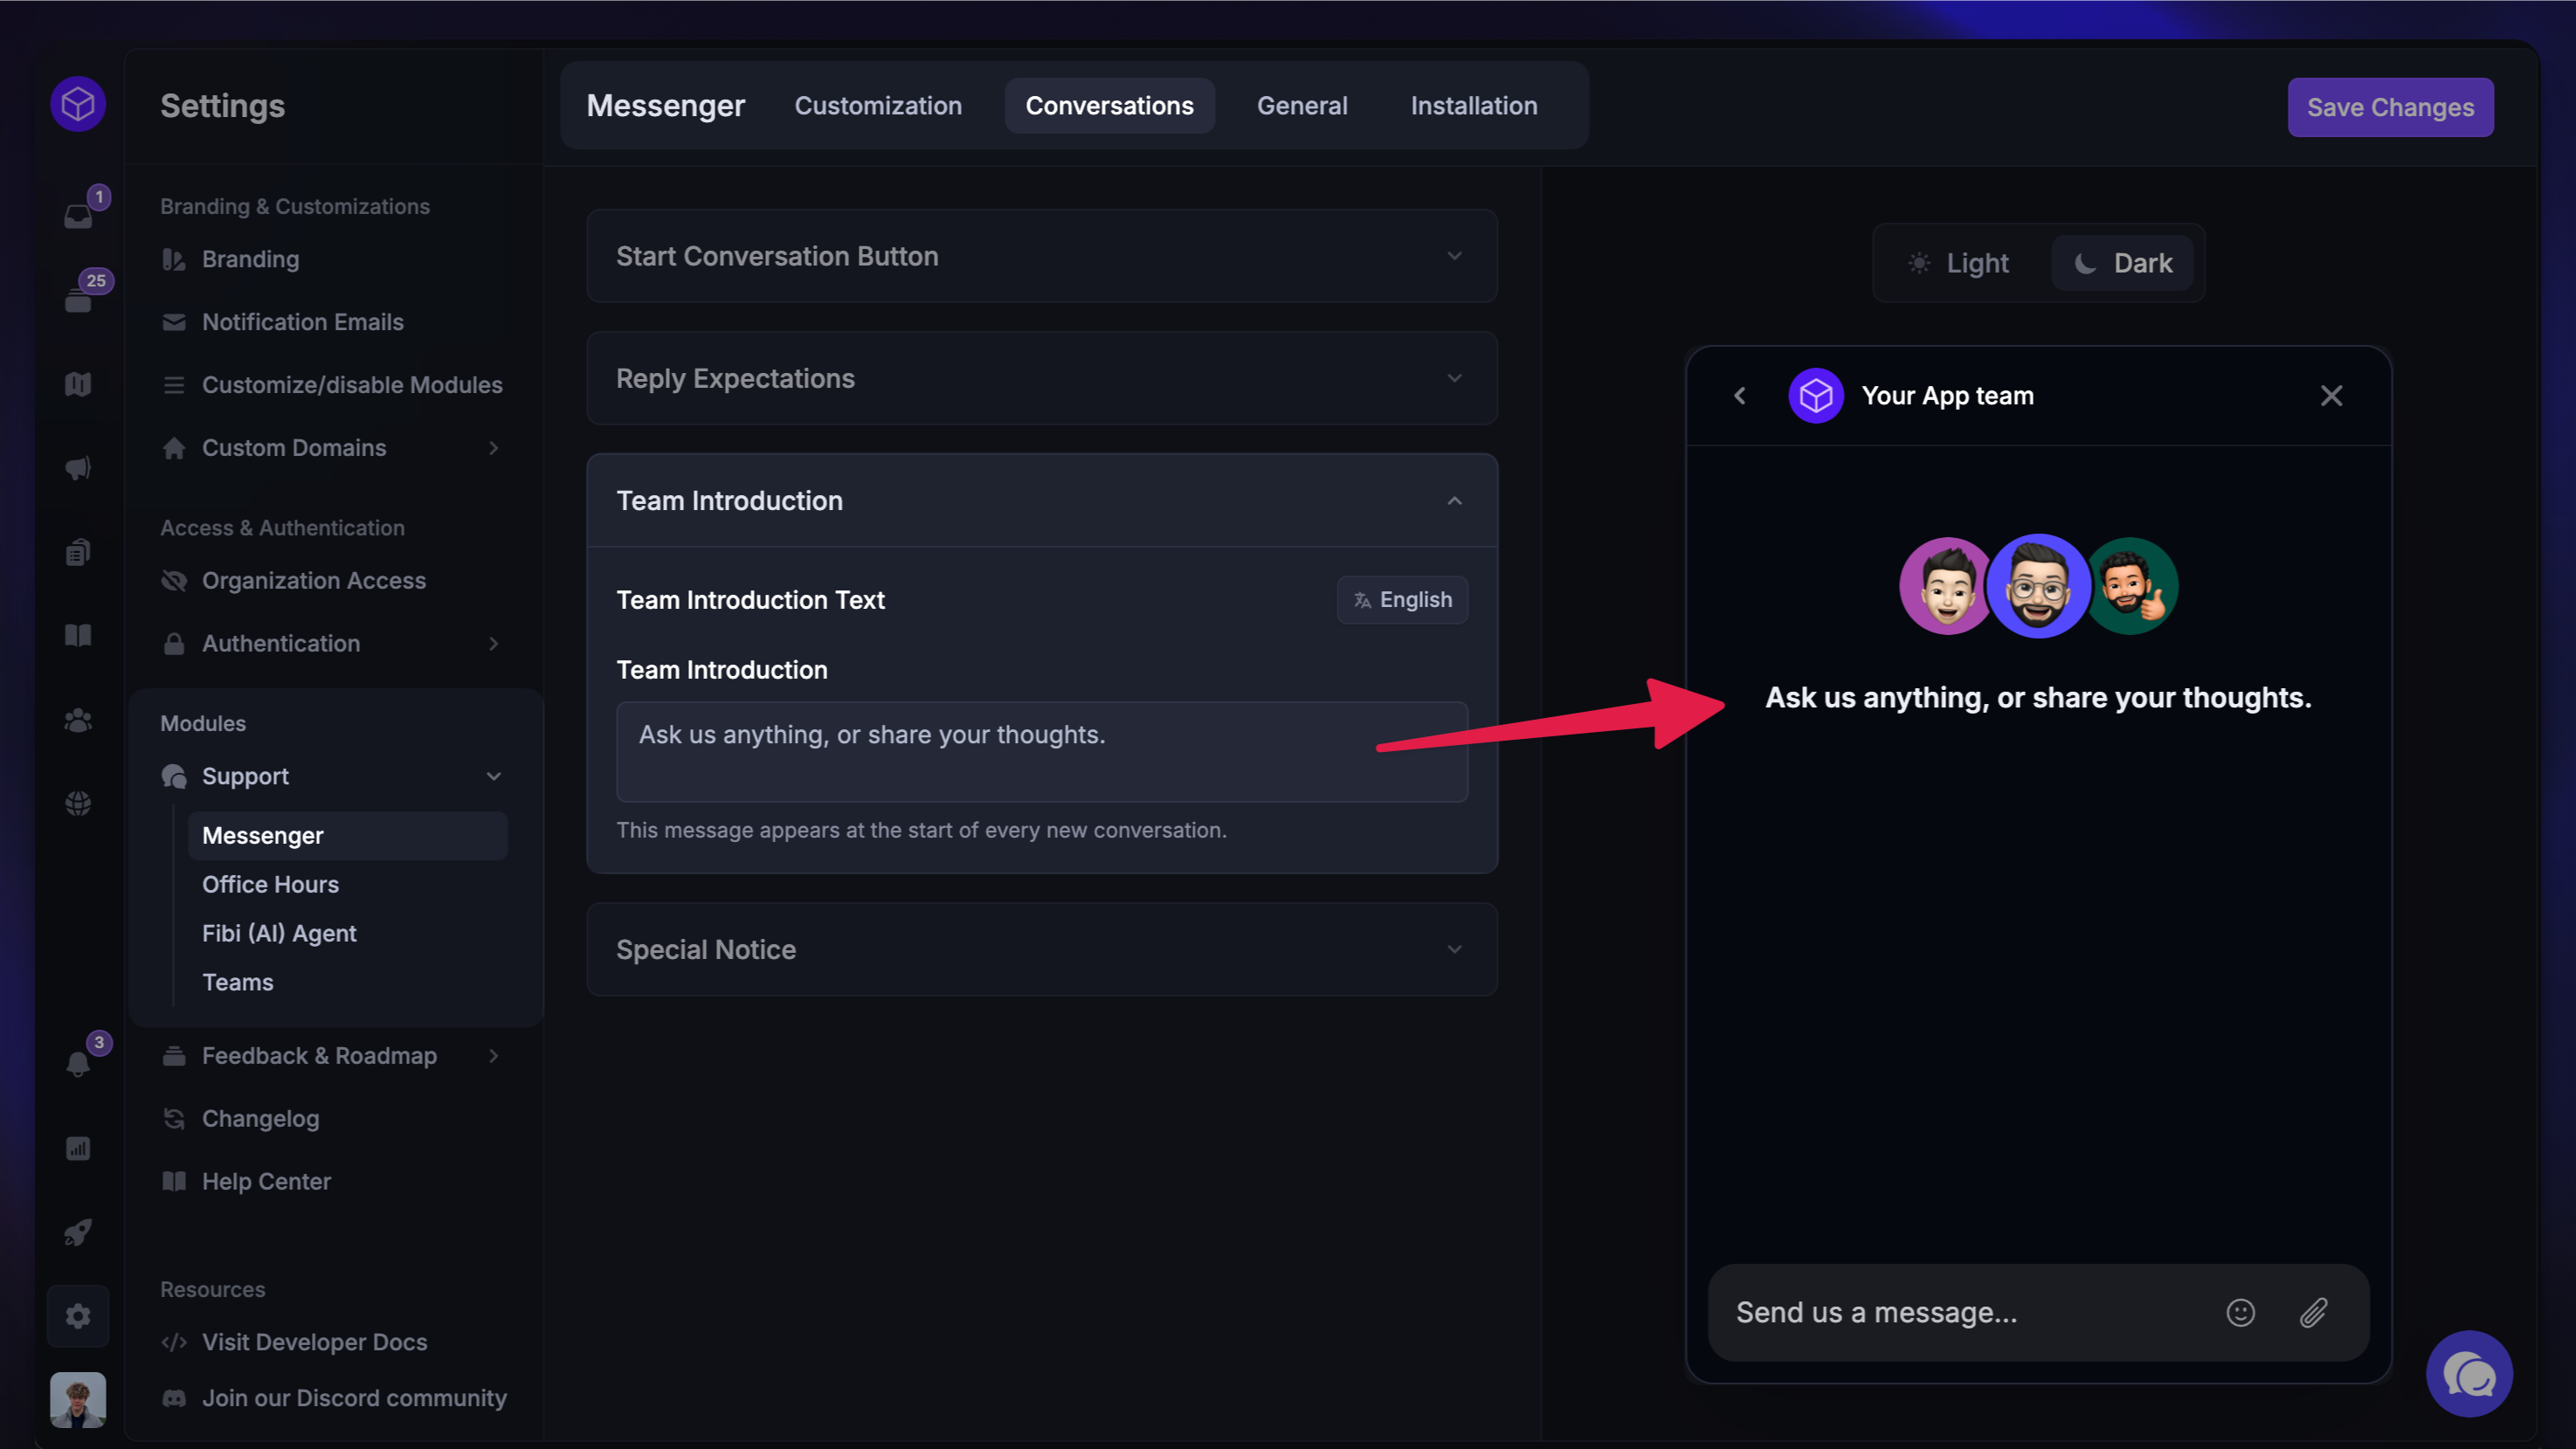
Set a custom team introduction to introduce your team to customers and set expectations before they start a conversation in the Messenger. You can also localize this message.
NB! Team introduction is only shown if Fibi AI Agent is disabled.
Special notice
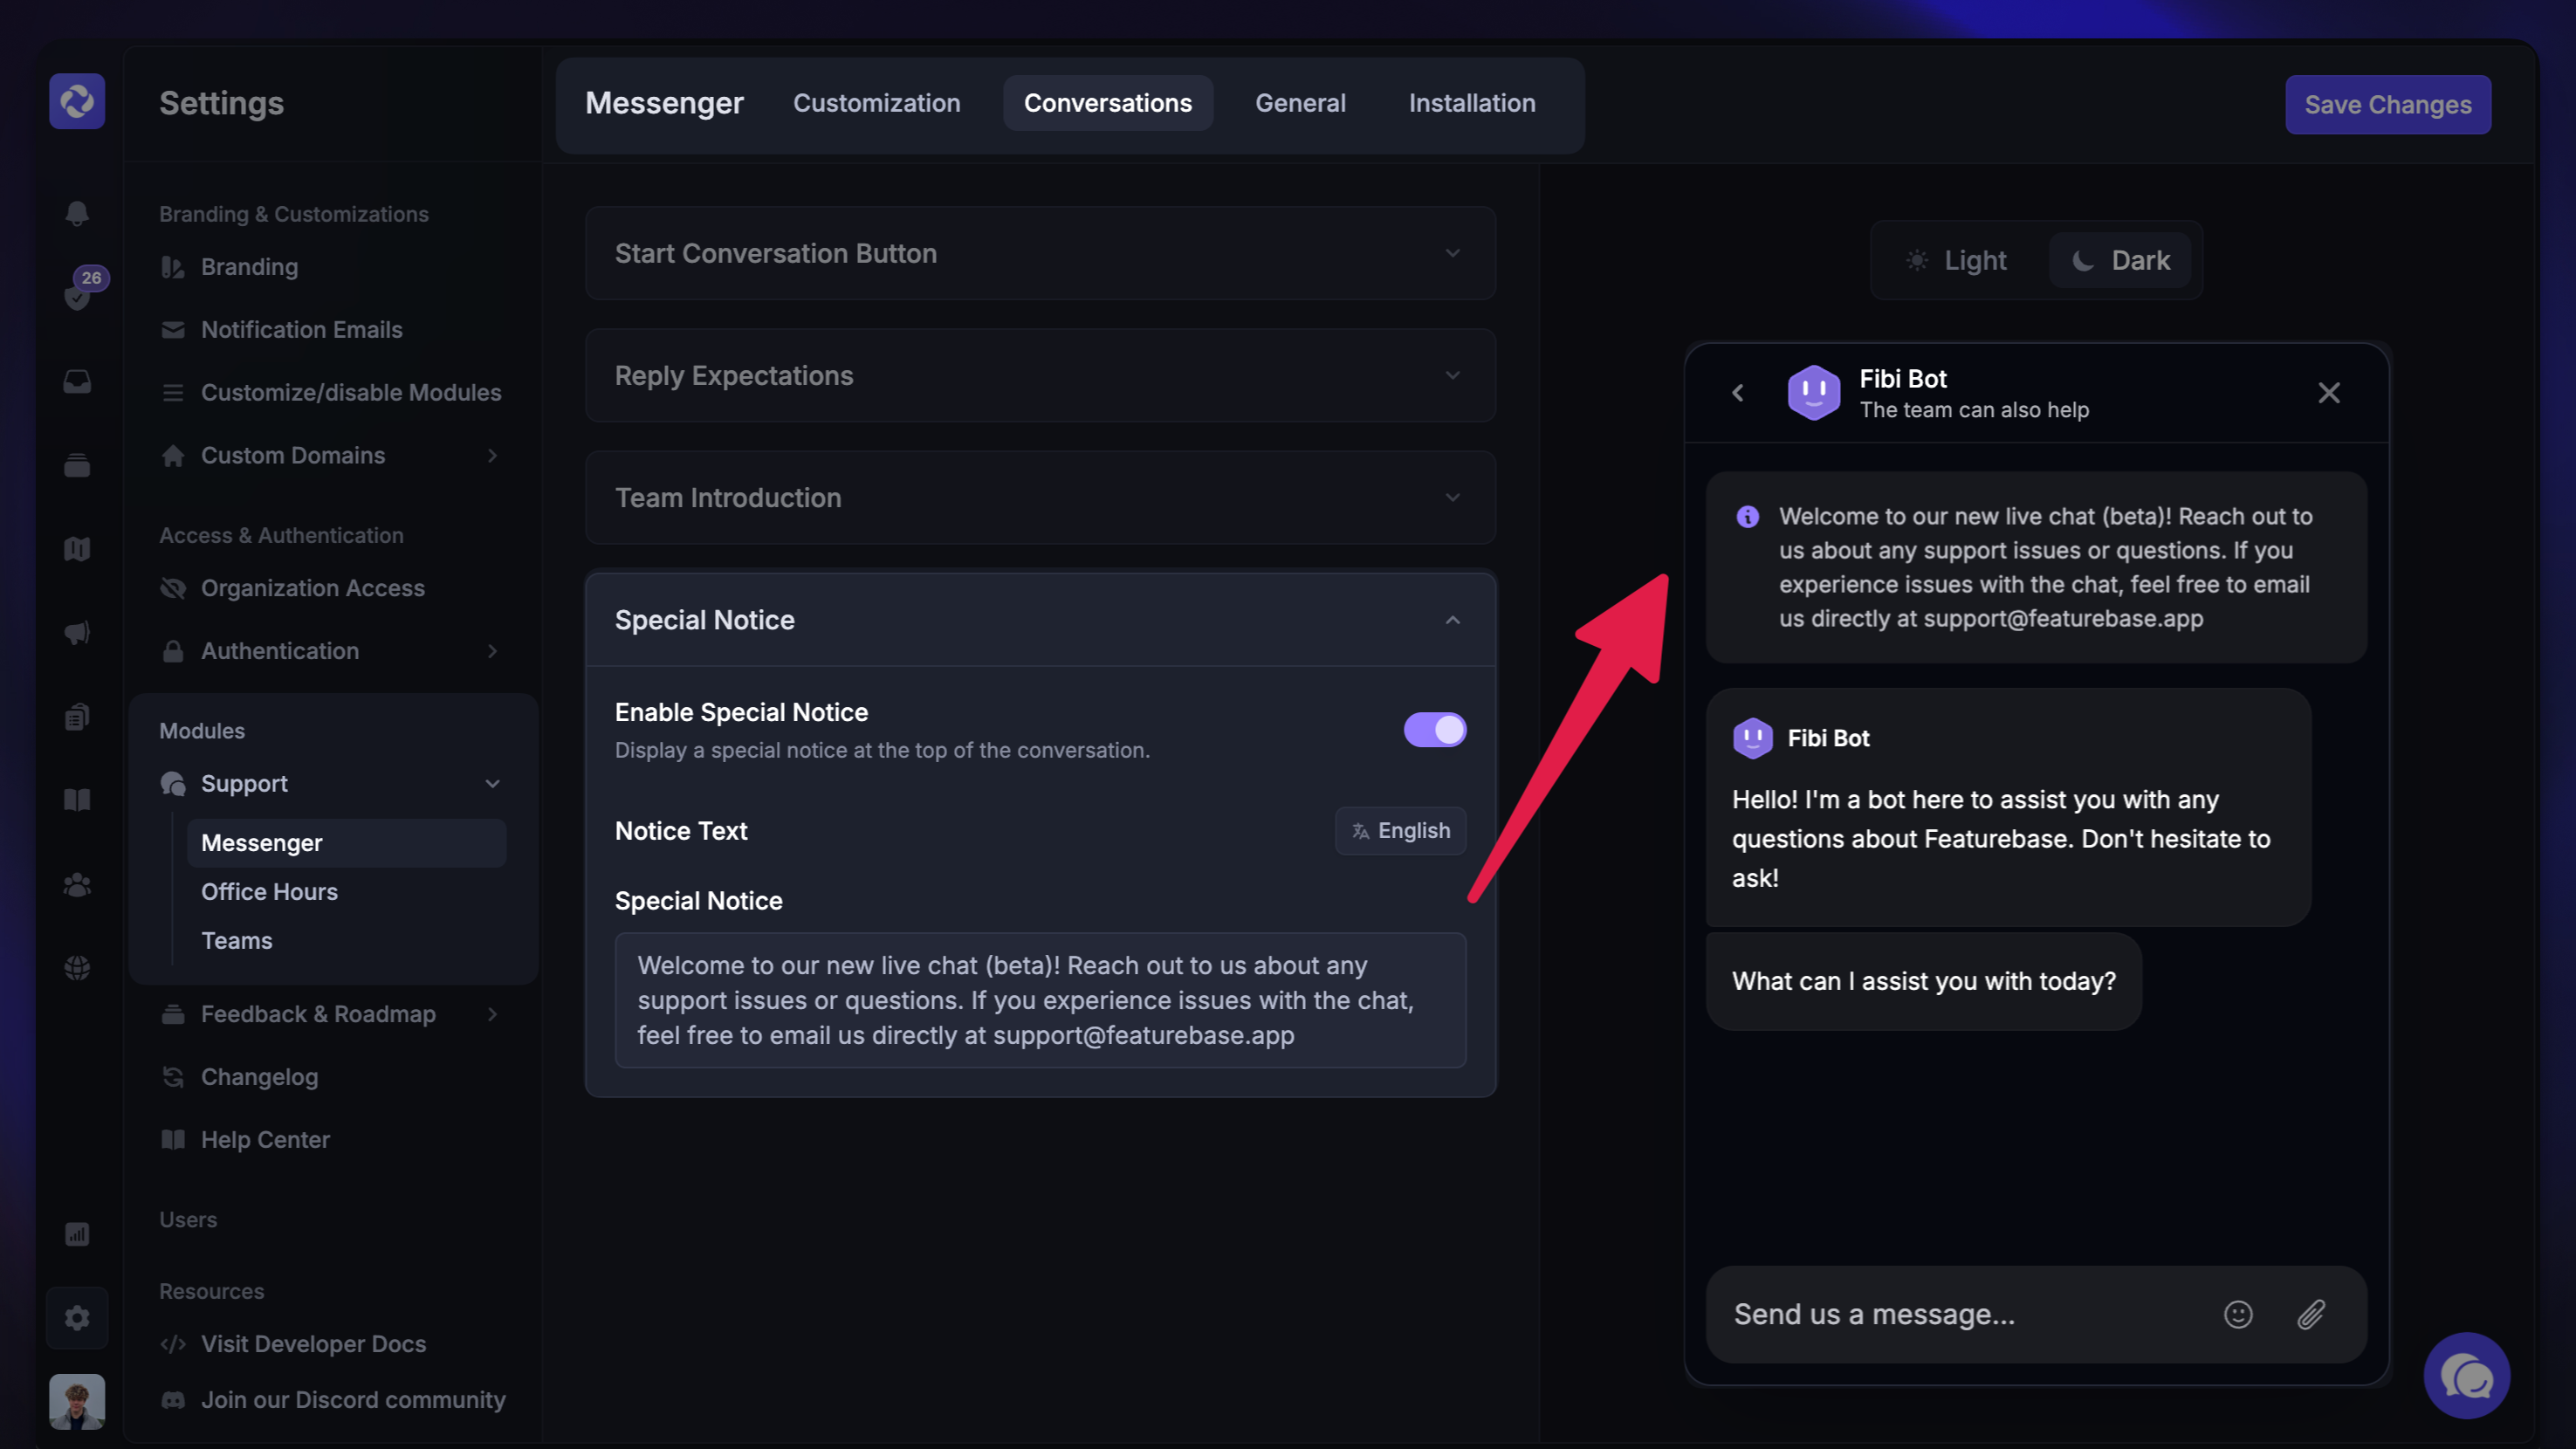
Write a Special notice to all your visitors and users. For example, if your response times are slower than usual. Special notices support multiple languages, and you can customize them with links and text styling for improved clarity and engagement.
General settings
Control who can start conversations, limit the inbound volume, and show users a privacy policy notice in your Messenger from Settings → Support → Messenger → General.
Control inbound volume
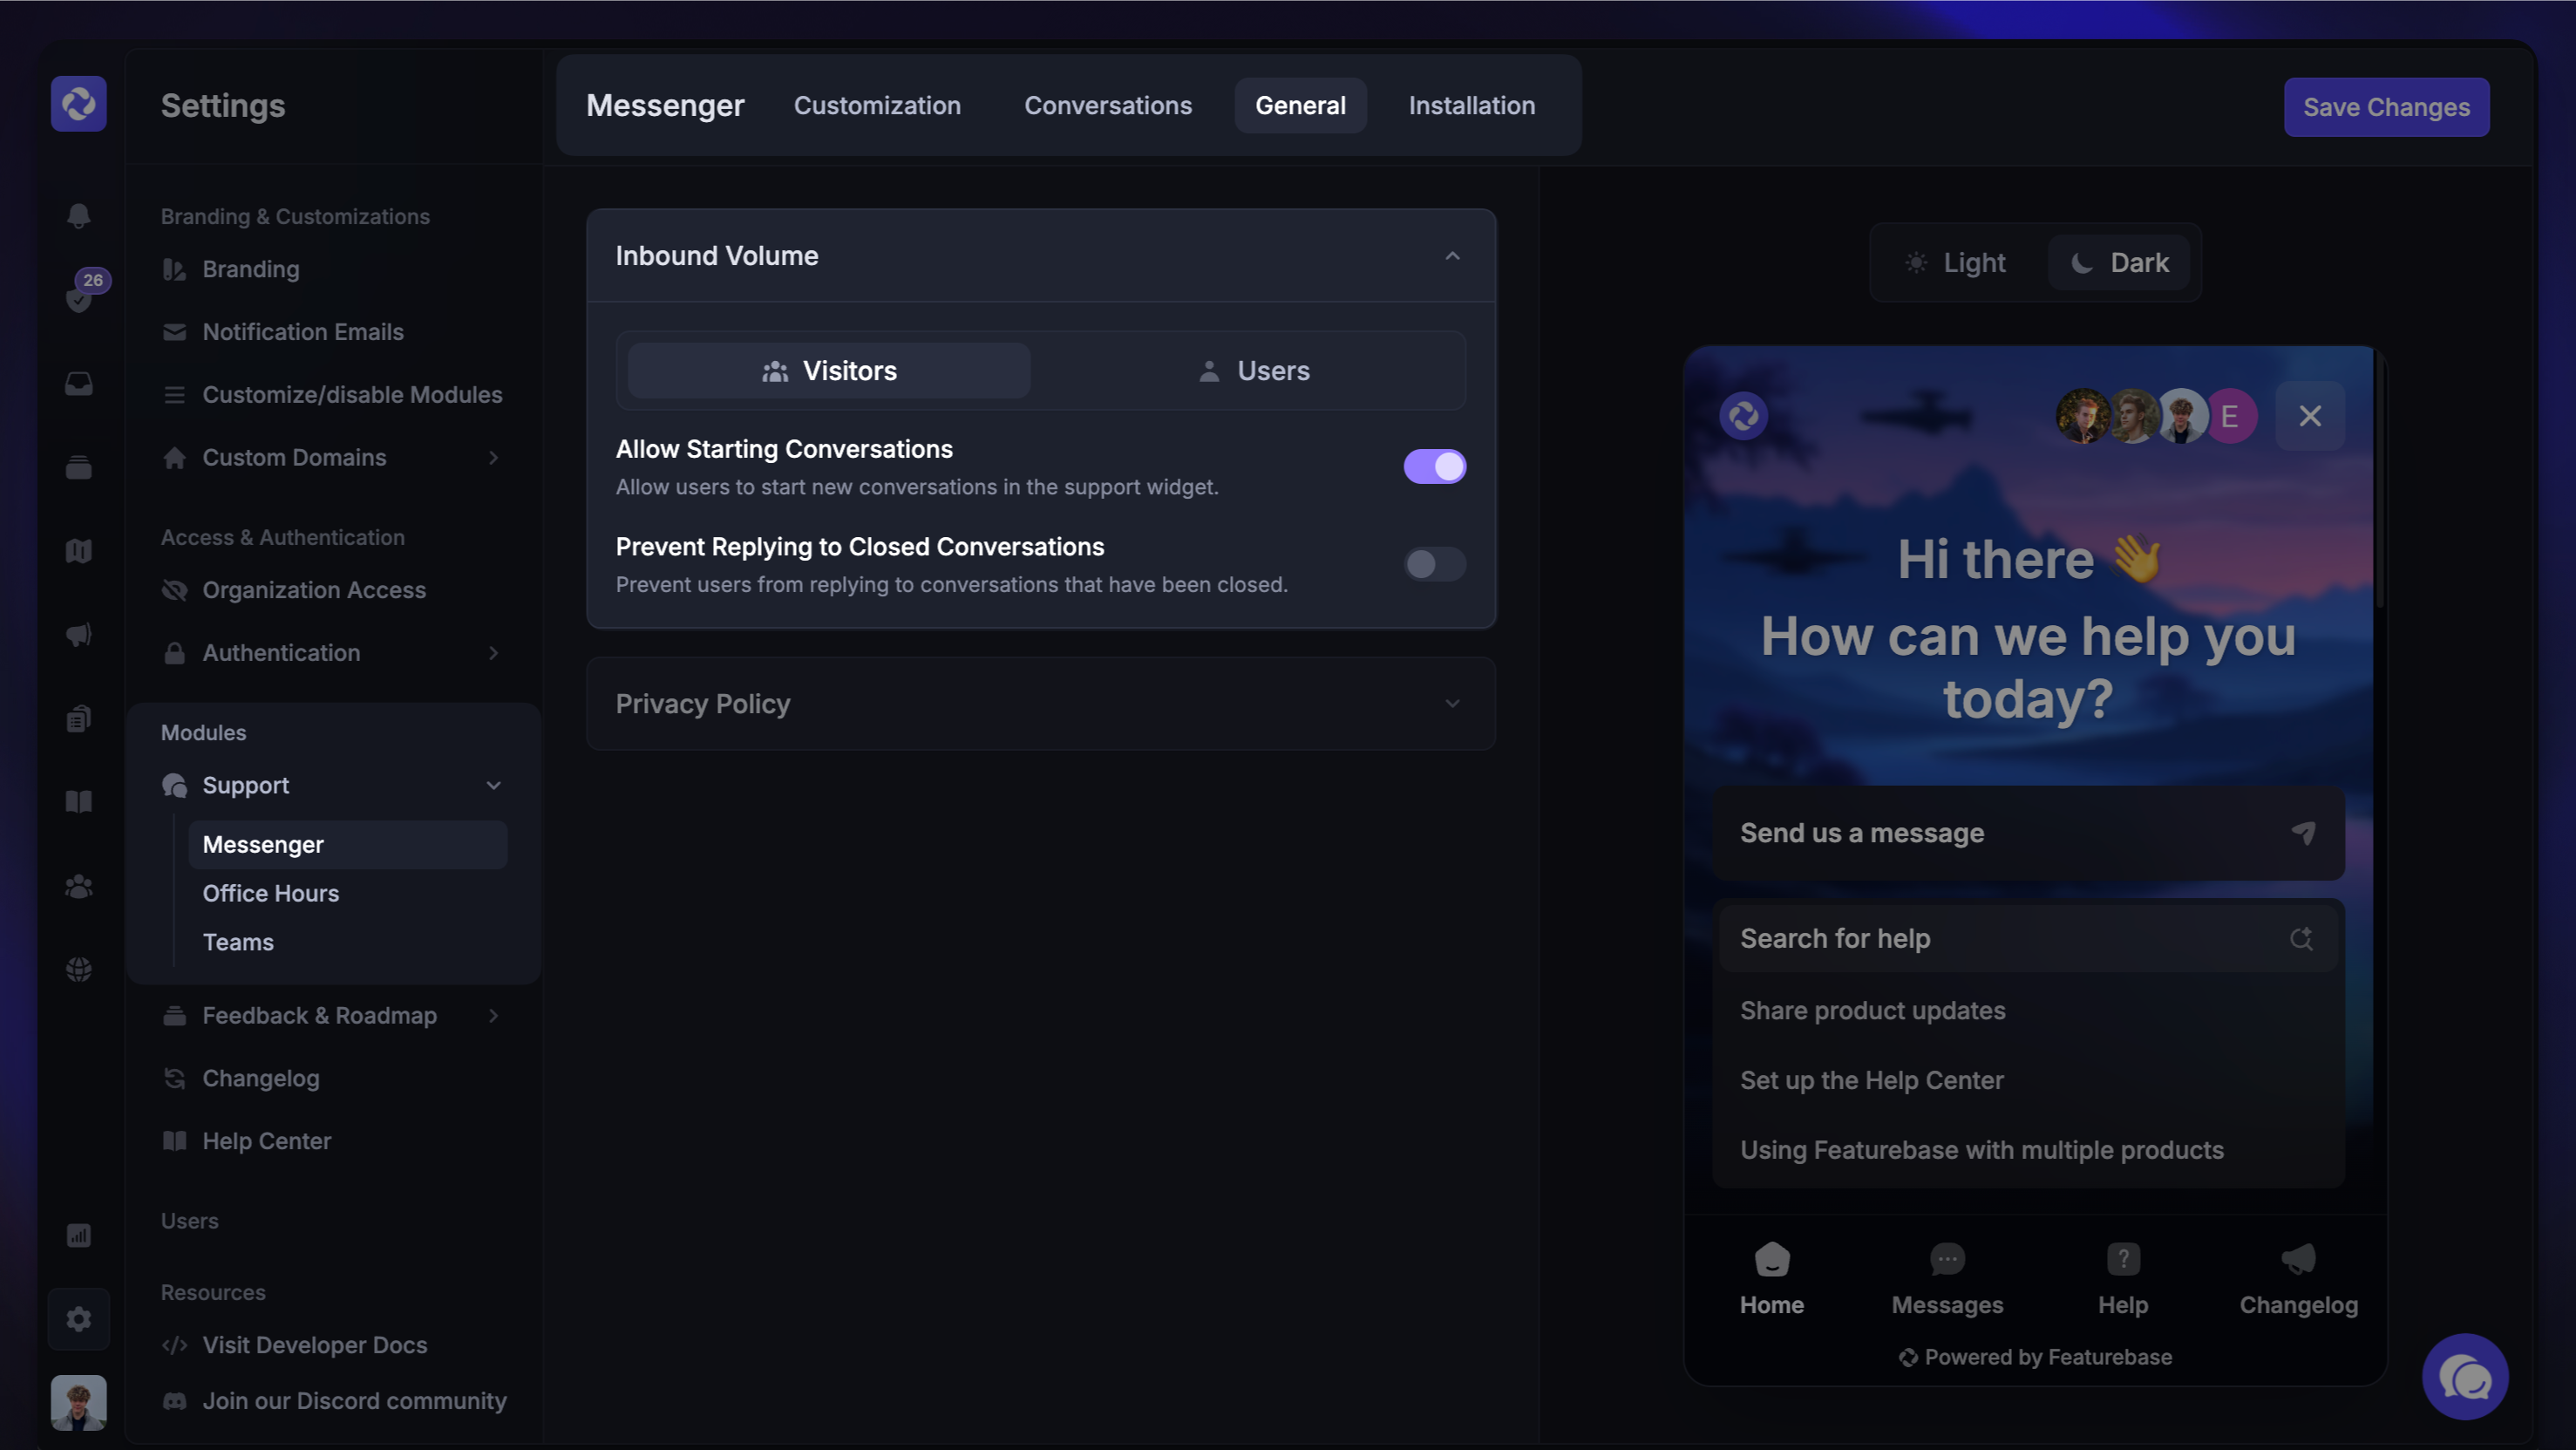
Control inbound volume by deciding who can start a conversation in the Messenger. You can also choose if users should be able to reply to closed conversations or be incentivized to start a new one.
Privacy policy
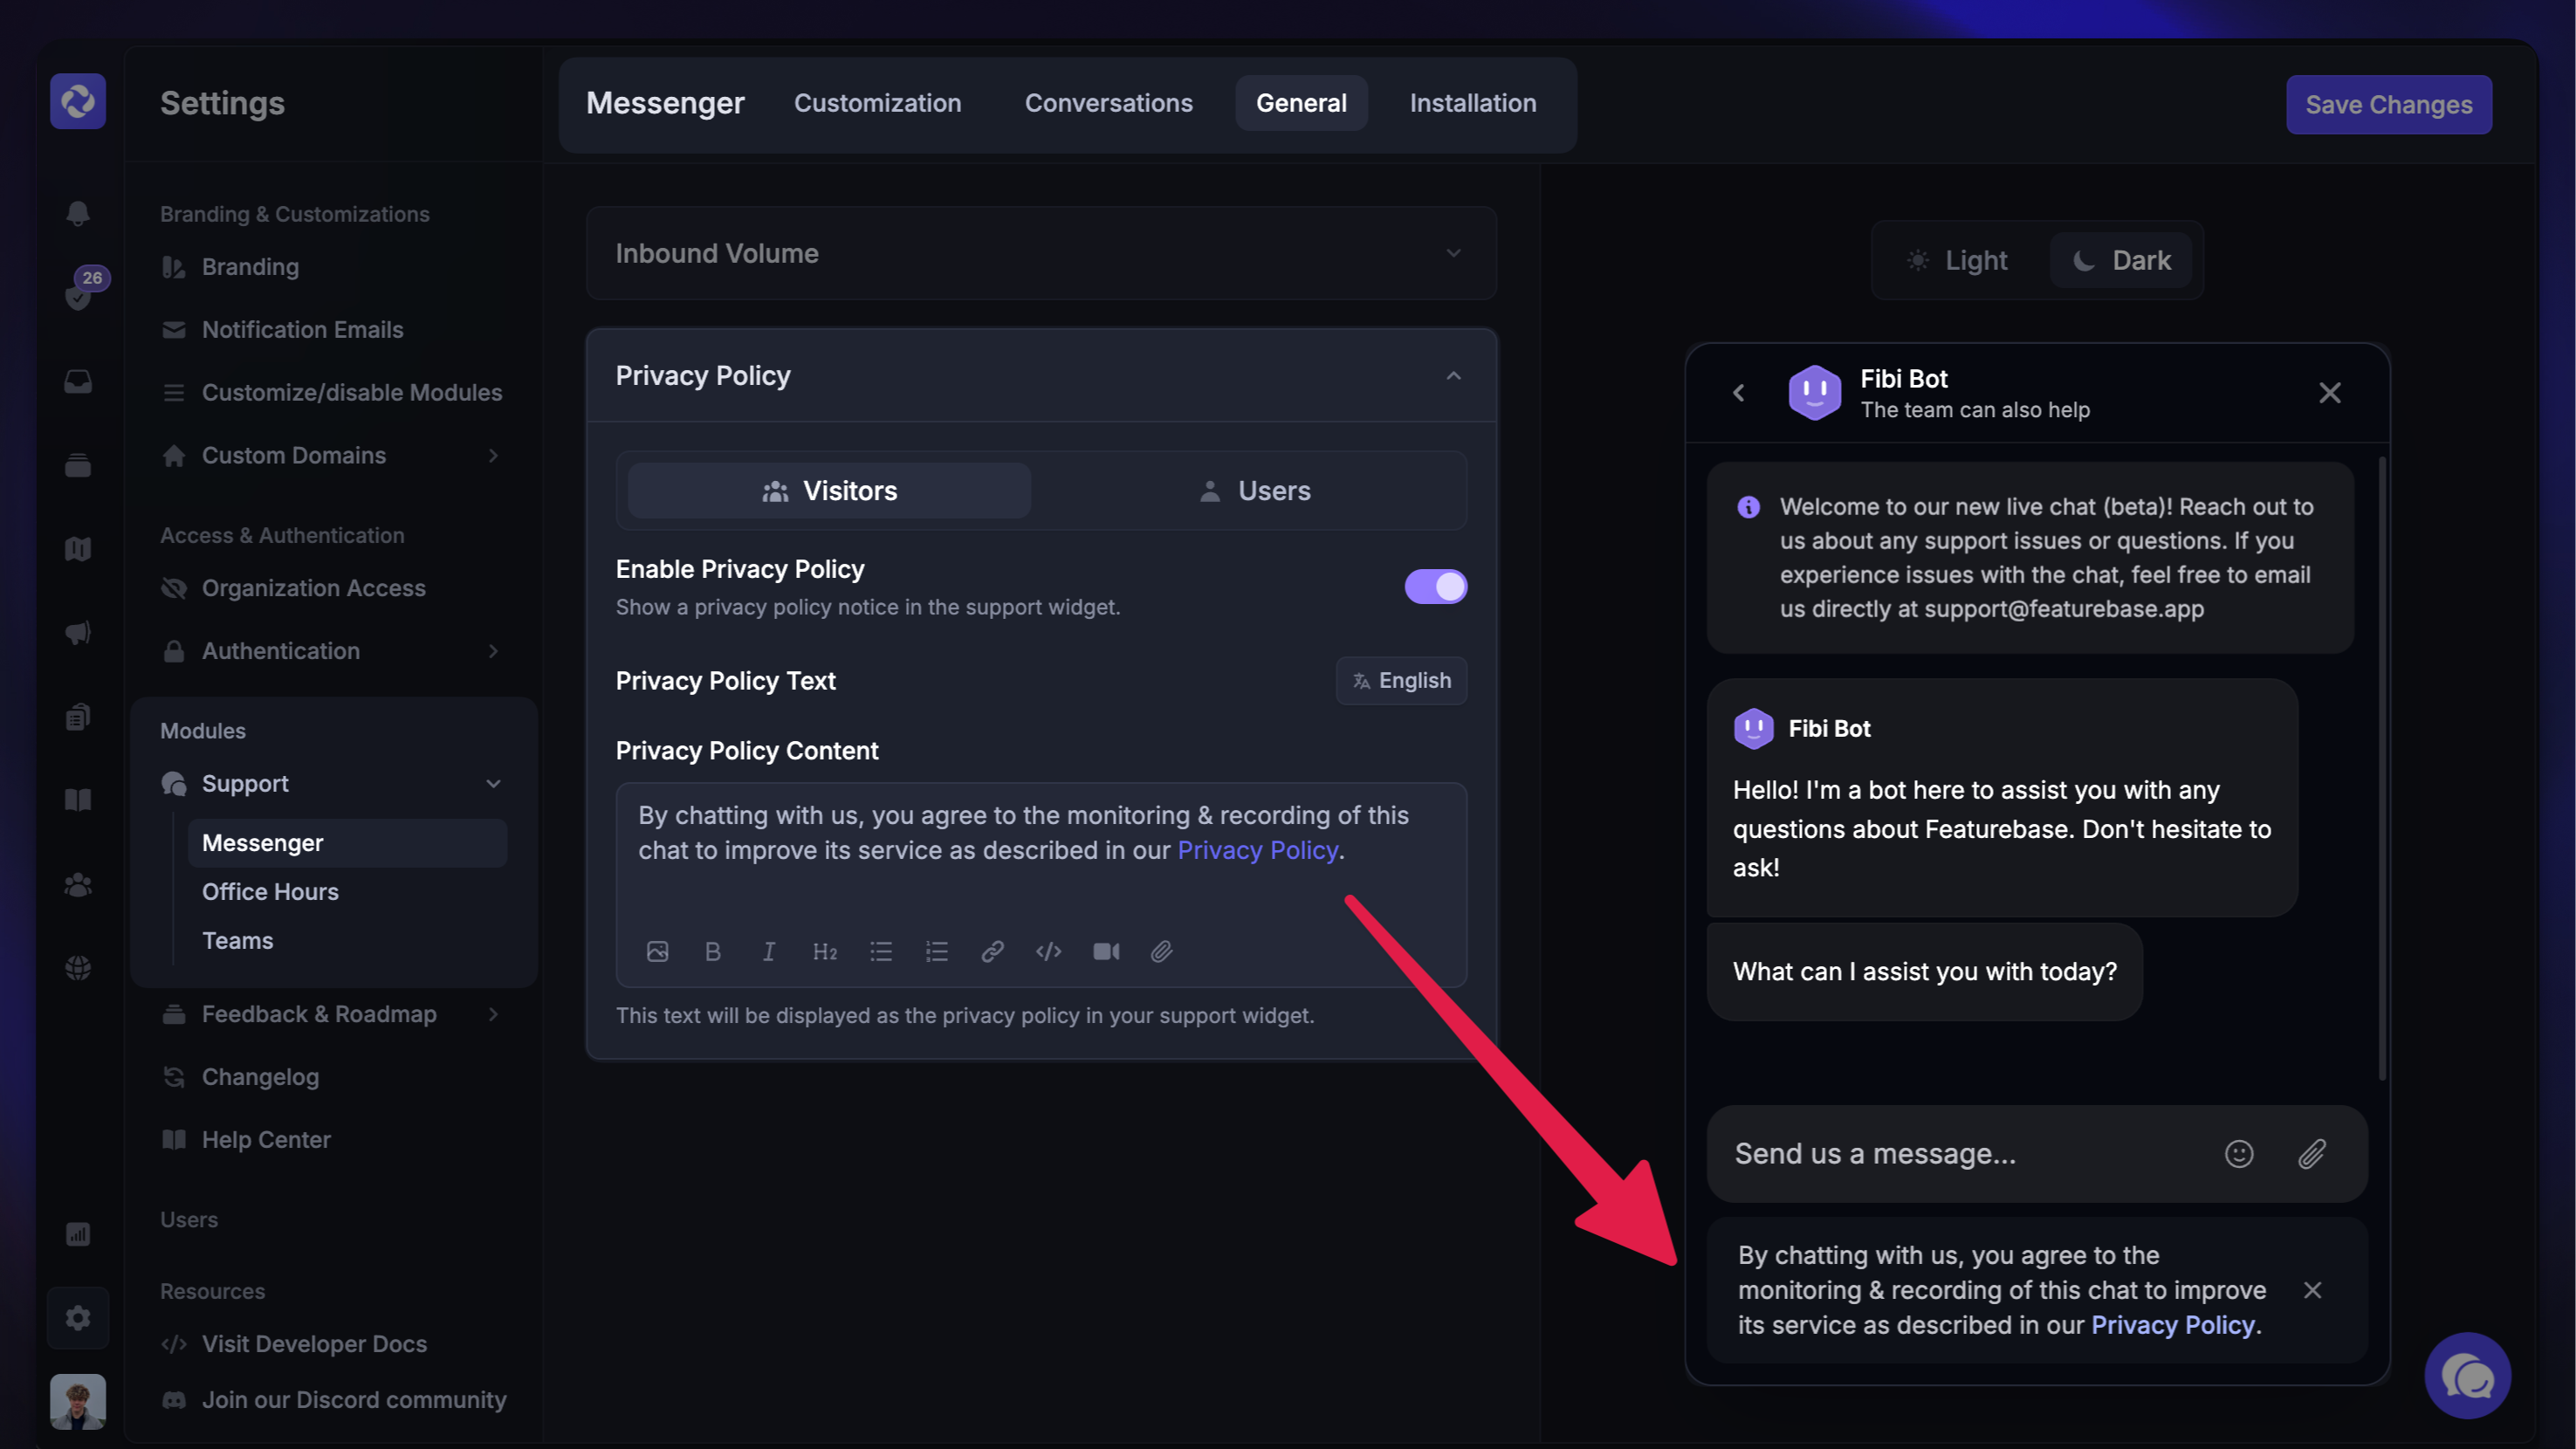
Link your privacy policy within the Messenger and remind customers of your data processing and protection policies. The notice will appear at the start of each new conversation until the customer either sends a message or dismisses it. It also supports localization.
Save and set live!
That’s it – make sure to hit the ‘Save Changes’ on the top right, and you’re all set up! 🎉
Next steps:
To use the Messenger, you must first install the Featurebase Messenger widget.
It’s very important to set up your support email address as one of the available sending addresses. When choosing which module should use the provided address, select “Support”. Emails will not work without this!
To make sure emails from your support email (e.g. support@yourapp.com) arrive in the Featurebase Inbox, set up automatic email forwarding.