Messenger installation
Learn how to install the Messenger widget into your app to support your customers from where they are.
Written By Markus Palm
Last updated 5 days ago
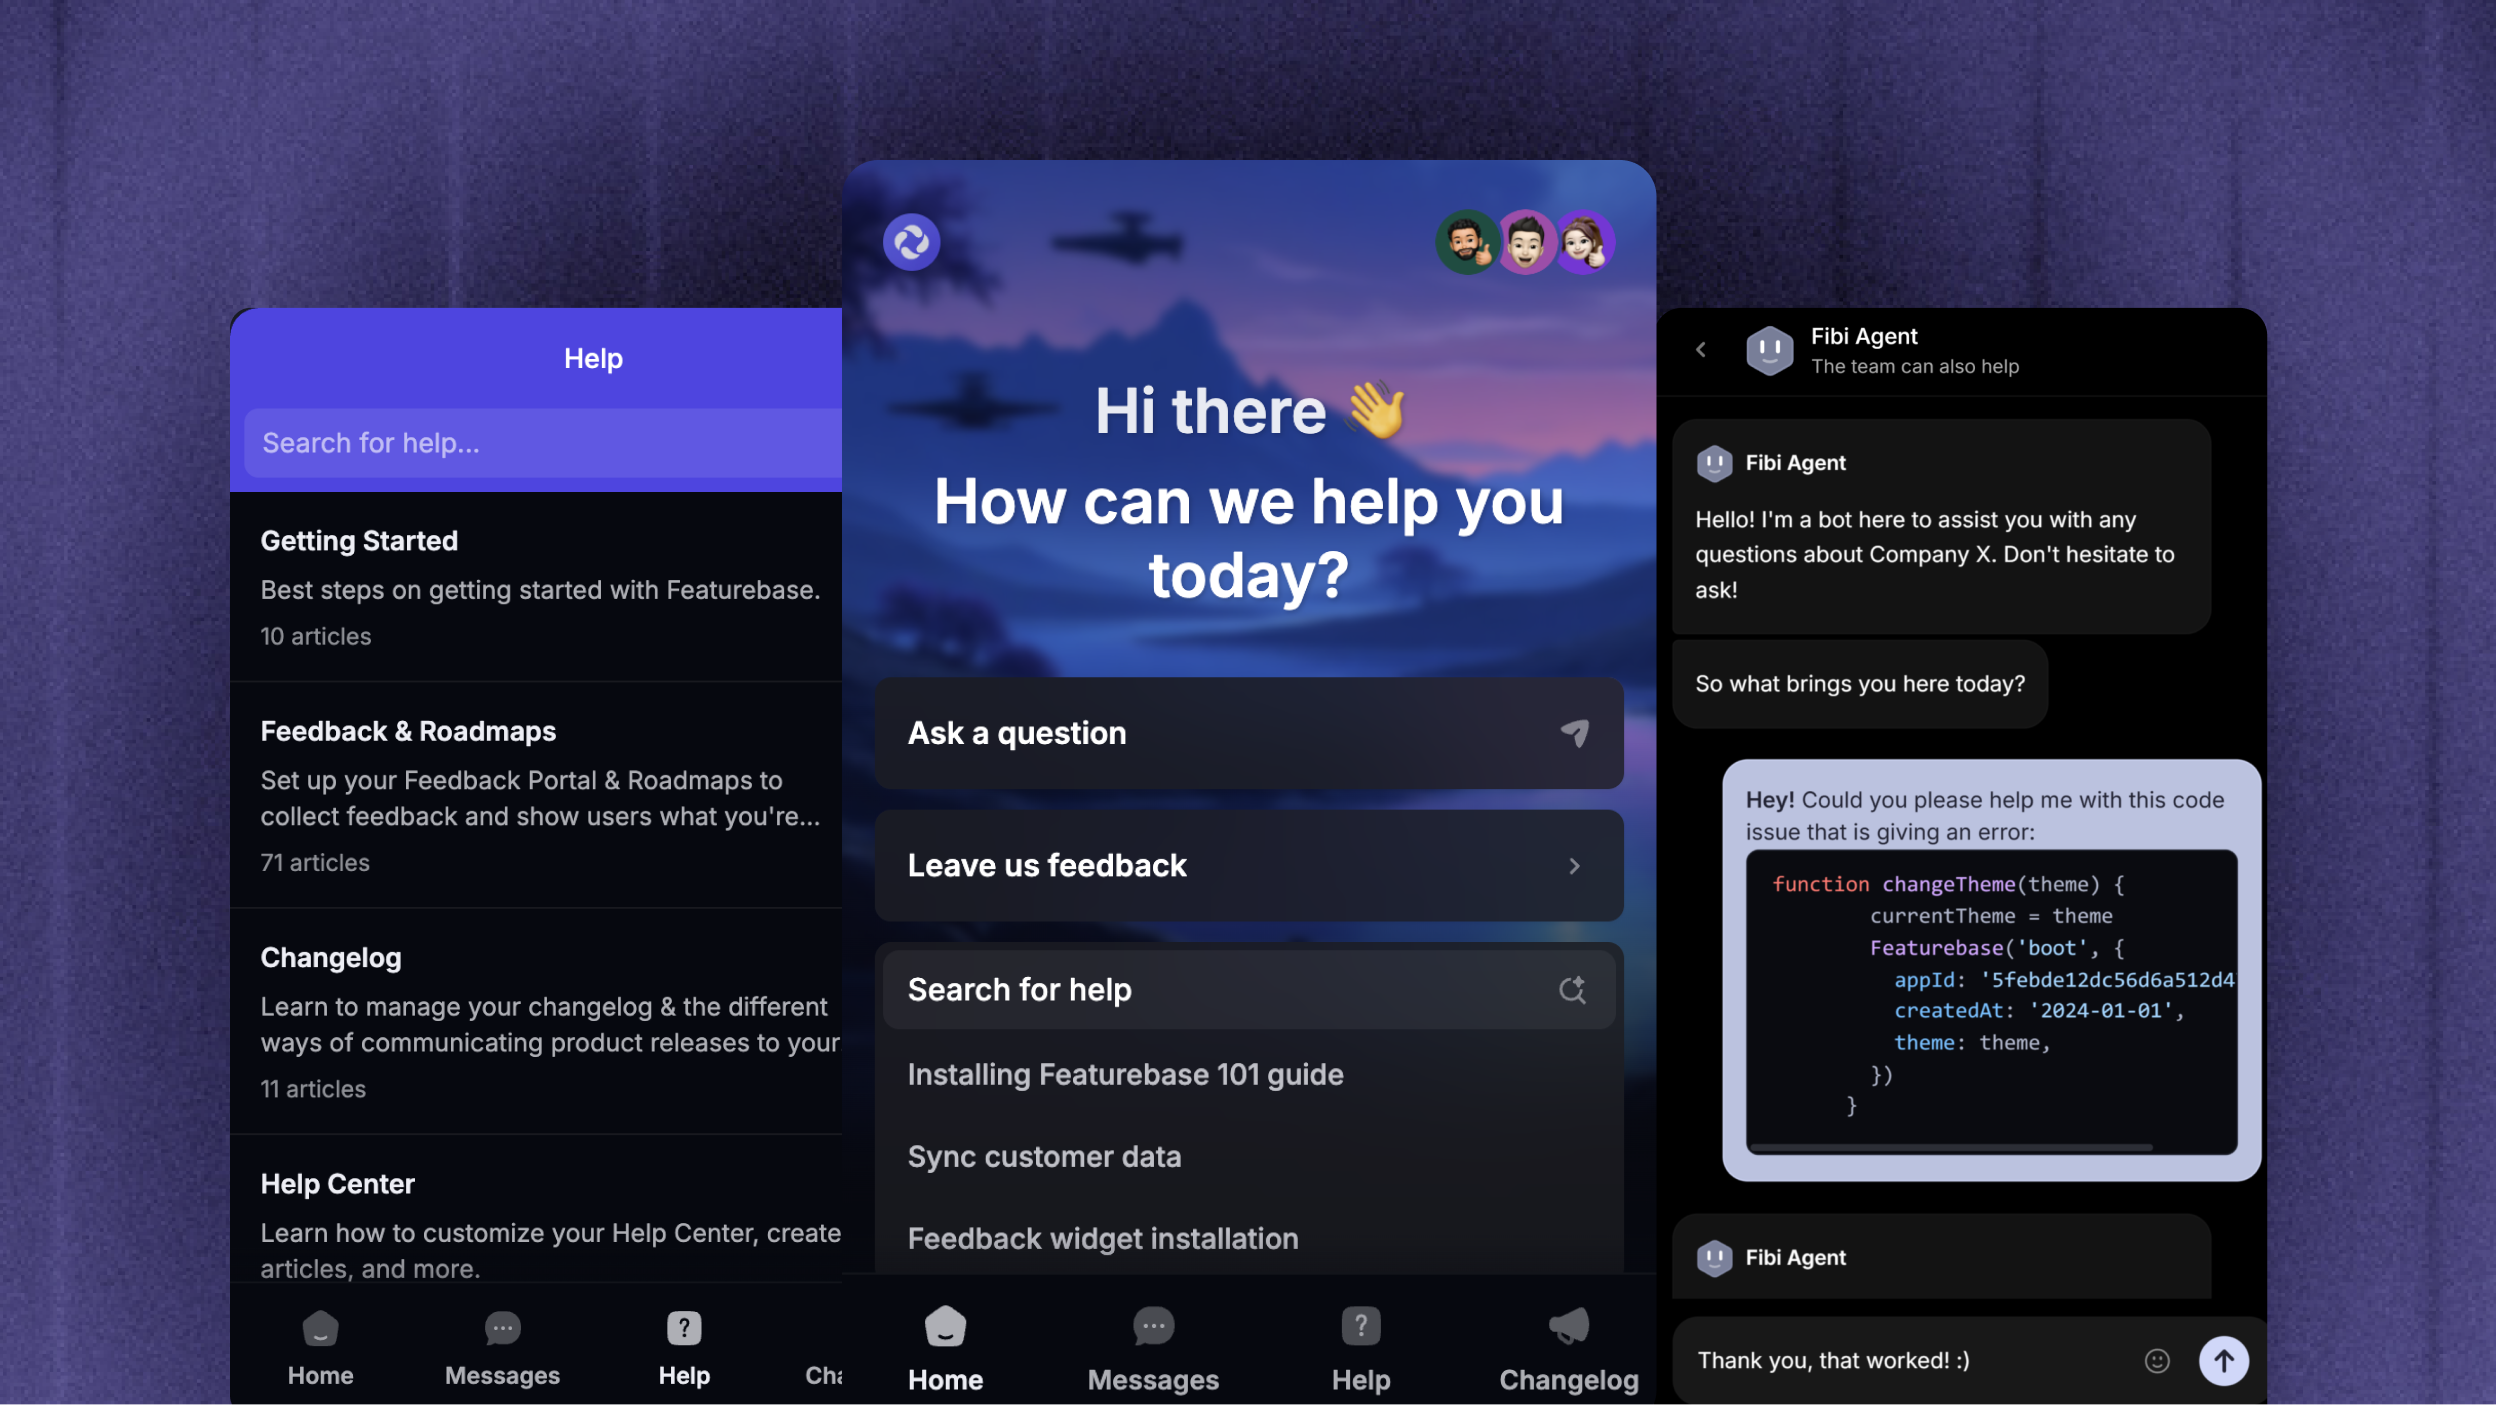
The Messenger — live chat, help center, updates feed, and news — is the only Featurebase surface that auto-boots from your universal SDK install. As soon as you finish Installation overview and Support is enabled in your dashboard, the floating launcher appears in your app.
Heads up: there is no separate Messenger install snippet. This article covers the things you can do after the universal install — customize its appearance, drive it from your own UI, or opt it out on a specific surface.
Install the Featurebase SDK
Every widget — including the Messenger — inherits its appId and the signed-in user from a single universal Featurebase install at your app root. Do that first, then come back here to configure the Messenger and drive it from your UI.
👉 Follow Installation overview (it takes about 2 minutes). Your appId lives in Settings → Developers → Installation.
👤 Logged-in product? Use a server-signed featurebaseJwt on the universal boot so conversations, read state, and contact attributes flow to the right person.
Configure & drive the Messenger
Unlike the other widgets, the Messenger has no separate mount call — the floating launcher appears automatically as soon as Step 1 is done and the Support module is enabled. Everything below is optional: tweak its appearance, open it from your own button, react to unread changes, or opt it out on a specific surface.
Turn the Messenger on or off
The Messenger is gated by the Support module. Toggle it in Settings → General → Manage modules to enable or disable the surface end-to-end. Customize the Messenger’s colors, logo, header, and launcher under Styling in Settings → Support channels → Messenger.
Need to opt out of the Messenger on a specific page (e.g. a marketing landing page) without touching the dashboard? Pass messenger={false}:
<FeaturebaseProvider appId="YOUR_APP_ID" messenger={false}>
  <MarketingPage />
</FeaturebaseProvider>
Featurebase({
appId: 'YOUR_APP_ID',
messenger: false,
});User identity
Identity is inherited from the universal install. Once a signed featurebaseJwt is on the boot call, the Messenger automatically associates conversations with the right contact — no extra wiring per surface.
Customize the Messenger (props)
The Messenger reads its appearance and launcher behavior from the same boot call you already have. Common props you may want to set:
theme—'light'or'dark'language— BCP-47 short code (e.g.'en','de','fr')hideDefaultLauncher— hide the built-in floating launcher and open the Messenger from your own button viashow()alignment—'left'or'right'horizontalPadding/verticalPadding— px offsets from the side / bottom
// Update the same <FeaturebaseProvider> from your universal install.
'use client';
import { FeaturebaseProvider } from 'featurebase-js/react';

export default function RootLayout({ children, user }) {
  return (
    <FeaturebaseProvider
      appId="YOUR_APP_ID"
      featurebaseJwt={user?.featurebaseJwt}
      theme="dark"               // 'light' | 'dark'
      language="en"              // BCP-47 short code (en, de, fr, ...)
      hideDefaultLauncher        // hide built-in launcher; open with show()
      alignment="left"           // 'left' | 'right'
      horizontalPadding={24}     // px from the side
      verticalPadding={80}       // px from the bottom
    >
      {children}
    </FeaturebaseProvider>
  );
}
import Featurebase from 'featurebase-js';
Featurebase({
appId: 'YOUR_APP_ID',
featurebaseJwt: user?.featurebaseJwt,
theme: 'dark', // 'light' | 'dark'
language: 'en', // BCP-47 short code
hideDefaultLauncher: true, // hide built-in launcher; open with show()
alignment: 'left', // 'left' | 'right'
horizontalPadding: 24, // px from the side
verticalPadding: 80, // px from the bottom
});Drive the Messenger from your UI (methods)
Once the Messenger is mounted, you can open / close it, jump to a specific space, pre-fill a new message, or react to unread changes — from any component in your app.
'use client';
import { useFeaturebase } from 'featurebase-js/react';

export function ChatLauncher() {
  const {
    show,                  // open the messenger
    hide,                  // close it
    showSpace,             // 'home' | 'messages' | 'help' | 'changelog'
    showMessages,          // shortcut for showSpace('messages')
    showArticle,           // open a specific help article by id or slug
    showChangelog,         // open changelog index, or pass an id for a specific entry
    showConversation,      // open a specific conversation by id
    showNewMessage,        // open the new-message composer (optionally pre-filled)
    setTheme,              // change theme at runtime ('light' | 'dark')
    setLanguage,           // change language at runtime
    update,                // re-identify the current visitor without re-booting
    shutdown,              // tear down the messenger (use on logout)
    unreadCount,           // reactive — re-renders on change
  } = useFeaturebase();

  return (
    <button onClick={show}>
      Chat {unreadCount > 0 && <span>({unreadCount})</span>}
    </button>
  );
}
import {
show, hide, showSpace, showMessages, showArticle, showChangelog,
showConversation, showNewMessage, setTheme, setLanguage,
update, shutdown,
whenReady, onShow, onHide, onUnreadCountChange,
} from 'featurebase-js';
show(); // open the messenger
hide(); // close it
showSpace('help'); // 'home' | 'messages' | 'help' | 'changelog'
showArticle('billing-faq'); // by id or slug
showChangelog(); // index, or pass an id for a specific entry
showConversation('conv_8q2x');
showNewMessage('I want to upgrade'); // pre-filled composer
setTheme('dark');
setLanguage('fr');
// Wrap subscriptions in whenReady() — boot is async.
whenReady(() => {
onShow(() => console.log('messenger opened'));
onHide(() => console.log('messenger closed'));
onUnreadCountChange((count) => {
document.title = count > 0 ? `(${count}) Acme` : 'Acme';
});
});Both stacks expose the same set of named functions — there is no Featurebase('action', …) string channel. The React hook just memoises them onto a context-aware object.
Install on websites for different brands
If your workspace has more than one brand, add each website's domain to its brand before you install the Messenger there. Add it under Messenger websites in Settings → Workspace → Branding, or at the top of the Messenger Installation tab with the brand selected. The Messenger uses the brand that matches the website, and the default brand when nothing matches.
FAQ
The launcher is not appearing in my app
The launcher is not appearing in my app
Walk through these:
Support module is enabled in Settings → General → Manage modules.
Your universal install in Installation overview runs at app startup, not inside a
useEffecttied to route changes.You did not pass
messenger={false}on the boot call.You are not setting
hideDefaultLauncherwithout then callingshow()from your own button.
How do I show an unread badge on my custom button?
How do I show an unread badge on my custom button?
Use useFeaturebase().unreadCount in React, or onUnreadCountChange in vanilla — both shown in the methods snippet above. The value updates reactively when new messages arrive.
How do I sign the user out of the Messenger?
How do I sign the user out of the Messenger?
Call shutdown() from your logout handler. The next render with a valid featurebaseJwt (or the next Featurebase({ appId, featurebaseJwt }) call in vanilla) re-identifies the new visitor cleanly.
Why is identity not flowing through?
Why is identity not flowing through?
The Messenger requires the universal SDK boot to include a signed featurebaseJwt when secure installation is enabled (which it is by default).
Was this helpful?
Still need help? Ask the team