Conversation tags
Tag individual replies in conversations to organize support requests, identify trends, and automate your Inbox.
Written By Markus from Featurebase
Last updated 2 days ago
Overview
Conversation tags let you label individual replies inside a conversation so you can organize support requests, track recurring issues, and trigger automations. Tags applied to messages are aggregated at the conversation level, so filtering, search, and Workflows can all match a conversation using any tag applied to any of its messages.
Common use cases:
Tracking bug reports, feature requests, and complaints
Categorizing conversations by topic, product area, or priority
Routing or escalating conversations through Workflows
Spotting trends in feedback over time
Tip: The longer your team tags consistently, the more valuable your reporting becomes – so it's worth agreeing on a small starter set early.
Create and manage tags
Create a tag
Click + New tag in the top right
Enter a name (for example Billing or Bug report)
Click Create tag
Tag names must be unique within your workspace and are case-insensitive.
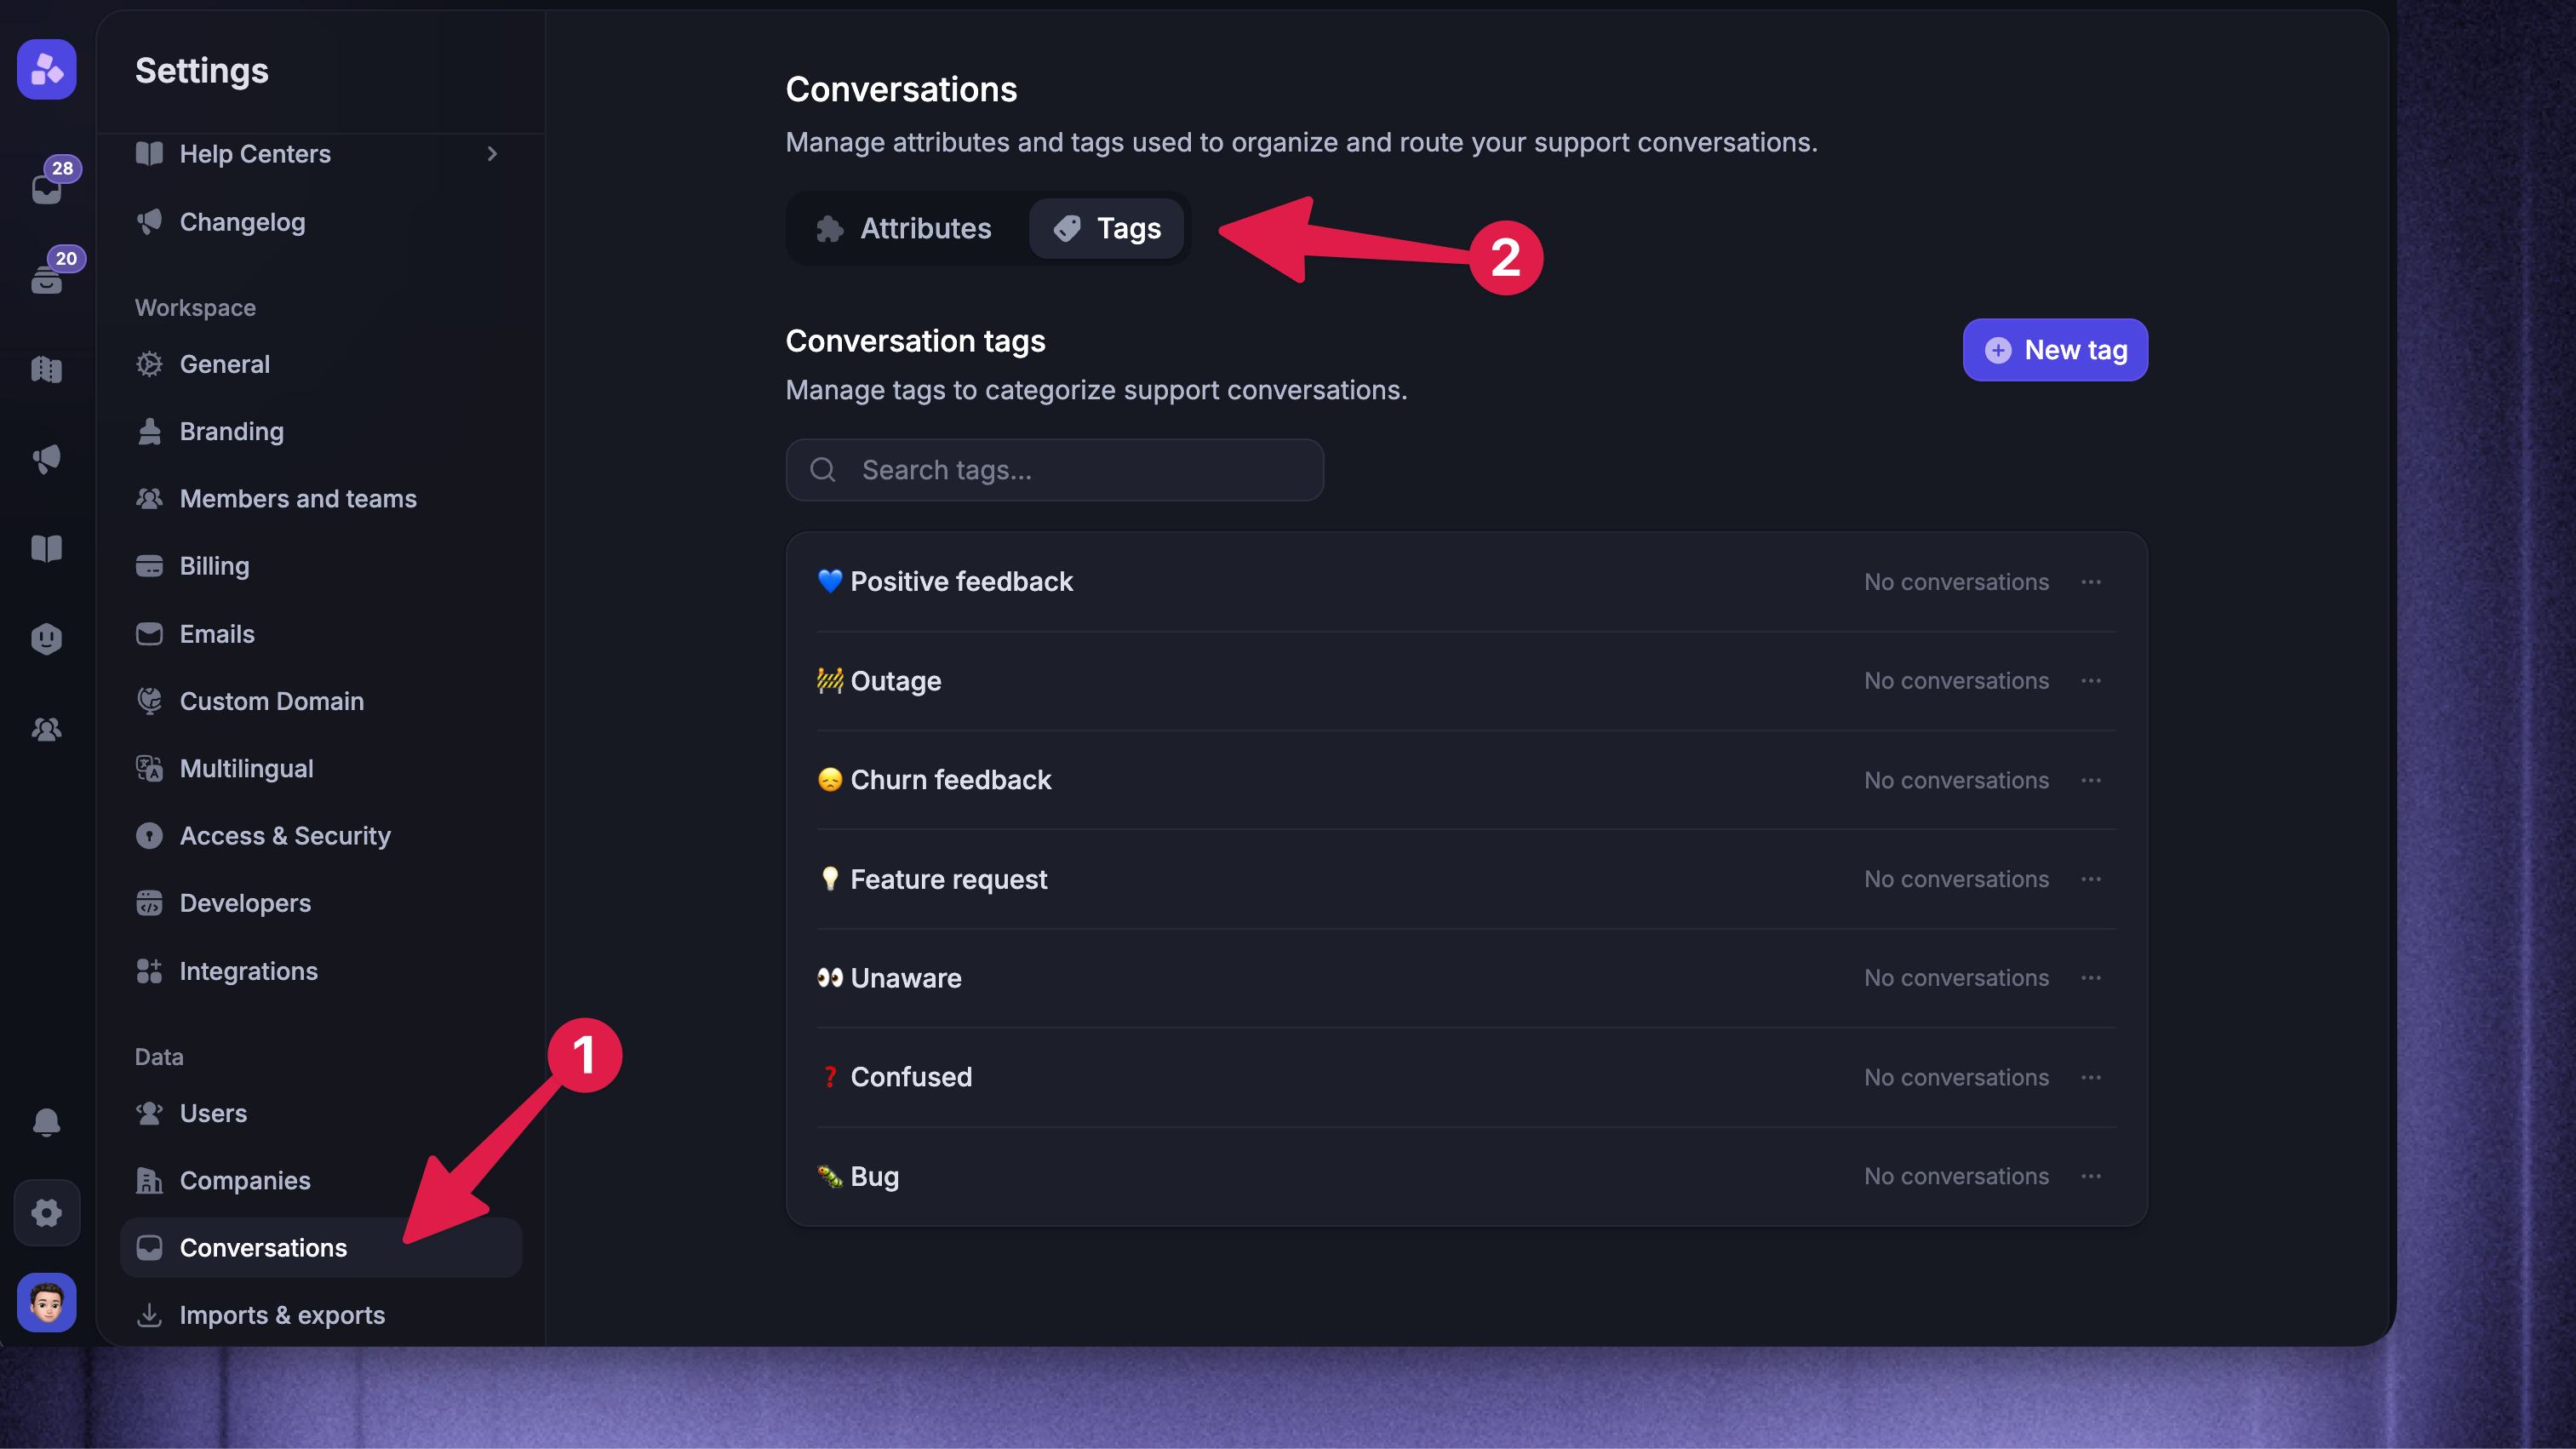
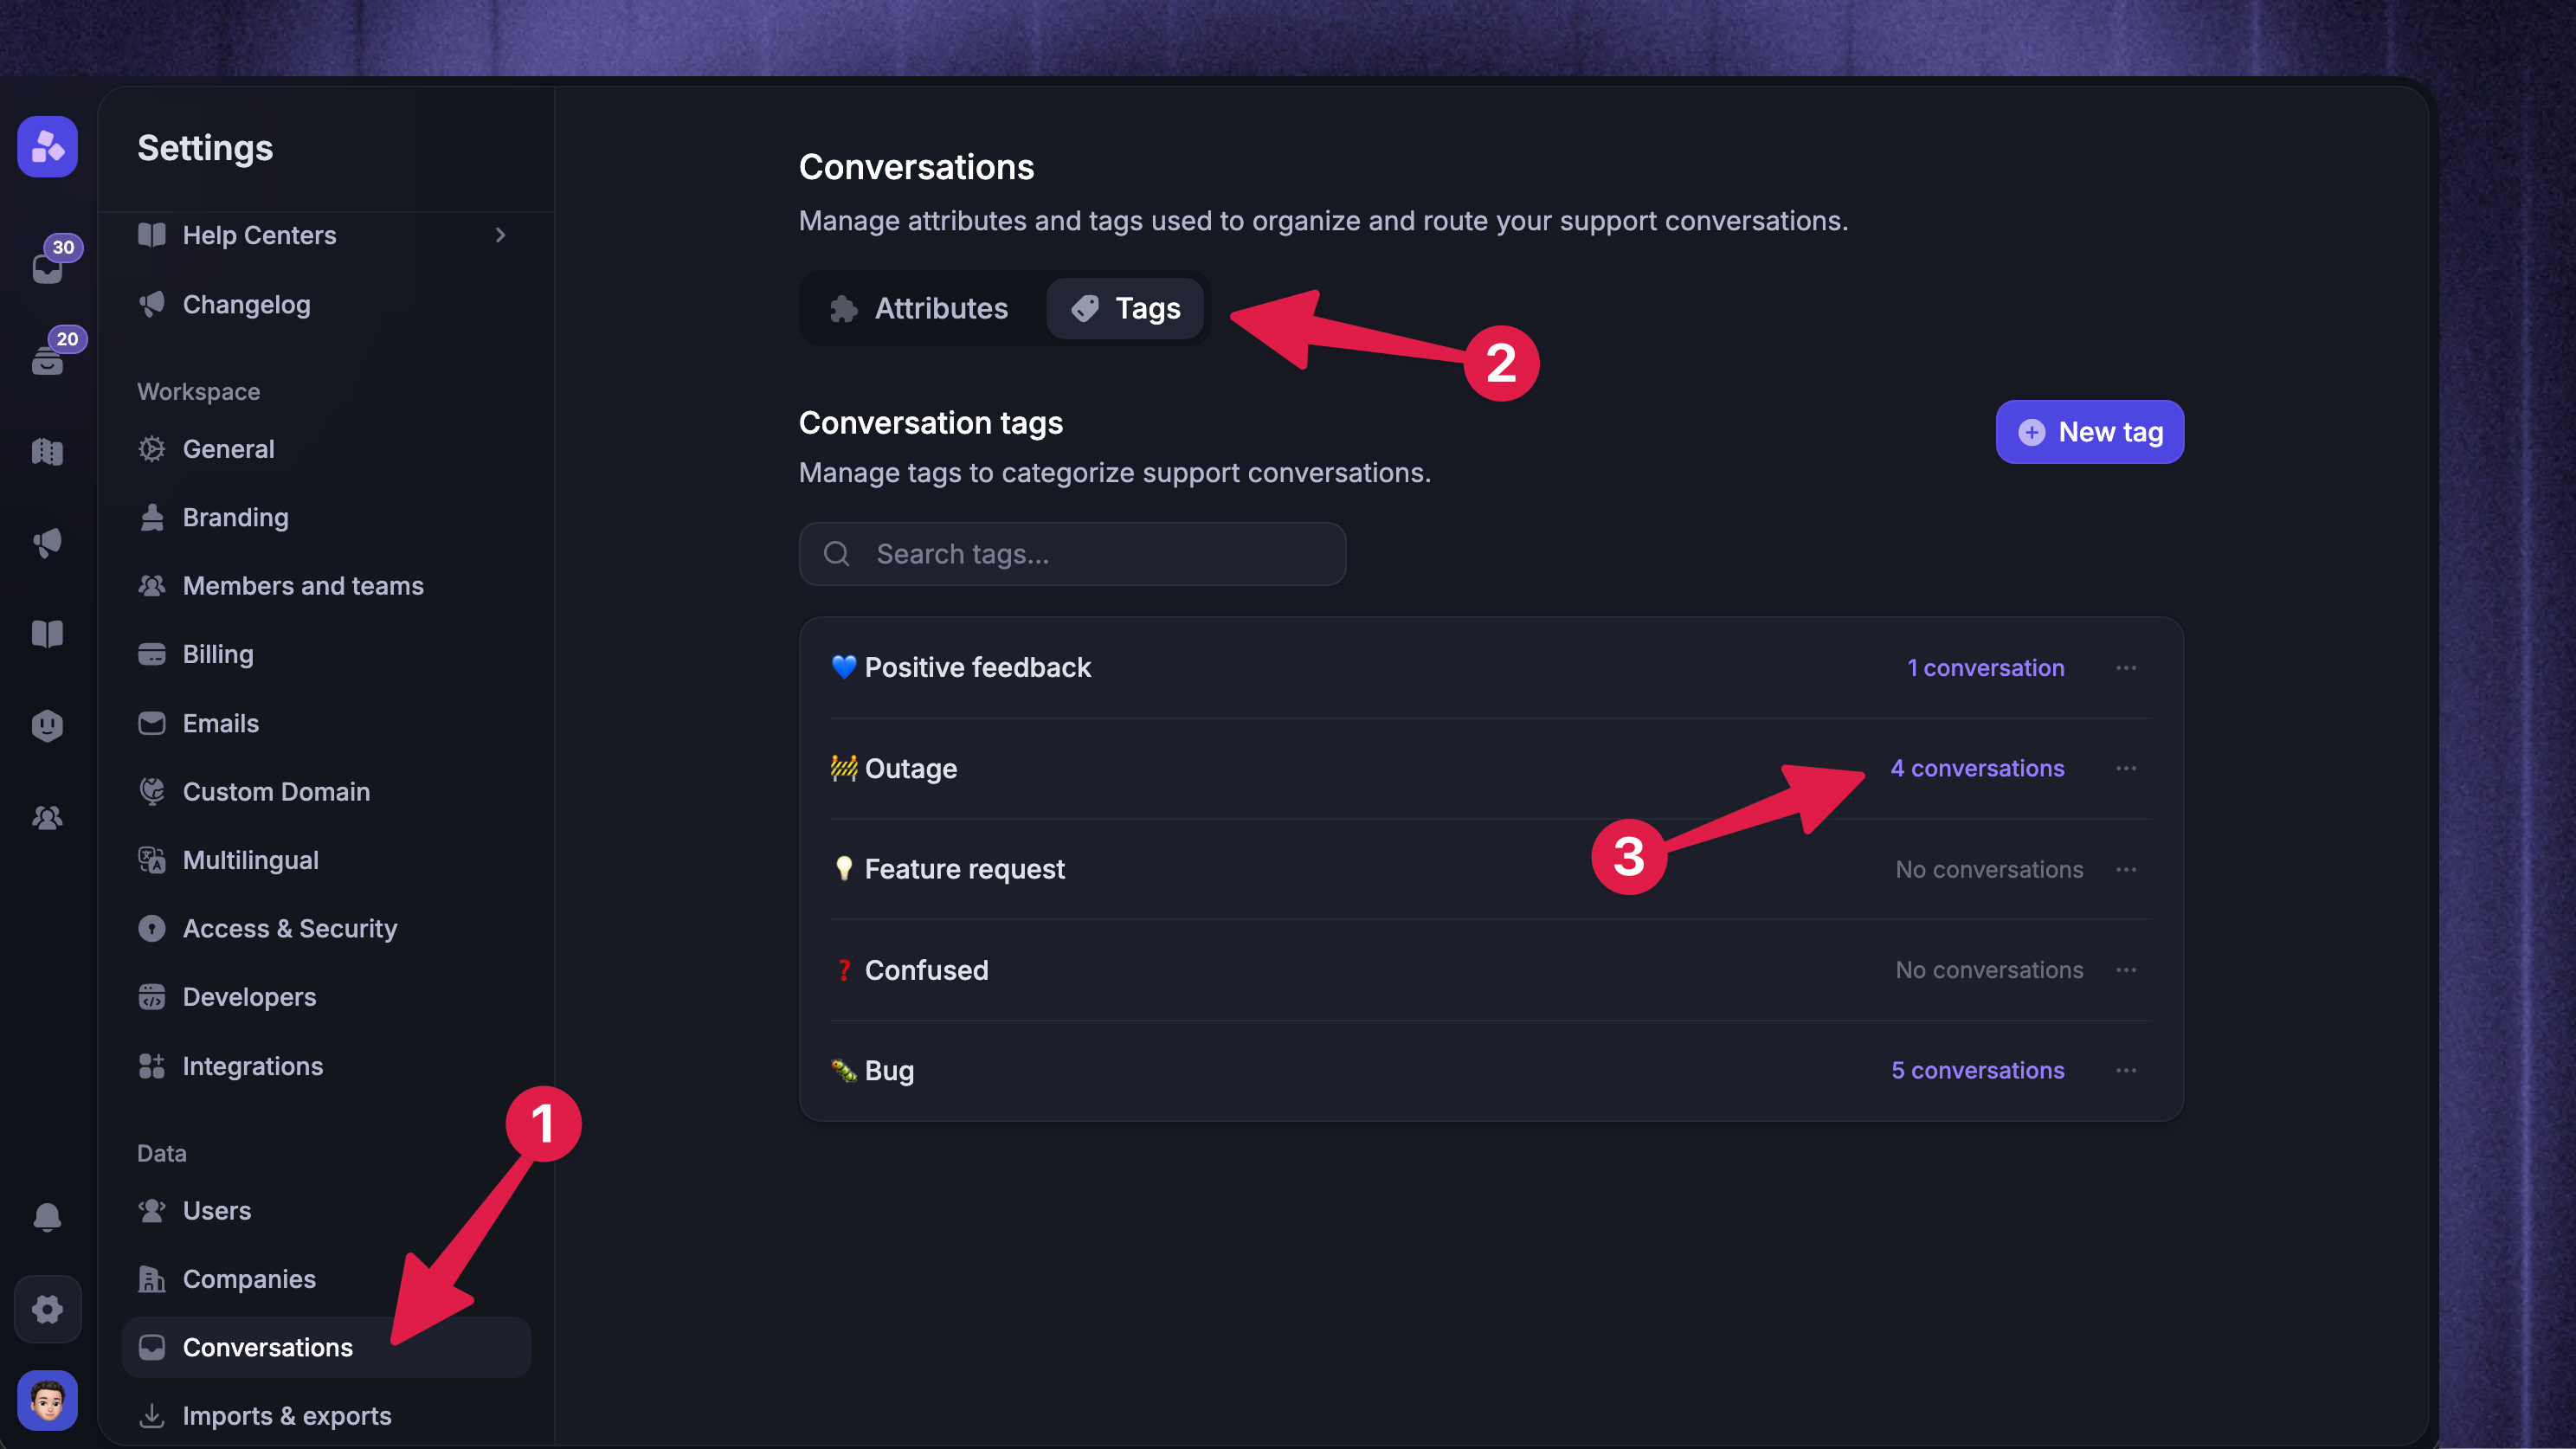
Managing tags

To rename, archive, or delete a tag, go to Settings → Conversations → Tags and click the ••• three dots next to the tag:
Rename – Update the name. Renaming applies everywhere the tag is used
Archive – Hide the tag from the live list so it can no longer be applied to new messages. Existing tags on conversations stay in place, and you can still filter by archived tags. To bring an archived tag back, switch to the Archived tab and click Restore
Alternatively, you can permanently delete the tag from every conversation. It becomes available under the Archive popup. This cannot be undone.
Notes:
Archived tag names are reserved – you cannot create a new tag with the same name as an archived one. Restore the archived tag instead.
Tags used in active Workflows cannot be archived or deleted. You will see a list of Workflows referencing the tag – remove the tag from those Workflows first.
Tag examples
Consistent tagging builds up a clear picture of what your customers are running into over time. Some general-purpose tags worth setting up early:
🐛 Bug– Apply to any reported bug so engineering can see how often it comes up and prioritize fixes. Add a comment with reproduction details if useful, and follow up with the customer once it's resolved❓Confused– Apply when users don't understand a feature or how to use it (for example "What does X mean?" or "It doesn't make sense that..."). These conversations often reveal product blind spots your team is too close to see👀 Unaware– Apply when a customer asks about or requests a feature that already exists. This is usually an awareness or education problem, not a product gap, and is worth surfacing to marketing and product education teams💡 Feature request– Apply when a customer wants new functionality. Pair this with creating a feedback post so your product team can track demand and customers receive updates as the request progresses😞 Churn feedback– Apply to feedback from churning customers. Reviewing patterns across these conversations helps you address future churn earlier in the cycle🚧 Outage– Apply during downtime or degraded performance to measure how widely your customer base is impacted and give your infrastructure team a sense of the blast radius💙 Positive feedback– Apply to praise and success stories. Useful for designers and product managers to see what's landing well, and for collecting customer quotes for marketing
Tip: Each quarter, review your top tags to inform your roadmap. Once you've been tagging consistently, surfacing the most-requested features or most-impactful bugs takes minutes instead of hours.
Apply tags to messages
Conversation tags are applied to individual messages, not the whole conversation.
You can tag any customer and teammate message. Internal notes and bot replies cannot be tagged.
1. Automatically with Workflows
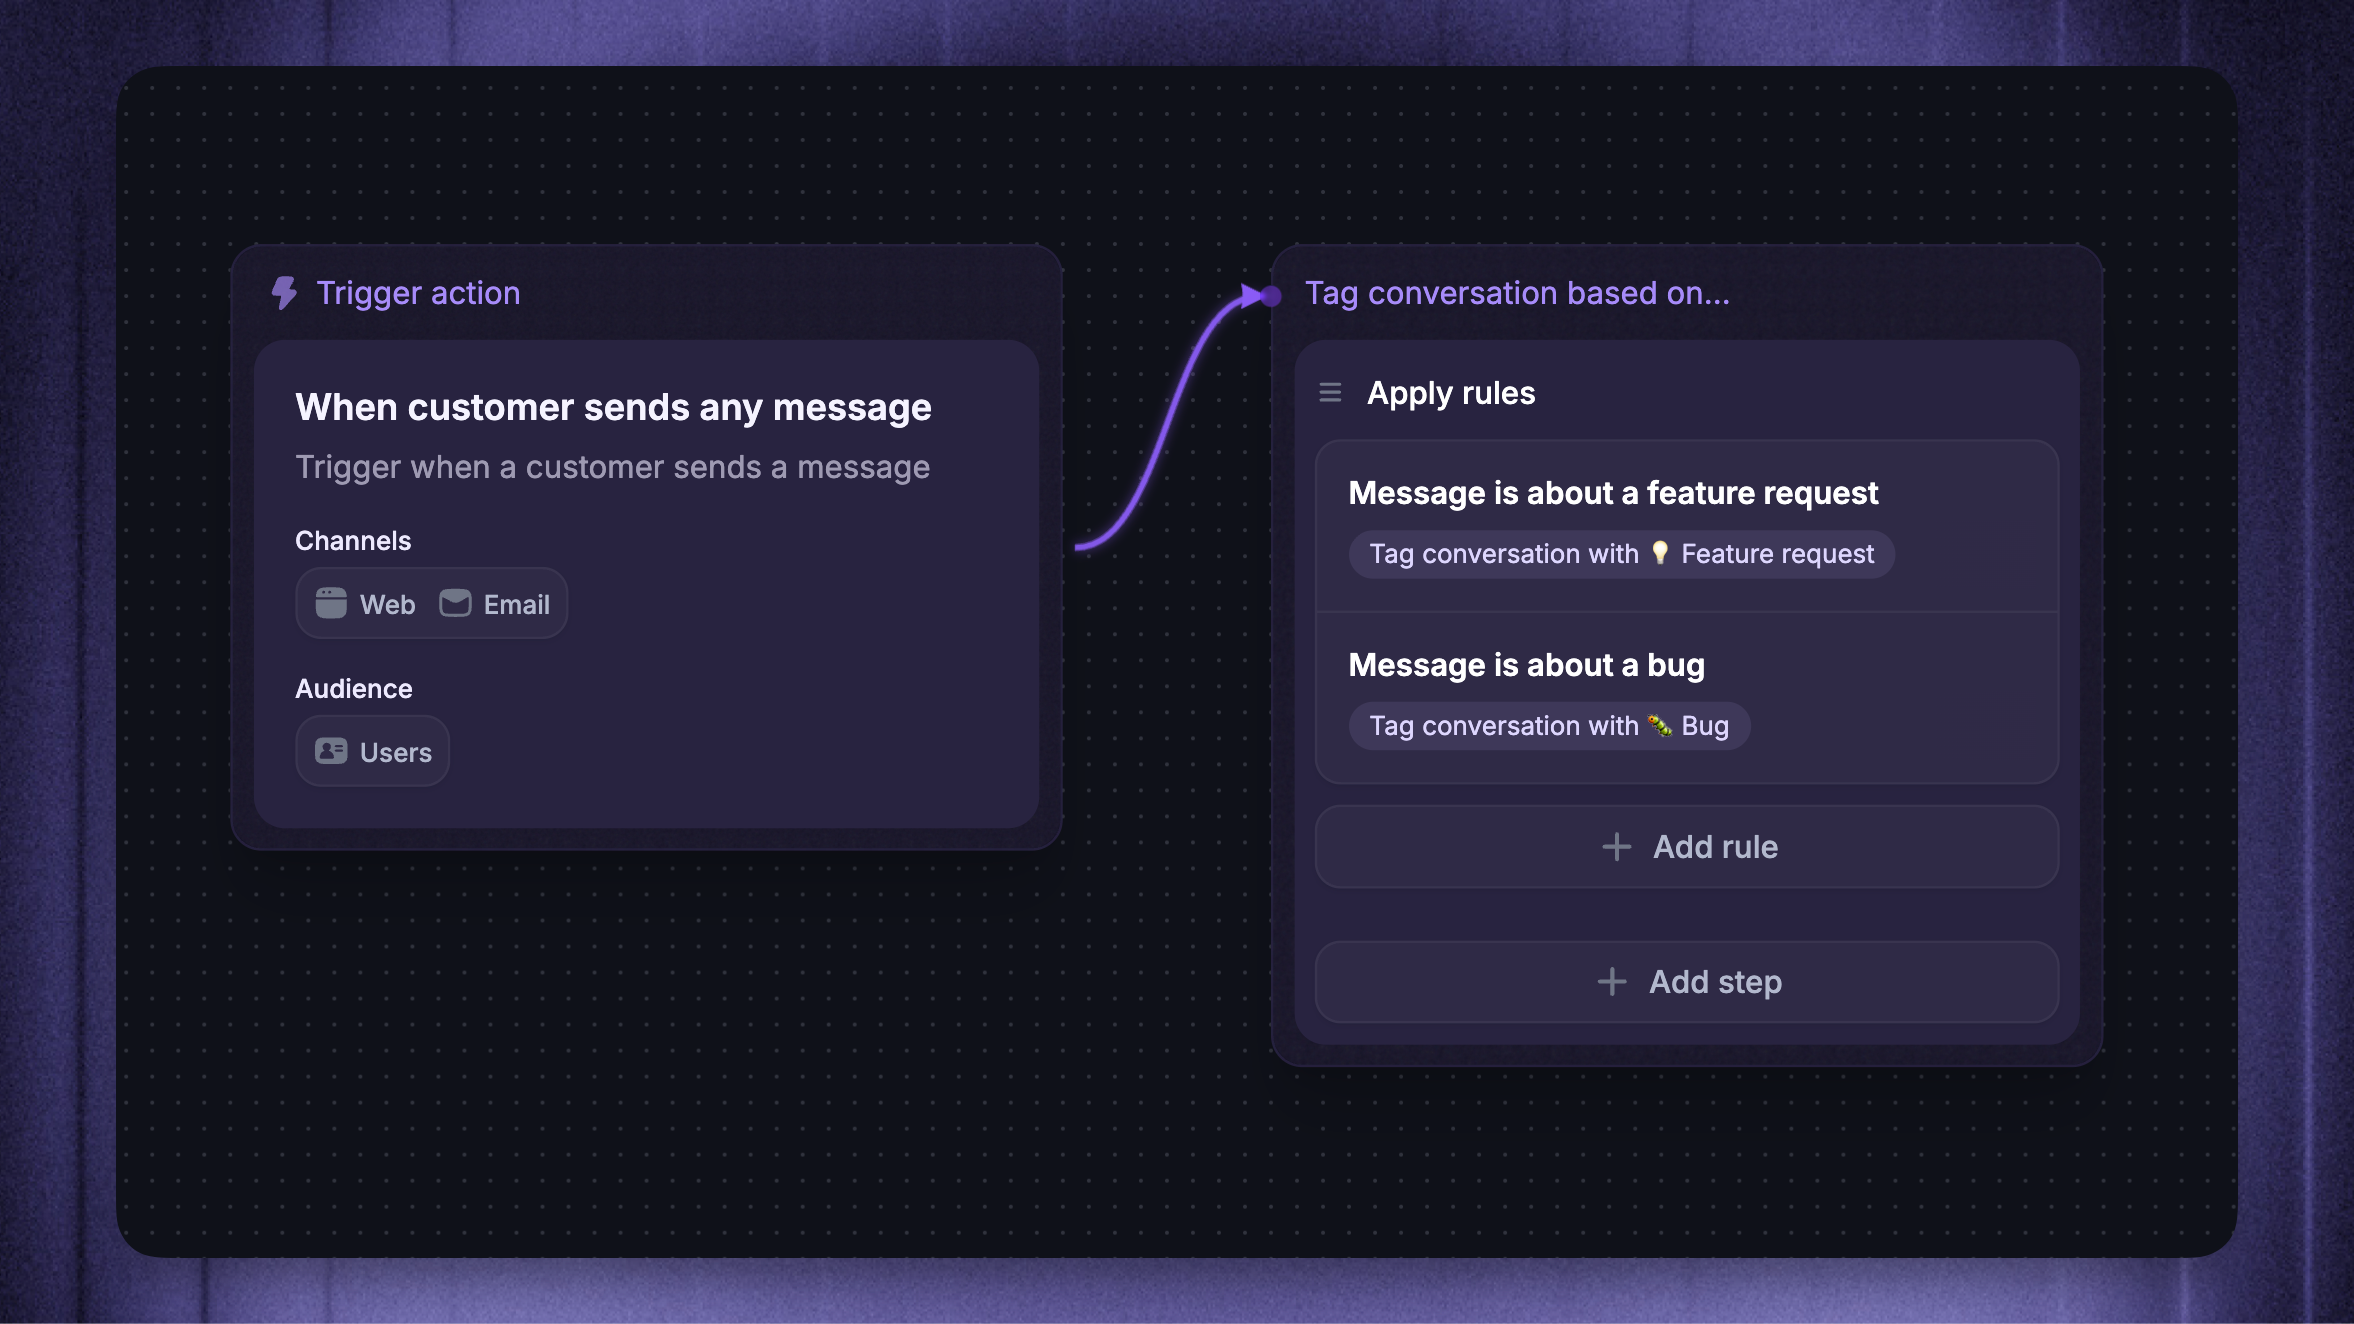
The recommended way to automatically and consistently apply tags is to use Workflows.
You can automatically tag conversations based on different rules (e.g., based on the content of the messages, user, company, or conversation attributes, and much more)
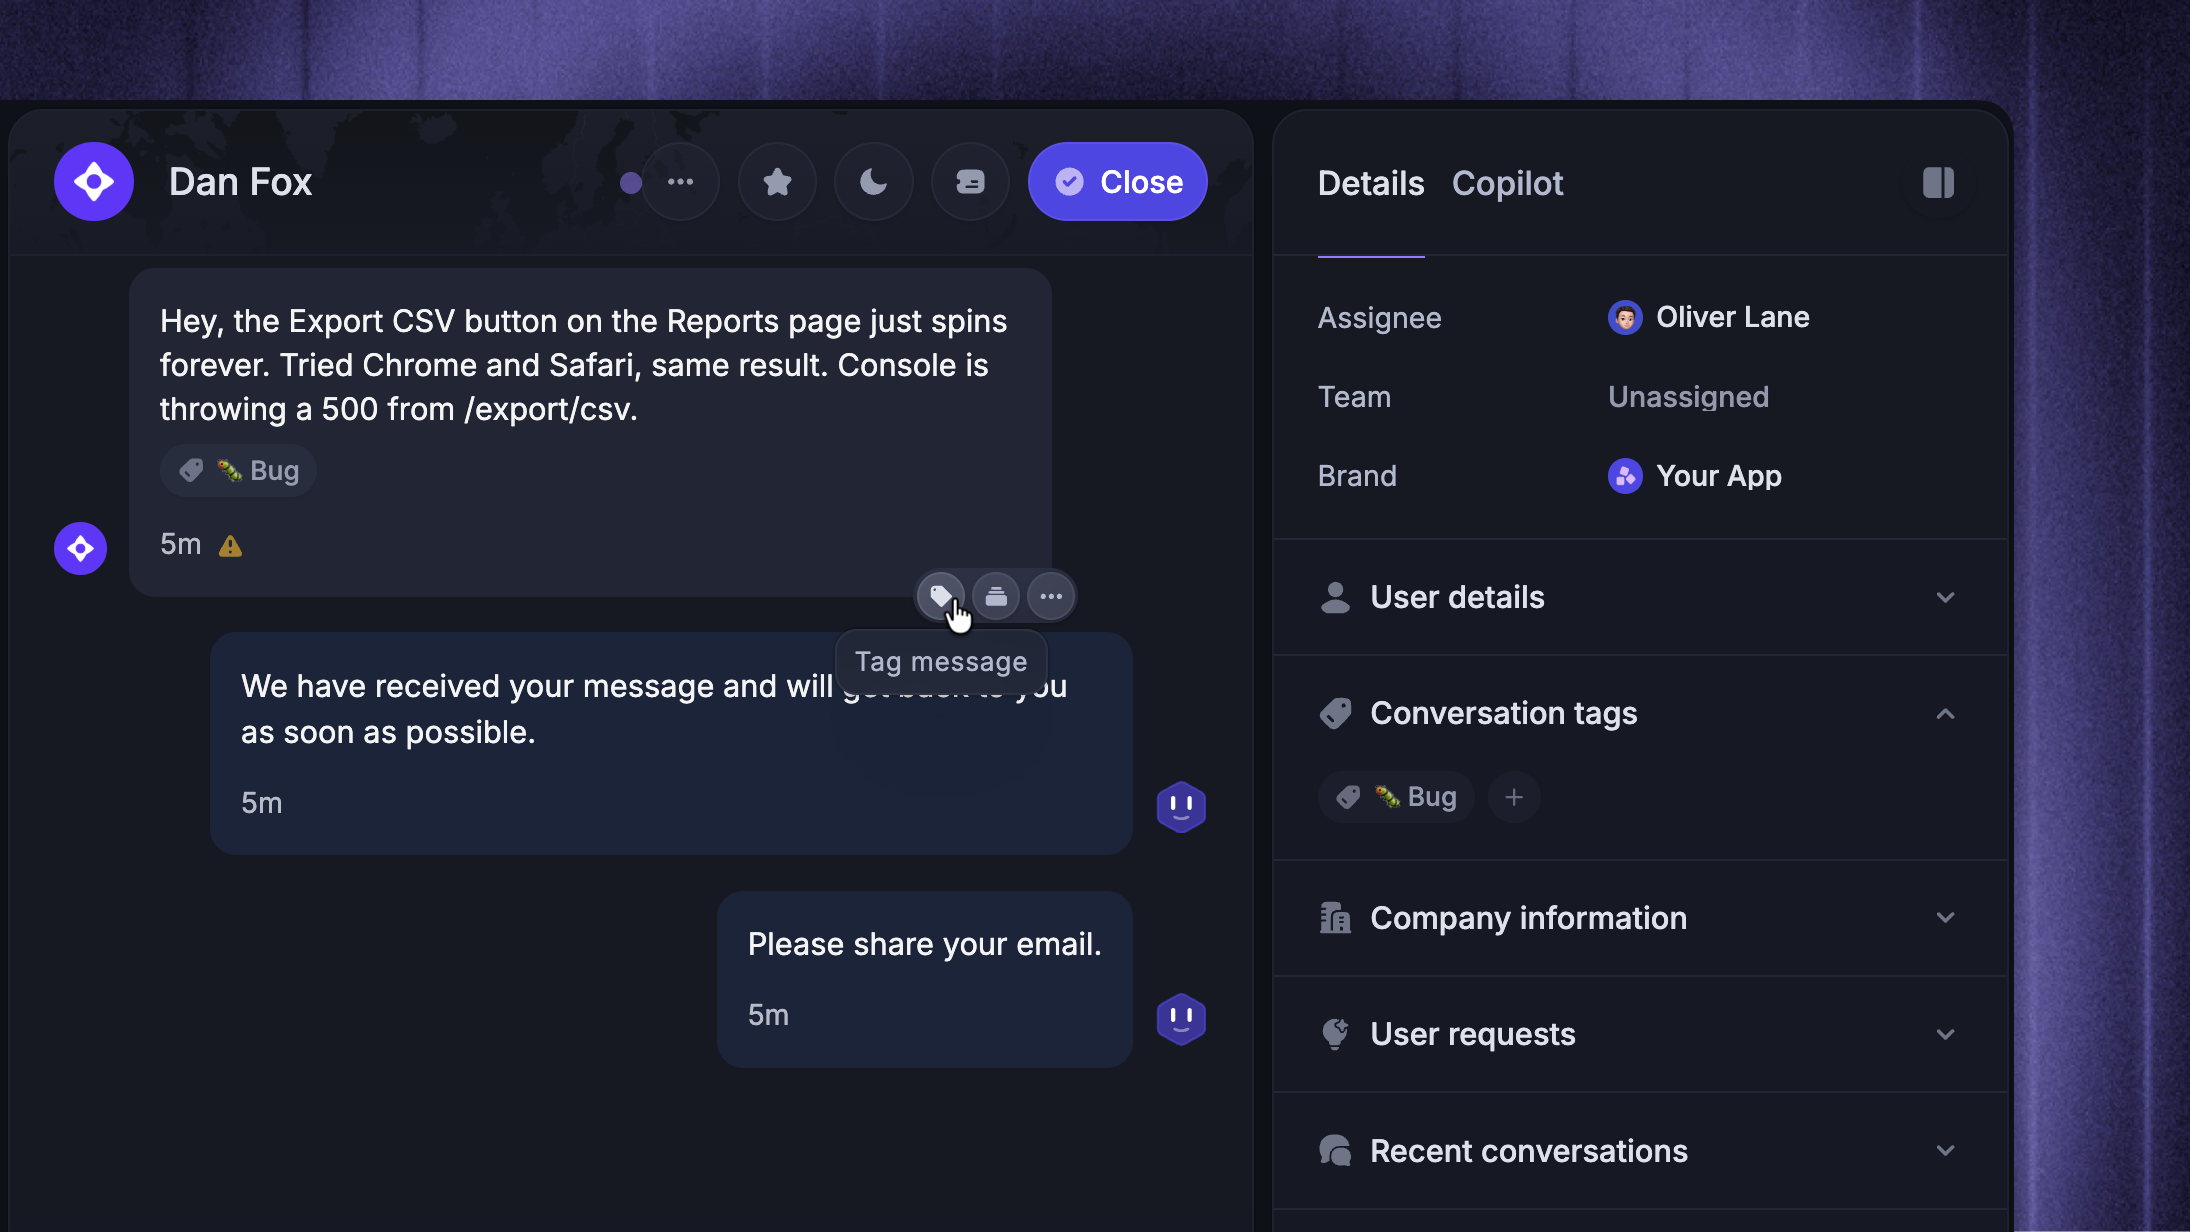
2. From a message

Hover over any message in the conversation and click the Tag icon next to the message actions. To remove a tag from a message, hover the tag chip beneath it and click the X.
3. From the right sidebar
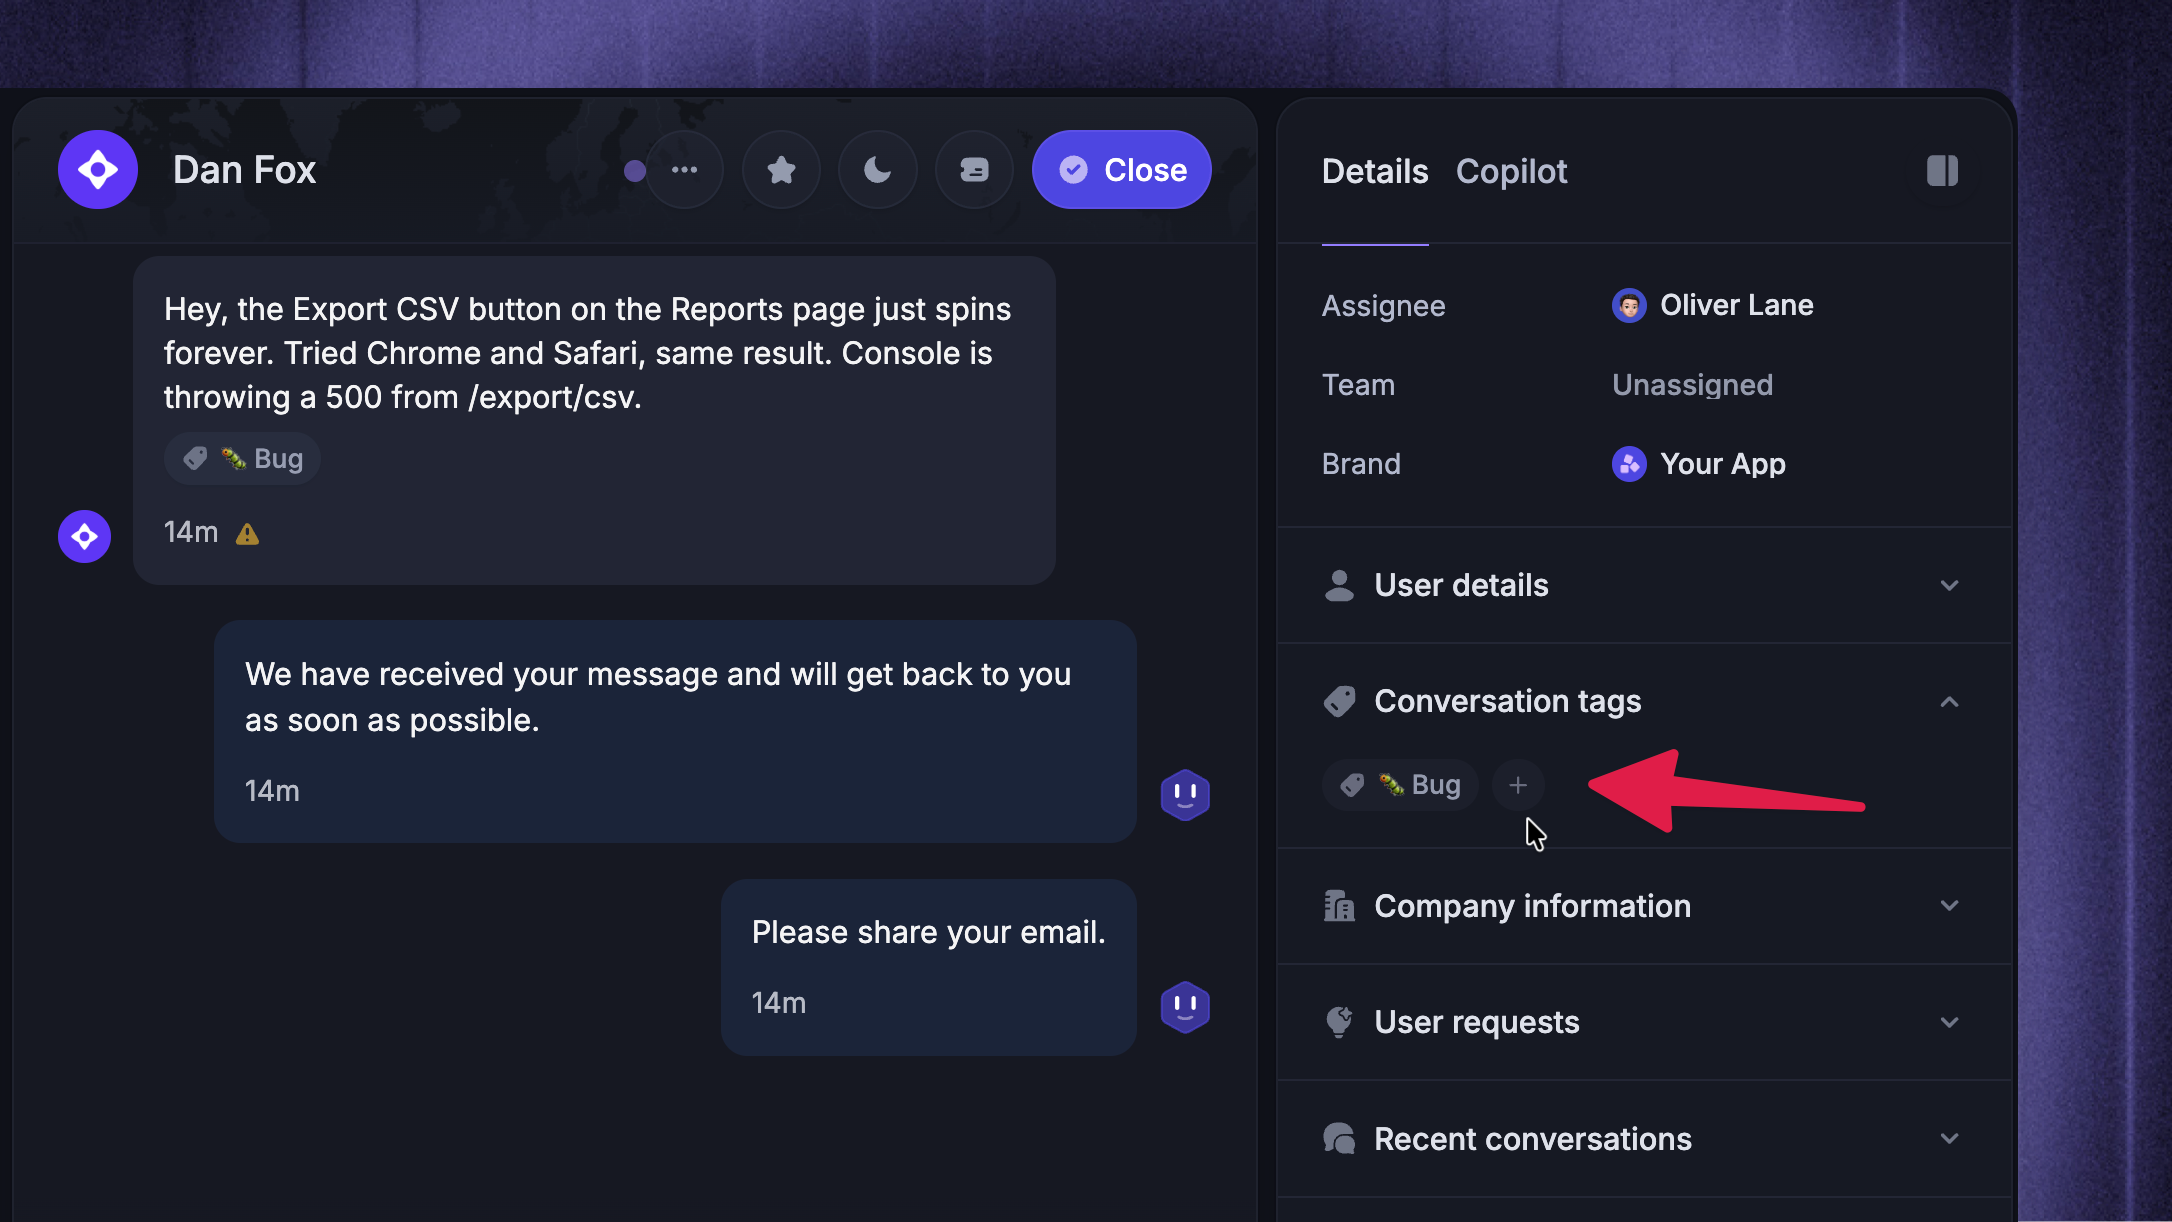
Open the Conversation tags section in the right sidebar of the conversation. All tags currently applied to any message in the conversation appear here as chips.
Click + to open the tag picker on the first customer message
Hover a chip and click the X to remove the tag from every message it appears on
4. Keyboard shortcut
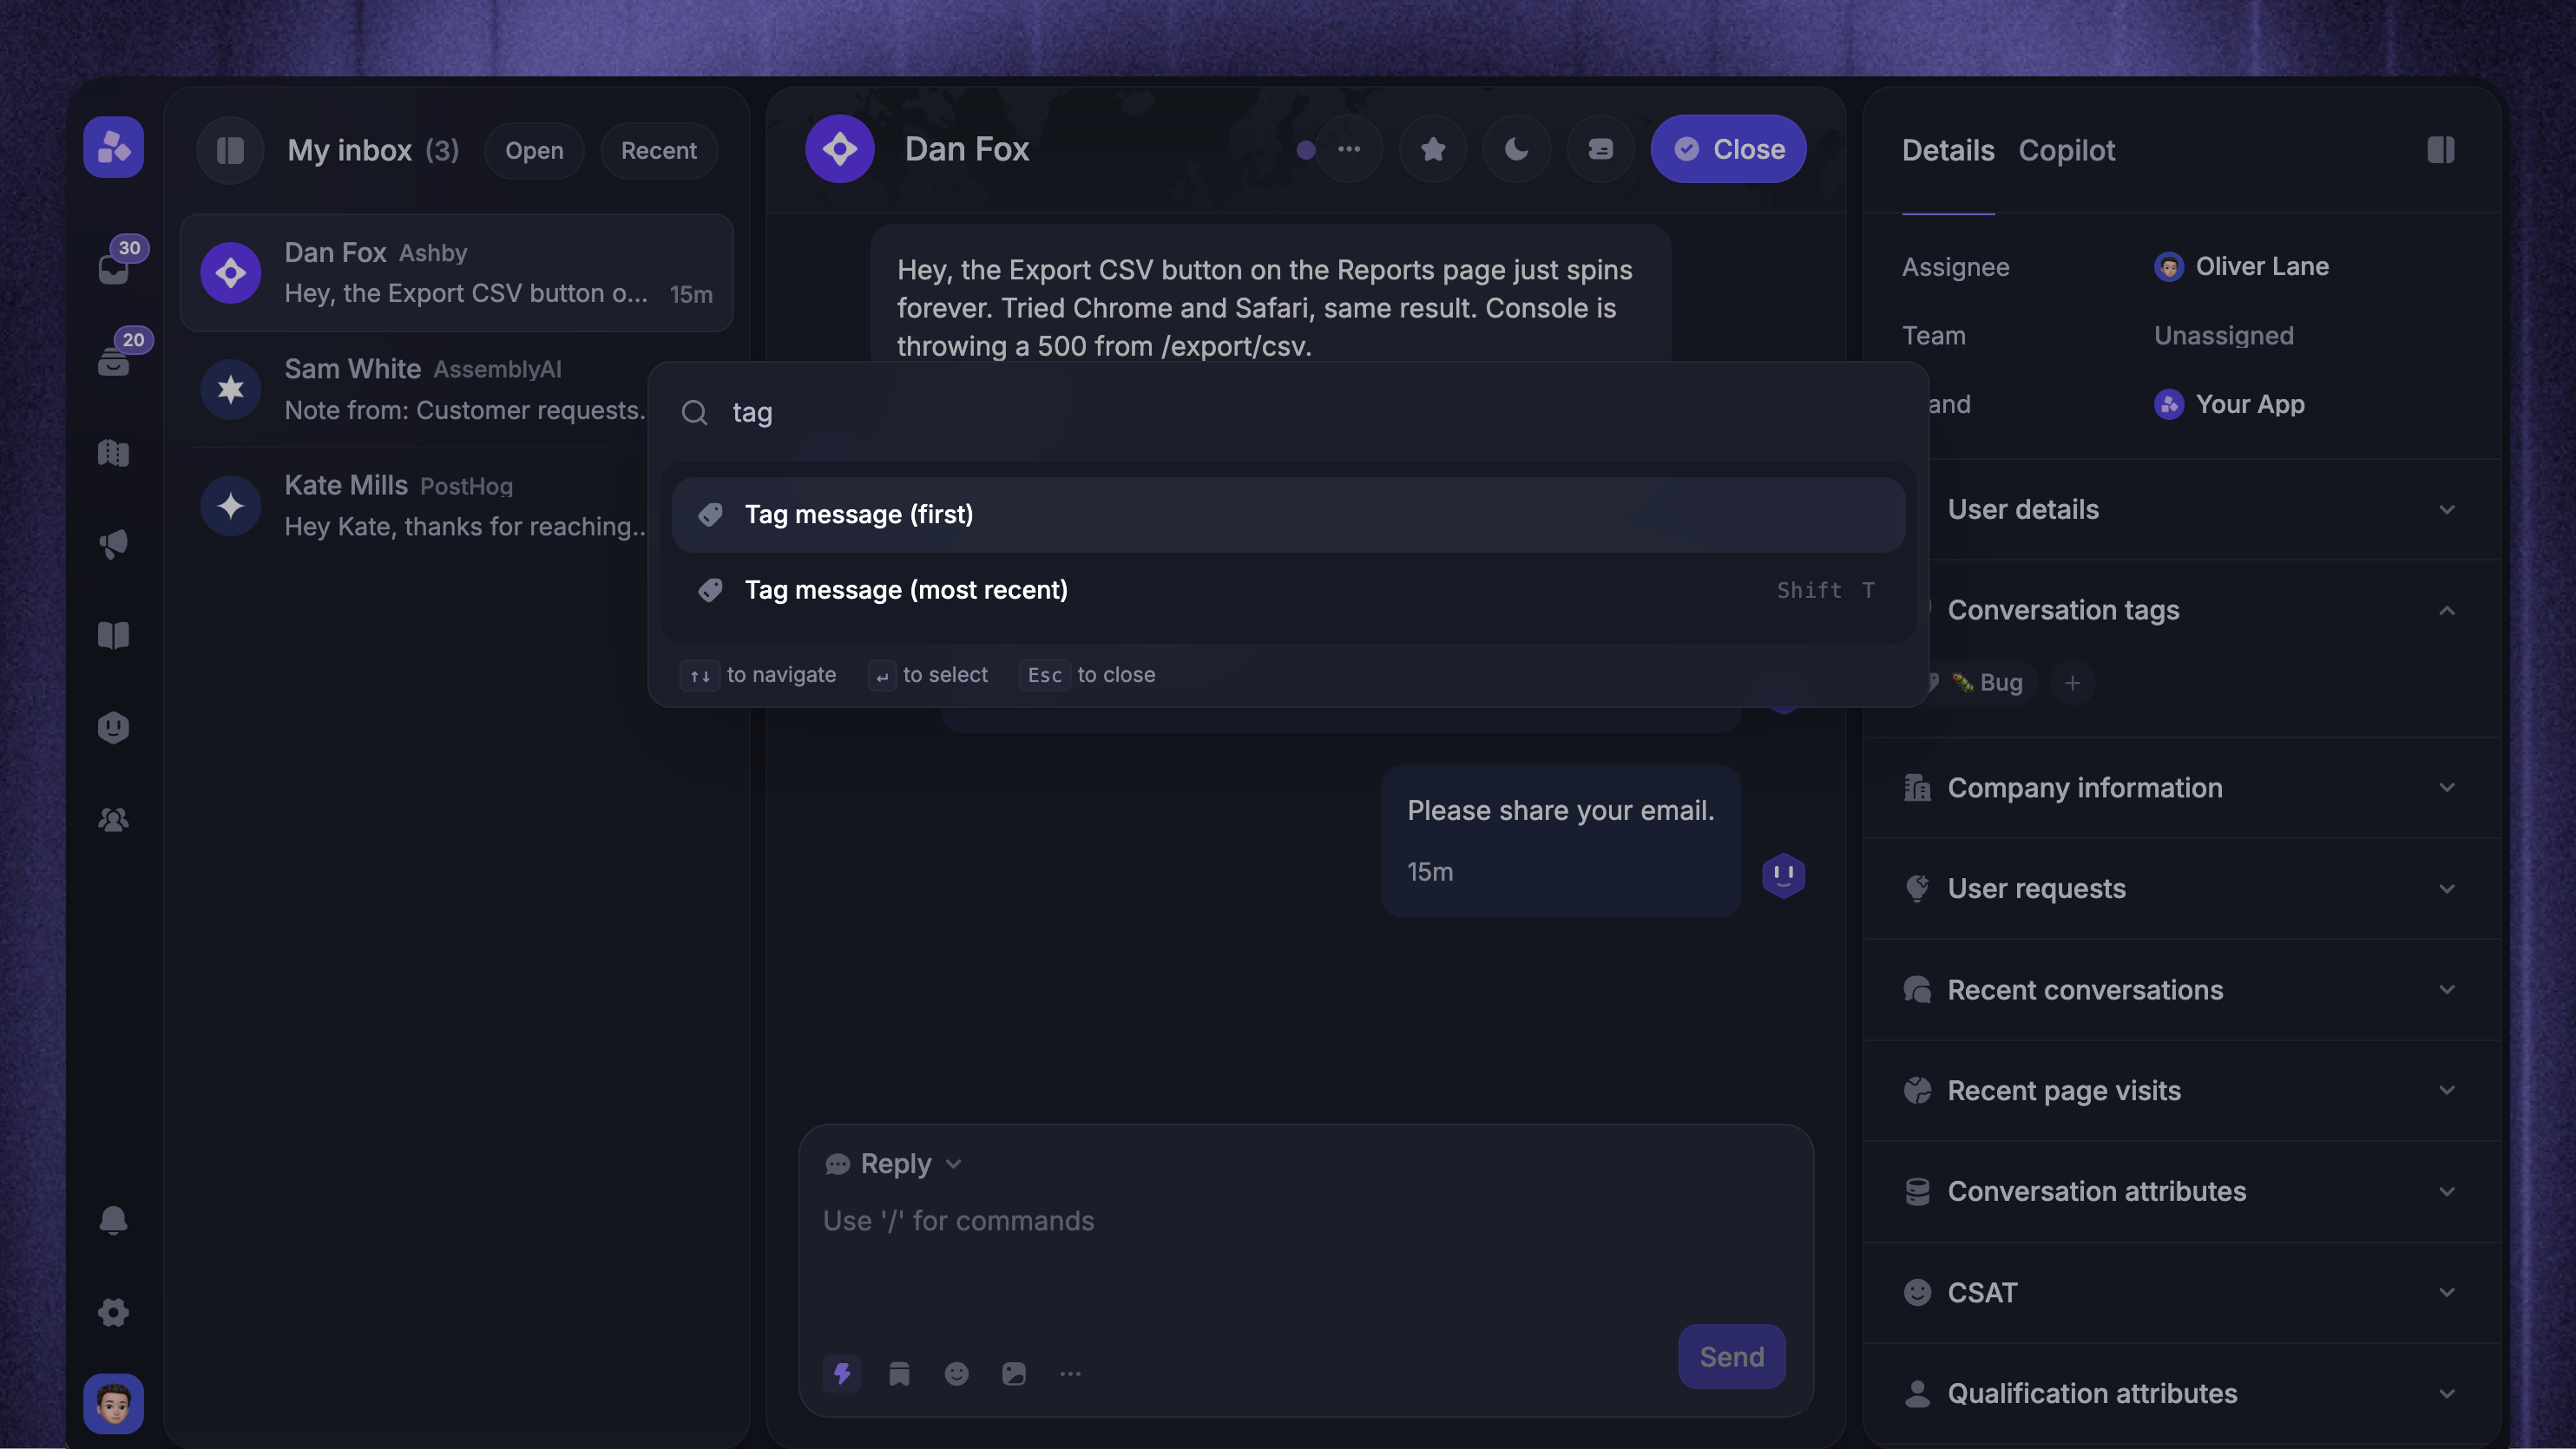
Press Shift + T while a conversation is open to tag the most recent message.
You can also open the command palette with CMD + K (Mac) or CTRL + K (Windows) and search for:
Tag message (first) – tag the first message in the conversation
Tag message (most recent) – tag the most recent message
Add tags in bulk
You can add tags to several conversations at once. Select the conversations using their checkboxes, then press ⌘/Ctrl K. Quick tagging adds a single tag, while Edit lets you add up to 10 tags at once.
Bulk tags are added to the latest eligible message in each conversation, and any existing tags are kept — bulk actions can add tags but can’t remove them. Adding tags in bulk requires permission to manage conversation tags.
Note: Every tag added or removed is recorded as a Tag update event in the conversation timeline, so you can always see who tagged what and when.
Filter and search by tags
Tags are aggregated at the conversation level, so any tag on any message makes the conversation match.
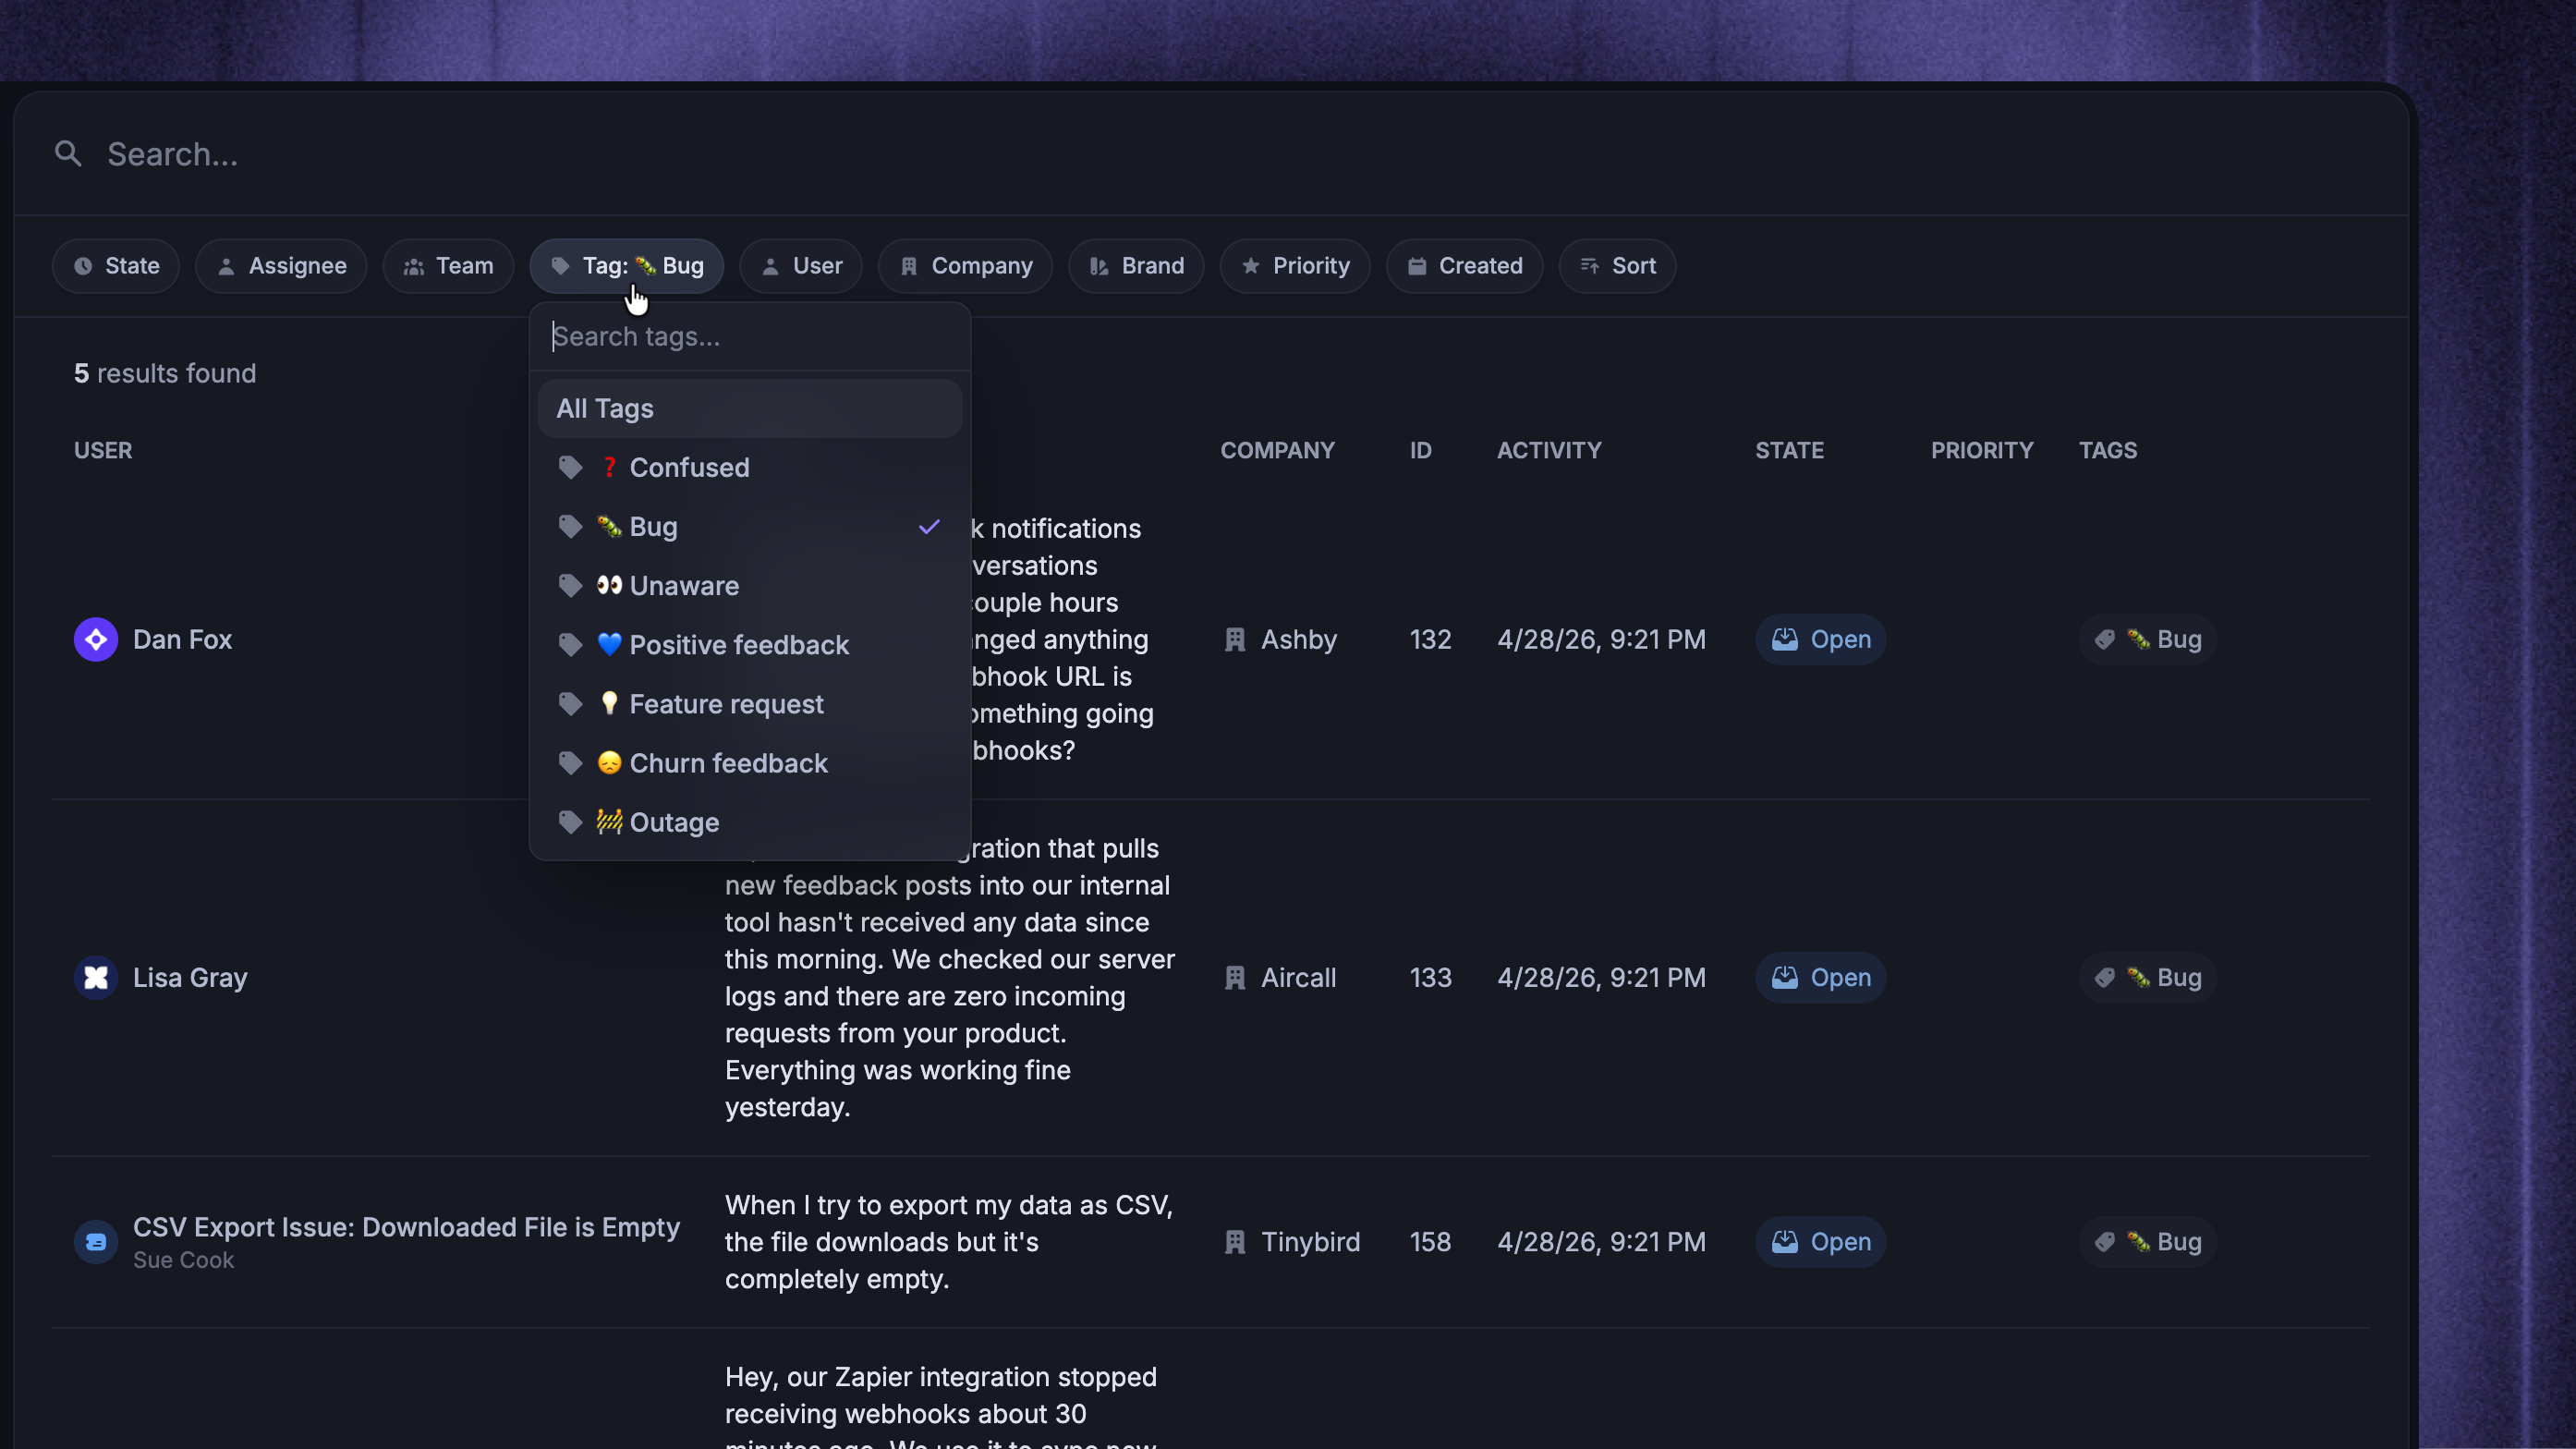
Inbox search filter
In the Inbox search, click the Tag filter to filter conversations by one or more tags. The filter is multi-select and shows the selected tags in the label.
Tip: You can also create custom inbox views based on specific filters and pin them to your Inbox sidebar to keep a live list of every matching conversation one click away.
Tag usage from settings
In Settings → Conversations → Tags, each tag shows a usage counter on the right. Click it to jump to the Inbox filtered by that tag.
Important to note
Tags can only be applied to customer messages, teammate messages, and email messages. Internal notes, bot replies, and redacted content are not taggable
Tag names are limited to 200 characters and must be unique (case-insensitive)
An archived tag's name is reserved – restore the archived tag or pick a different name
Tags used in Workflows cannot be archived or deleted until you remove them from those Workflows