How ticket states work
Learn and customize how ticket states are categorized and behave as a ticket moves through each stage.
Written By Markus from Featurebase
Last updated 2 days ago
Overview
Ticket states help set clear expectations, ensuring both your customers and teammates are aware of a ticket's progress.
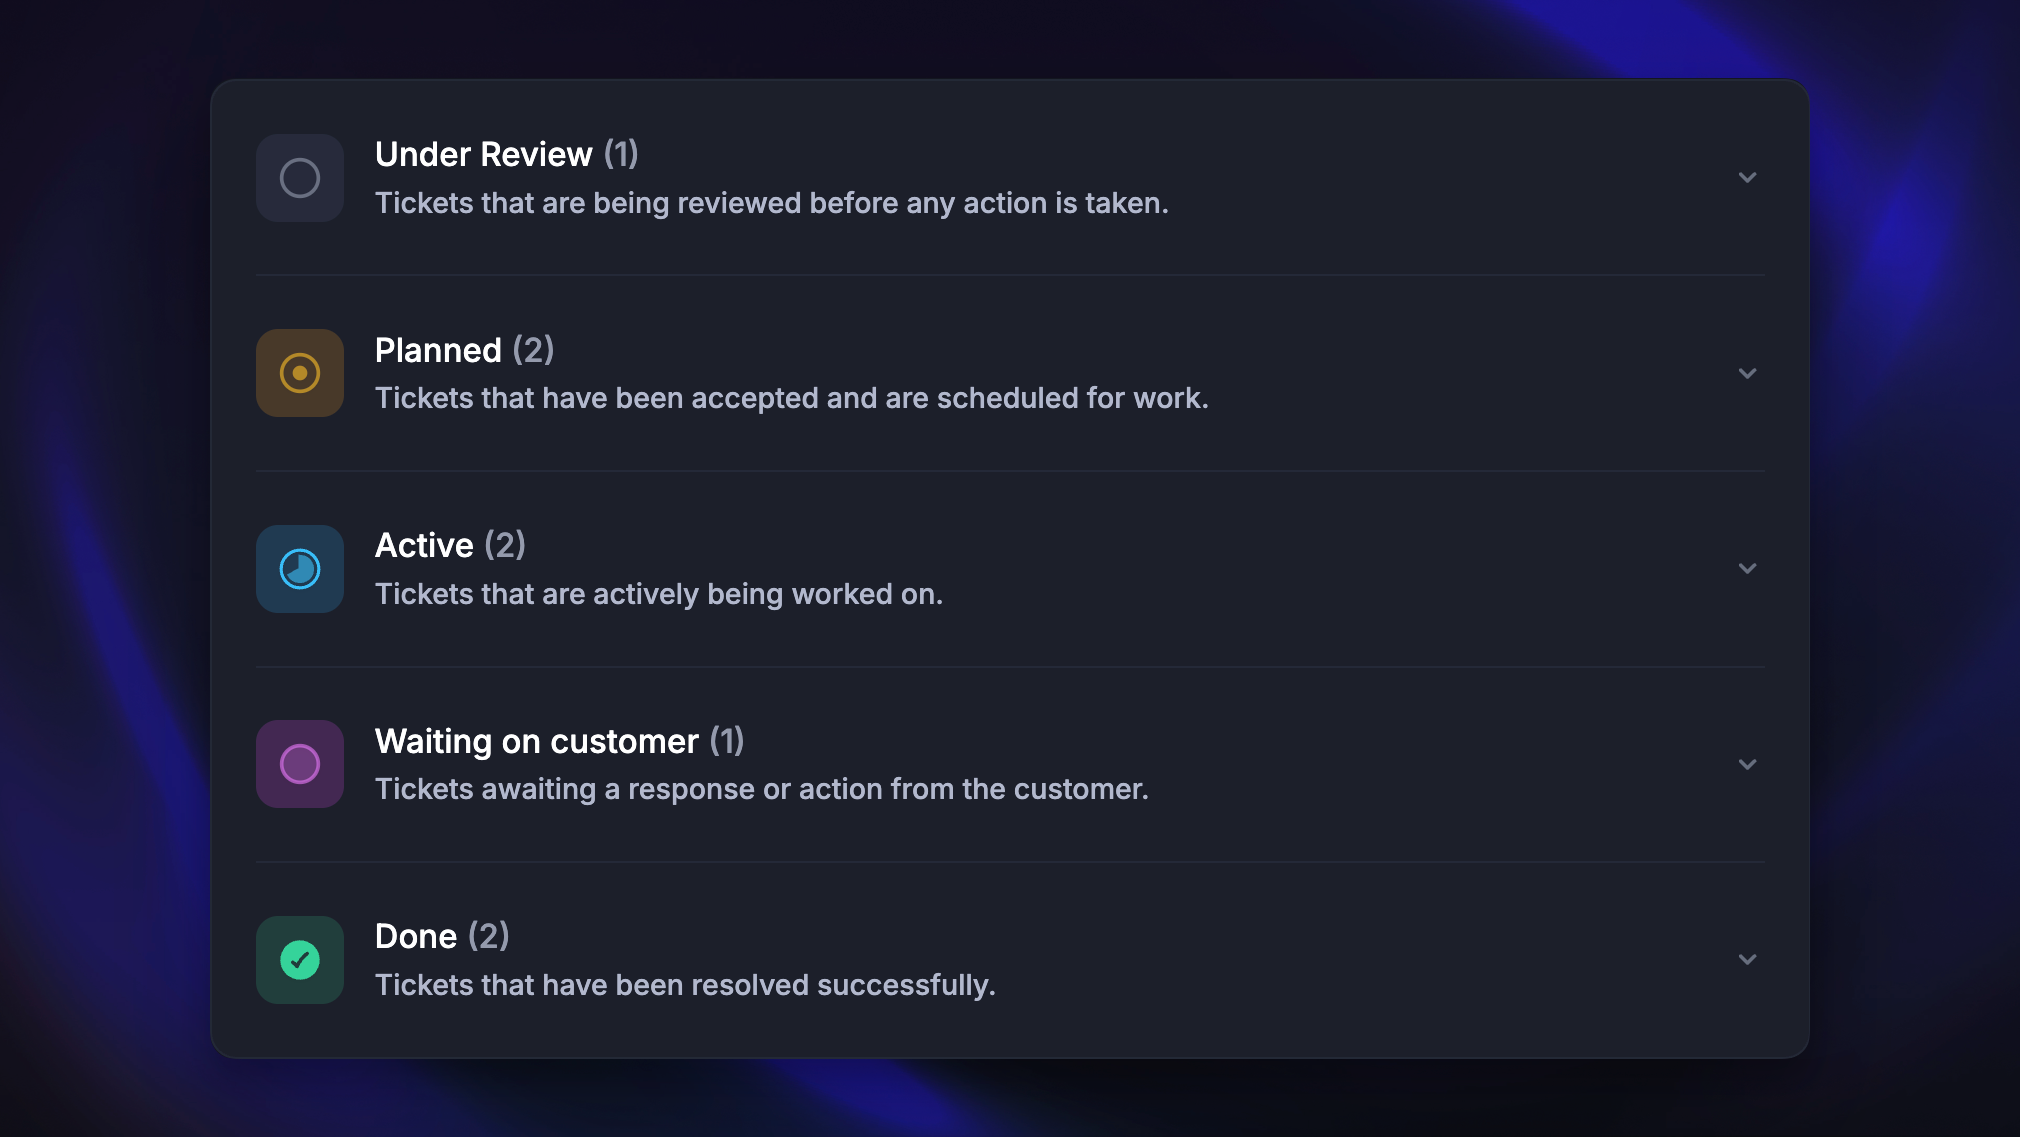
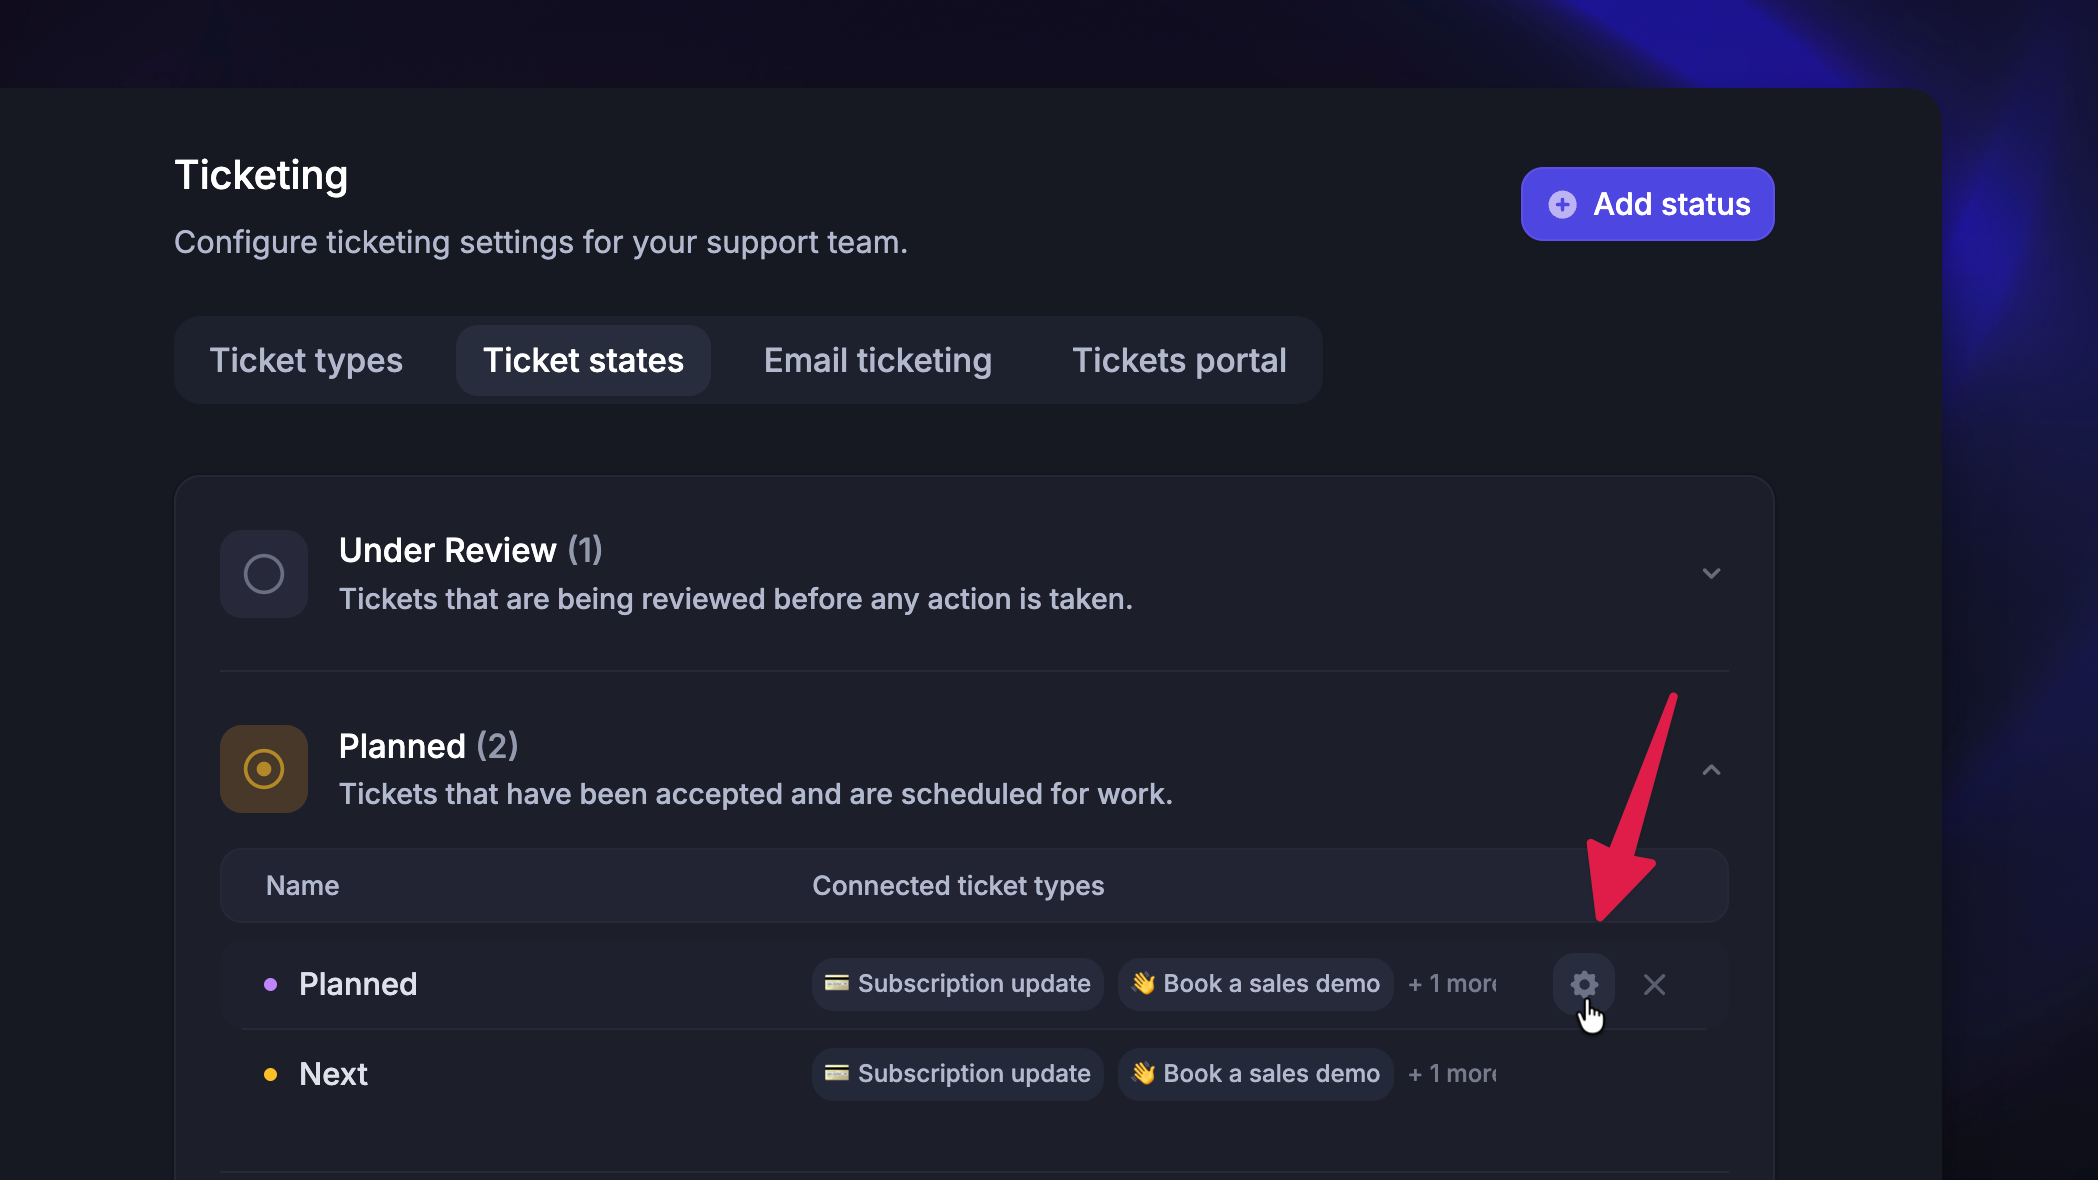
States are organized into 4 categories - Under Review, Active, Waiting on customer, and Done - each with distinct behaviors.
You can create multiple custom statuses within each category and connect them to specific ticket types.
Ticket state categories
Notes:
Setting a ticket to Done does not automatically close the linked conversation. You can automate this with Workflows if needed.
Adding a participant by an end user changes the ticket state from ‘Waiting on Customer’ and starts the SLA timer, even without a reply. This is expected behavior.
Custom ticket states
You can create custom statuses under any of the 4 state categories. Custom statuses inherit the behavior of their parent category.
Managing ticket states
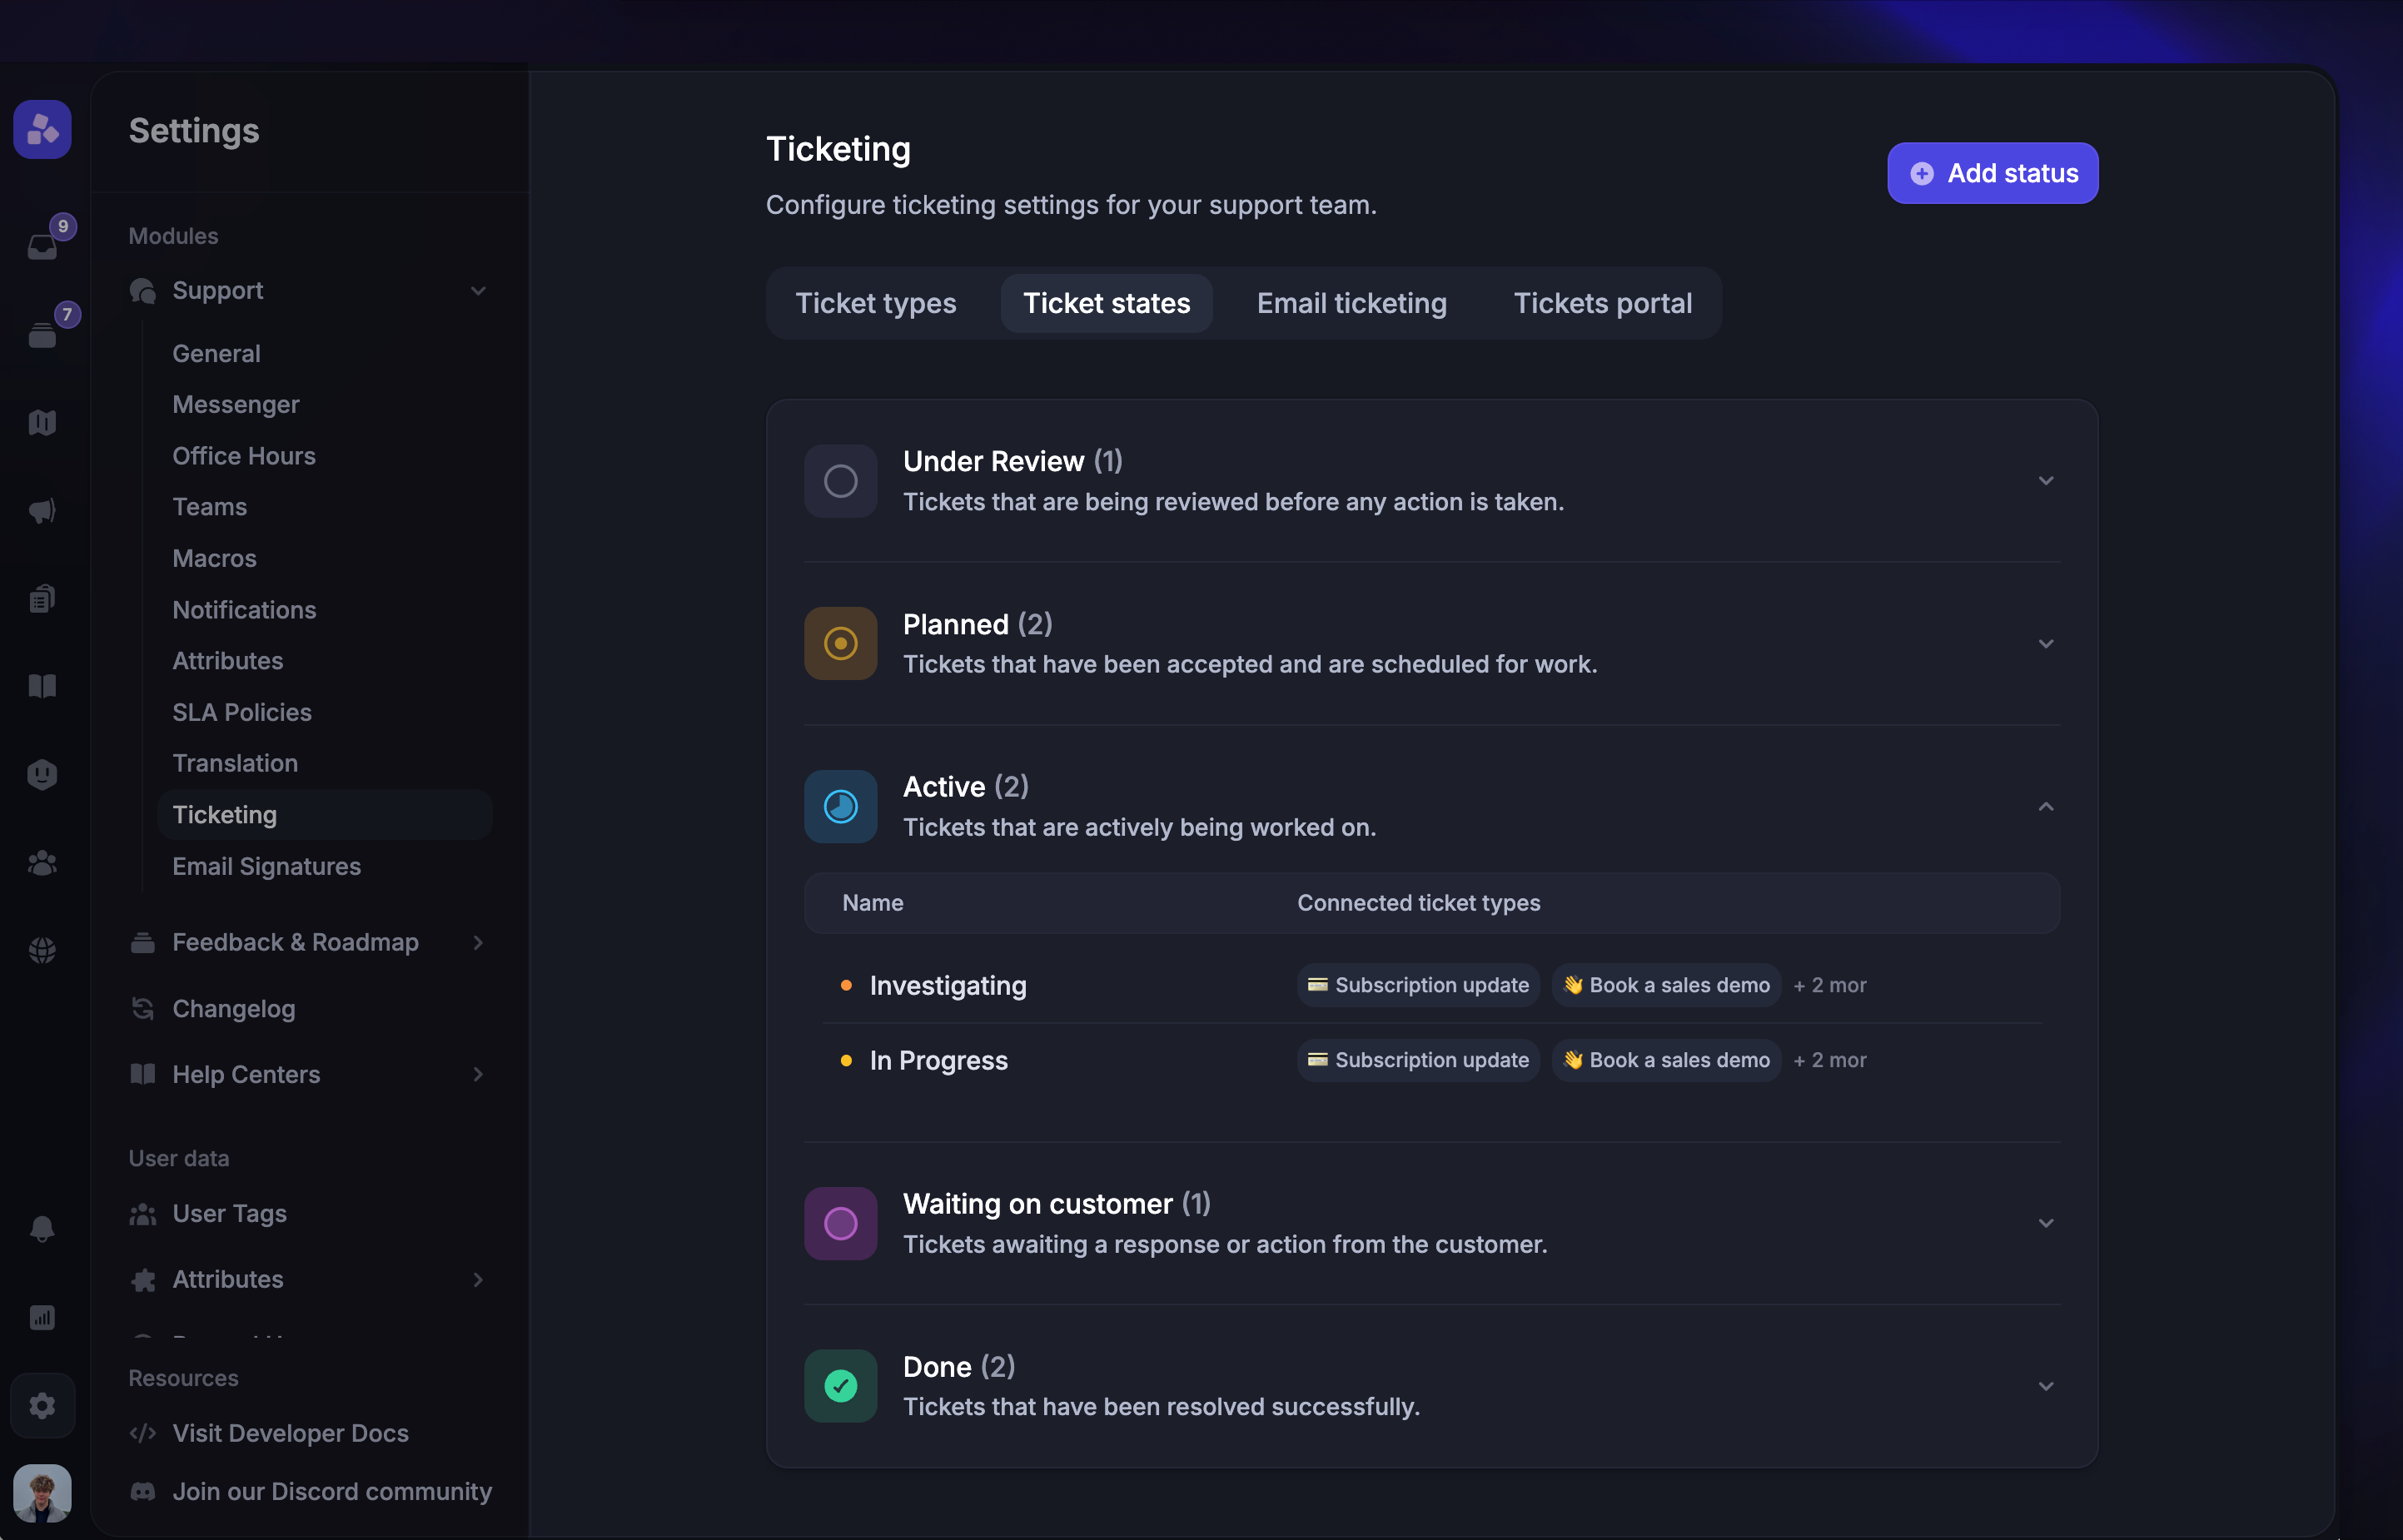
To manage ticket states across your workspace:
Each category shows a list of statuses, their connected ticket types, and whether they are the default
Click the settings icon next to any status to edit it, or click Add status to create a new one
Creating a new ticket state
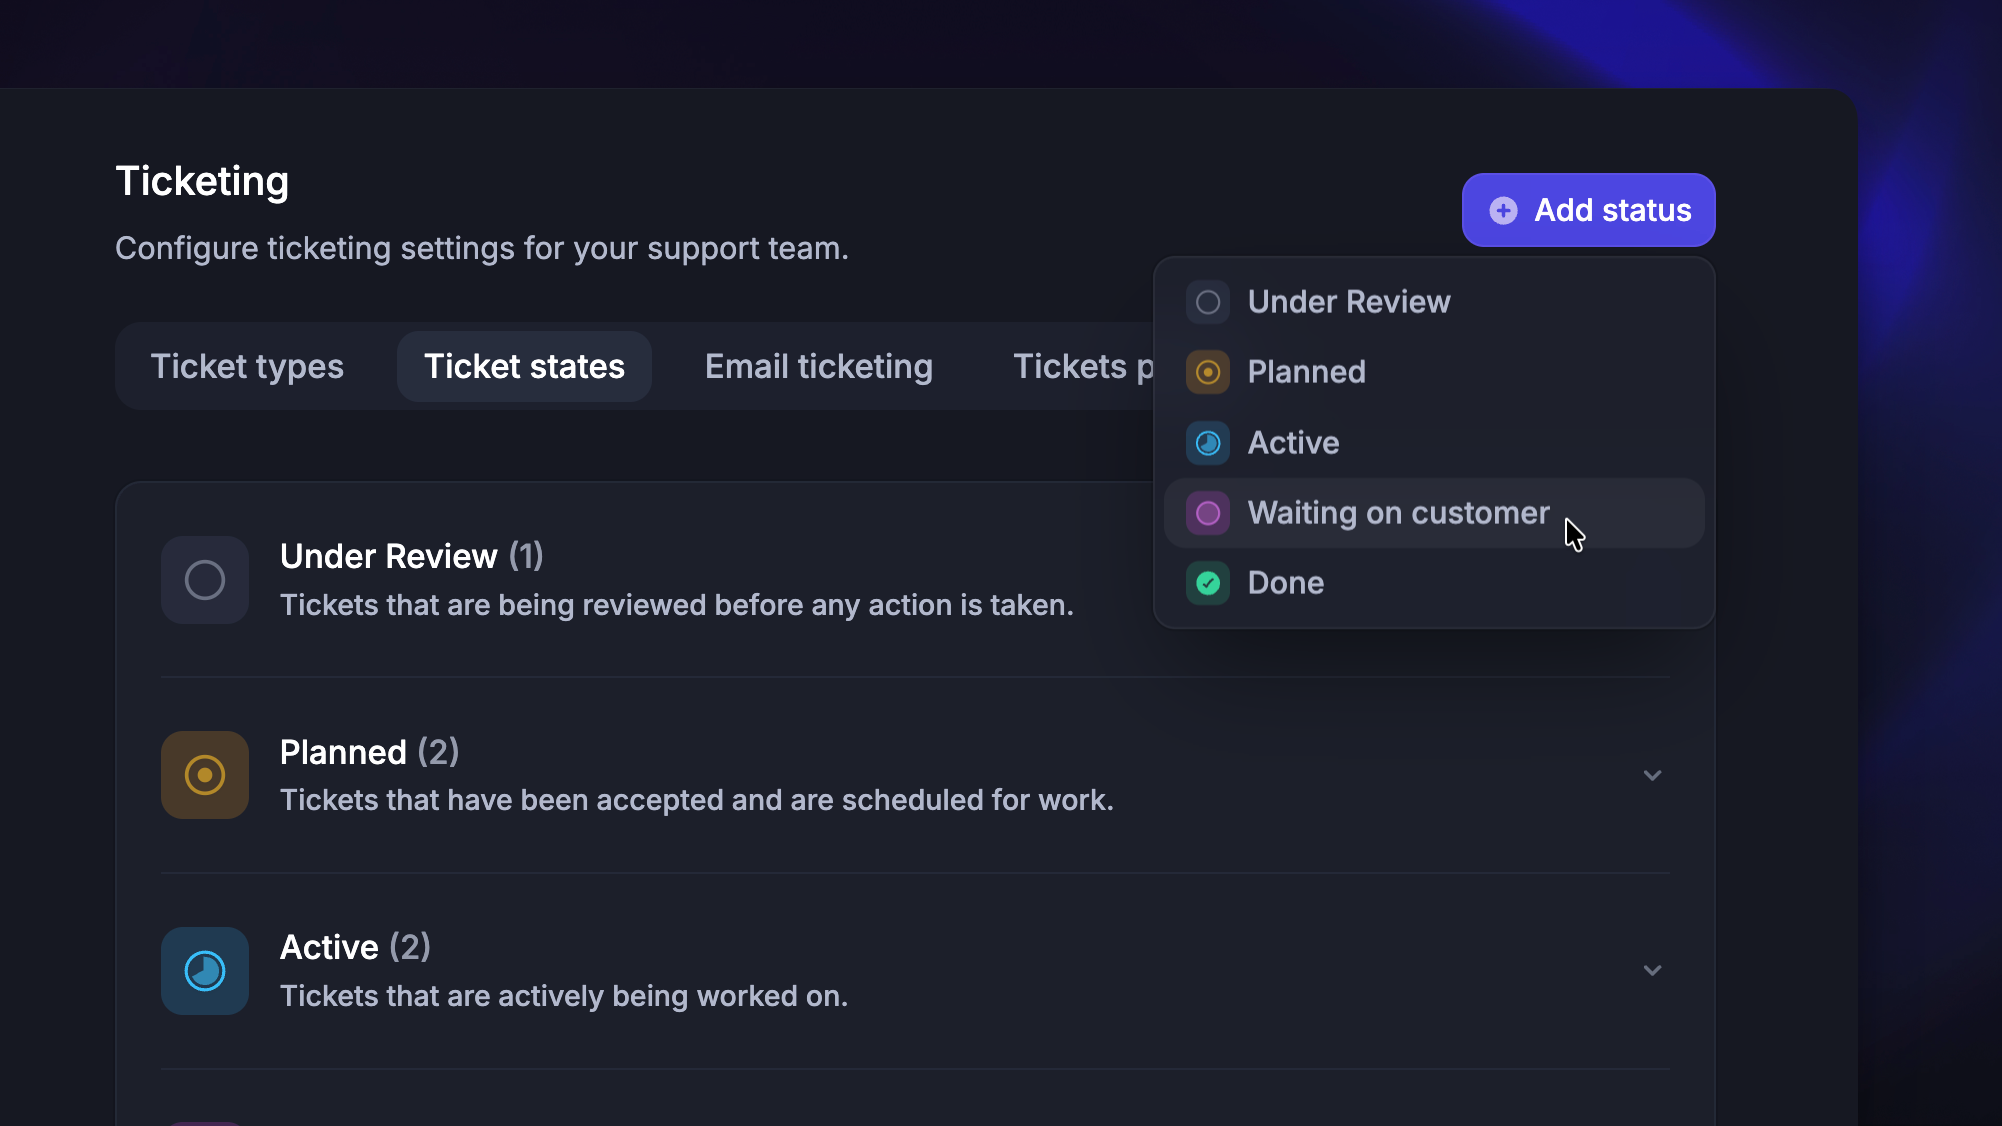
Click Add status in the top right
Choose the category you want the status to be under
Choose a name and color for the new status
Click Save
Note: The new status will be available to all ticket types by default. You can restrict which ticket types use it by configuring Statuses in the individual ticket type settings.
Customizing states for a specific ticket type
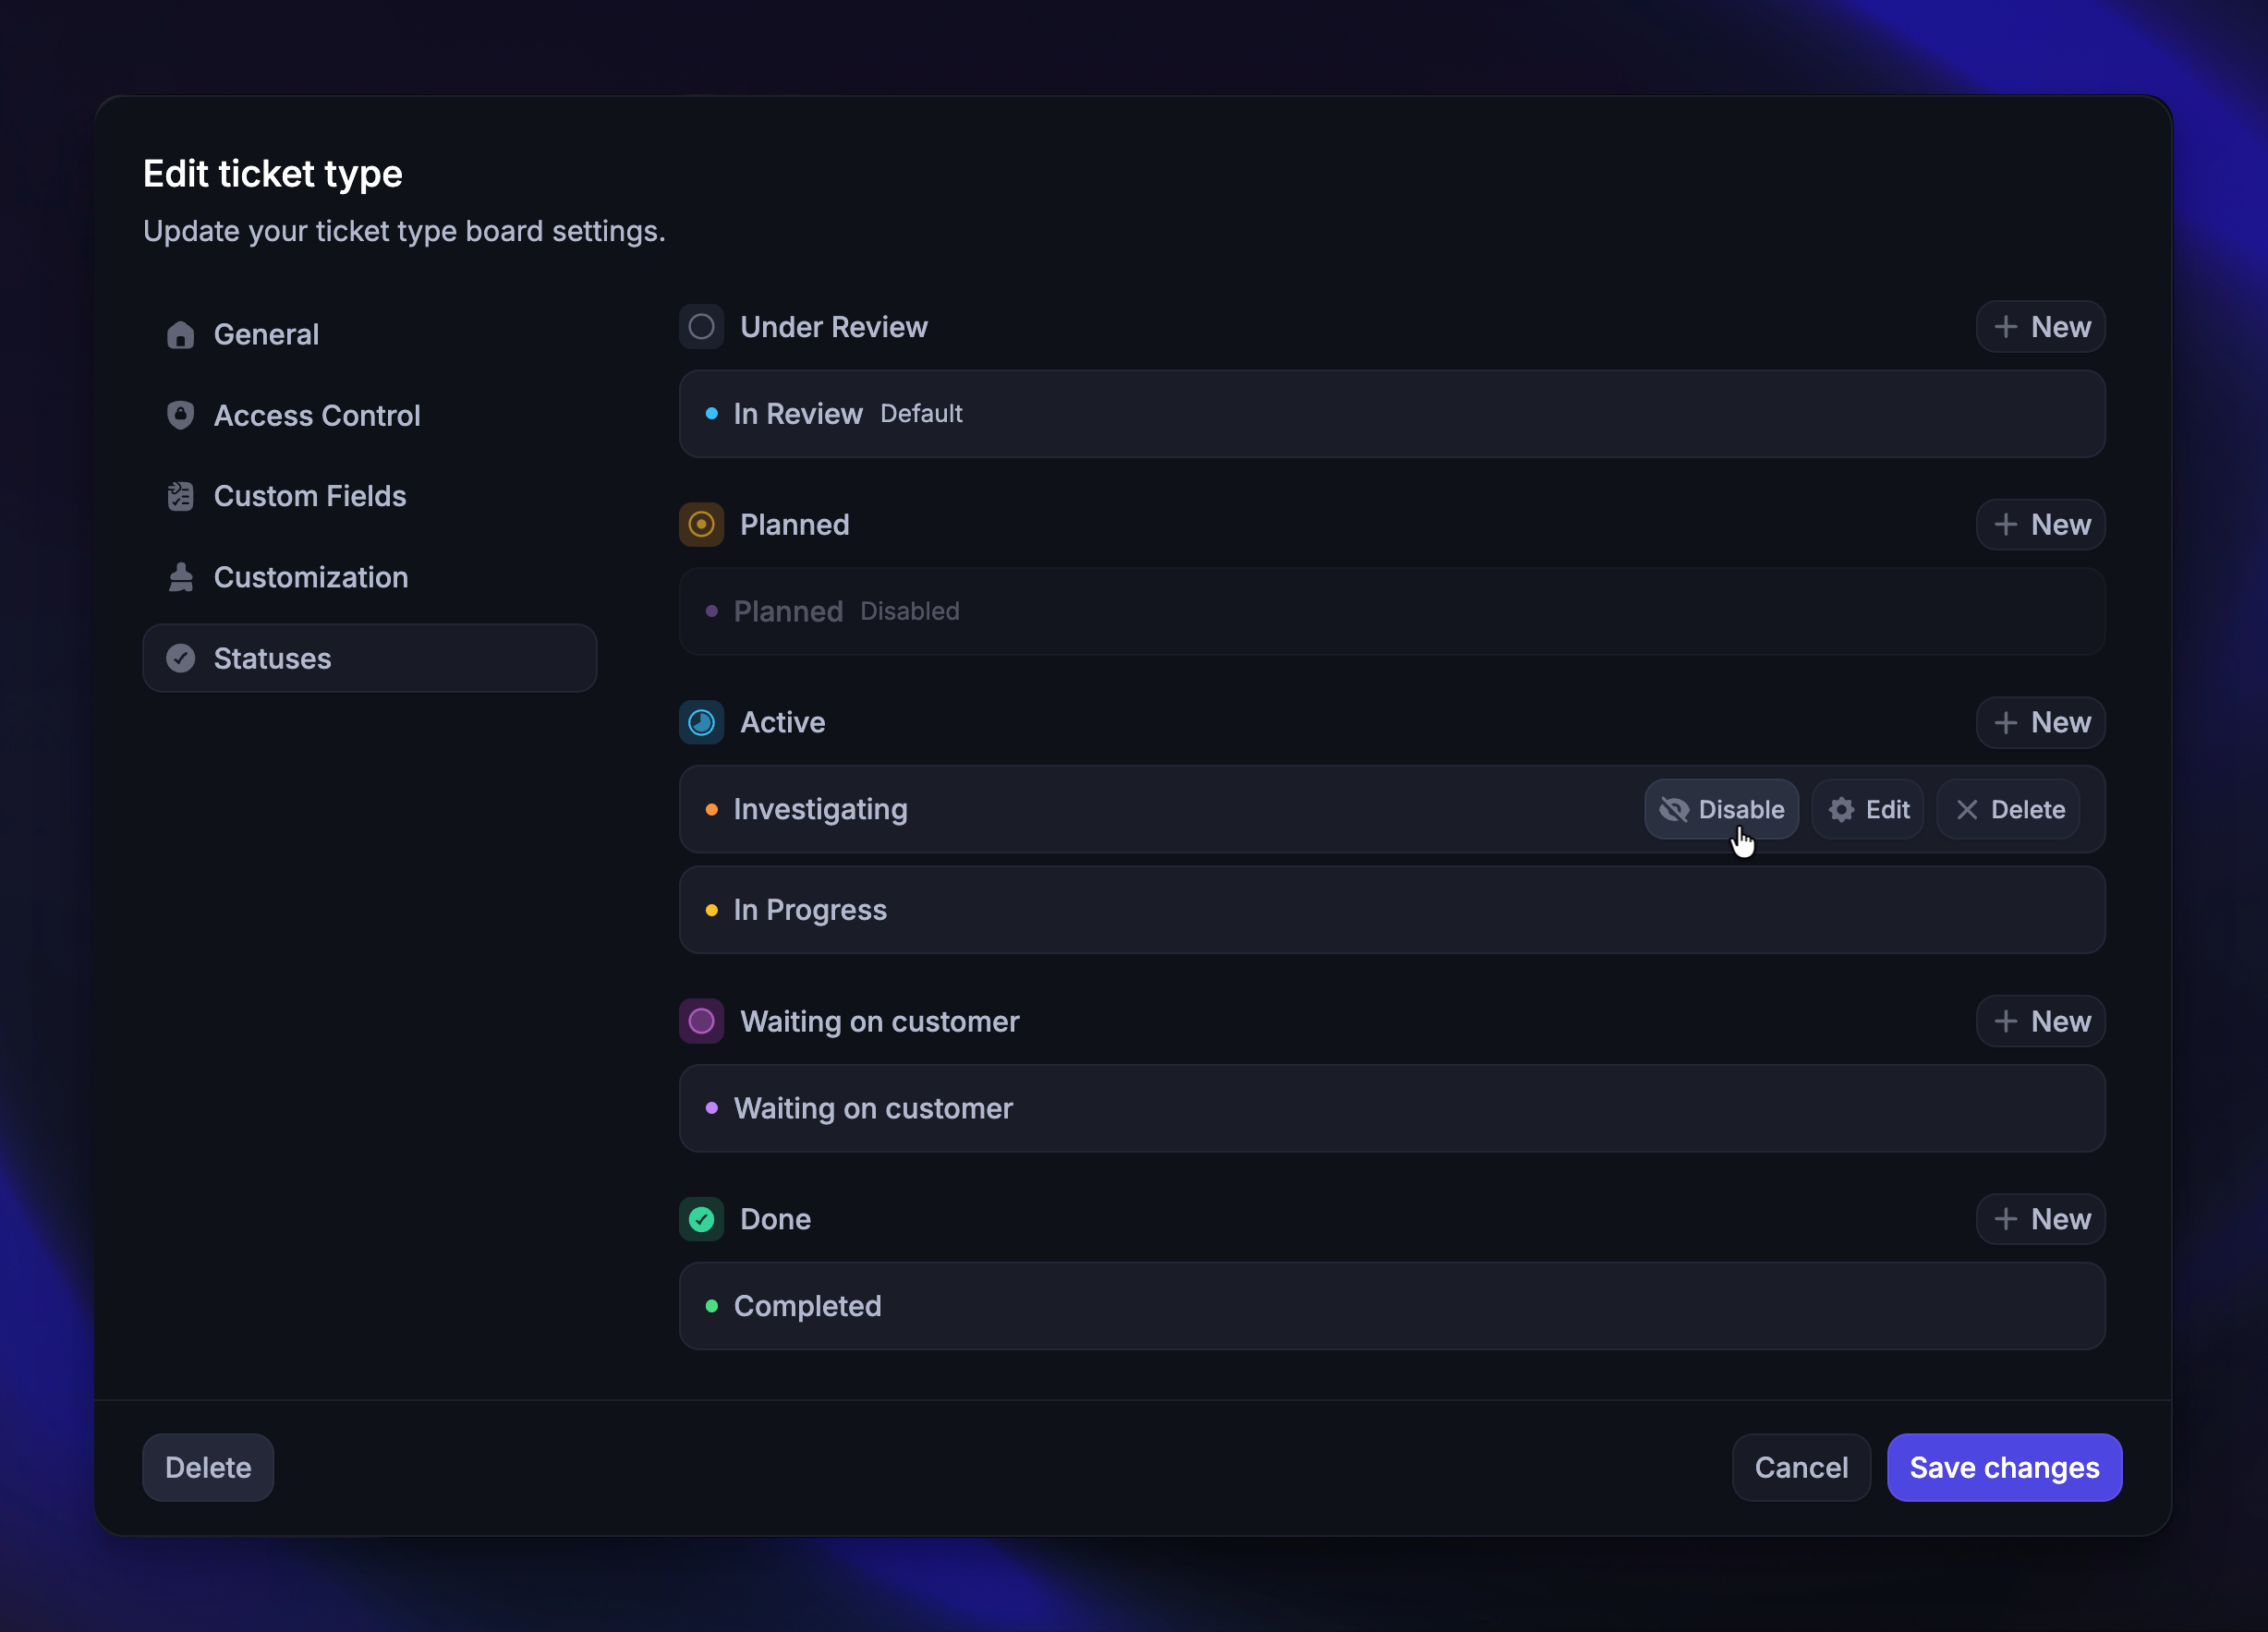
Each ticket type can use a different set of statuses. To customize which states a ticket type uses:
Click the ⚙️ gear icon to edit the ticket type you want to modify
Open the Statuses section
Enable or disable individual statuses for that ticket type
Removing a status from a ticket type only removes it from that ticket type. Other ticket types that use the same status remain unchanged.
Customer-facing experience
Customers see the status of their tickets in the following places:
Messenger widget - When the Tickets module is enabled in your Messenger settings, customers can view all their tickets, current statuses, and progress from the Tickets tab. Individual ticket views show a visual progress bar based on the status categories (Under Review, Planned, Active, Done), so customers always know where things stand.
Ticket Portal - If enabled, customers can view, track, and manage all their tickets from a dedicated portal page. Each ticket displays its current status and any unseen activity is highlighted
Email notifications - Customers receive an email notification when a ticket status changes. The email includes the updated status name
If you edit or customize a ticket state, customers will see the updated labels in the Messenger and in any new email notifications. Emails sent before the update will retain the original labels.
Note: Status updates and notifications are only sent for Customer ticket types. Tracker and Back-office tickets are internal and do not notify end users.
Teammate experience in the Inbox
Teammates can see and change ticket states while working on tickets from the Inbox in several ways:
Command palette (
CMD+K/CTRL+K) - Use the command palette to quickly convert conversations to tickets and manage ticket actionsConversation header - When a conversation has a linked ticket, the current ticket status is displayed as a button in the conversation header. Click it to open a dropdown and change the status to any state configured for that ticket type
Conversation sidebar - Linked tickets appear in the right-hand sidebar with their current status badge. Hover over a ticket to see full details (e.g. ticket type, ticket ID, status, custom fields, and linked conversations)
Inbox filters - Filter your conversation list by ticket status using the status dropdown. You can also sort by SLA breach soonest to prioritize urgent tickets
Managing existing ticket states
Editing a ticket state
Click the settings icon next to any status on the Ticket states page to edit its name or color.
Customers will see the updated label in the Messenger and Ticket Portal
New email notifications will use the updated name
Emails sent before the update will retain the original label
No new notification is triggered just because the label changed
Important: Changing a status name or color updates it across all connected ticket types that use this status - including existing tickets, currently open tickets, and future tickets.
Deleting a ticket state
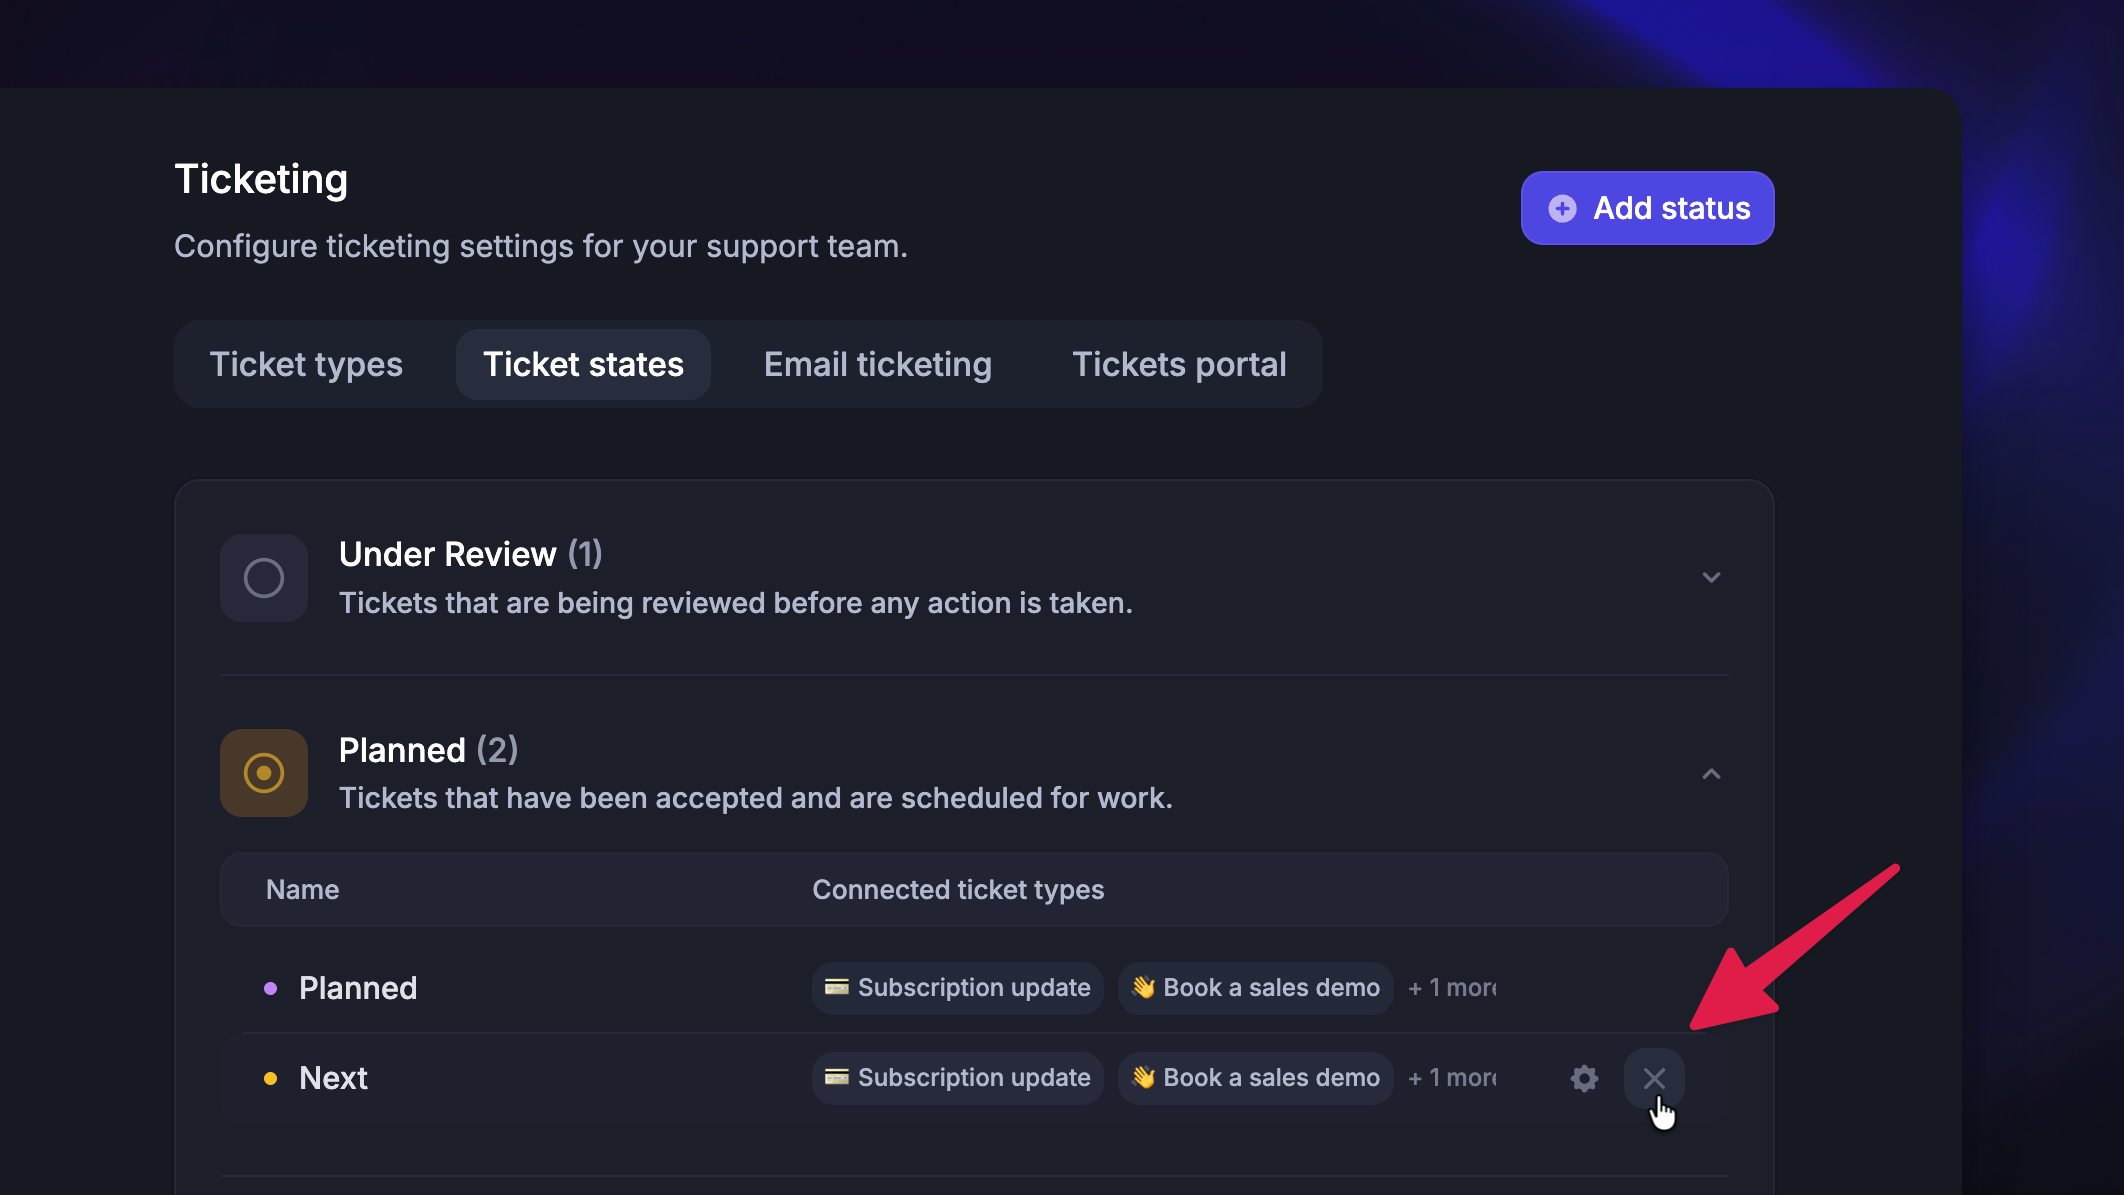
You can delete any status that is not marked as the default. To delete a status, click the settings icon next to it and select Delete.
All tickets with that status will be moved to the default status
Default statuses cannot be deleted
This action cannot be undone
API
You can view and update ticket states using the Featurebase API. When you retrieve a ticket, the response includes the current status with its name, color, and type. You can update a ticket's status via the API by providing a valid status ID.
Note: Ticket states can’t be managed (e.g. created or deleted) via the API.