How to create & manage Customer tickets
Learn how to create Customer tickets, manage statuses, communicate with customers, edit details, and link to other tickets.
Written By Markus from Featurebase
Last updated 2 days ago
Overview
There are several ways to create Customer tickets depending on the situation:
Convert a conversation to a Customer ticket from the Inbox – when a teammate needs to track a complex query beyond the conversation
Send a ticket form within a conversation – so the customer fills in the details themselves
Automatically convert inbound emails to tickets – to create tickets for every new email without manual steps
Automatically create tickets via Workflows – to convert conversations to tickets based on rules you define
Customer self-service via the Ticket Portal – let customers submit tickets directly from a dedicated portal page
Create a Customer ticket via the API – to create tickets programmatically from your own app or website
Before you can create tickets from the Inbox, you'll need to set up at least one Customer ticket type →
Once a ticket is created and linked to a conversation, you can manage it directly from the Inbox – change statuses, communicate with customers, edit ticket details, and link to Back-office or Tracker tickets.
Creating Customer tickets
Convert a conversation to a Customer ticket
You can convert any conversation in the Inbox into a Customer ticket and fill in all the details on the customer's behalf:
Click the ticket icon in the conversation header
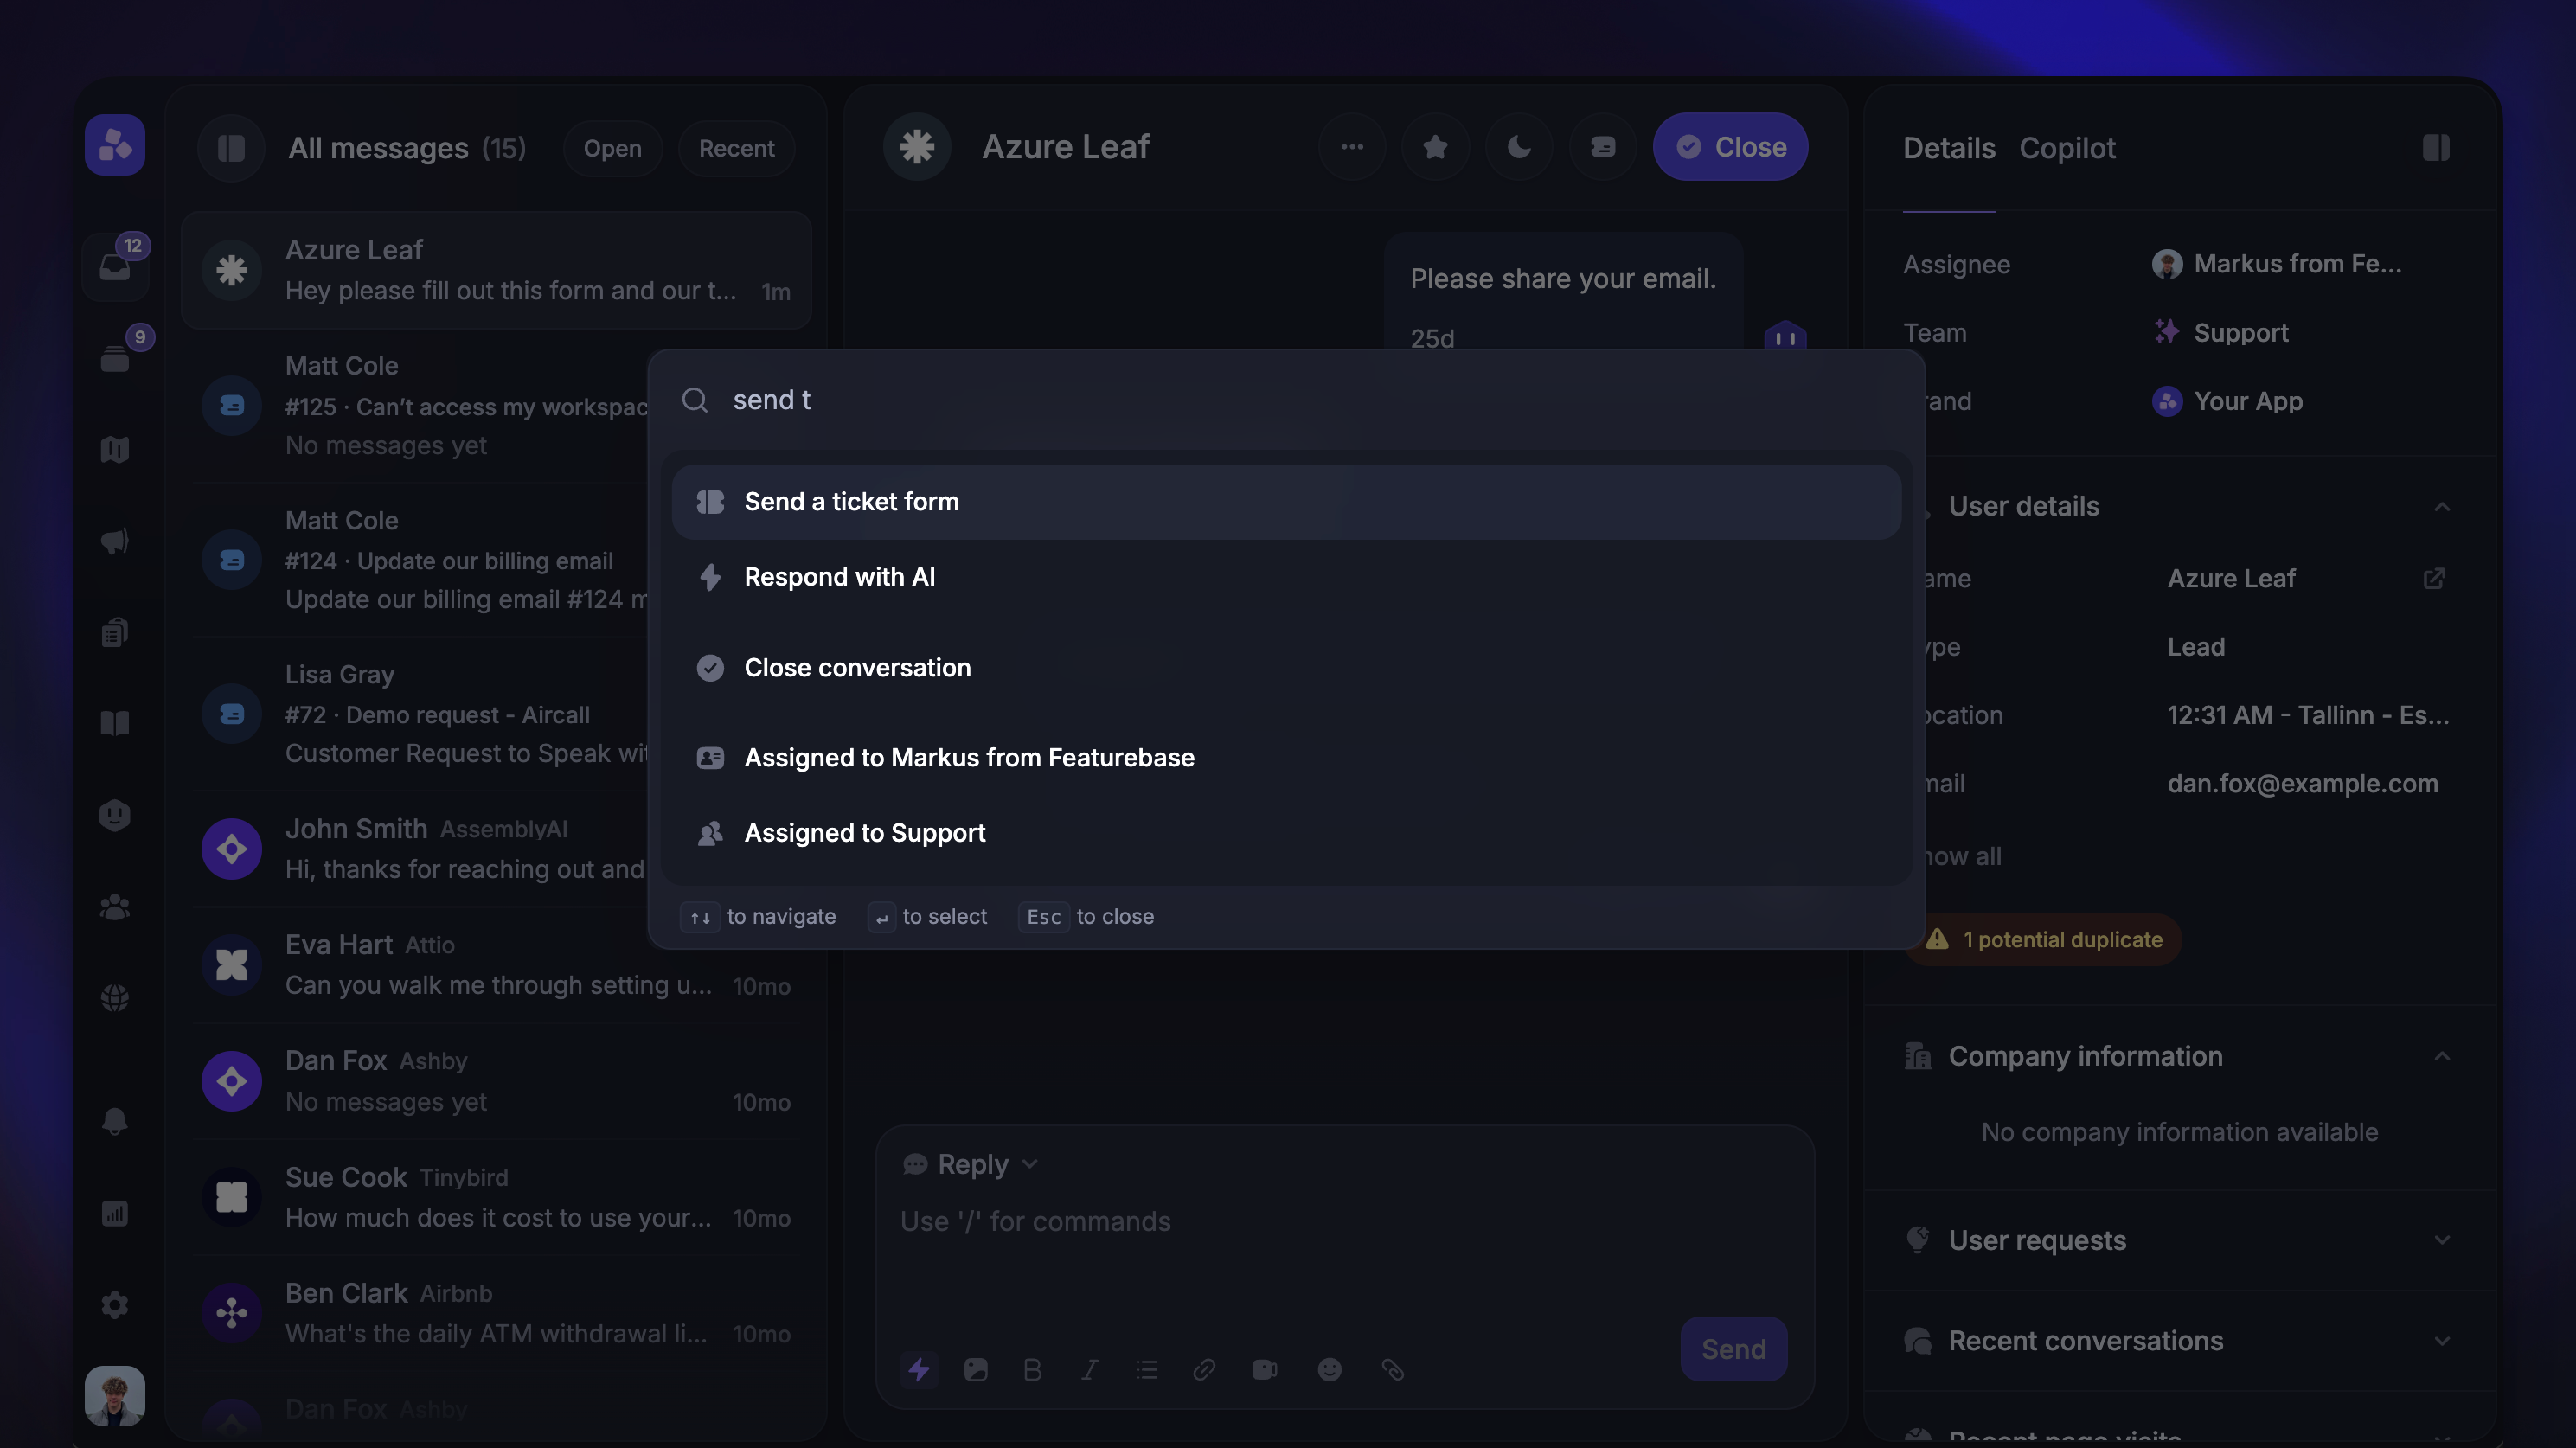
You can also open the command palette with
CMD+K/CTRL+Kand select Convert to customer ticket
Select the Customer ticket type
Fill in the ticket form (title, description, and any custom fields)
Click Create
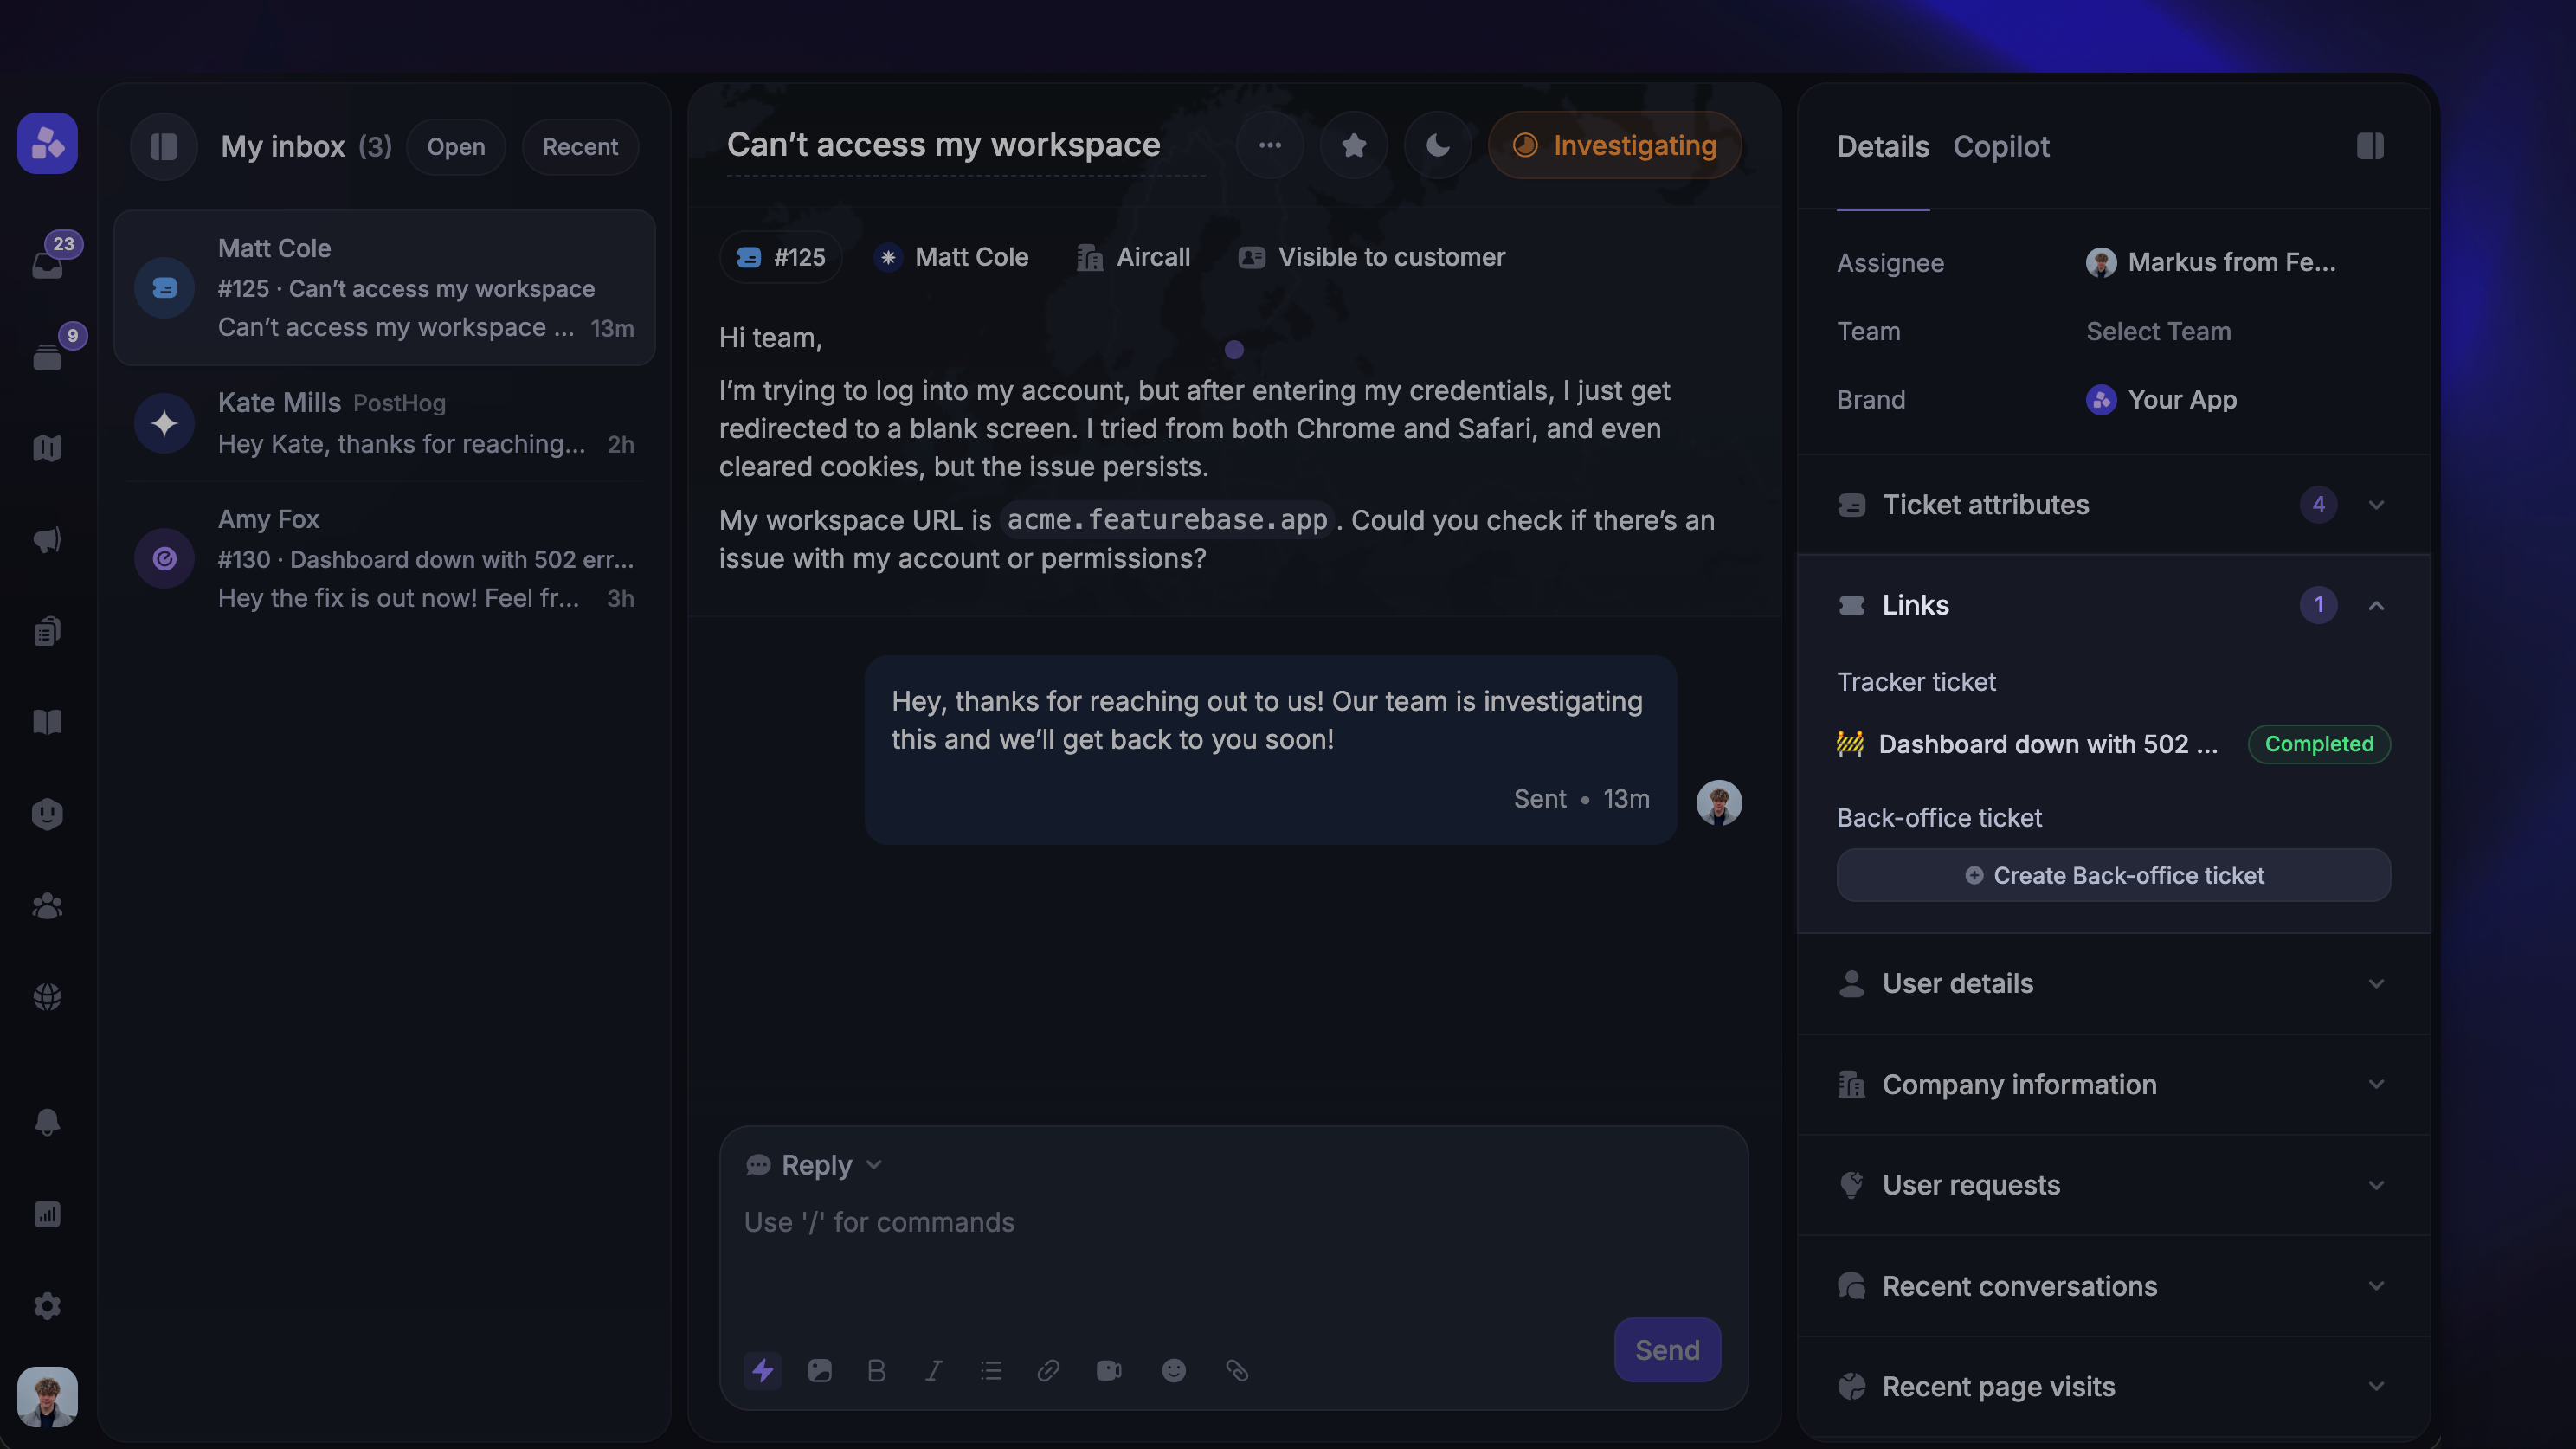
Once the ticket is created, it's automatically linked to the conversation. You'll see the ticket status in the conversation header, and full ticket details (ticket type, ID, status, custom fields, and linked conversations) in the right-hand sidebar.
Note: Featurebase uses AI to auto-fill the ticket title, description, and custom fields based on the conversation context. You can review and edit the prefilled values before submitting.
Manually send a ticket form within a conversation
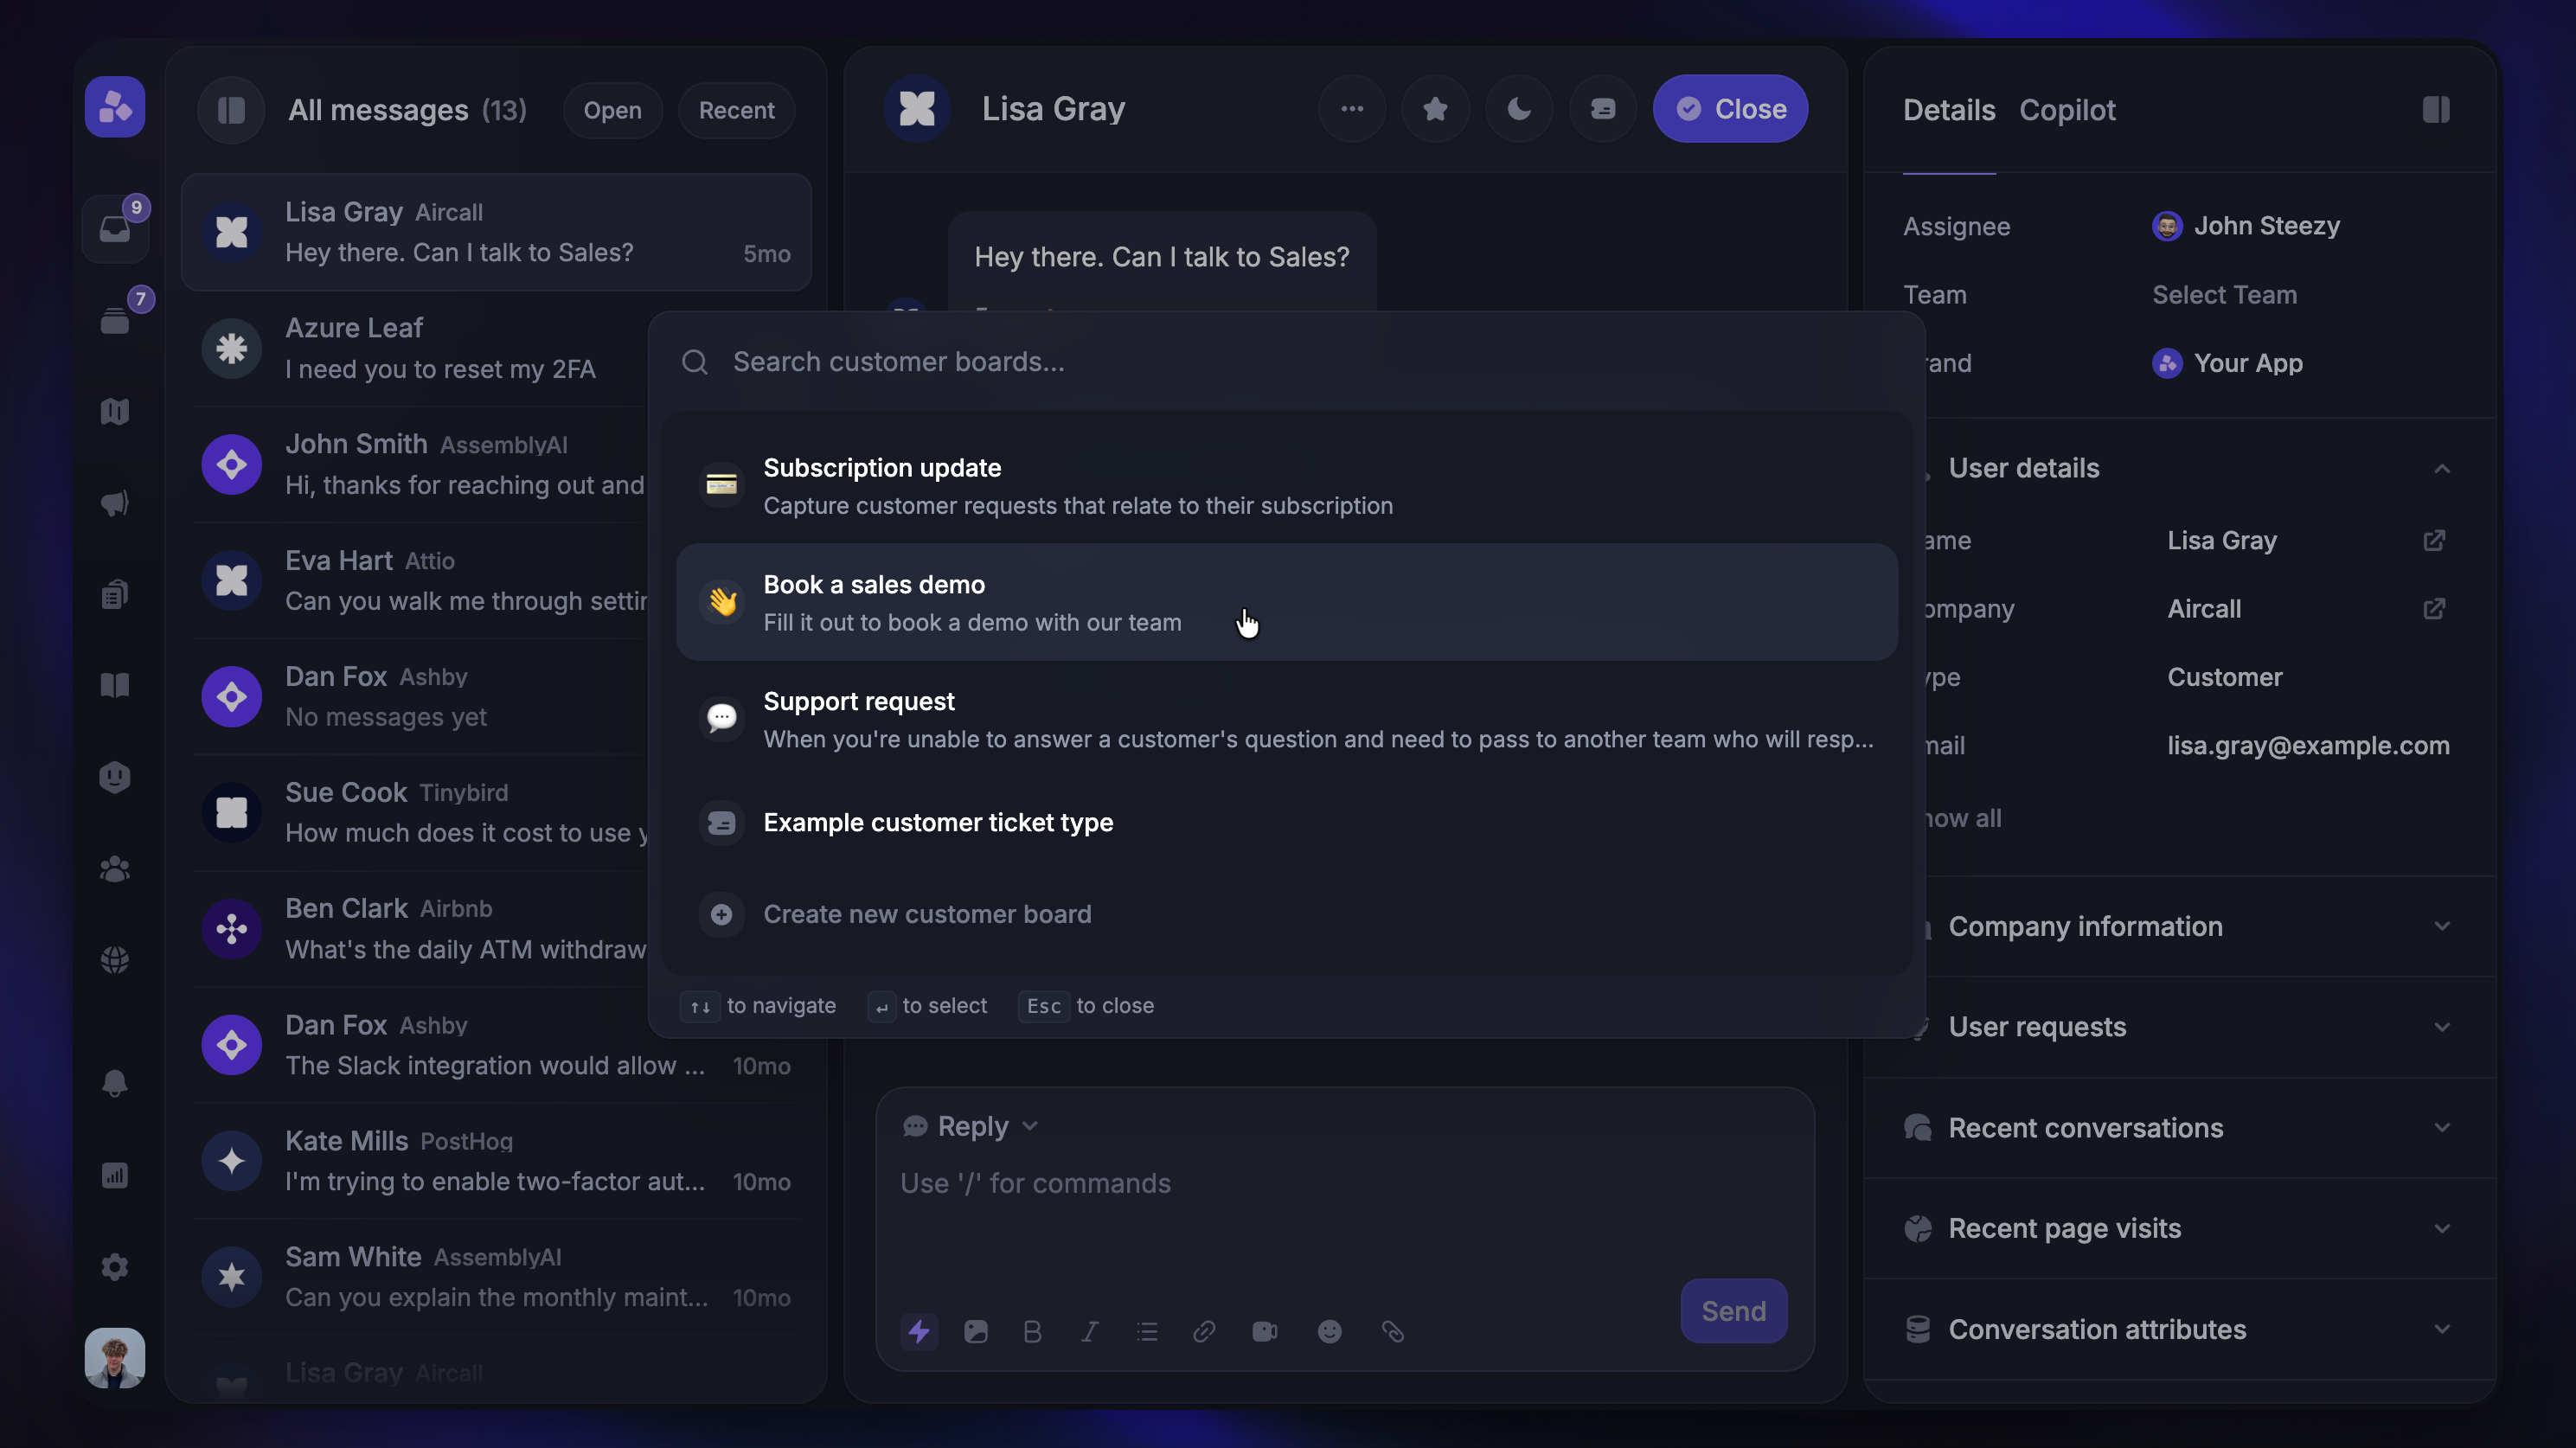
Reduce back-and-forth by sending a ticket form to the customer within the conversation so they can submit all necessary information themselves.
Open the command palette with
CMD+K/CTRL+KSelect Send a ticket form
Choose the Customer ticket type
A ticket form prompt is inserted into the message editor – send it as part of your reply
The customer receives the form and fills it in
The ticket form prompt can be combined with a regular message – just type your message around it.
Note: This option is only available when the conversation doesn't already have a ticket linked.
Automatically convert inbound emails to tickets
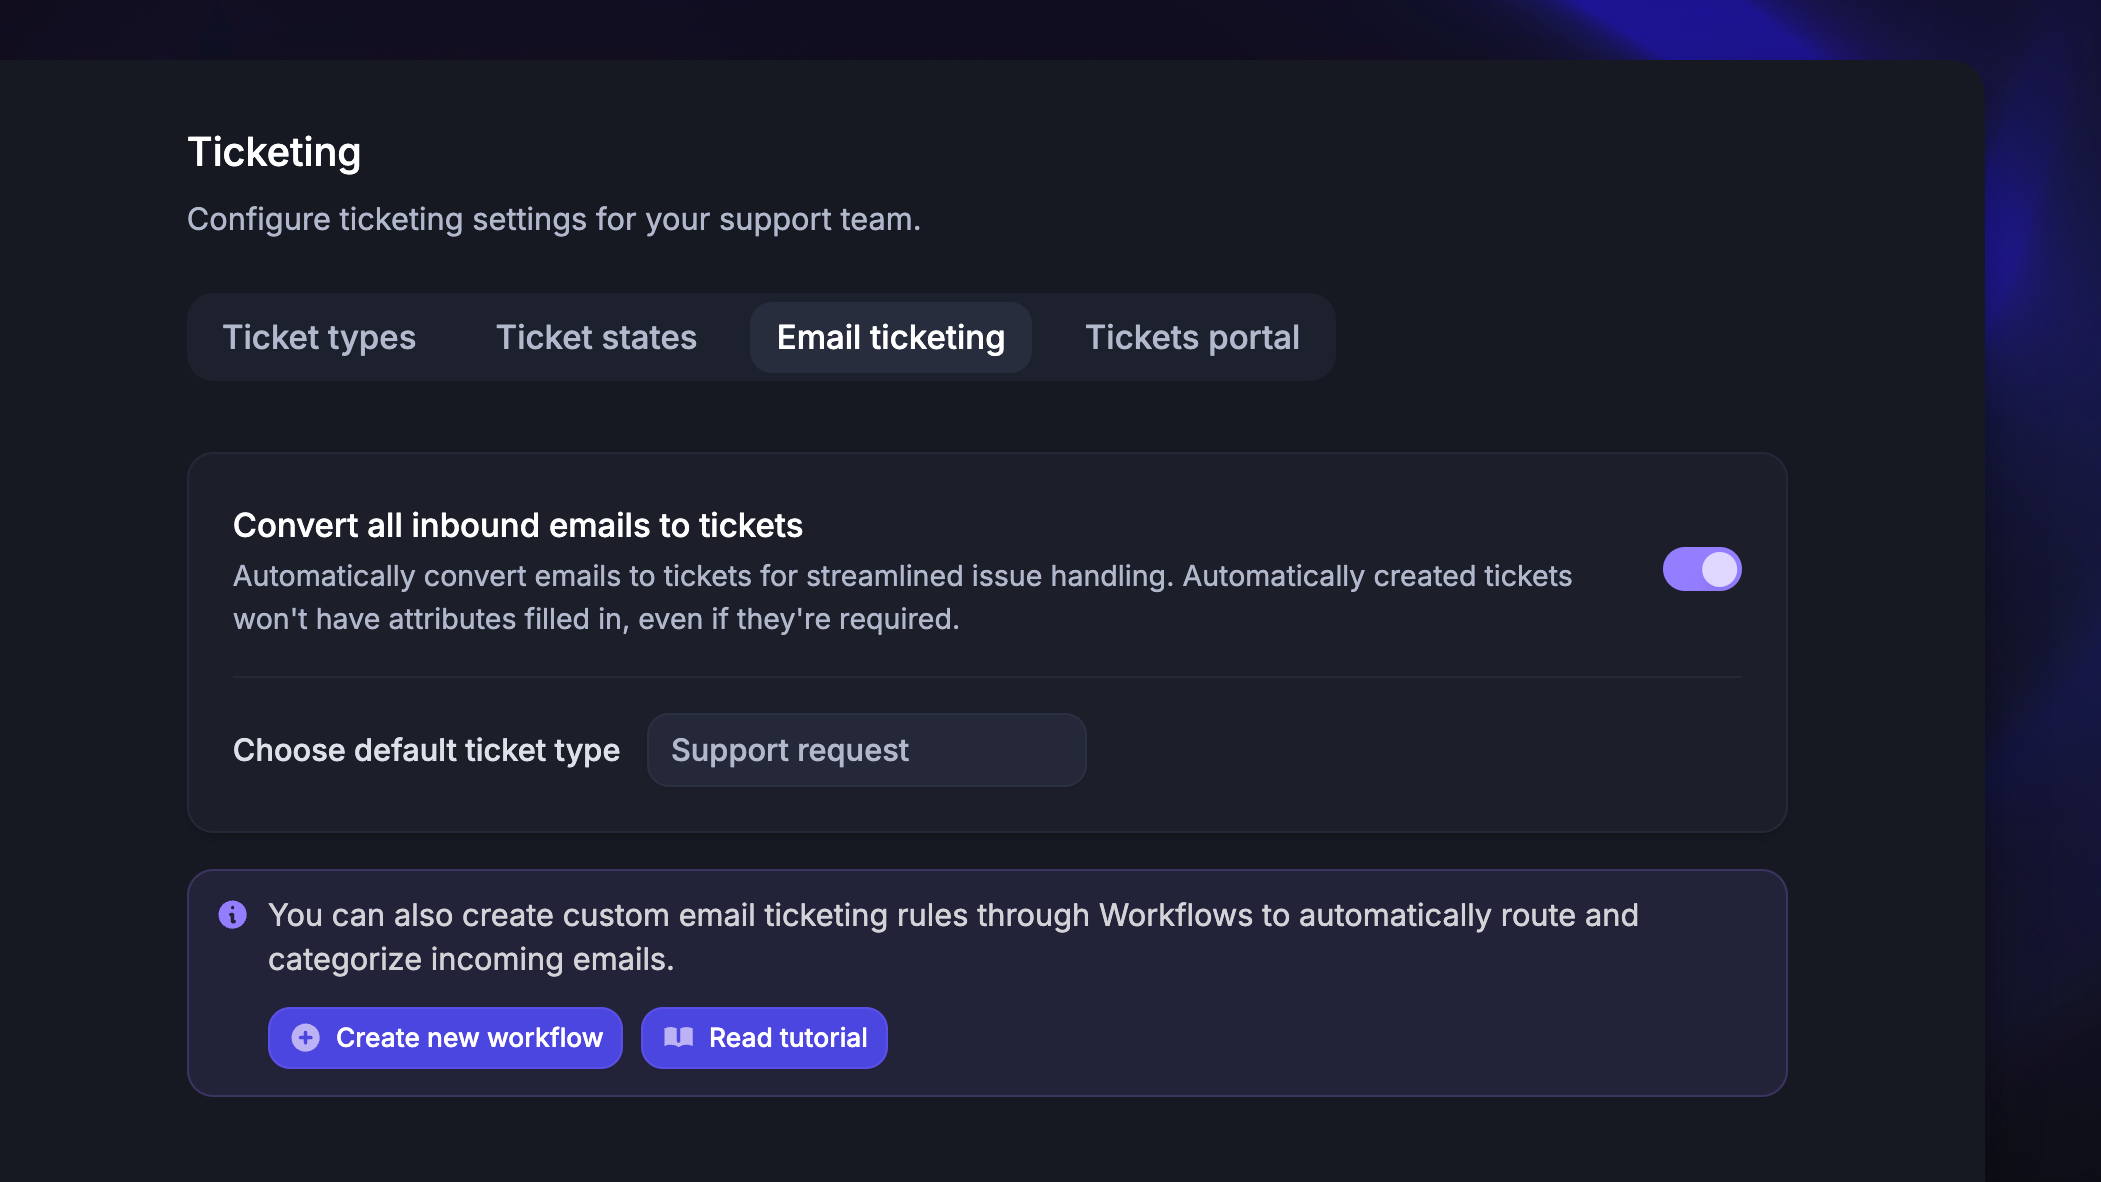
You can configure Featurebase to automatically convert every new inbound email into a Customer ticket. To enable this:
Toggle on Convert all inbound emails to tickets
Choose the default Customer ticket type
Good to know:
Only new customer-initiated emails are converted – replies to existing conversations and admin-sent emails are not
Automatically created tickets won't have custom fields filled in, even if they're marked as required
The ticket title is set to the email subject
Automatically create tickets via Workflows
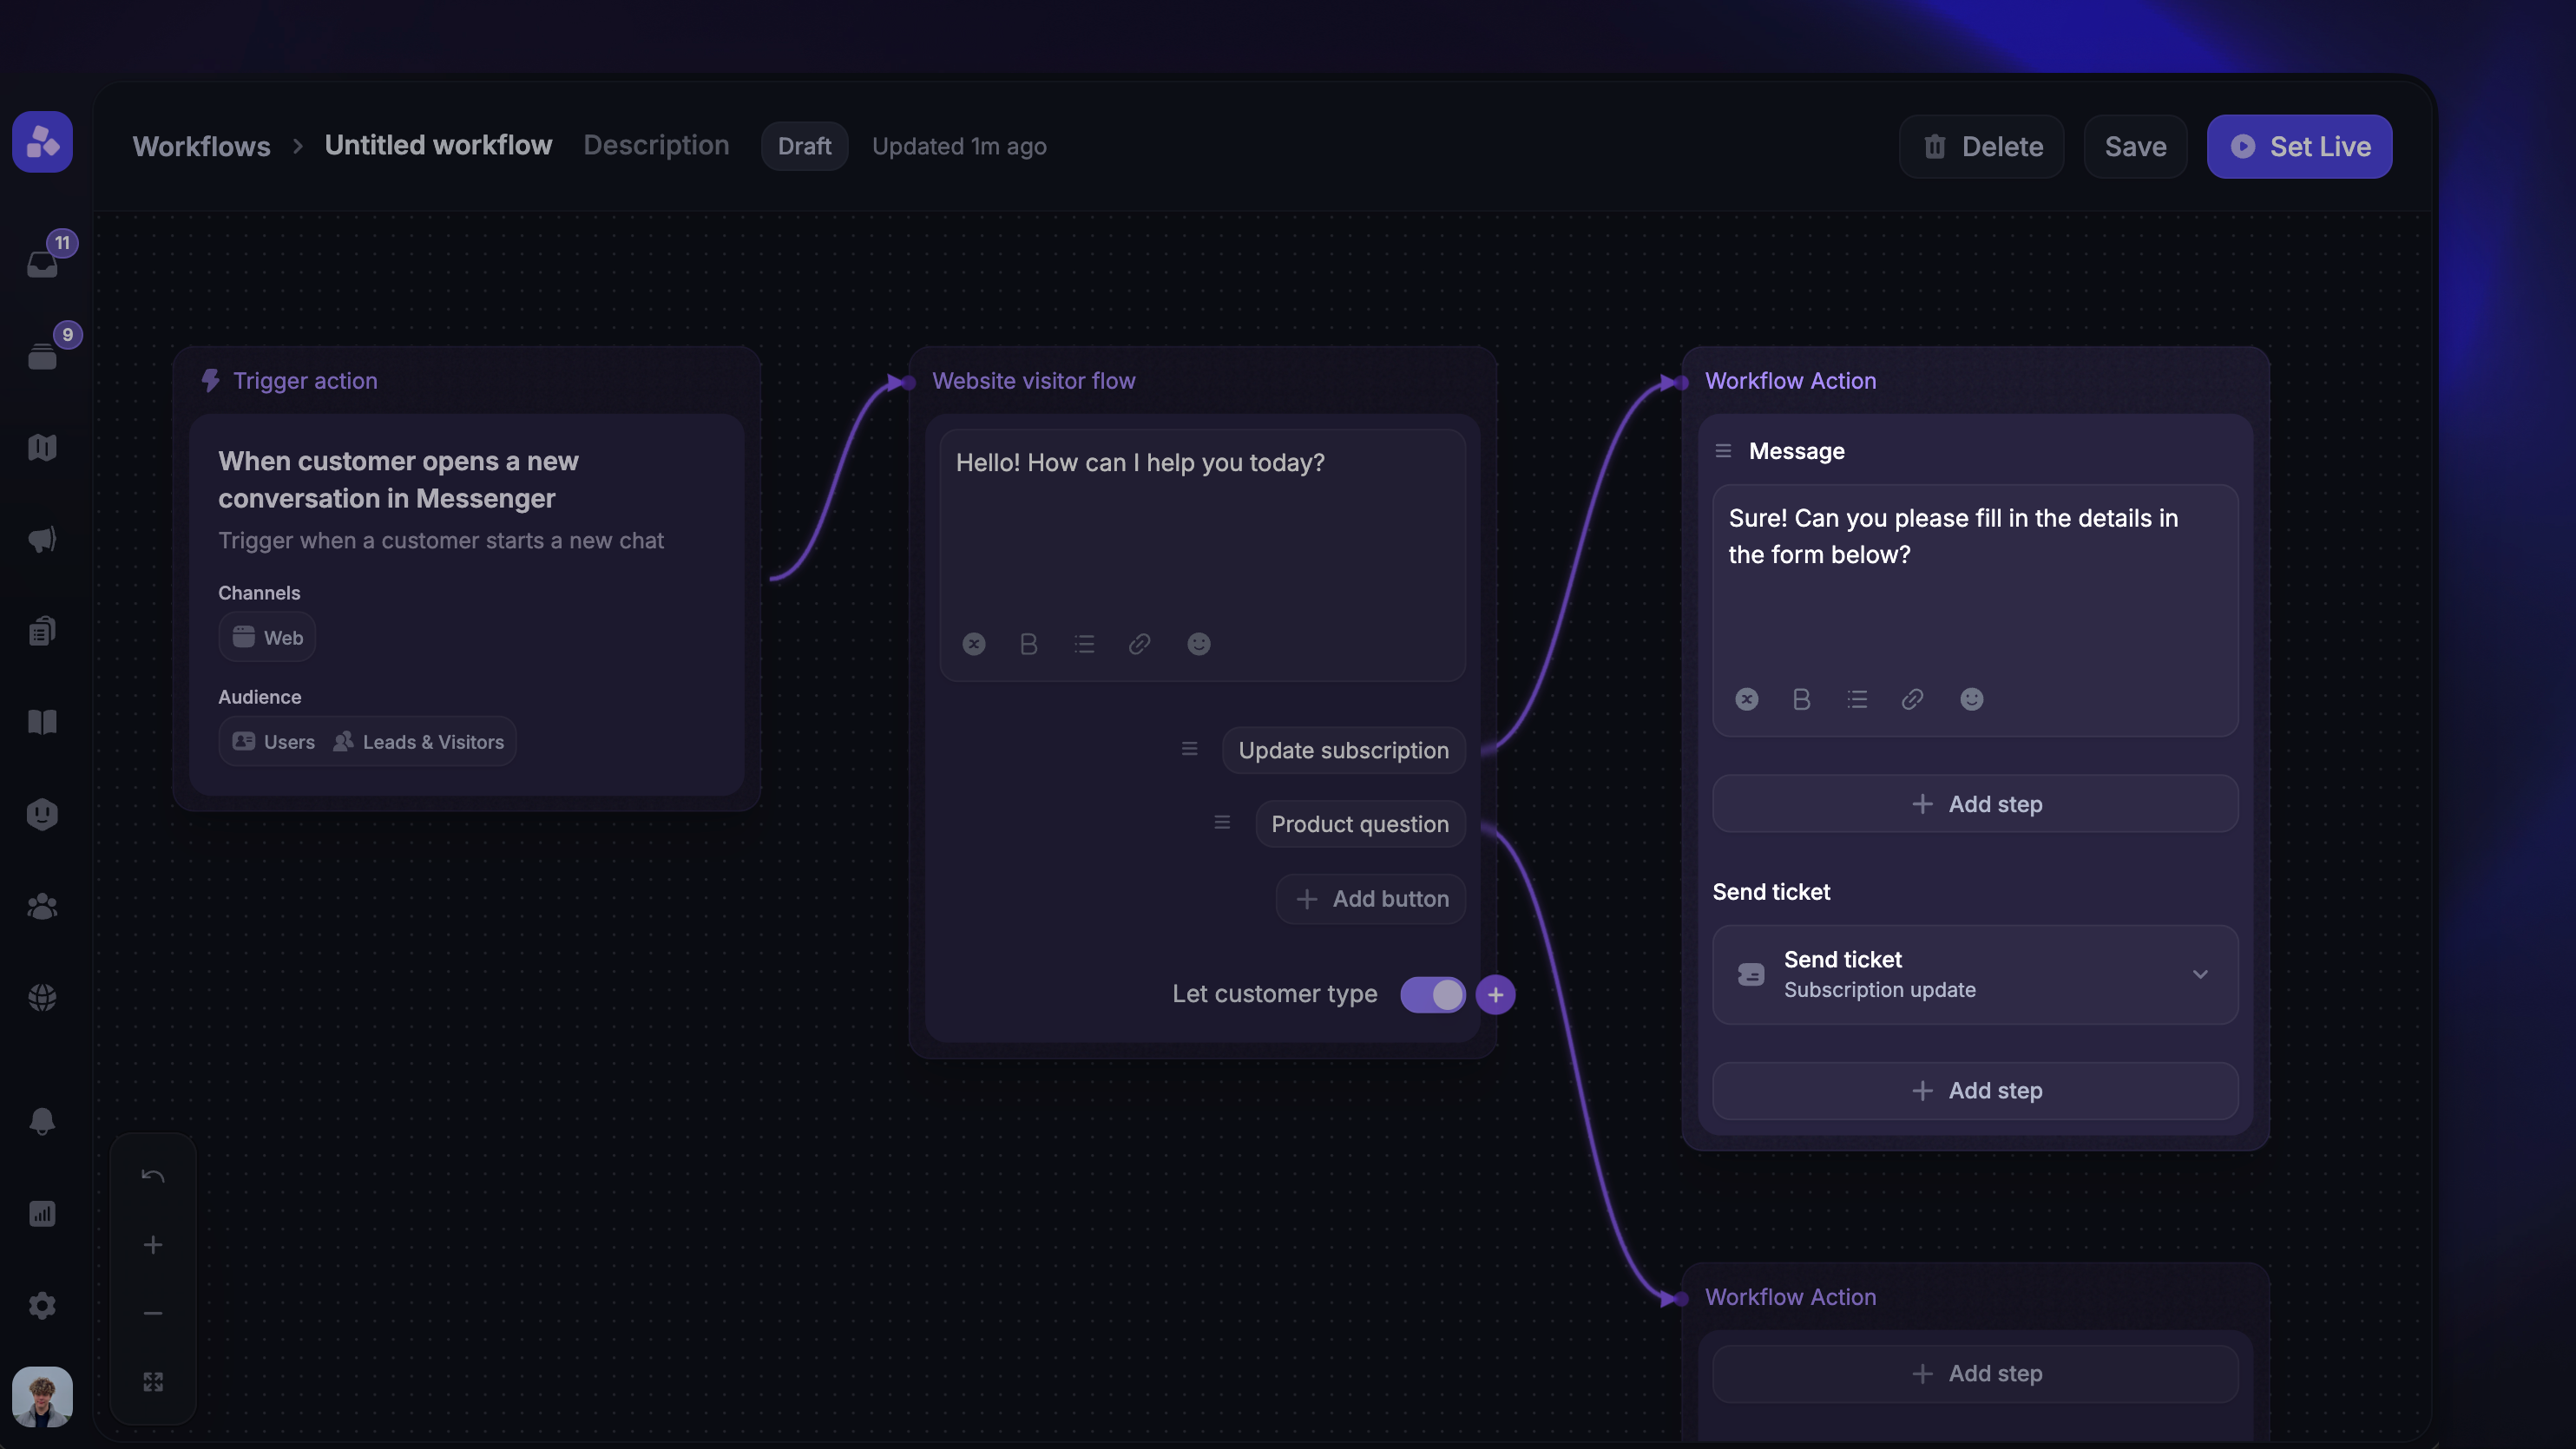
Send users the ticket form to ensure your team has all the necessary information about the ticket up front and eliminate the need for back-and-forth with the customer.
Automatically convert conversations to tickets based on rules you define and link them to the conversation (e.g. when a conversation matches certain criteria or a customer selects a specific topic)
The ‘Convert to Ticket’ workflow action creates a Customer ticket and links it to the conversation automatically.
Note: If the conversation already has a Customer ticket linked, the action is skipped.
Customer self-service via the Ticket Portal
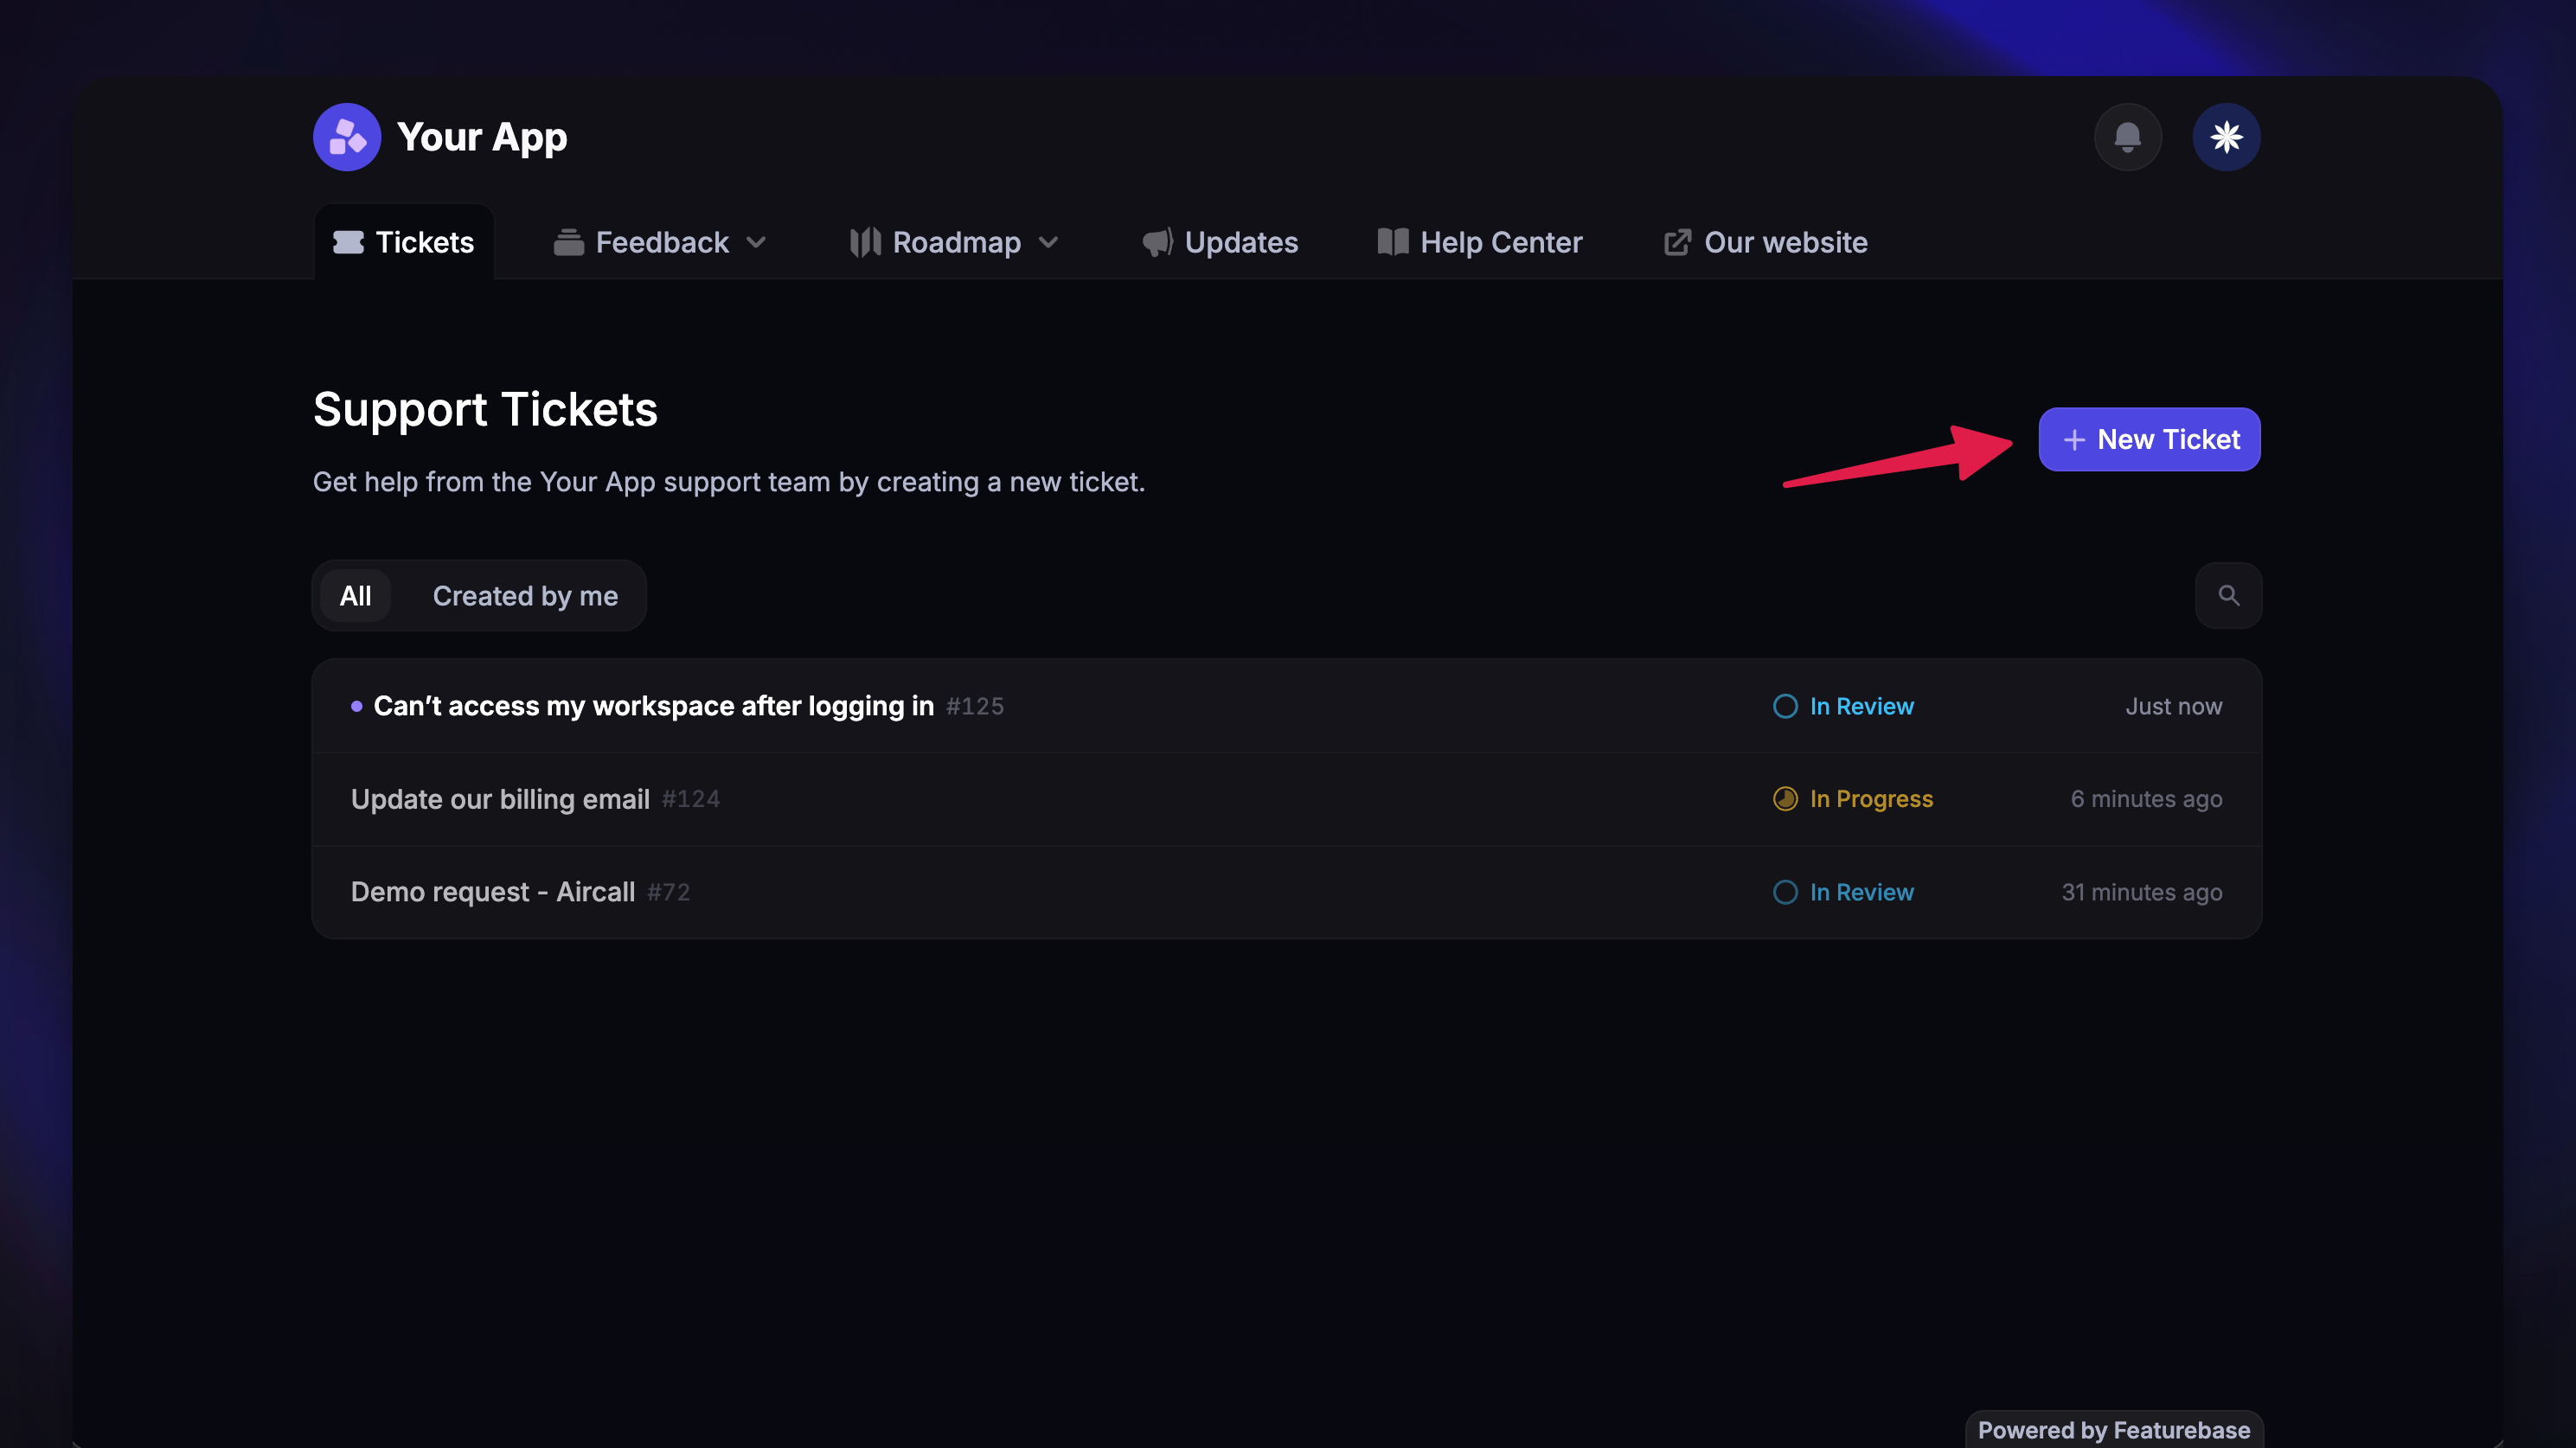
Customers can create tickets themselves via the Ticket Portal – a dedicated page for submitting new tickets and tracking existing ones.
When a customer clicks New Ticket on the portal, they see the ticket creation form with the title, description, and any public custom fields you've configured for that ticket type.
Good to know:
Customers can filter between all tickets and the tickets they created
If your workspace allows anonymous submissions, customers can create tickets without logging in
Create a Customer ticket via the API
You can programmatically create Customer tickets using the Featurebase API. This is useful when you want to:
Embed a custom ticket form in your product
Create system-generated tickets from external events
Migrate tickets from another tool
Managing Customer tickets
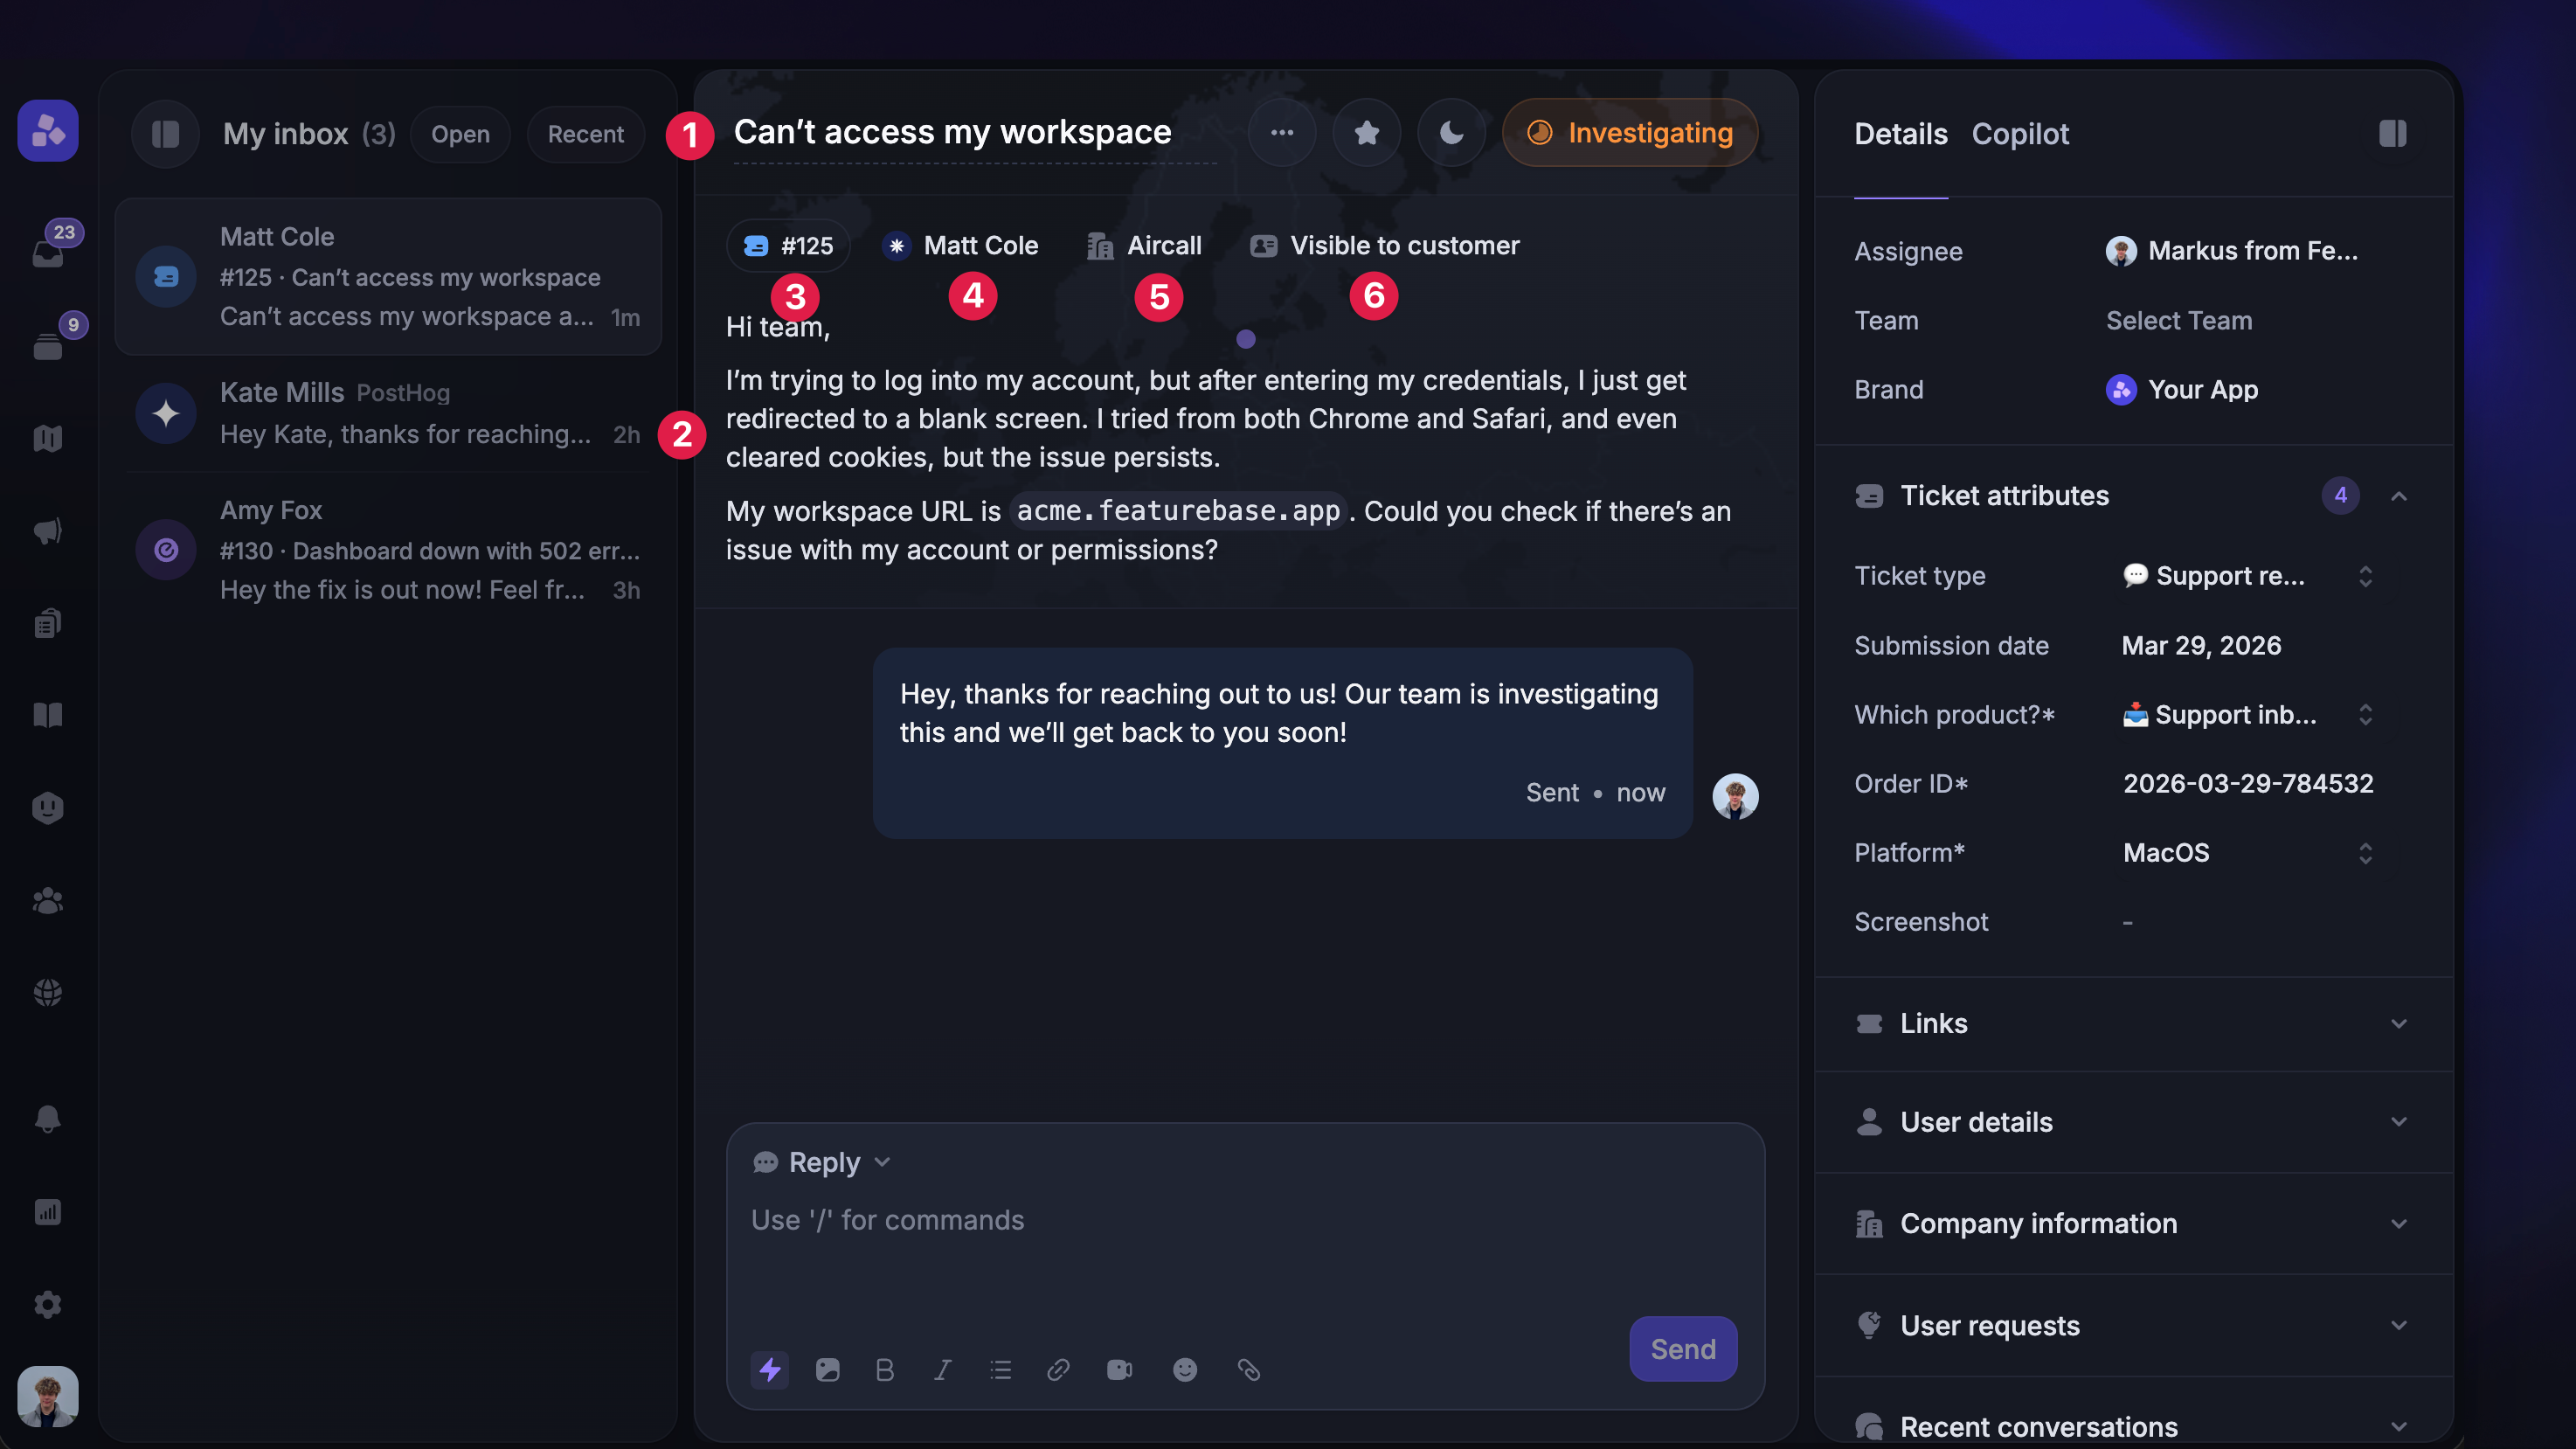
Once a Customer ticket is created and linked to a conversation, you can manage it directly from the Inbox.
To help your team differentiate between Customer tickets, Back-office tickets, Tracker tickets, and regular conversations, the Inbox shows visual indicators for each type.
Customer ticket always has the following default fields visible in the middle panel:
Ticket title (click to edit)
Ticket description (click to edit)
Customer-facing ticket ID (click to copy)
User
Users company
Visibility label
The ticket ID (e.g. #1225) and ticket type are read-only and cannot be changed after creation.
If the ticket type has custom fields configured, those appear in the right-hand sidebar. Custom field values can be updated directly from the sidebar.
Changing the ticket status
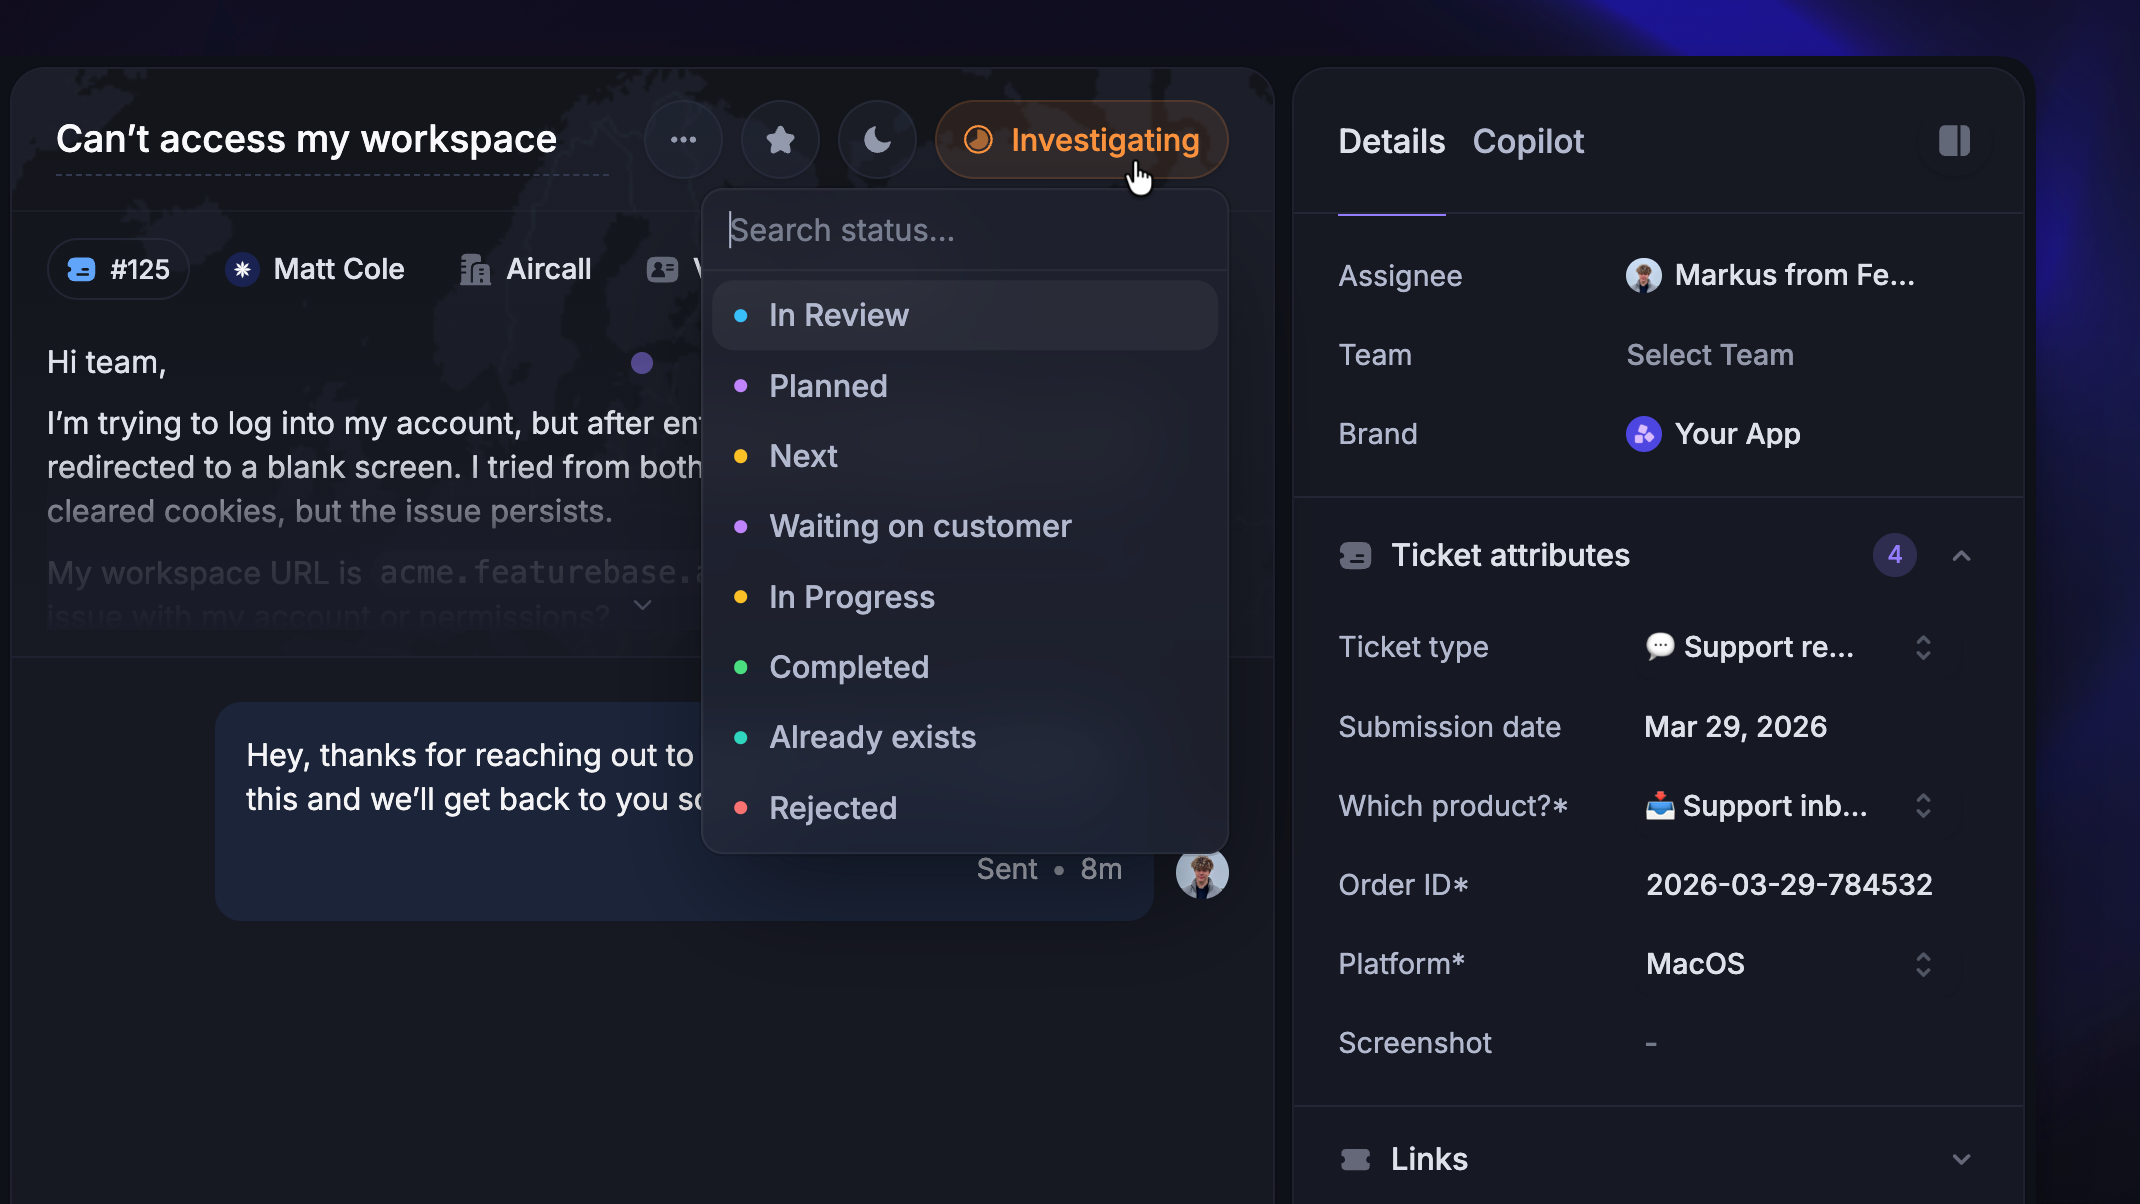
Click the status button in the conversation header to open a dropdown with all statuses configured for that ticket type.
Status changes on Customer tickets are visible to customers – they'll see the updated status in the Messenger, Ticket Portal, and via email notification.
Communicating on a Customer ticket
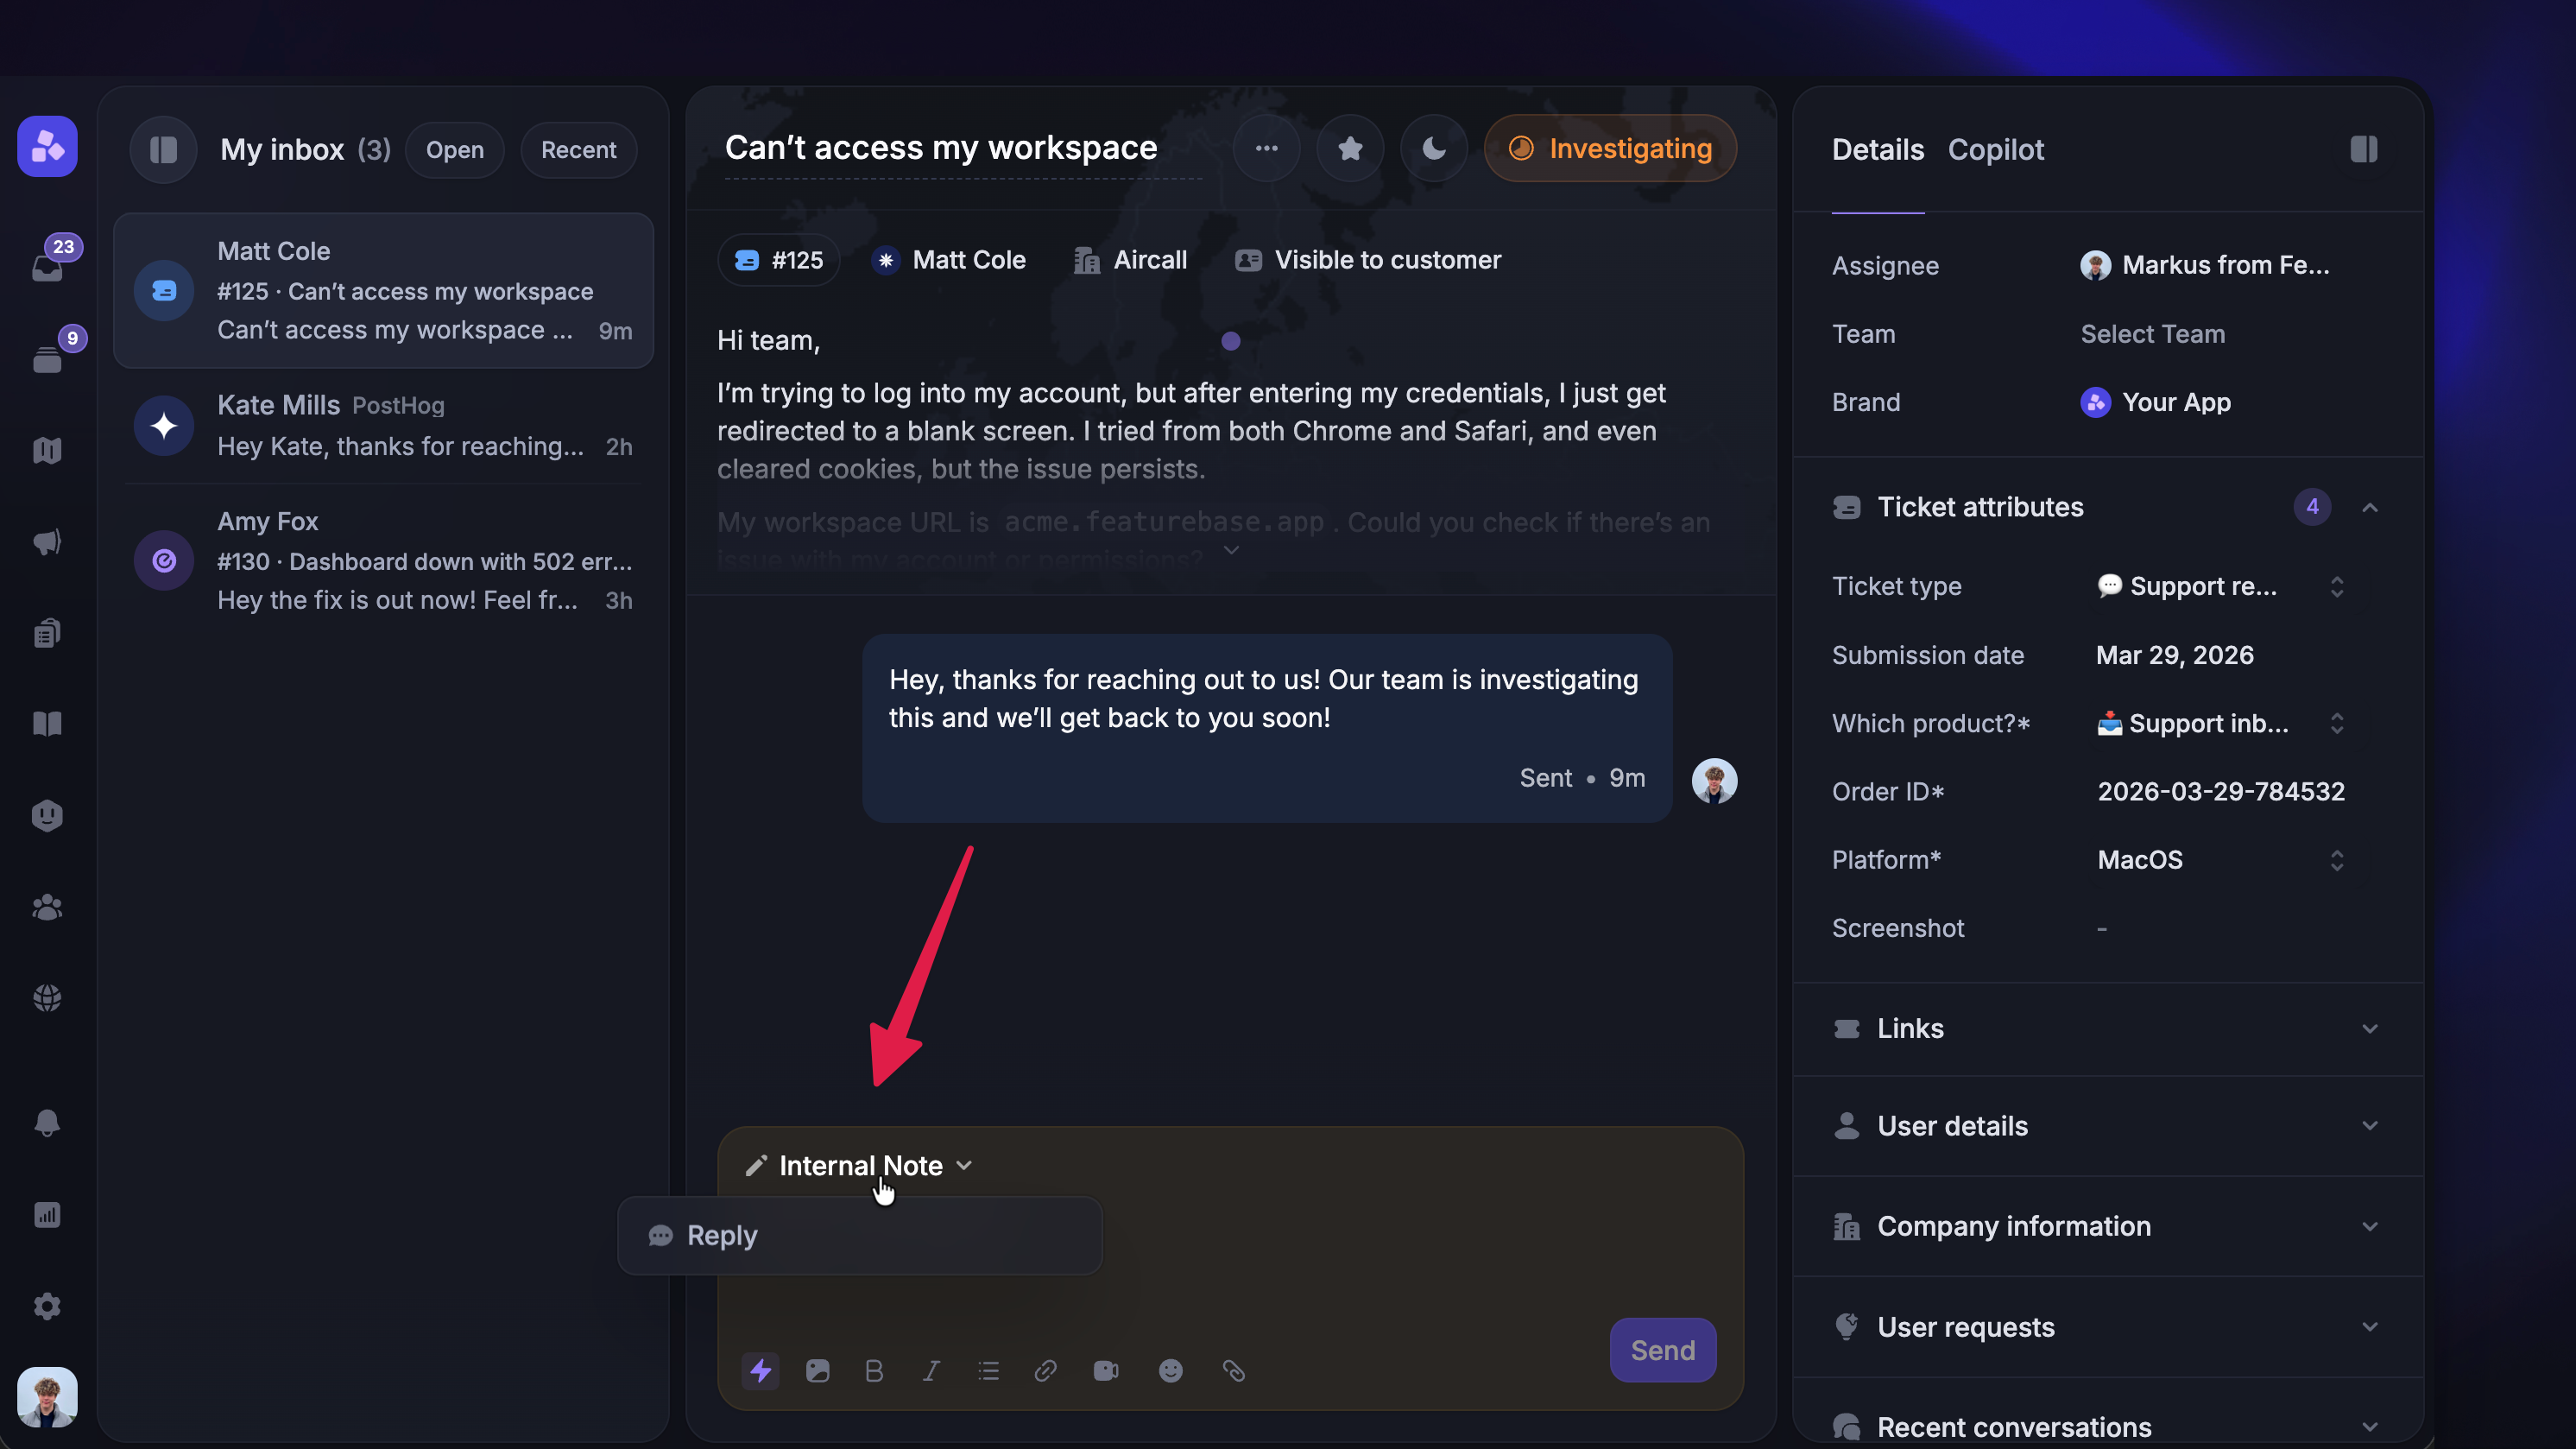
Customer tickets support both customer-facing replies and internal notes.
Press
Rto compose a reply to the customerPress
Nto switch to internal notes mode (visible only to your team)
Internal notes are useful for leaving context for teammates without notifying the customer. You can switch between modes at any time from the composer.
Linking to other tickets
From the Links section in the right-hand sidebar, you can connect the Customer ticket to Back-office or Tracker tickets:
Use Back-office tickets when a teammate needs to complete an internal task related to a conversation or you need to coordinate between teams without involving the customer.
Use Tracker tickets when you want to track a known problem in one place and update all affected customers from one place automatically (e.g., multiple customers have reported the same bug, and you want to update them all at once when it’s fixed)