When to use Customer / Back-office / Tracker tickets
Learn the difference between the 3 ticket types in Featurebase and when to use each one.
Written By Markus from Featurebase
Last updated 4 months ago
Overview
Featurebase offers 3 types of tickets, each designed for a different workflow. Understanding when to use each type helps you keep customer communication clear and internal work organized.
Customer tickets - private conversations between your team and a single customer for async requests
Back-office tickets - internal tickets between your team for tasks that happen behind the scenes
Tracker tickets - shared issues reported by multiple customers, with status updates sent to all linked conversations
You can create and manage ticket types from Settings → Support → Ticketing.
Customer tickets
Customer tickets are used for one-on-one requests between your team and a single customer. They are the most common ticket type and the only type that is visible to customers.
Use Customer tickets when you want to track individual customer requests alongside your conversations, or need to collect information from a specific customer (e.g. a refund request or account change).
Some common examples of Customer ticket types are:
💳 Billing issue
🔄 Refund request
📦 Order change
🔐 Account access issue
🧪 Beta sign-up
How customer tickets work
Visibility:
Each conversation can have 1 Customer ticket linked to it
Customer tickets are visible to the customer they are linked to
Customers can see the ticket and its progress in the Ticket Portal and the Messenger Tickets tab with a progress bar with 4 stages: Reviewing, In progress, Active, and Completed
Communication:
Customers receive email notifications when the ticket is created and when its status changes
Customer tickets support both replies (visible to the customer) and internal notes (visible only to your team)
Notes are cross-posted to all linked conversations, so teammates working on related tickets stay in sync
How to create a Customer ticket
You can create a Customer ticket from a conversation in the Inbox using the command palette (CMD+K on Mac, CTRL+K on Windows) and selecting Convert to customer ticket.
You can also create Customer tickets automatically using Workflows with the Convert to ticket or Send ticket actions.
To send a ticket form to a customer during a conversation, use CMD+K and select Send a ticket form. This prompts the customer to fill out the ticket details themselves.
Back-office tickets
Back-office tickets are internal tickets for tasks that happen behind the scenes. Customers never see them.
Use Back-office tickets when a teammate needs to complete an internal task related to a conversation or you need to coordinate between teams without involving the customer.
Some common examples of Back-office ticket types are:
💳 Process refund → Finance team
🔍 Account investigation → Security team
🔧 Engineering escalation → Technical support team
📋 Compliance review → Legal team
How Back-office tickets work
Visibility:
Back-office tickets are never visible to customers - no email notifications are sent and they do not appear in the Ticket Portal or Messenger
They appear in the Inbox sidebar with the label "Internal"
Communication:
You can create multiple Back-office tickets from the same conversation (there is no limit like with Customer or Tracker tickets)
Back-office tickets support internal notes only - there is no option to send customer-facing replies
Updates written in the Back-office ticket are cross-posted to the linked conversation as internal notes, so teammates on the customer side can see what happened
How to create a Back-office ticket
From any conversation in the Inbox, open the command palette (CMD+K) and select Create Back-office ticket, then choose the ticket type.
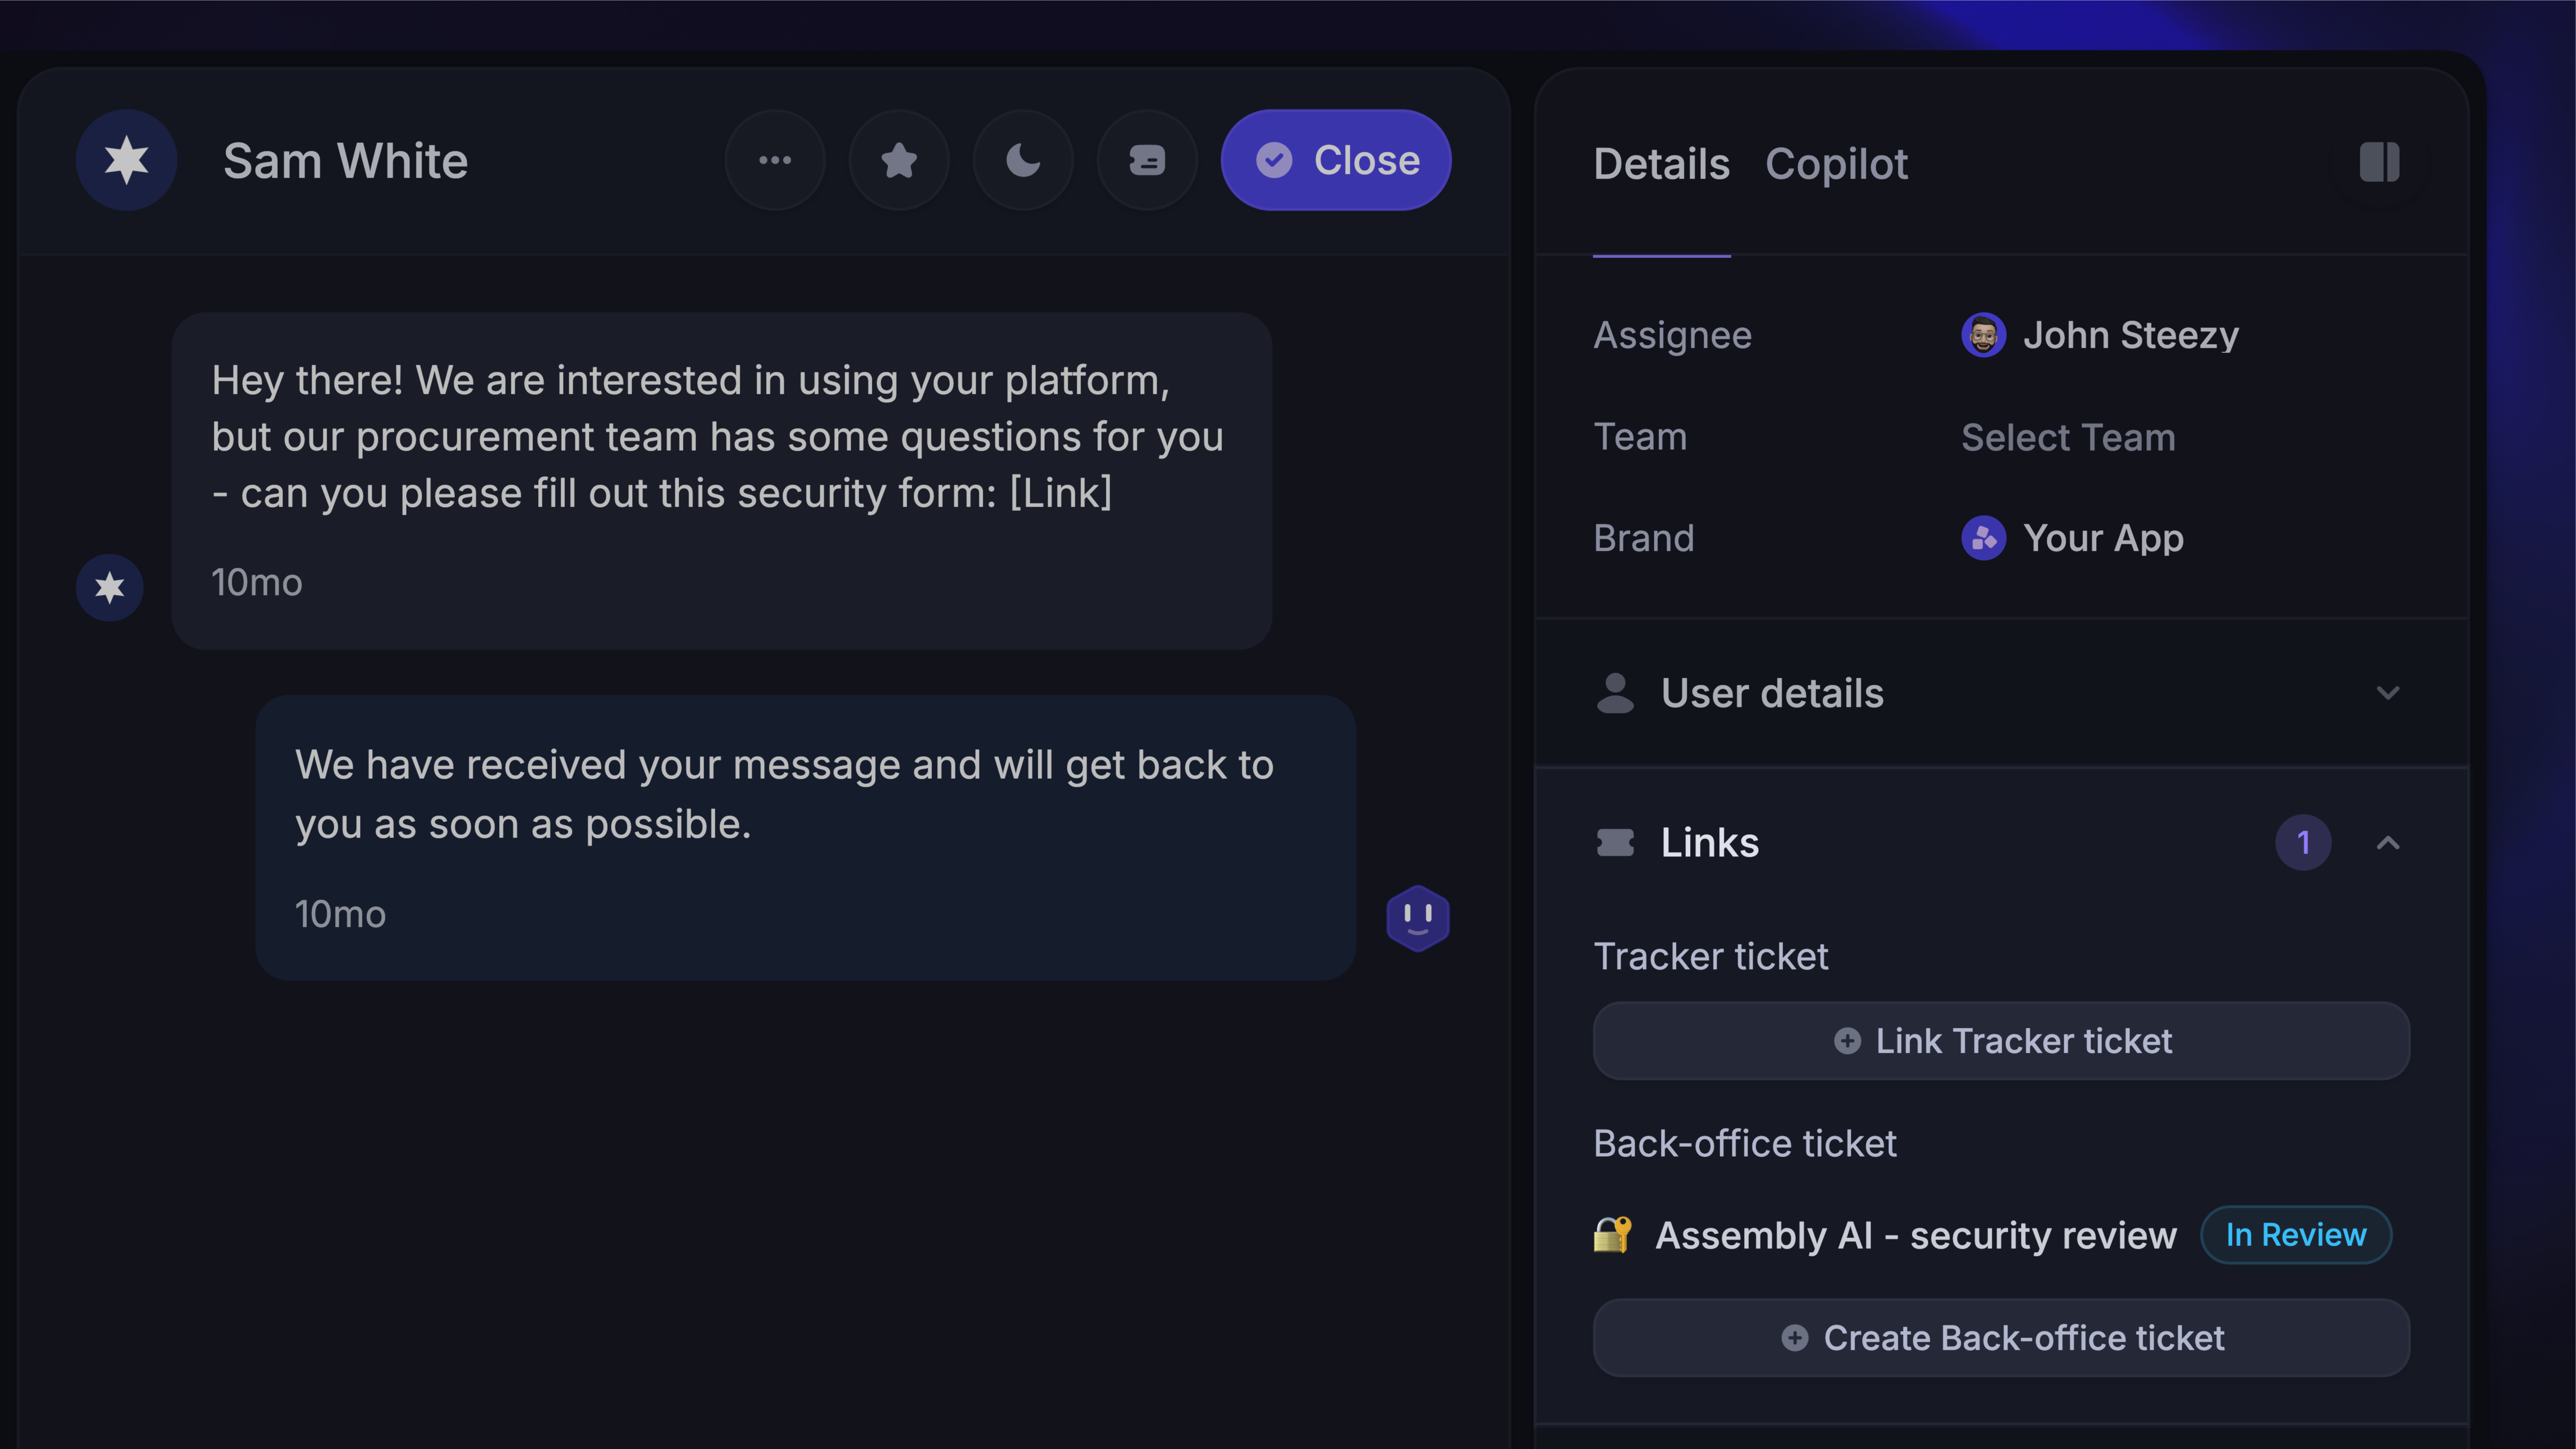
You can also create Back-office tickets directly from the right-hand sidebar in any conversation by clicking Create Back-office ticket in the Links section.
Tracker tickets
Tracker tickets are used to track a shared issue that affects multiple customers. Instead of managing the same problem across dozens of separate conversations, you link them all to a single Tracker ticket and update them at once.
Use Tracker tickets when you want to track a known problem in one place and update all affected customers from one place automatically (e.g., multiple customers have reported the same bug, and you want to update them all at once when it’s fixed)
Some common examples of Tracker ticket types are:
🐛 Bug report
💡 Feature request
🔌 Service outage
🚧 Scheduled maintenance
📦 Faulty delivery batch
How Tracker tickets work
Visibility:
Tracker tickets are internal - customers never see the Tracker ticket itself
However, when you change the status of a Tracker ticket, the status automatically updates all linked customer tickets
In the Inbox sidebar, tracker tickets display the label "Internal" and show how many conversations are linked
Communication:
Tracker tickets support internal notes only - there is no option to send customer-facing replies directly from the tracker
Notes written in the tracker ticket are cross-posted to all linked conversations as internal notes
Status update messages are forwarded out to all linked conversations as admin messages, so customers on the receiving end of linked customer tickets see the update
Limits:
Each conversation can have 1 Tracker ticket linked to it (alongside a customer ticket)
Tracker tickets cannot be linked to customer ticket type boards - they must use a Tracker or back-office board type
How to create and link Tracker tickets
From a conversation in the Inbox, open the command palette (CMD+K) and select Link tracker ticket. You can then search for an existing tracker ticket or create a new one.
You can also create Tracker tickets directly from the right-hand sidebar in any conversation by clicking Create Tracker ticket in the Links section.
Example: handling a widespread bug
Customer A reports a bug - you create a customer ticket and a tracker ticket, then link the tracker to the conversation
Customers B, C, and D report the same bug - you create customer tickets for each and link them to the same tracker ticket
Your team fixes the bug and updates the tracker ticket status to "Done"
All four customer tickets automatically update to "Done", and each customer receives a status notification