Getting started with tickets
Follow this step-by-step guide to get introduced to and fully set up with tickets in Featurebase.
Written By Markus from Featurebase
Last updated 4 months ago
Overview
When it comes to customer questions, some are straightforward to answer and best resolved over chat. But others are more complex, requiring more time to resolve or input from other teams. That's where tickets come in.
Tickets let you turn conversations into structured, trackable work items with statuses, assignees, and custom fields. They keep your team organized and your customers in the loop throughout the entire resolution process.
This guide walks you through everything you need to understand and set up tickets in Featurebase.
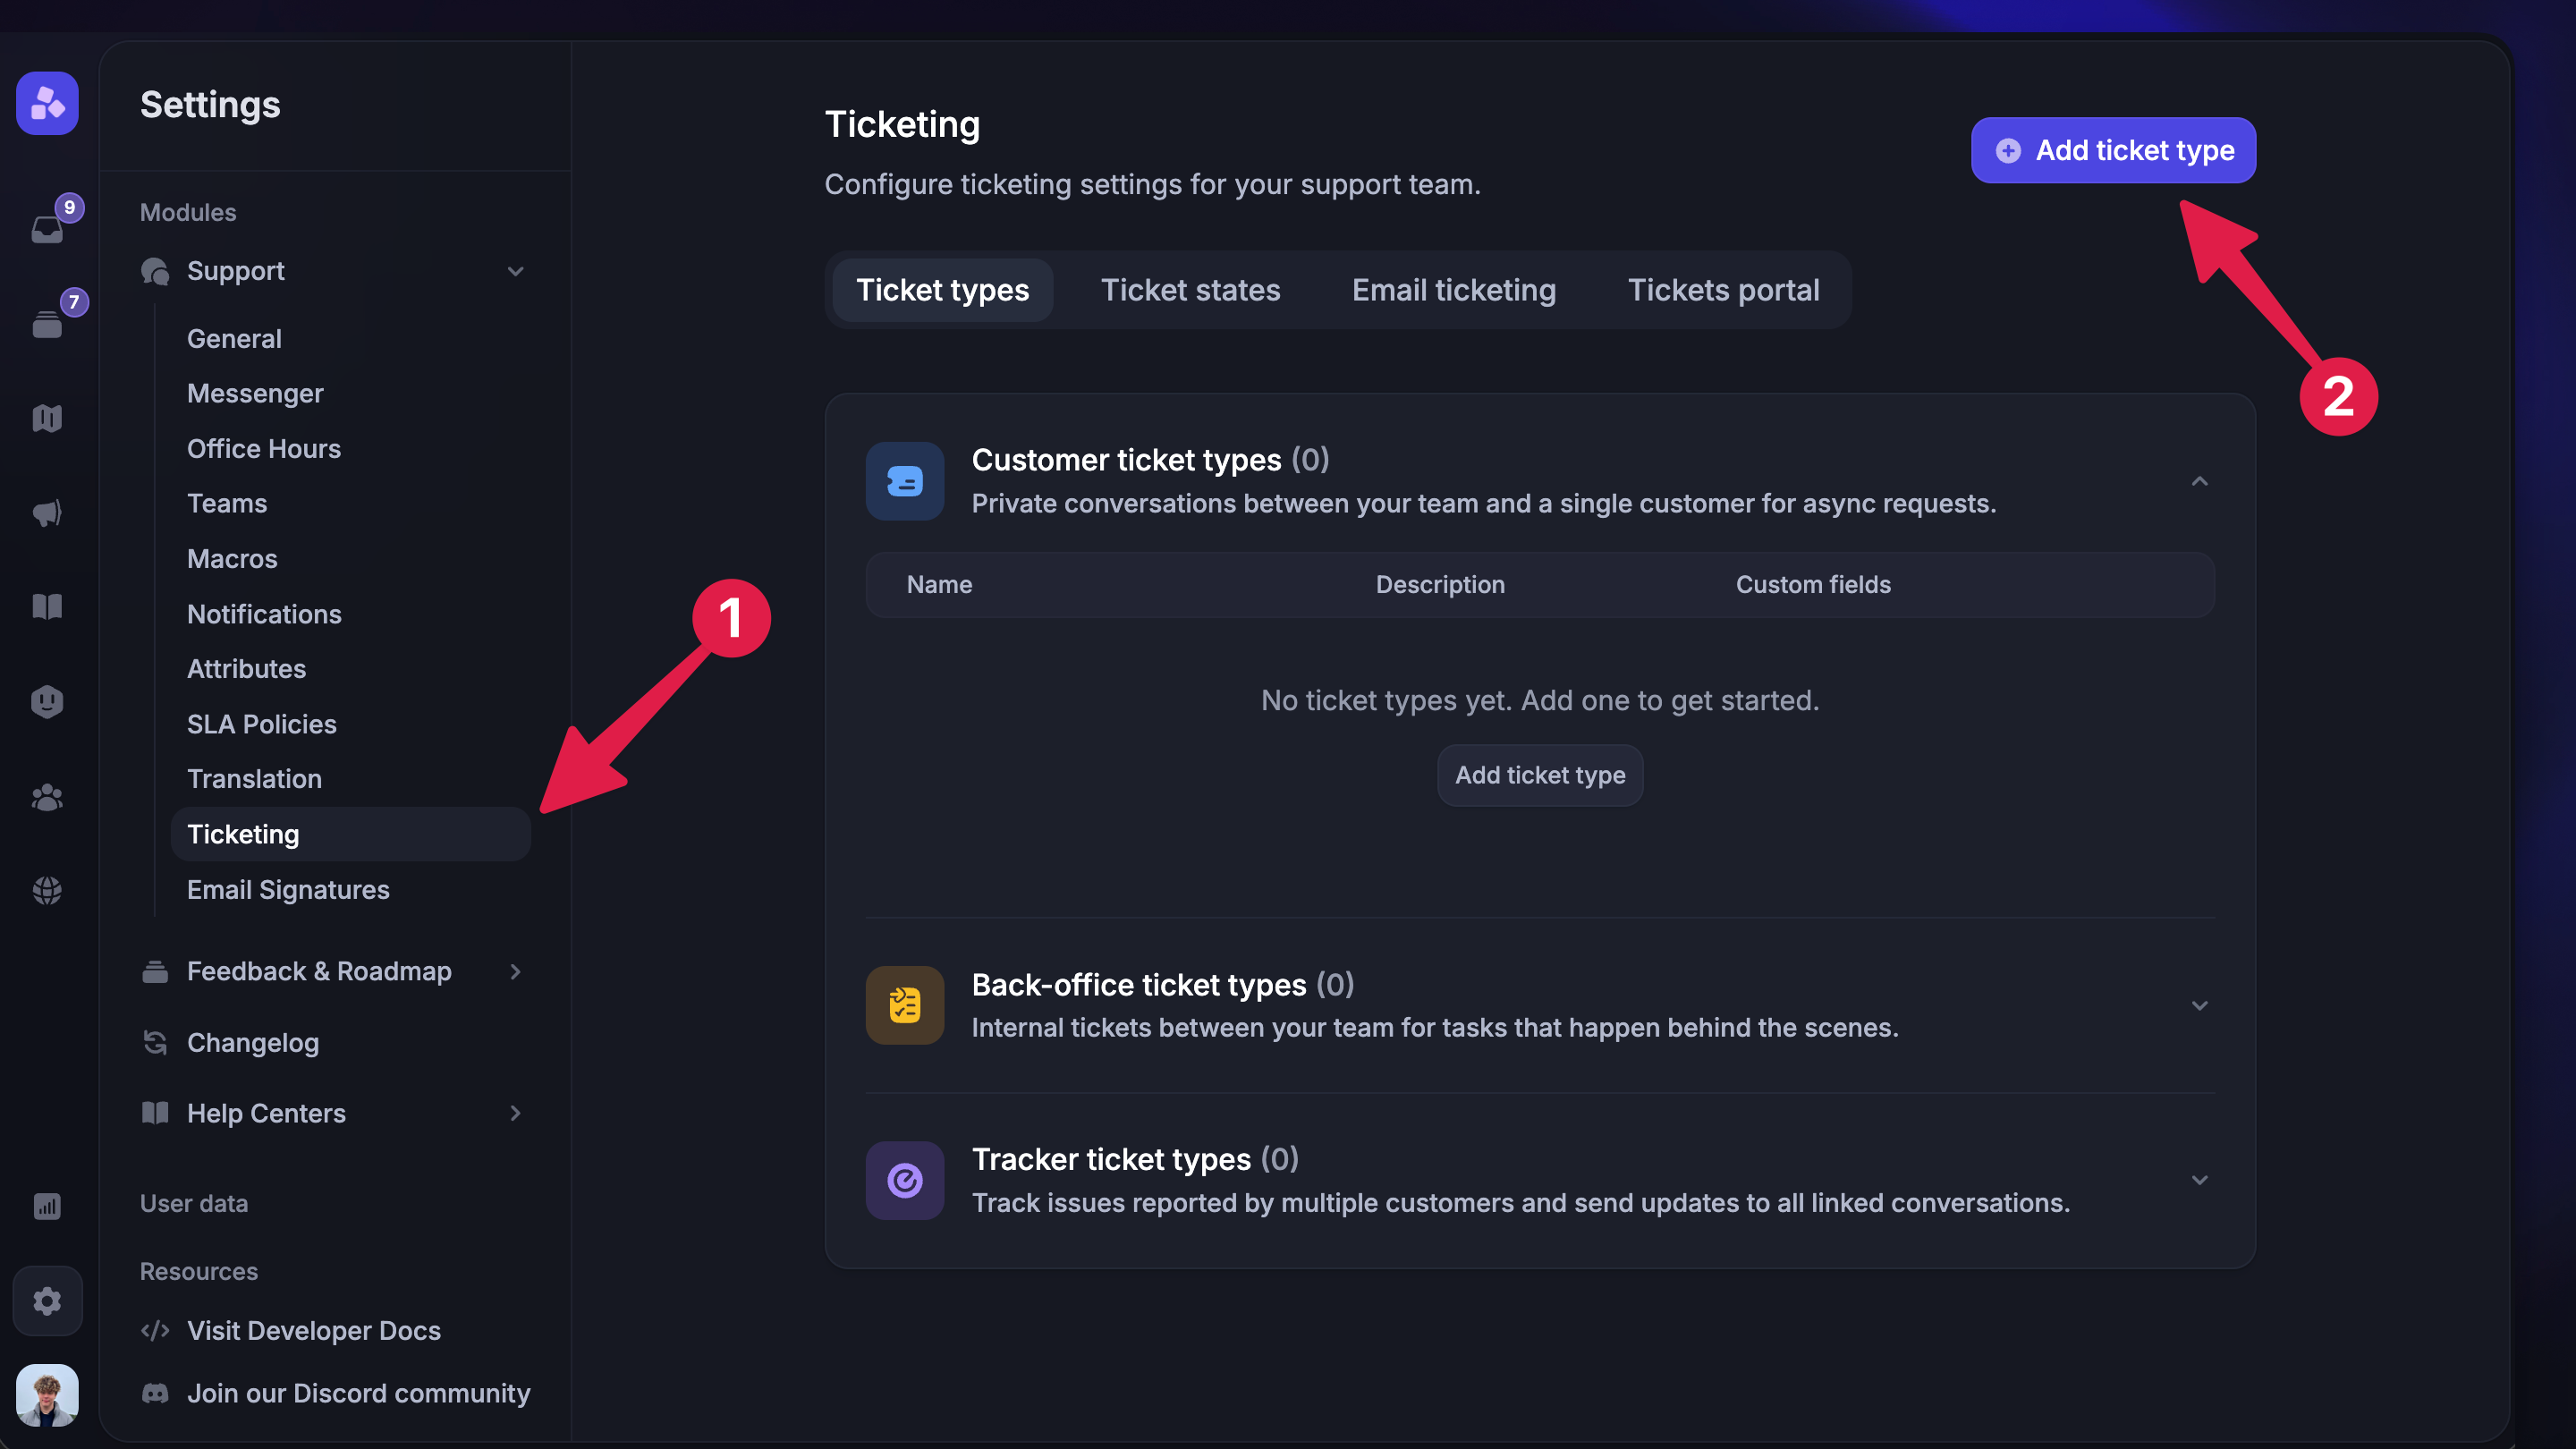
1. Understand ticket types
Not all complex queries are the same. They come in different shapes and sizes and require different processes. That's why Featurebase offers 3 distinct ticket categories:
Customer tickets - Private conversations between your team and a customer for async requests where users can see the status, track progress, and receive email notifications. Best for bug reports, feature requests, refund requests, and any issue where the customer needs visibility into progress
Back-office tickets - Internal tickets between your team for tasks that happen behind the scenes. Best for issues that require cross-team collaboration, like escalations to engineering or billing investigations
Tracker tickets - Internal tickets that represent a shared issue across multiple customer conversations. When you update the status of a tracker ticket, it automatically updates all linked customer tickets. Best for known bugs or outages affecting many customers
Learn more about the different ticket types & use cases →
2. How to create tickets
There are many ways to create tickets depending on the channel and who's creating the ticket:
Teammates create tickets
Convert a conversation to a ticket - From any conversation in the Inbox, teammates can convert it into a Customer, Tracker, or Back-office ticket. The conversation and ticket stay linked, so all updates flow between them
Create a ticket directly - Teammates can create tickets directly from the ticket type without an existing conversation
Auto-convert inbound emails - Enable automatic ticket creation for all new inbound support emails. Go to your support settings and enable Convert inbound emails to tickets, then select the default ticket type
Customers create tickets
Ticket creation from the Messenger - Customers can submit tickets directly from the Tickets tab in the Messenger widget. They'll see a form with the fields you've configured for that ticket type
Send a ticket form via Workflows - Use the Send Ticket action in Workflows to prompt customers to fill out a ticket form during a conversation. This is useful for collecting structured information like bug details or account information
Convert to ticket via Workflows - Use the Convert to Ticket action in Workflows to automatically create a ticket from a conversation without customer input. This is great for auto-triaging specific types of requests
Create tickets via API
You can also create tickets programmatically using the Featurebase API. This is useful for building custom ticket forms or integrating ticket creation into your own product.
3. Set up your tickets
Now that you're up to speed, here's how to get everything configured.
Set up ticket types - You'll want to create a ticket type for each of your use cases and assign the correct ticket type to drive the right team processes.
Configure ticket statuses (optional) - Ticket statuses help set clear expectations, ensuring both your customers and teammates are aware of a ticket's progress.
Assign tickets to the right teams with Workflows - Use our visual Workflow builder to automatically assign tickets to the most relevant team.
Enable the ticket portal (optional) - Give customers a dedicated space to view, track, and manage their tickets, with custom branding and domain (e.g. tickets.company.com).
Set up integrations with 3rd party platforms (optional) - Integrations (e.g. Linear, Jira, ClickUp, GitHub) help streamline team collaboration and minimize tool switching.
Set up your Inbox to easily find and view tickets - We make it easy to filter and find tickets in the Inbox.
How customers get notified about tickets
Featurebase tickets are optimized for real-time updates so your customers always stay in the loop.
Email notifications - Customers receive an email when a ticket is created on their behalf and when the ticket status changes
Messenger widget - Customers can view all of their tickets, current statuses, and progress stages from the Tickets tab in the Messenger. They also see ticket events directly in their conversation thread
Progress stages - The Messenger shows a visual progress bar based on your status categories (e.g. Submitted → In Progress → Completed), so customers always know where things stand
Customers can also track the progress of all their tickets from the ticket portal - a dedicated page where they can view, track, and manage their tickets.
Note: Email notifications are only sent for Customer tickets. Tracker and Back-office tickets are internal and do not notify end users.