Connect your email support channel
Learn how to automatically send support emails from your customers to your team in Featurebase, and more.
Written By Bruno from Featurebase
Last updated 11 days ago
Overview
If you want to connect with customers over email (e.g. support@yourcompany.com) and manage the conversations in Featurebase, you will need to set up automatic forwarding and authenticate your domain.
Setting up the email channel allows you to:
Connect your email addresses to the appropriate brands
Centralize emails so teammates can respond directly from the inbox
Automatically forward emails to ensure all messages are routed to your workspace
Use a custom domain for replying to customer emails and sending proactive support emails.
Note: Admin access to your email provider and domain settings is required for automatic forwarding and domain setup. Invite your admin to Featurebase.
Before you begin
Make sure you've completed these two steps first:
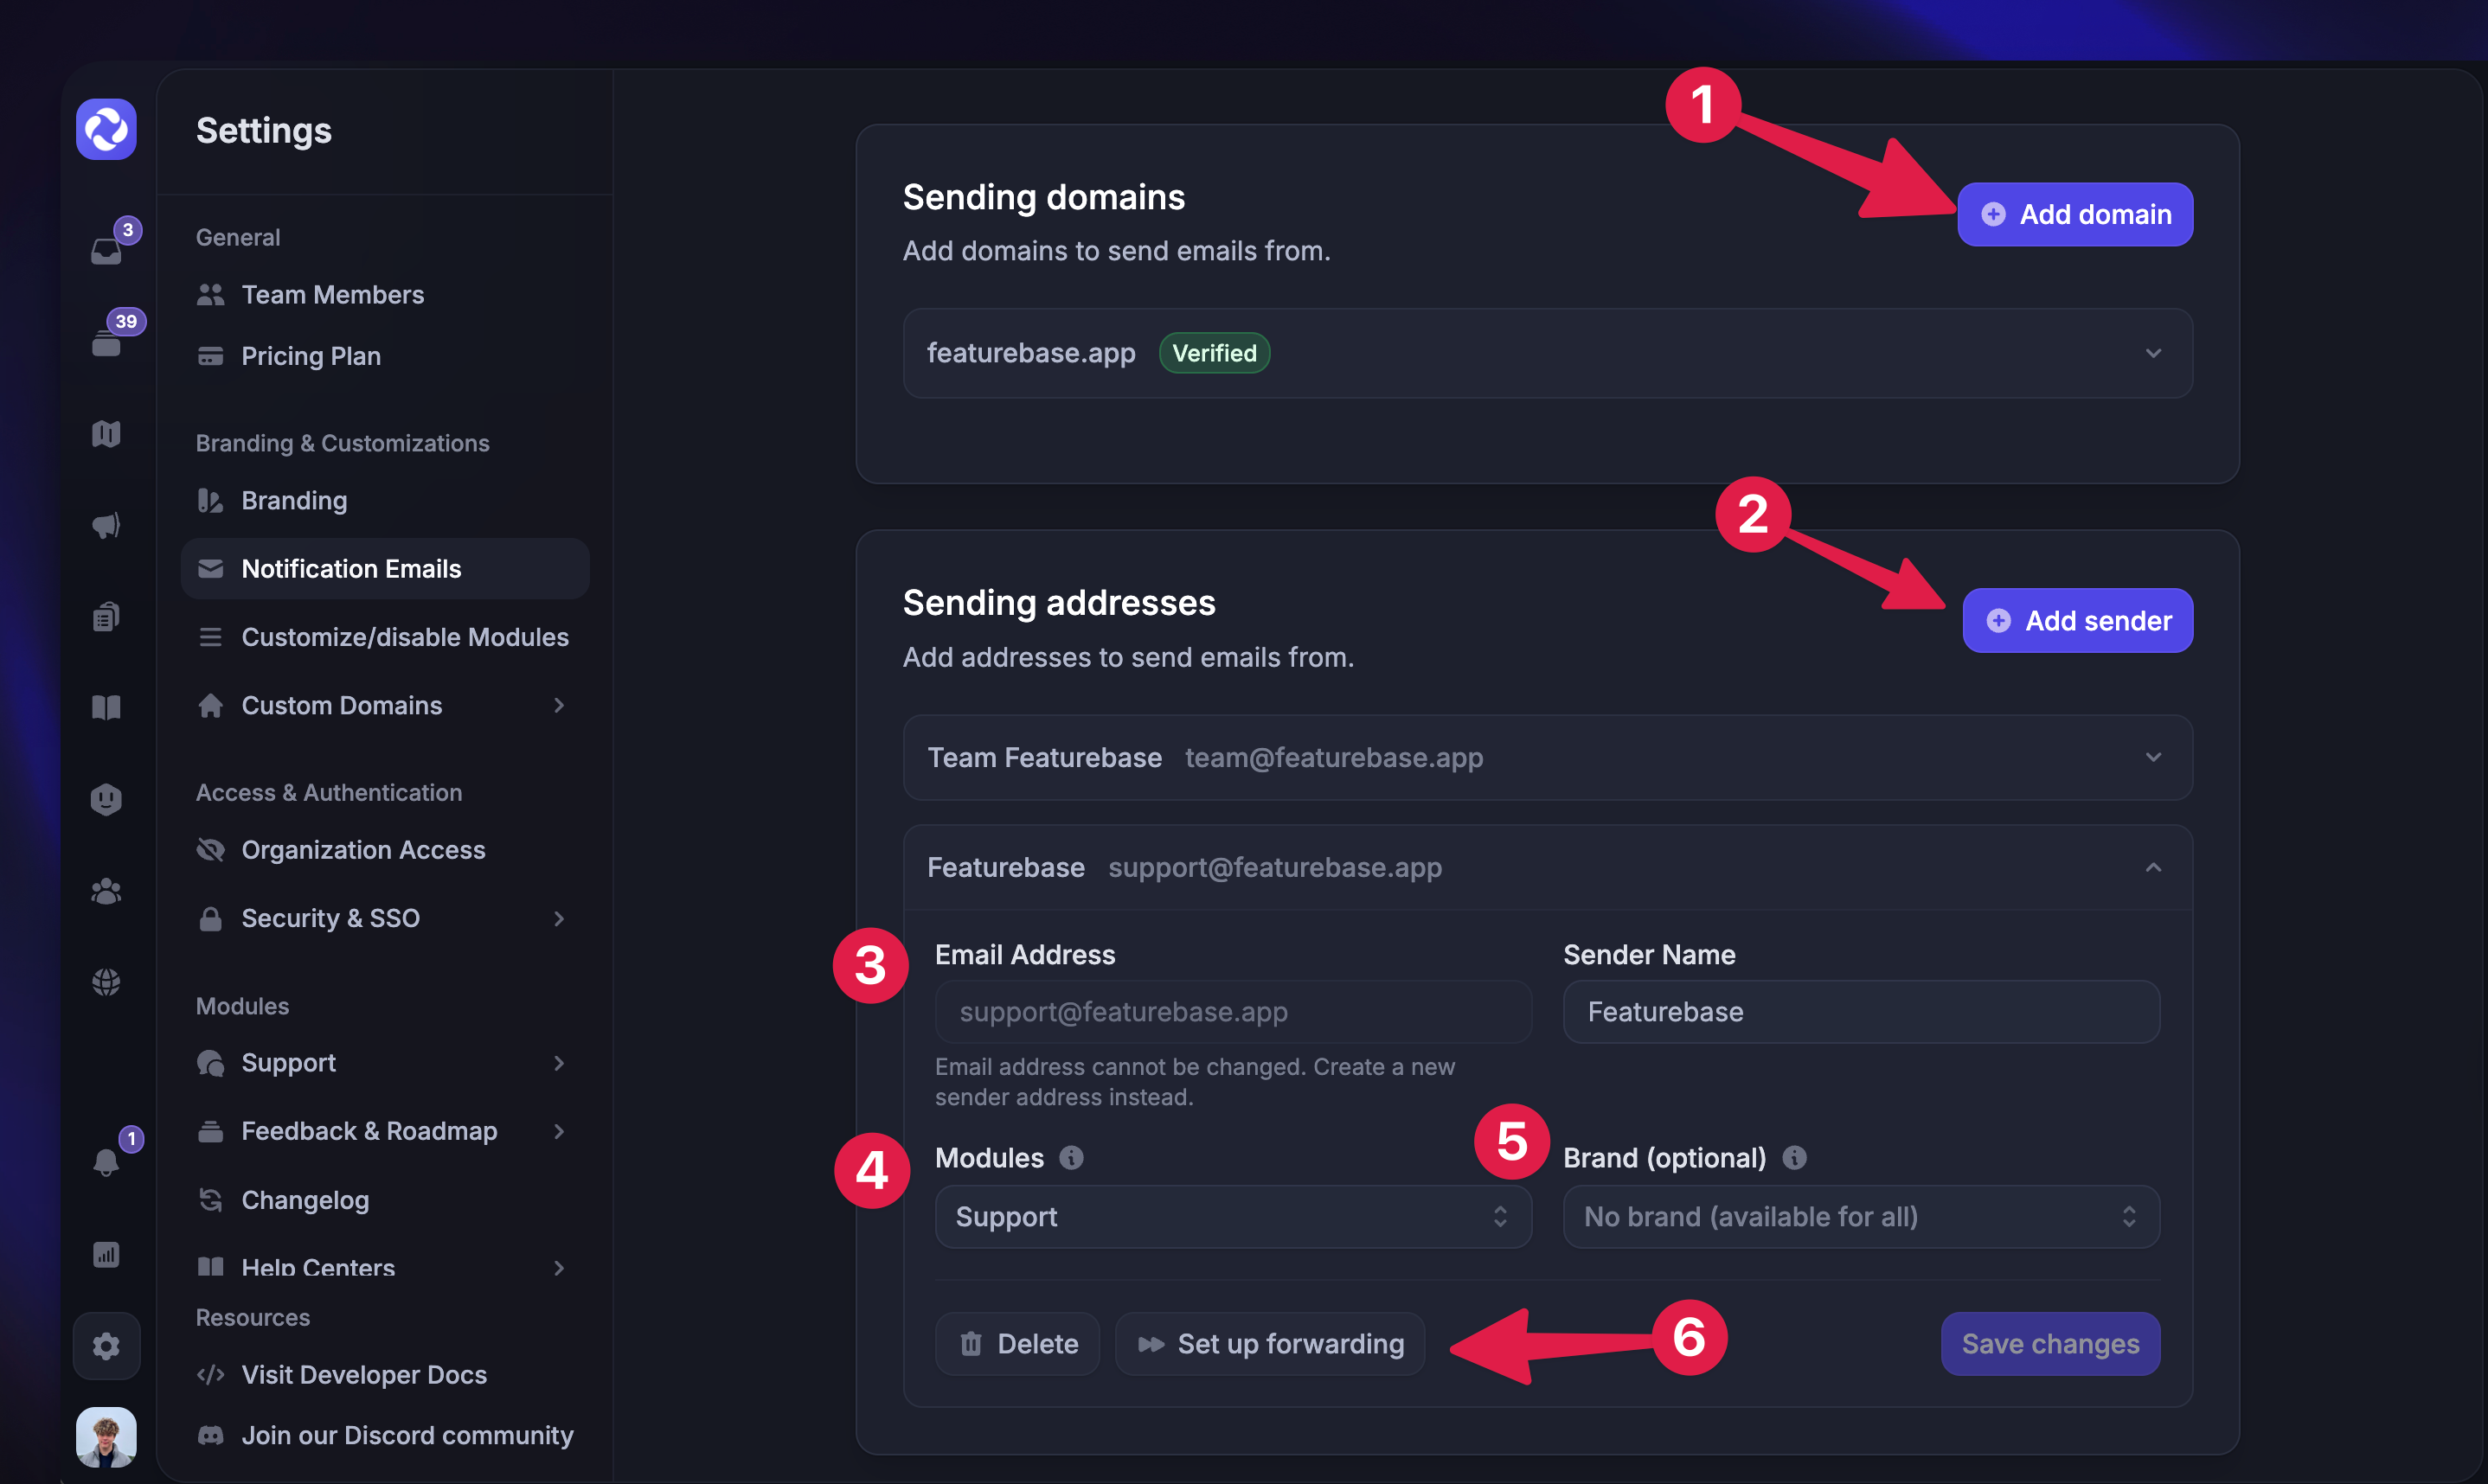
Set up a custom sending address
If you have a multi-brand setup, you can have multiple sending addresses
Get your Featurebase workspace email from Settings → Emails
In the ‘Sending addresses’ section, click "Set up forwarding" next to your support sending address.
This will reveal your unique Featurebase forwarding address, like this:
workspaceIdIsHere@parse.featurebase-mail.comCopy it - this is what you'll plug into your email provider!
Set up email forwarding with your email provider
You’ll now set up forwarding from your email host to Featurebase. Below are the steps for common providers:
Google Workspace
✅ No rate limits, reliable delivery.
Go to the Google Admin Console
Navigate to Apps → Google Workspace → Gmail
Open Default Routing and click Configure
Under “Add Setting”:
Set the recipient as your customer-facing email (e.g.
support@yourcompany.com)Scroll to Change envelope recipient and select Replace recipient
Paste your Featurebase workspace email as the new recipient
Under Options, select:
Perform this action on non-recognized and recognized addresses
Save your changes
Go back to Featurebase and Verify Ownership
🕒 It may take up to 24 hours for routing changes to take effect.
Microsoft 365
🔧 Works for both shared and individual mailboxes.
Visit the Microsoft 365 Admin Center
Choose the mailbox:
For shared: Teams & Groups → Shared Mailboxes
For users: Users → Active users
Click Edit next to Email forwarding
Enable Forward all email sent to this mailbox
Paste your Featurebase workspace email
Save and return to Featurebase to Verify forwarding
⚠️ If forwarded emails are not arriving in Featurebase and you see the error 550 5.7.520 Access denied, Your organization does not allow external forwarding, your organization's outbound spam policy may be blocking external forwarding. To fix this:
Go to the Microsoft 365 Defender Portal at security.microsoft.com
Navigate to Email & collaboration → Policies & rules → Threat policies
Select Anti-spam policies
Click on Anti-spam outbound policy (Default)
Click Edit protection settings
Scroll down to the Forwarding rules section
Change Automatic forwarding rules from Automatic - System-controlled to On - Forwarding is enabled
Click Save
Note: Changes may take up to 1 hour to take effect.
Gmail (personal Gmail accounts)
⚠️ Best for low-volume use.
Open your Gmail settings → See all settings
Go to the Forwarding and POP/IMAP tab
Click Add a forwarding address
Paste your Featurebase workspace email
Gmail will send a confirmation email—check your Inbox in Featurebase to verify it
Once confirmed, choose to Forward a copy of incoming mail to your Featurebase address
Save changes
Outlook.com
Go to Settings → View all Outlook settings → Mail → Forwarding
Enable Forward your mail to another email account
Enter your Featurebase workspace email
Save
Check Featurebase Inbox for the verification email and confirm
iCloud Mail
Go to iCloud Mail Settings
Click the gear icon → Preferences → Rules
Create a new rule to Forward to your Featurebase workspace email
Confirm and save
Verifying ownership
Your domain or mailbox provider may require you to verify ownership of the forwarding address. Typically, they send a verification email, which can be found in your inbox.
Click on this link to open your Inbox. Look for an email from your email provider to confirm.
Important notes
Don't use mailing lists like Google Groups for forwarding – they often mess with email headers and prevent proper identification of users.
Every forwarded email becomes visible to your team. Avoid forwarding private emails.
Verification is required. Your email provider will likely send a verification email to your Featurebase inbox—make sure to confirm it.
After forwarding is confirmed, authenticate your domain if you haven’t already, to prevent spam or bounces.