Custom email sending address
Set up a custom sending address to ensure high deliverability & improve personalization for your notification emails.
Written By Bruno from Featurebase
Last updated 2 months ago
Overview
Set up a custom email sending address (e.g. notifications@example.com) to use email follow-ups with the live chat, ensure high deliverability on notification emails, and improve personalization for notification emails.
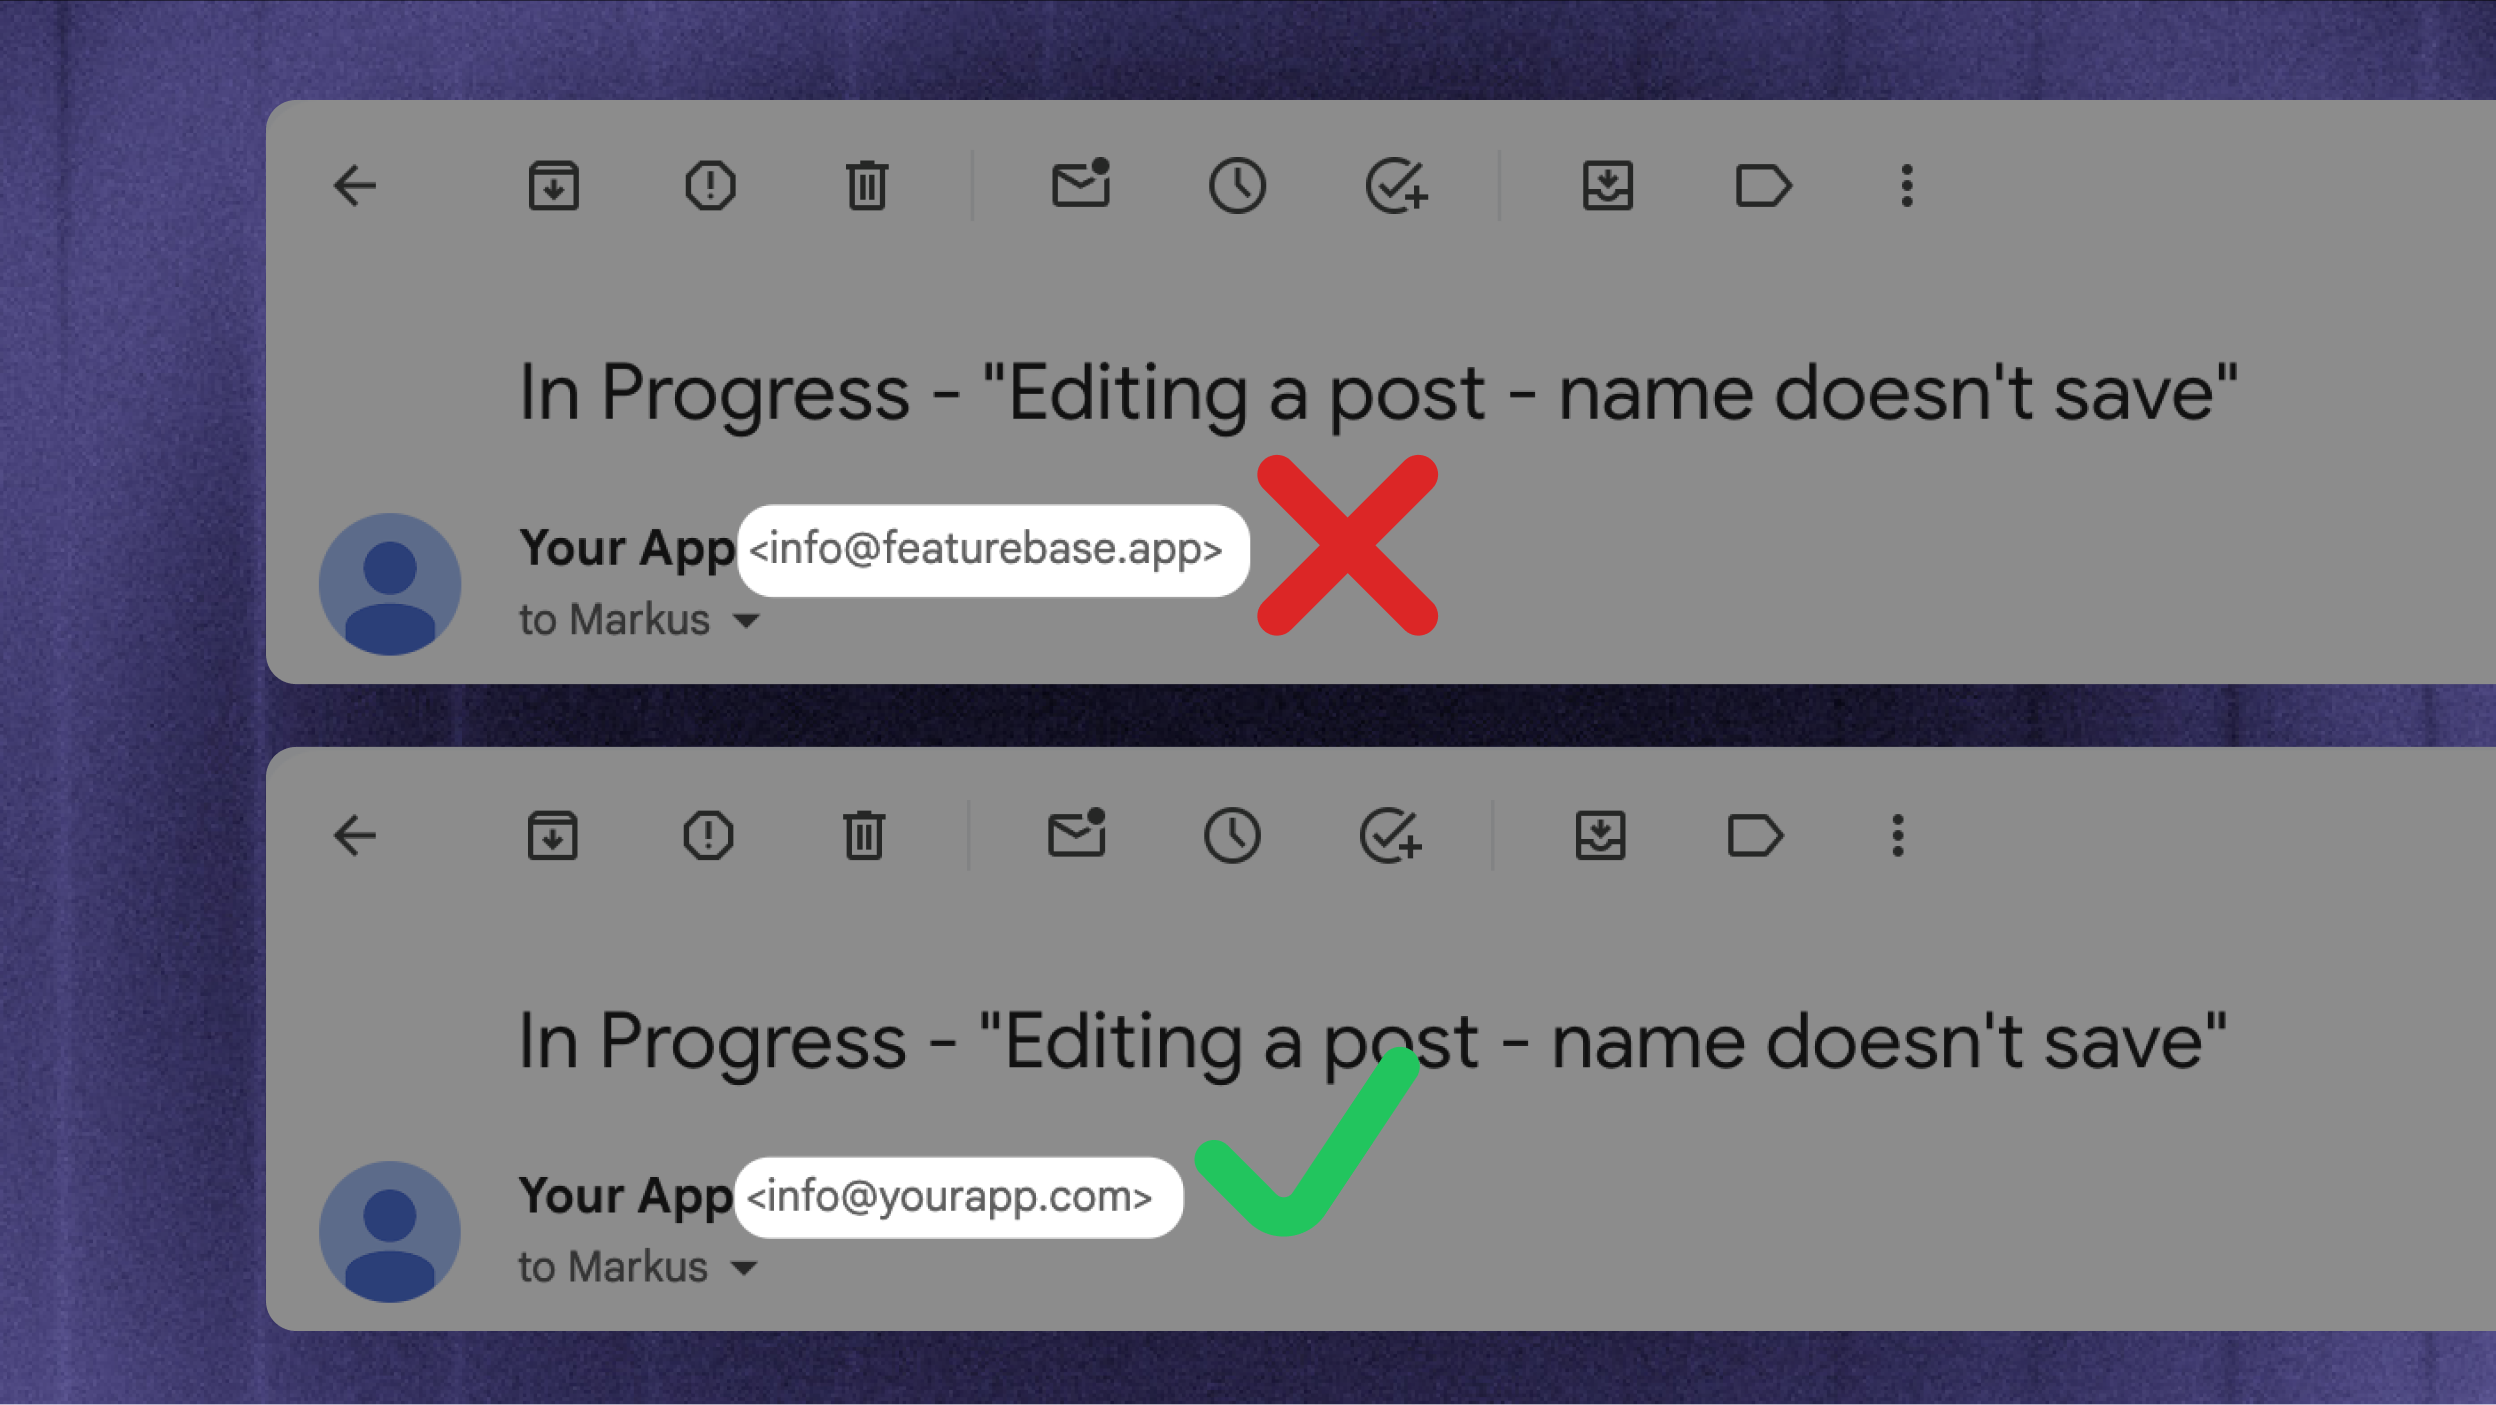
By default, your notification emails in Featurebase will be sent from our address (info@featurebase.app). You can have different email addresses for your support, feedback, and changelog emails.
If you’re managing multiple brands from a single Featurebase workspace, you can also have different emails for each brand.
NB! Support module emails require custom sending domains to function. Without them, customers won't receive your response emails when they aren’t in your dashboard!
Adding a custom email sending address
1. Add a sending domain
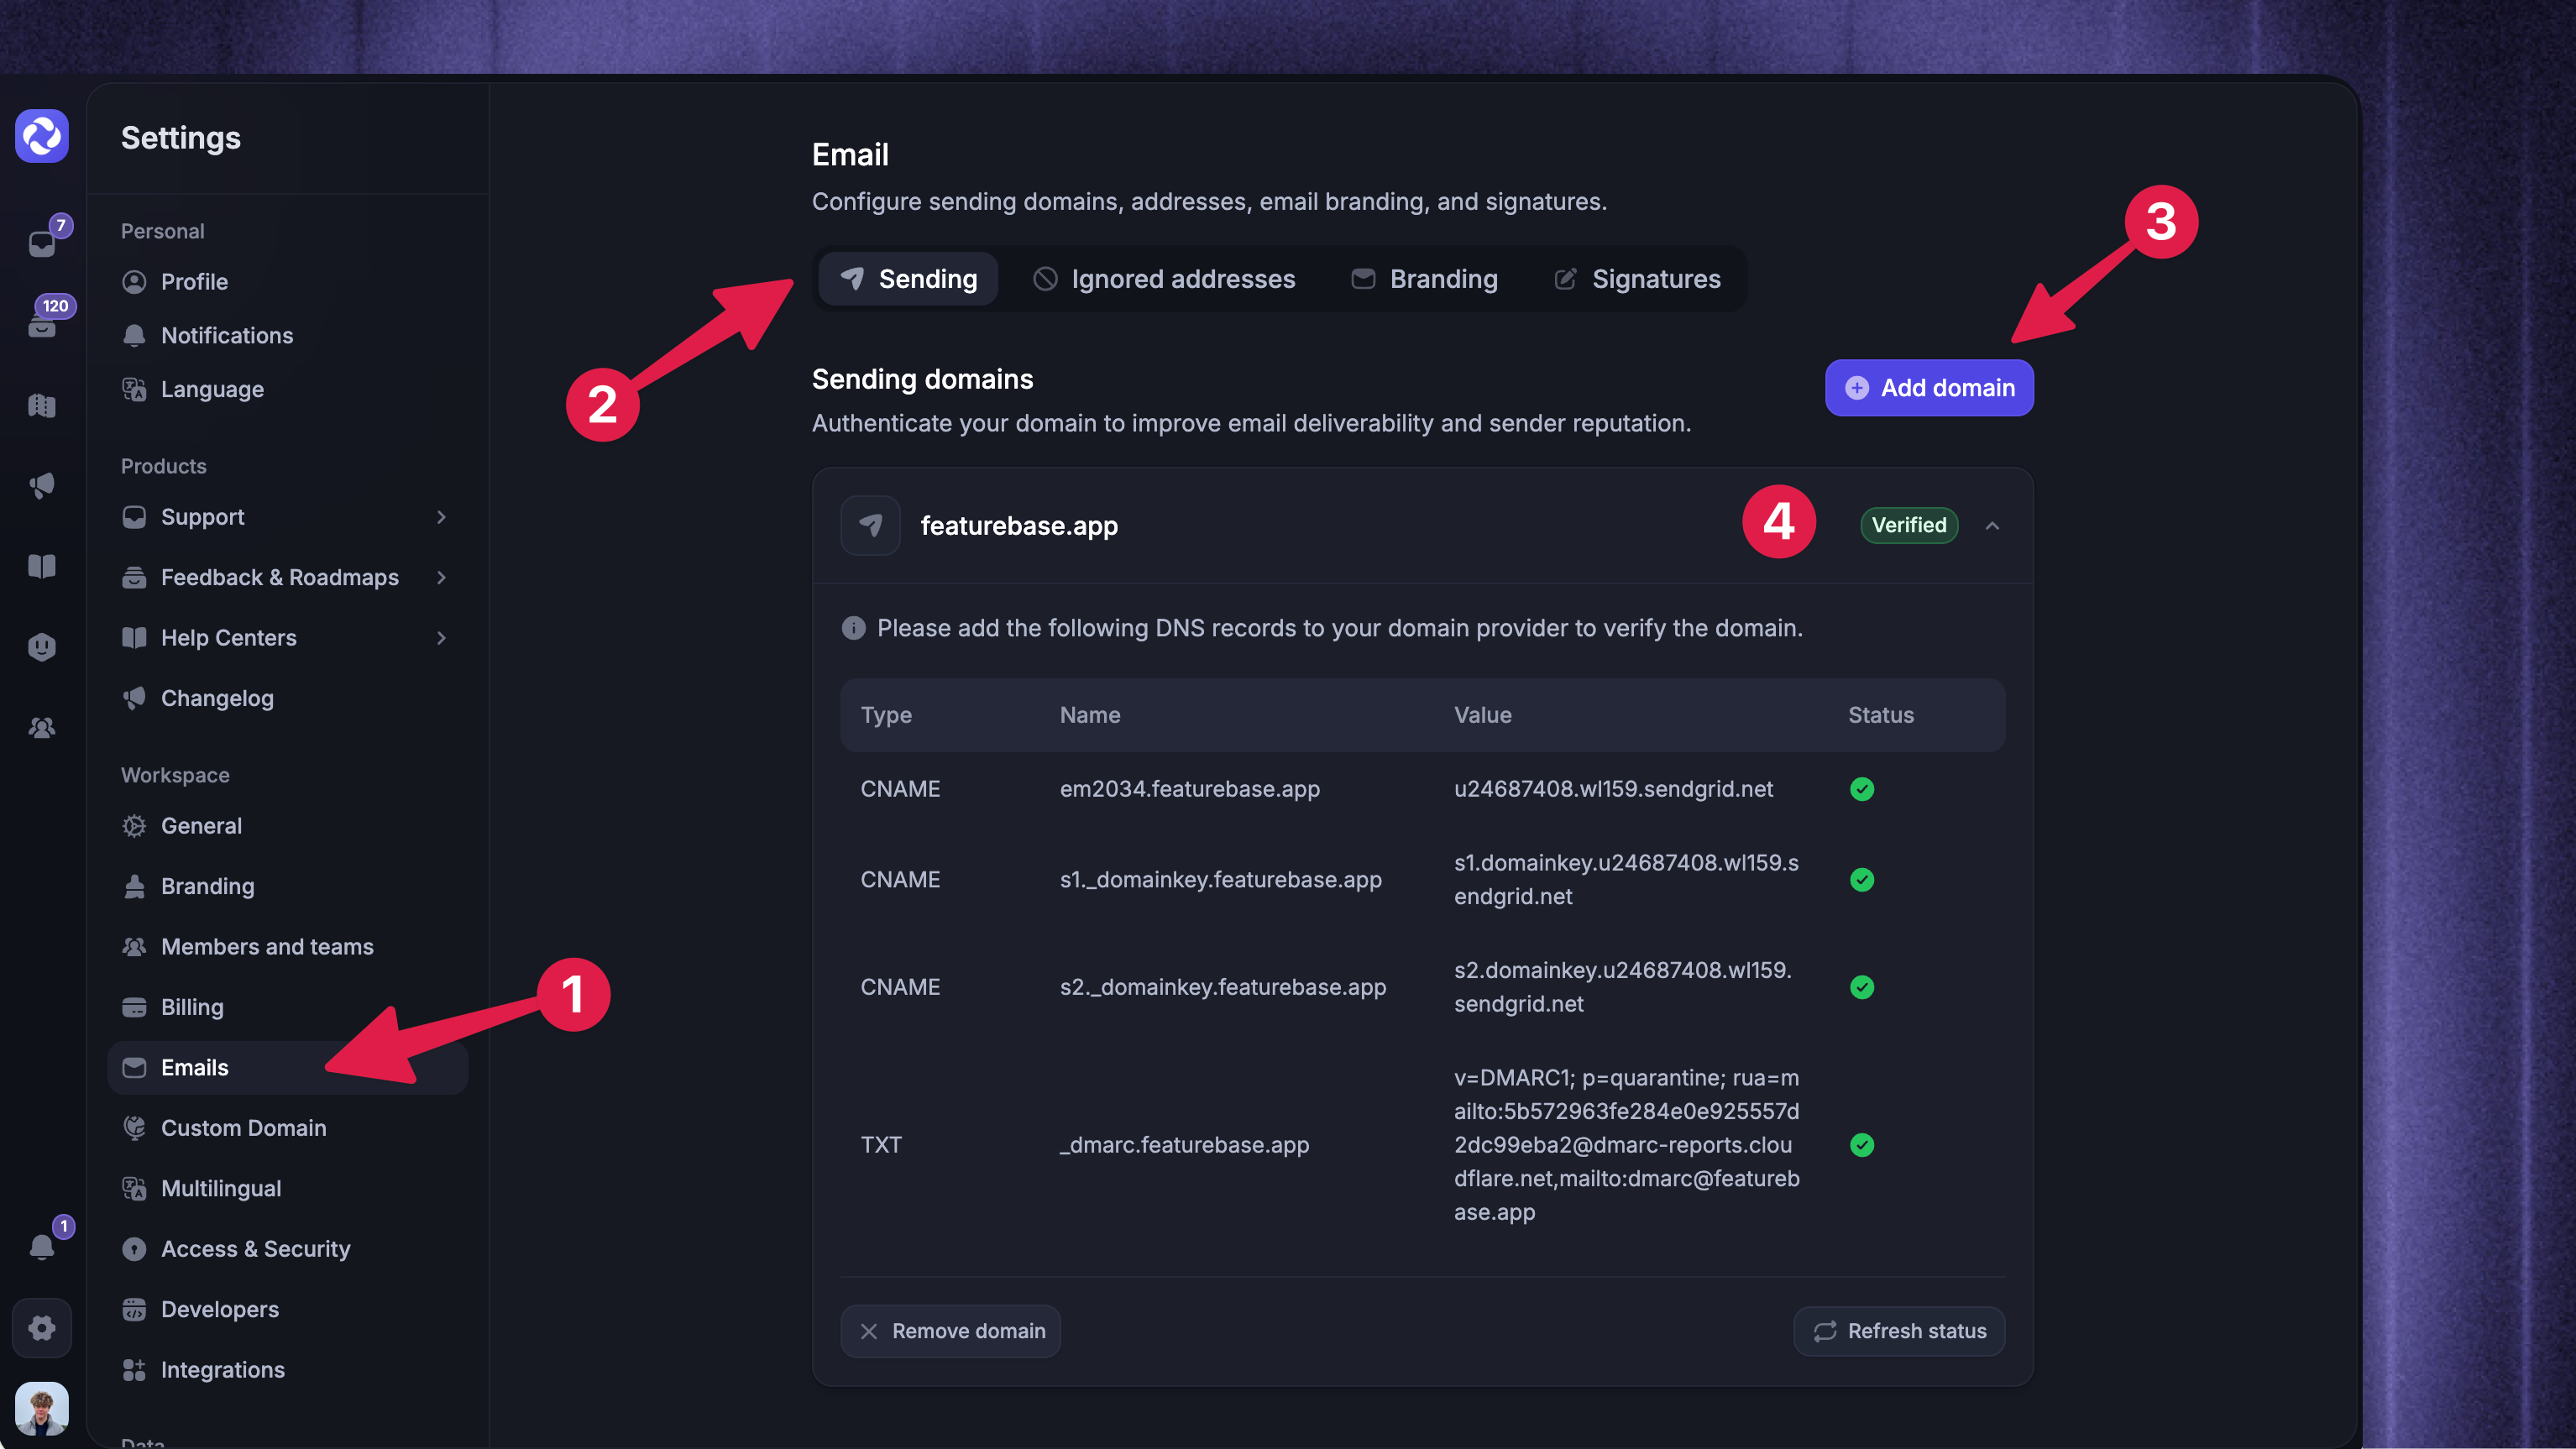
Go to your Featurebase Settings → Emails
Click the “Add domain” button in the “Sending domains” section to authenticate the domain you want to send emails from
Add your domain and expand the card to see a list of DNS records. Add these records to your domain provider and click the “Refresh status” button to see if our servers have received them
After adding the records and refreshing the status, the card should showcase a Verified status for the domain
Notes:
DNS propagation can take some time, so the status might not update instantly after adding the records.
You can add multiple domains and even connect each with a specific brand
2. Add your sending addresses
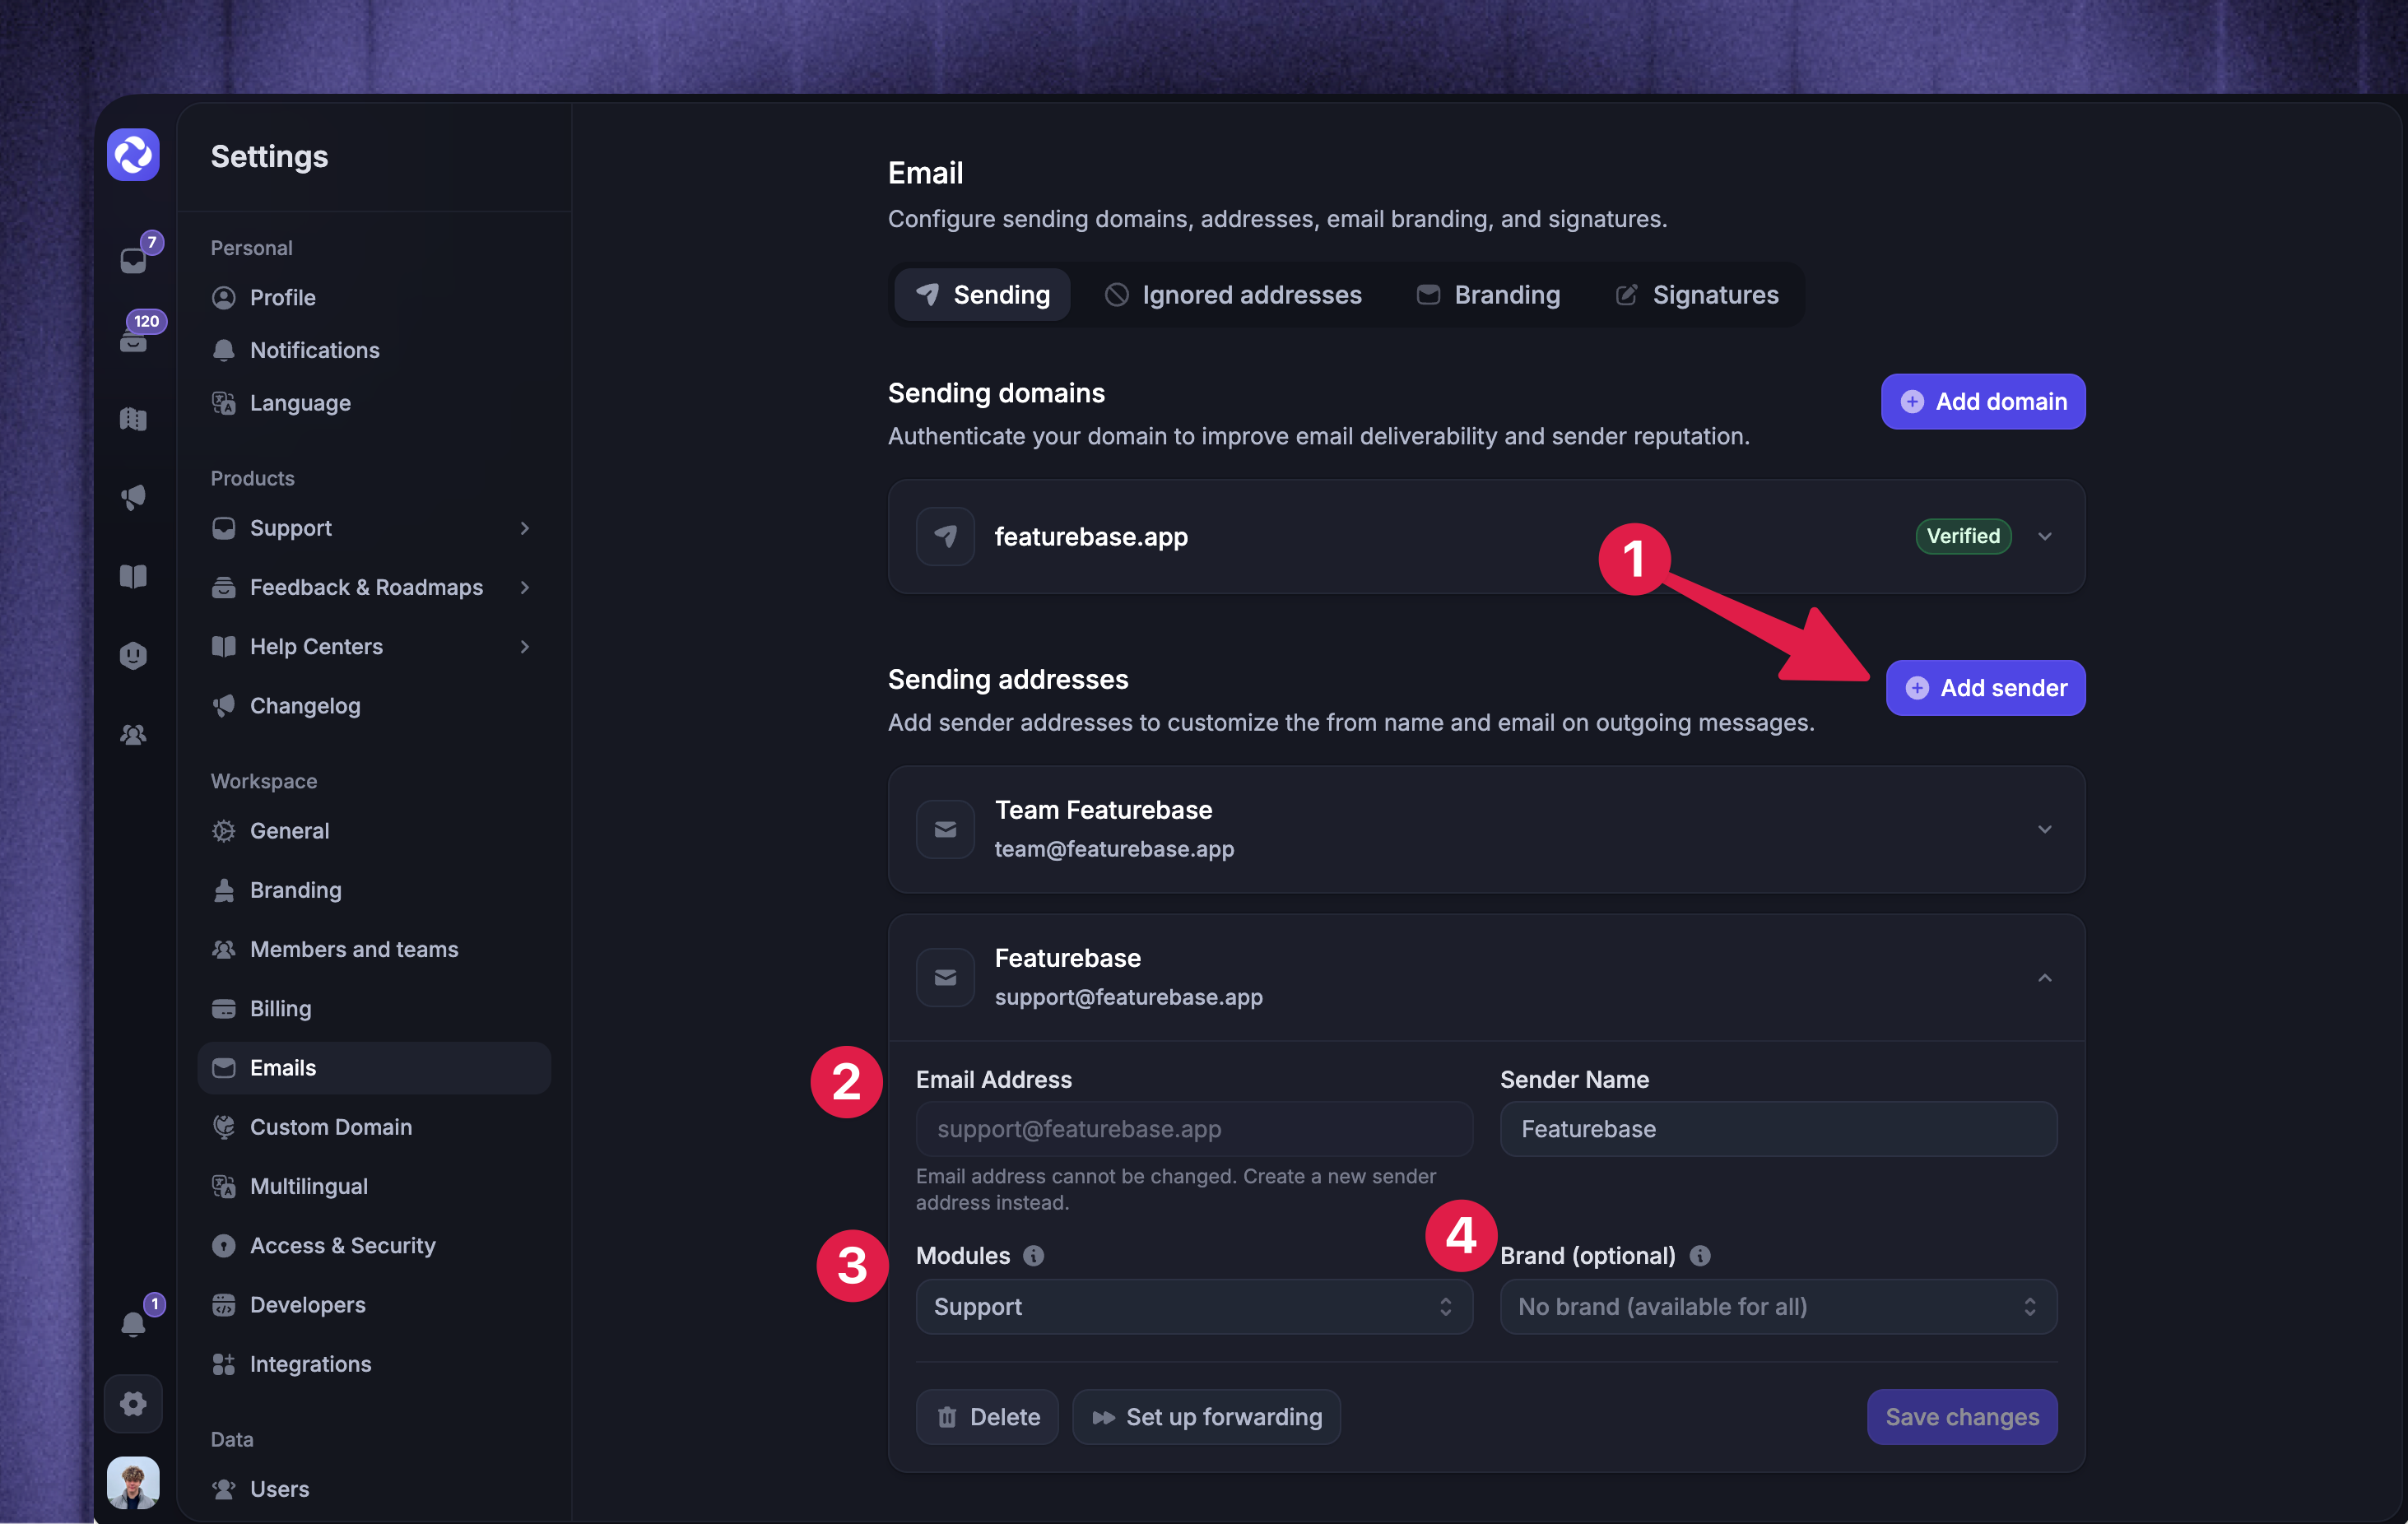
After you’ve successfully verified a domain in the previous step, you can easily add new sending addresses for that domain:
Click the “Add sender” button in the “Sending addresses” section
Fill in the details and use the domain name you added from the previous step for the email address
Select which modules the address applies to (you can have different emails for the support, changelog, and feedback notifications)
Select which brand the address applies to, if you have a multi-brand setup (optional)
Then click “Add sender” and you’re done!
🎉 Congratulations! You’ve successfully set up a custom sending address in Featurebase. You’ll now get to benefit from better email deliverability & personalization.
Tips & next steps
Set up email forwarding to receive your customers’ support emails automatically in your Support Inbox.
For the domain, we recommend using a subdomain (e.g. notifications.example.com) to protect the sending reputation of your main domain.
For sending addresses, we recommend using the same email address for feedback and changelog modules to improve deliverability.