Targeting & triggering surveys
Choose who can see a Survey, where it appears, and when it can run.
Written By Markus Palm
Last updated 4 days ago
Overview
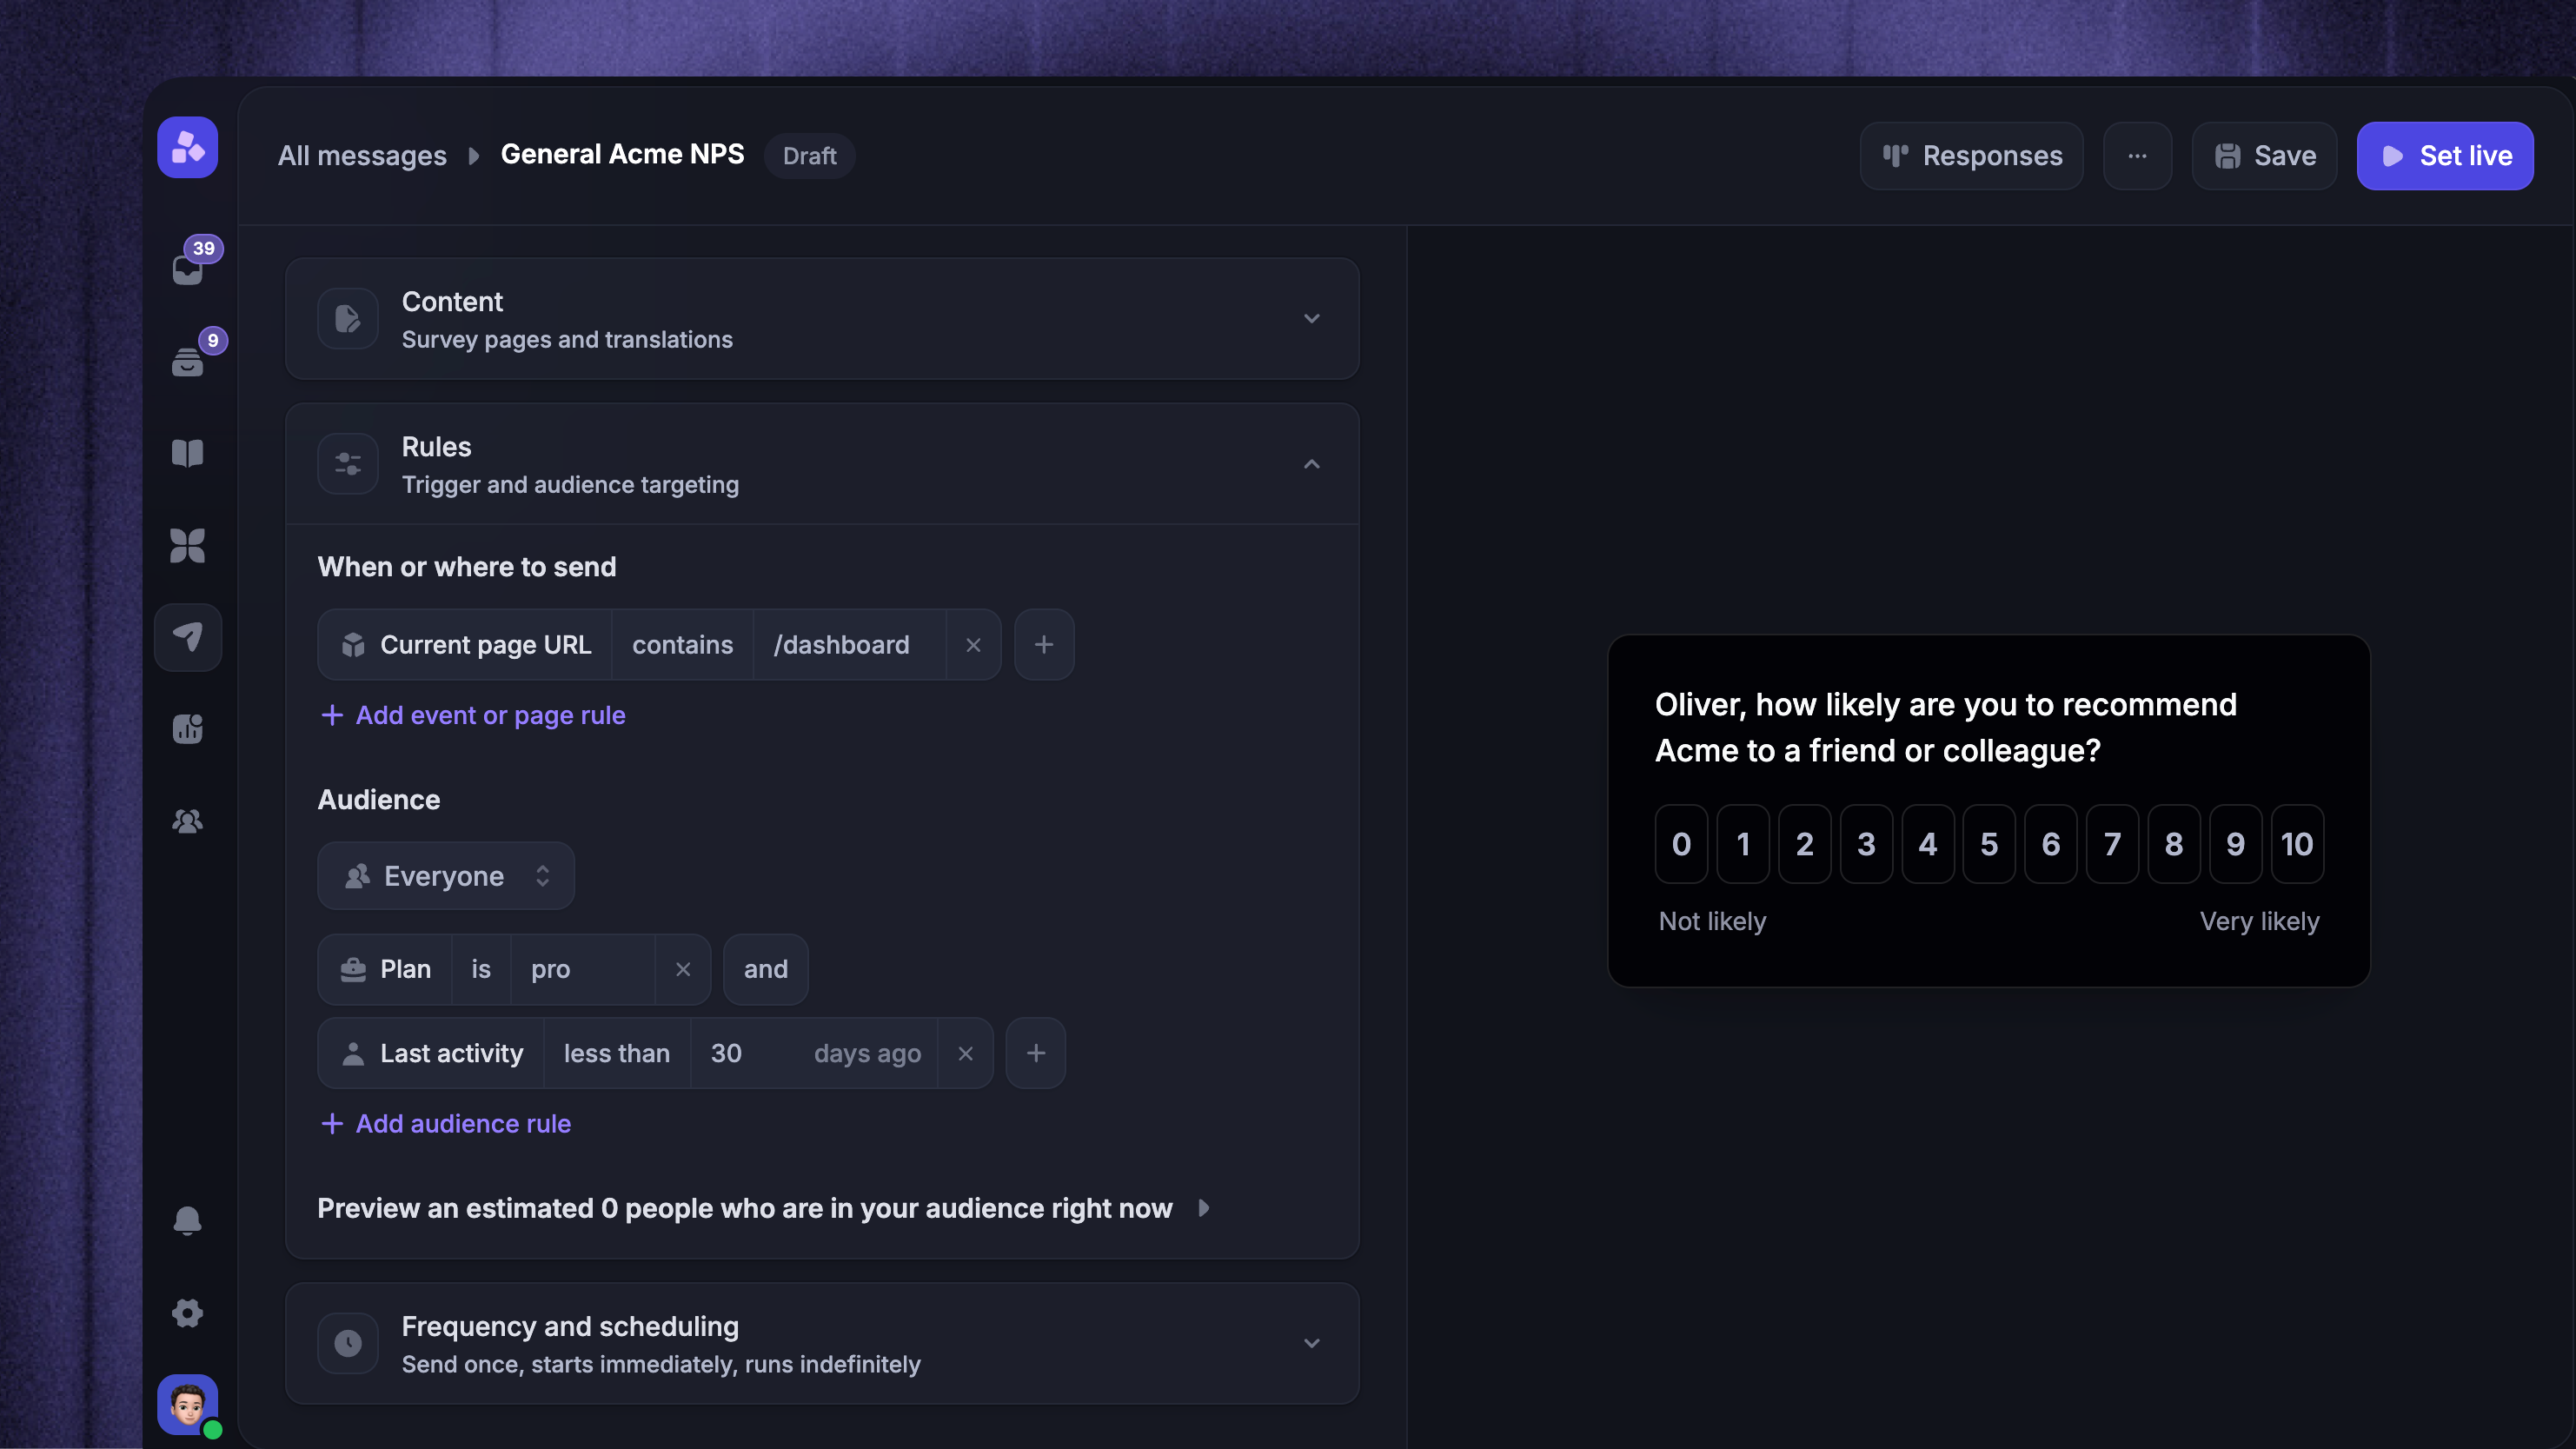
Use Survey rules to control who can receive a Survey, where it appears, how often it can show, and when it can run.
Survey audiences are dynamic: new people can become eligible while the Survey is live as their attributes change. Trigger rules control where the Survey can appear.
Choose where & when the Survey appears
Trigger rules determine the page context where the Survey can be shown. If you do not add trigger rules, Featurebase shows the survey on every page that the survey widget is installed.
Start by configuring where & when the survey triggers:
Current page URL - show the Survey only on matching pages
Time on page (seconds) - wait until the person has spent enough time on the page
CSS selector - show the Survey only when an element matching the selector is present on the page. Enter the selector exactly as it appears on your site, such as
#pricingor.upgrade-banner. Negative comparators match when no element with that selector exists.
For Current page URL and CSS selector, use these string comparators:
isis notcontainsdoes not containstarts withends with
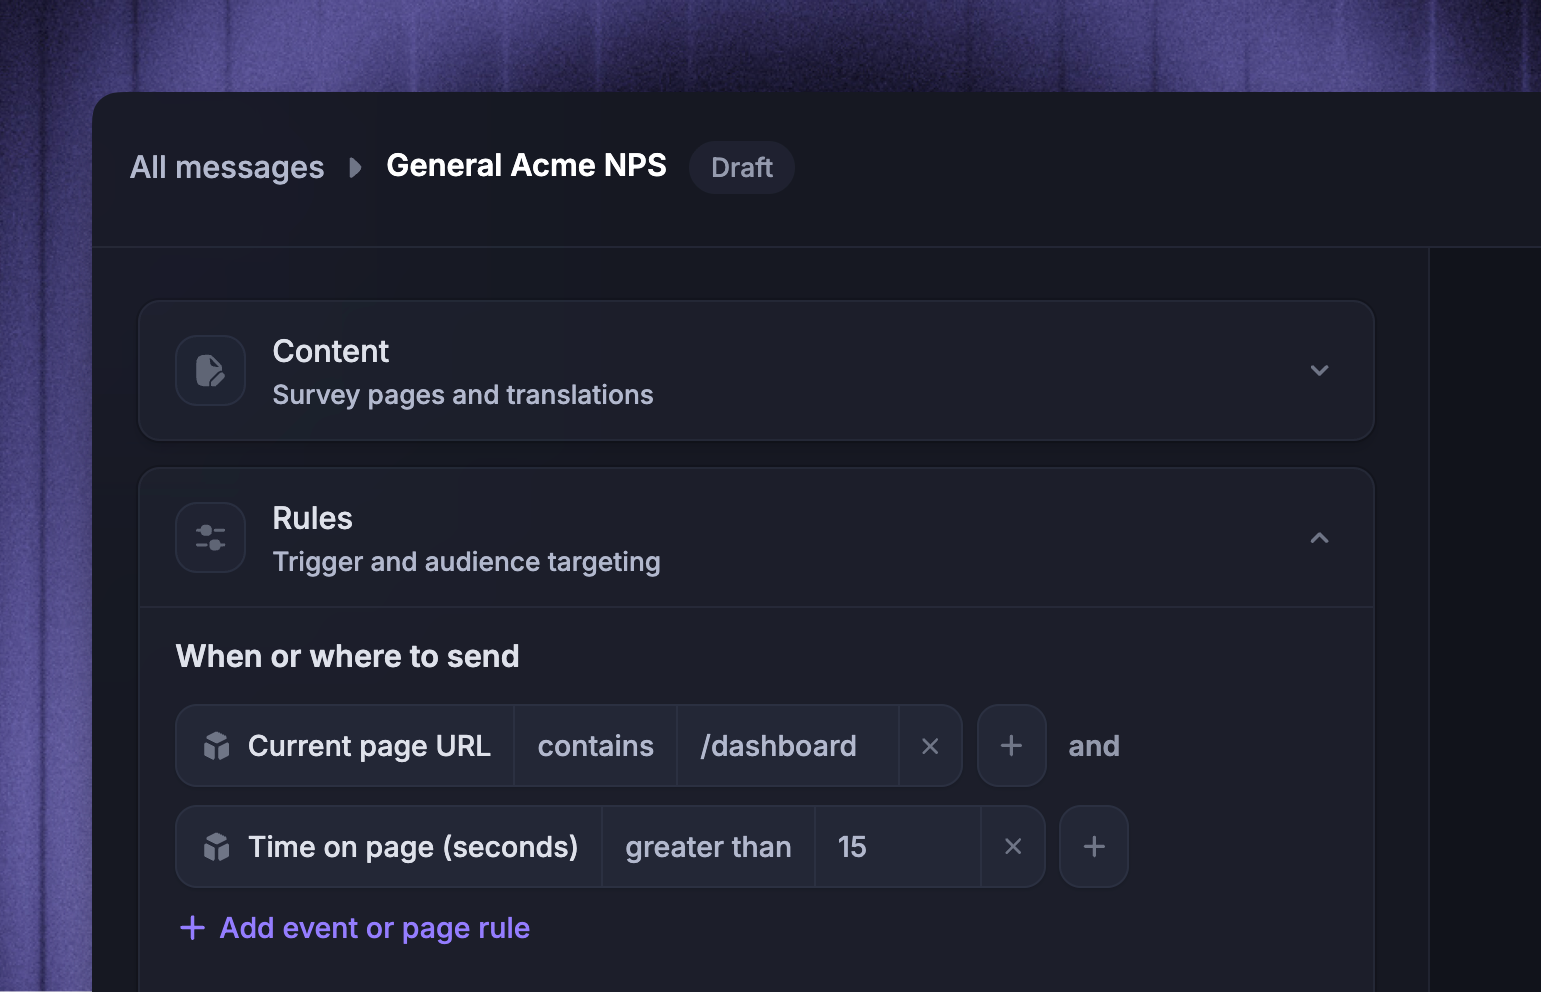
Tip: Keep trigger rules close to the question you are asking. For example, ask feature feedback on that feature's page, and use Time on page (seconds) when the person needs time to understand the page before answering.
Choose who can receive the Survey
Then, under the same Rules section, configure the audience who can receive your survey. Depending on whether you want to reach users, visitors, or leads, you can target:
Users - anyone who has signed up to your product or logged in to an existing account
Visitors & Leads - anyone who visits your sites or starts a conversation with you
Visitors - people visiting your site before they become known users
Everyone - users, visitors, and leads
Then add audience rules to further narrow the Survey. Audience rules can use grouped AND/OR logic over available user and company attributes, such as plan, company, lifecycle stage, role, or custom attributes your workspace tracks.
Last survey received records when a user or lead last received an in-app Survey. Surveys include an audience group that matches either of these conditions:
Last survey received is more than 14 days ago
Last survey received is unknown
Keep these conditions in the same OR group. The first gives people a break between Surveys. The second includes people who have no recorded Survey delivery.
You can change the number of days or remove the group. This rule considers all in-app Surveys, while frequency settings control repeats of this particular Survey.
Use Preview audience before setting the Survey live. It helps you check whether the current audience is too broad, too narrow, or empty.
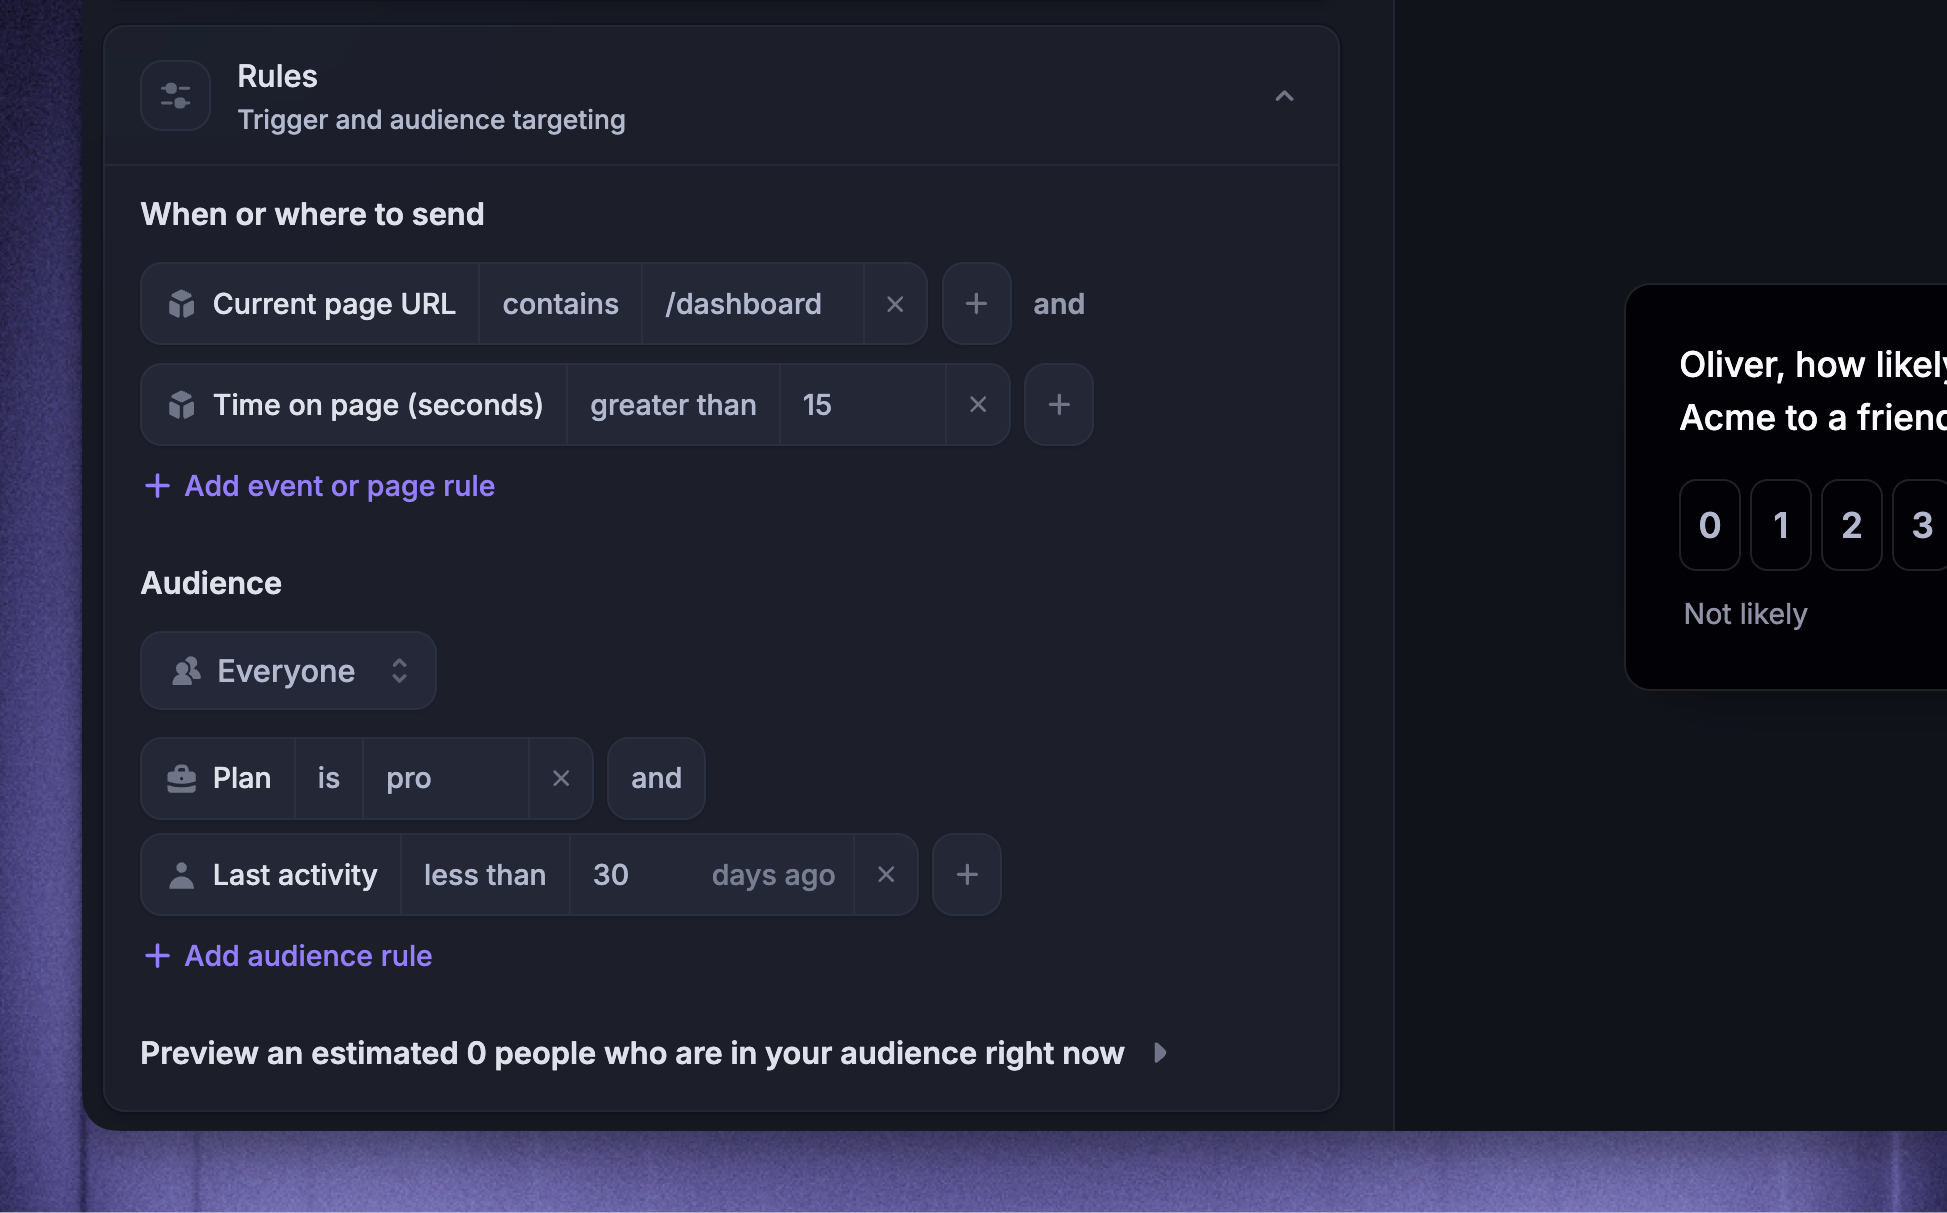
Note: An unfinished Survey can keep appearing until the person completes or dismisses it, even if their audience data changes. Its trigger, frequency, and scheduling rules still apply.
Set frequency and scheduling
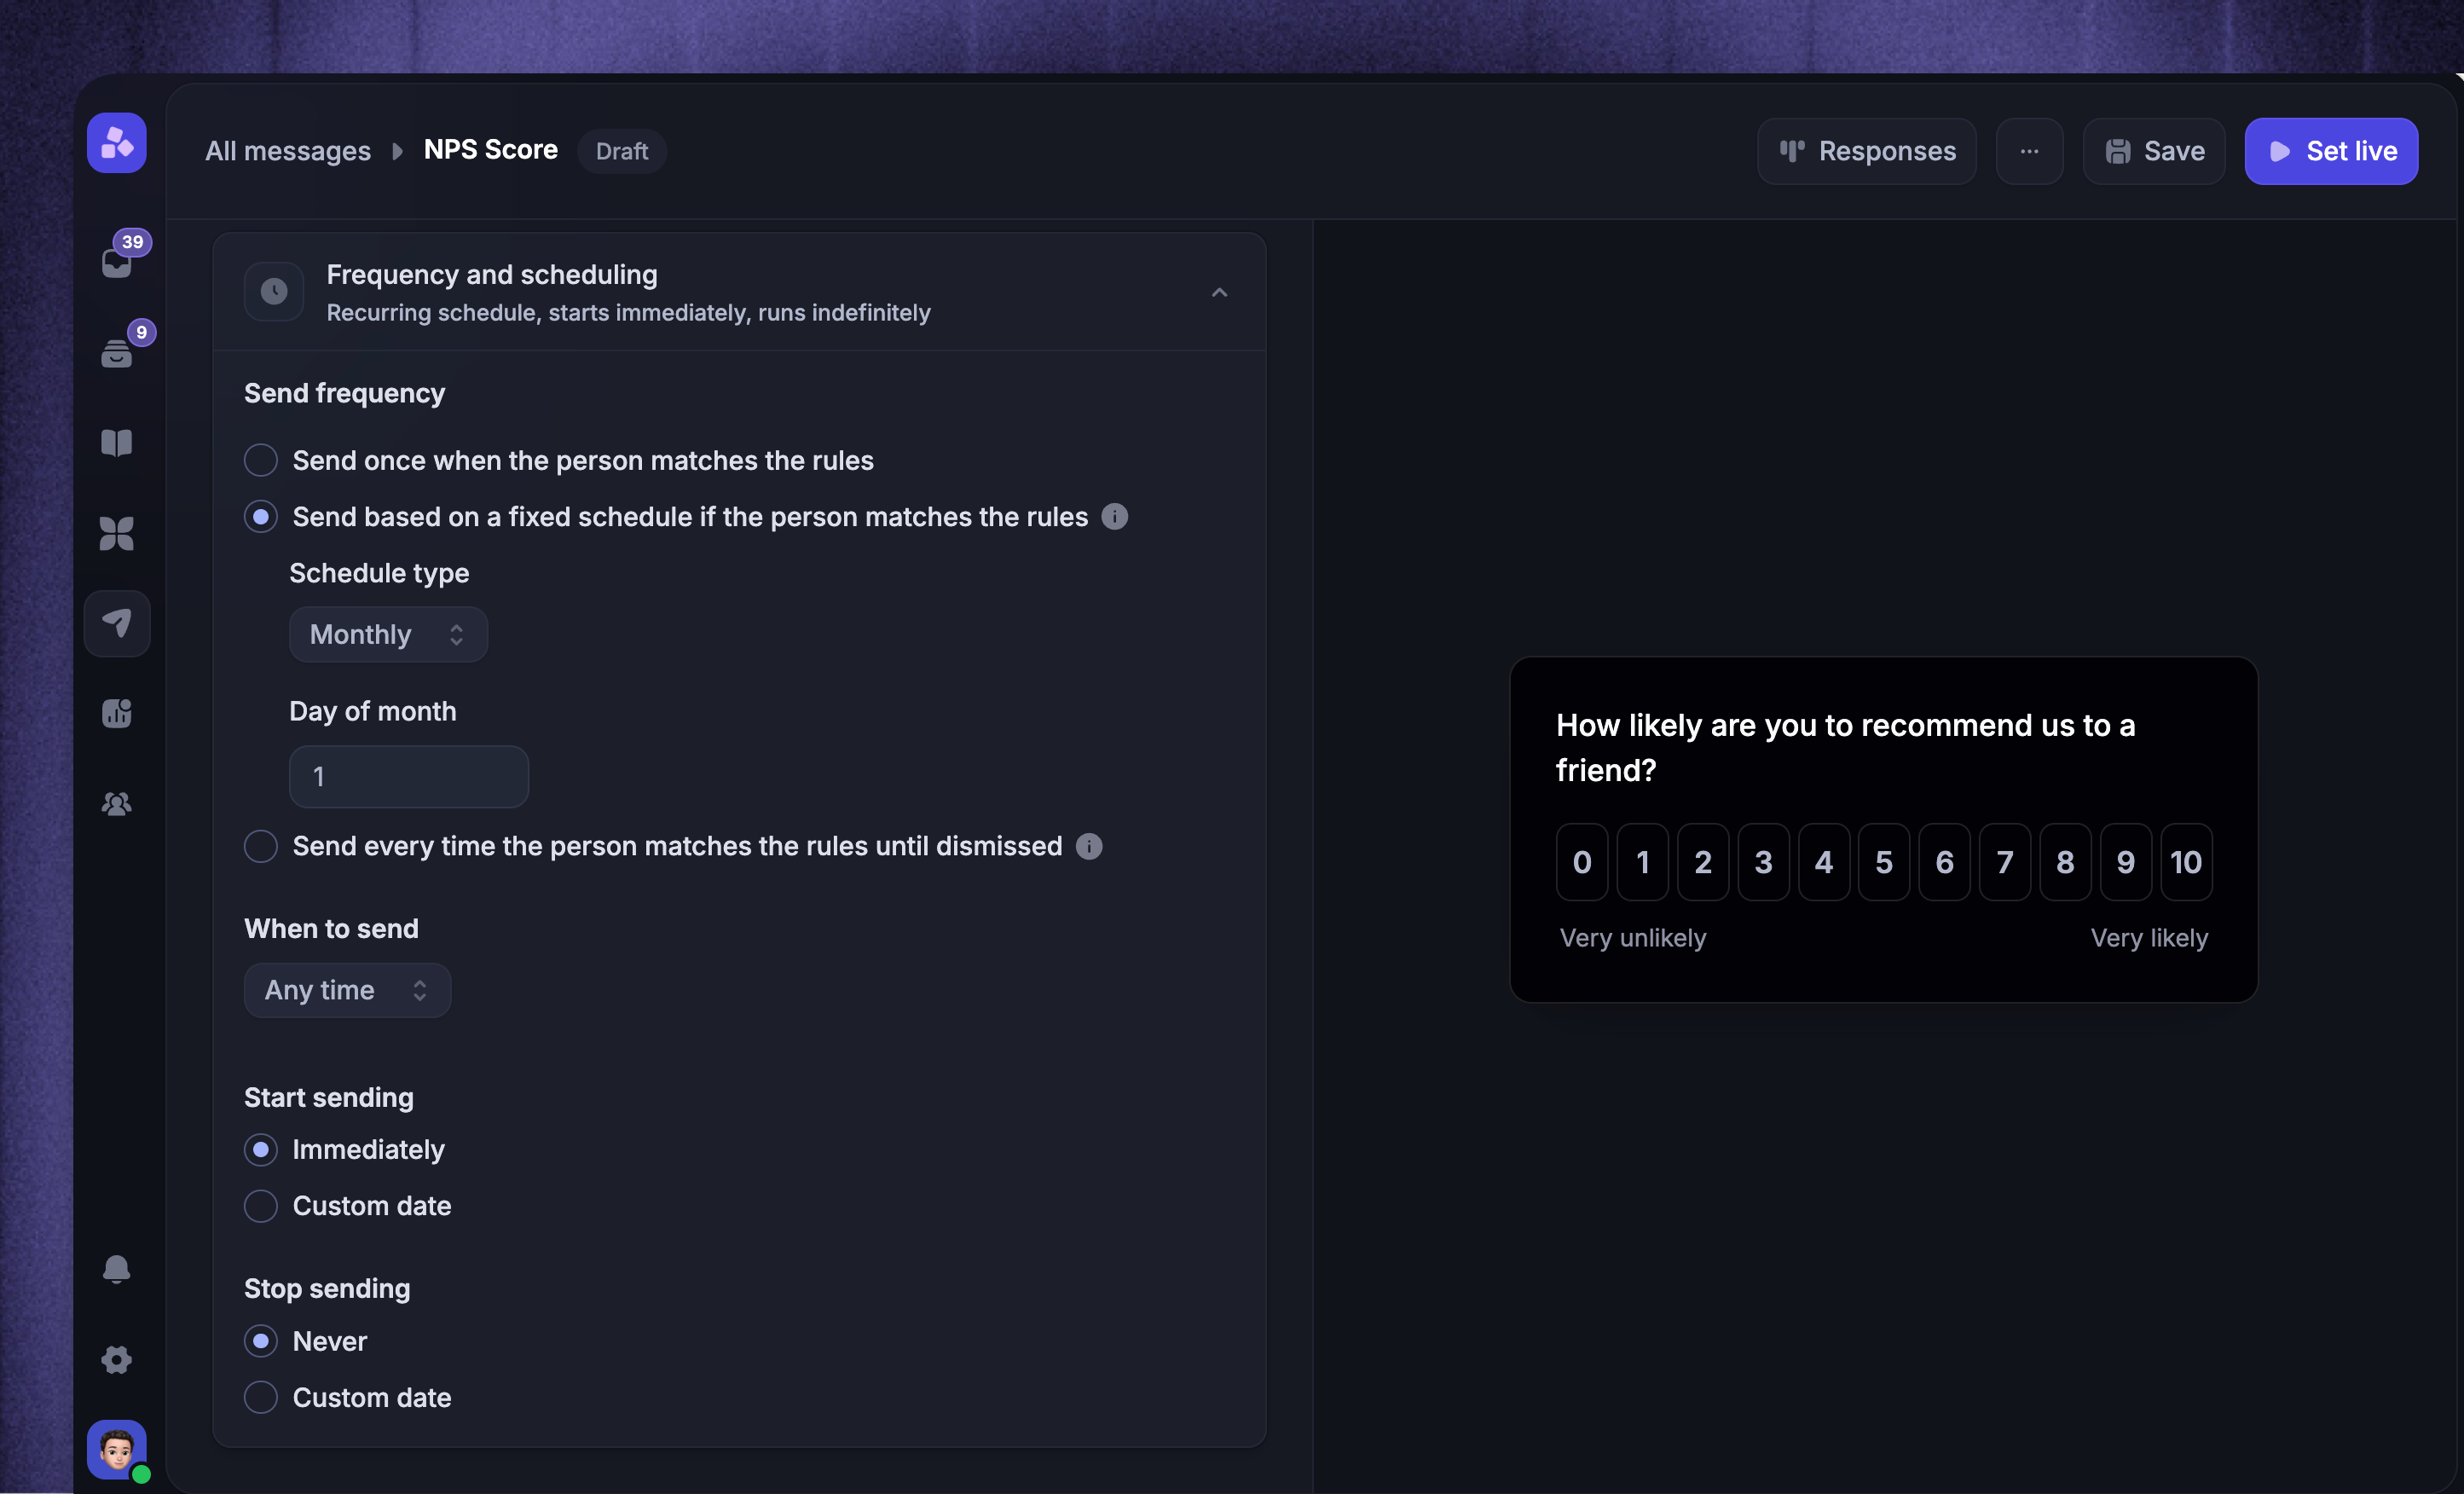
In Outbound → your Survey → Frequency and scheduling, choose how often the Survey can run:
Send once when the person matches the rules - Keep showing the Survey until the person completes or dismisses it, then do not show it to that person again
Send based on a fixed schedule if the person matches the rules - Run the Survey on a weekly, monthly, or yearly schedule
Send every time the person matches the rules until dismissed - Allow the person to complete the Survey again after the configured wait, while they still match its rules
By default, Surveys can repeat 30 days after completion. Maximum sends limits the number of completed Survey attempts.
For a multi-page Survey, answering one page does not finish the Survey. The person must reach the end of their Survey path. Dismissing the Survey stops it from appearing again, regardless of the frequency setting.
Then configure the timing:
When to send - choose Any time, During office hours, Outside office hours, or Custom times
Start sending - choose Immediately or Custom date
Stop sending - choose Never or Custom date
All scheduled dates and custom-time windows use your workspace timezone.
Save and launch
Use Preview audience to confirm the estimated matching audience, then choose the right state action:
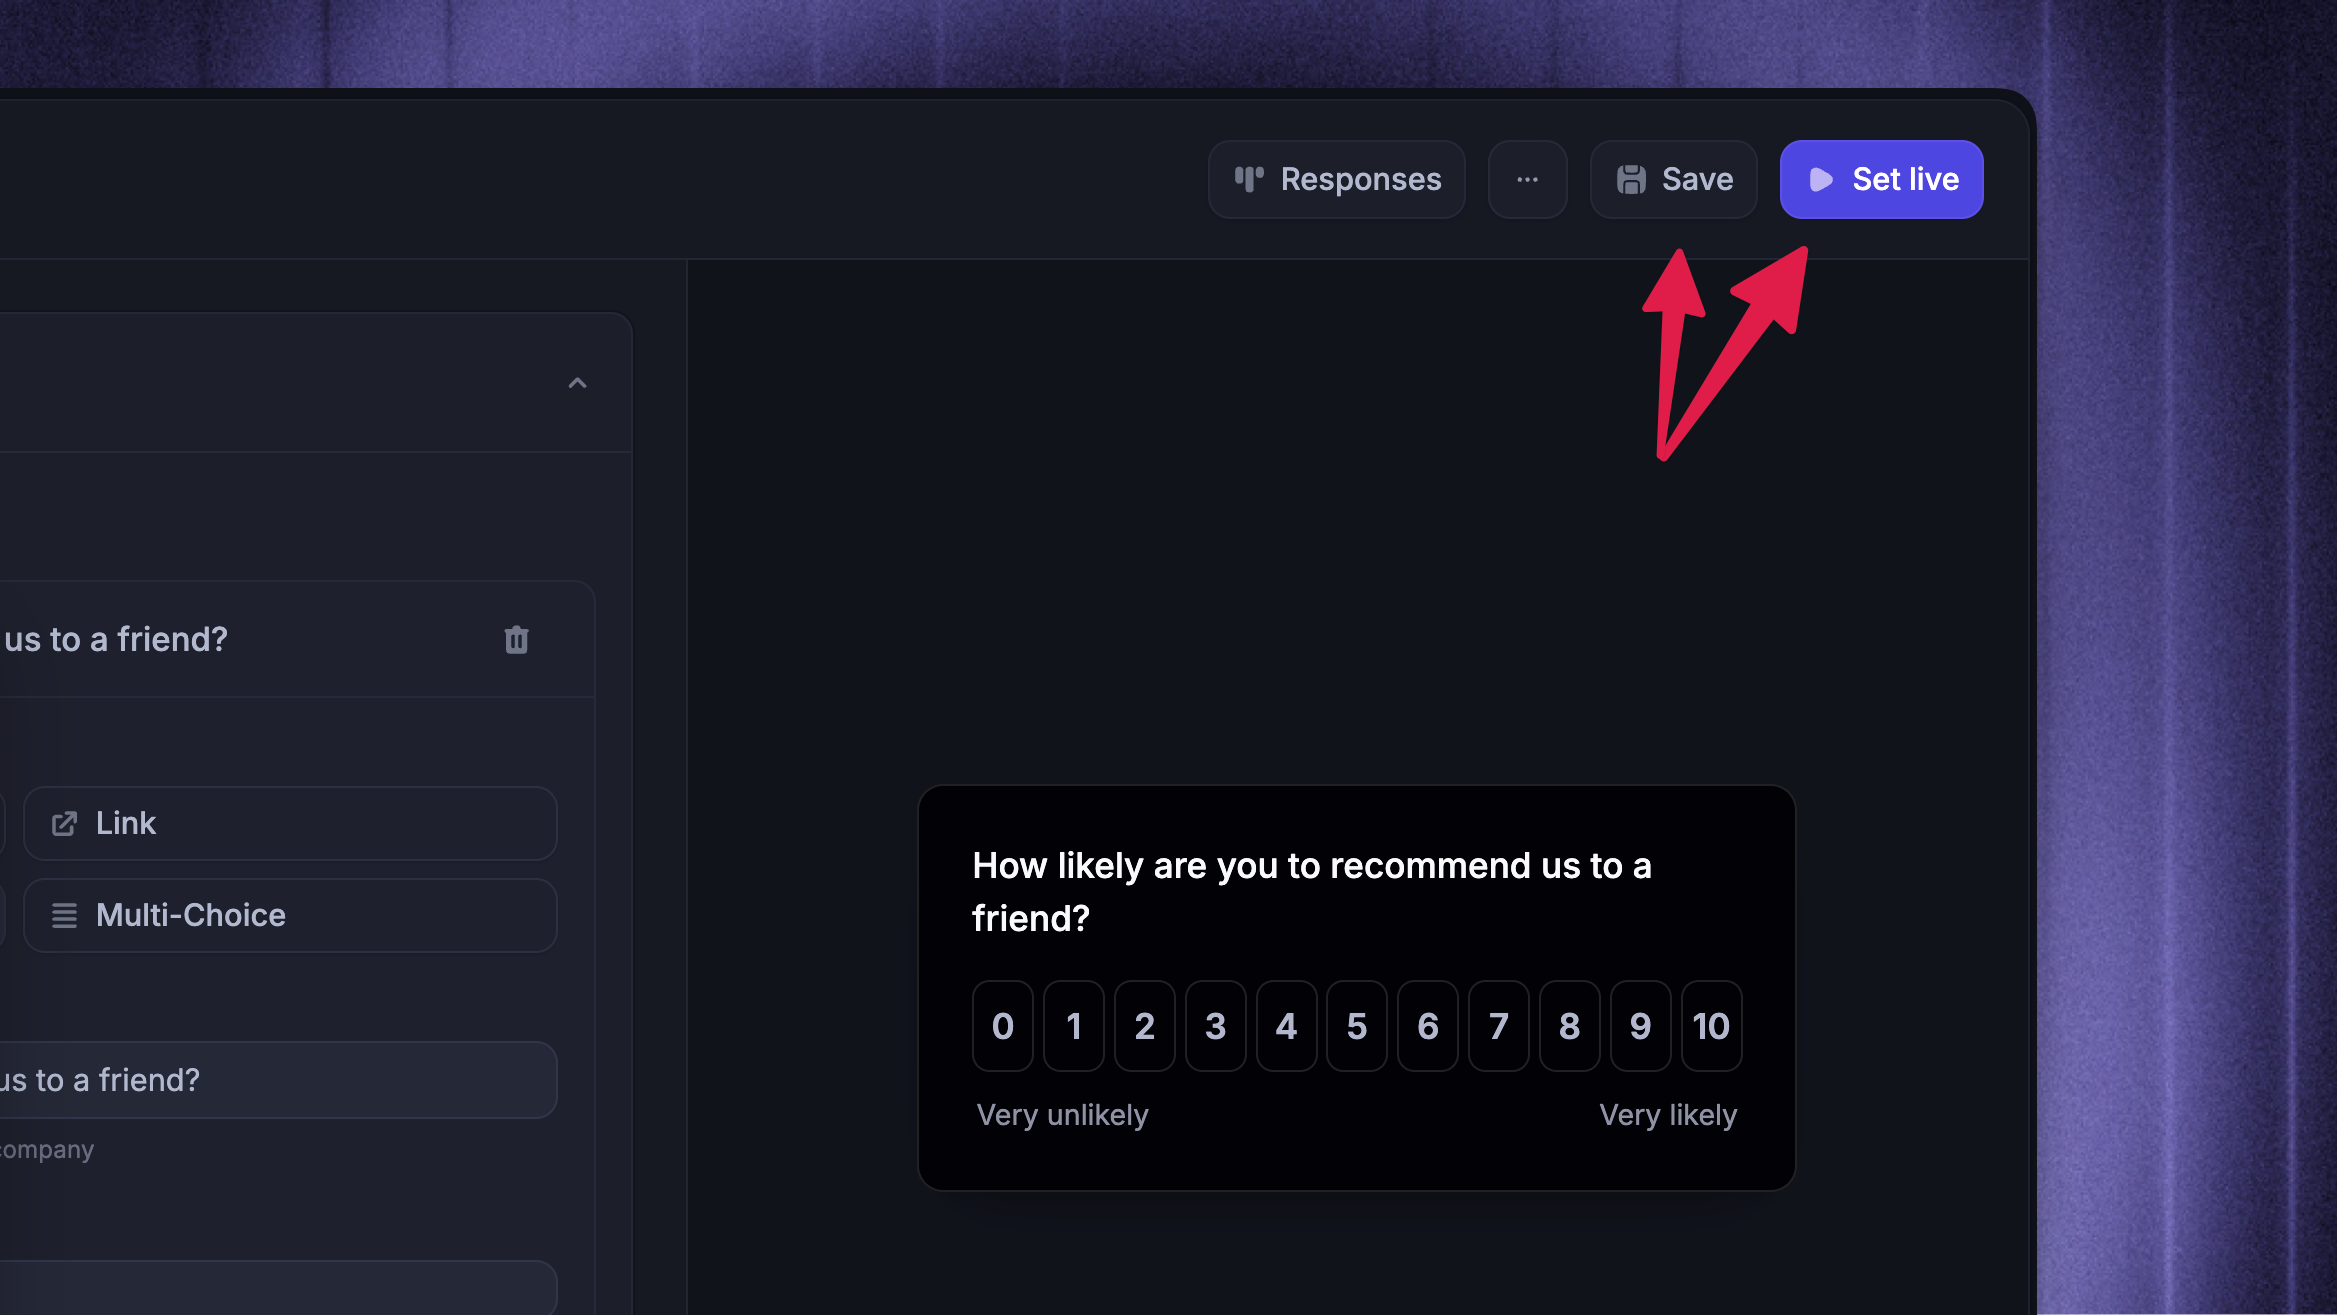
Save - saves the survey version without publishing it to your users
Set live / Schedule - starts a Survey with an immediate start date (Schedule is only available if ‘Start sending’ is a date in the future)
After a Survey is live, use Responses to review results.
FAQs
Do Survey audiences update after the Survey is live?
Do Survey audiences update after the Survey is live?
Yes. New people can become eligible as their data changes while the Survey is live. Surveys already received follow the unfinished-Survey behavior described above.
What happens if I do not add trigger rules?
What happens if I do not add trigger rules?
The Survey can run for every visit that matches the audience, frequency, and schedule. In the editor, this appears as Runs for every visit.
Add trigger rules when the Survey should only appear on specific pages, after a certain time on page, or when a specific page element is present.
Can I show a Survey only when a page element exists?
Can I show a Survey only when a page element exists?
Yes. Add a CSS selector trigger rule and enter the selector for the element, such as #pricing or .upgrade-banner.
Use negative comparators when the Survey should only run when that element is not present.
Why is my Survey not appearing?
Why is my Survey not appearing?
Check these settings:
State and schedule - The Survey must be live, its start date must have arrived, and the current time must be inside its send window
Audience and trigger rules - The person and page must qualify for a Survey delivery
Last survey received - For a new delivery, the default rule requires the last Survey delivery to be more than 14 days ago, or no recorded delivery
Previous activity - A dismissal, a completed Send once Survey, a repeat wait, or Maximum sends can prevent another delivery
Use 'Preview audience' to check the audience rules. It is an estimate, not a guarantee that the Survey will appear: trigger rules, scheduling, and previous activity also affect delivery.
Was this helpful?
Still need help? Ask the team