Post tags & automatic AI tagging
Use tags to automatically organize and sort your feedback with AI.
Written By Markus from Featurebase
Last updated 3 months ago
Overview
Tags help you sort and organize feedback by factors that you create (e.g. priority or product areas).
Featurebase also supports AI tagging to automatically categorize incoming feedback posts by analyzing their content and applying relevant tags, based on your requirements.
Tags can be public (visible to all users) or private (visible only to your team). We suggest using tags internally to categorize and filter feedback for a better overview.
Tip: You can bulk assign tags to multiple posts simultaneously.
Managing post tags
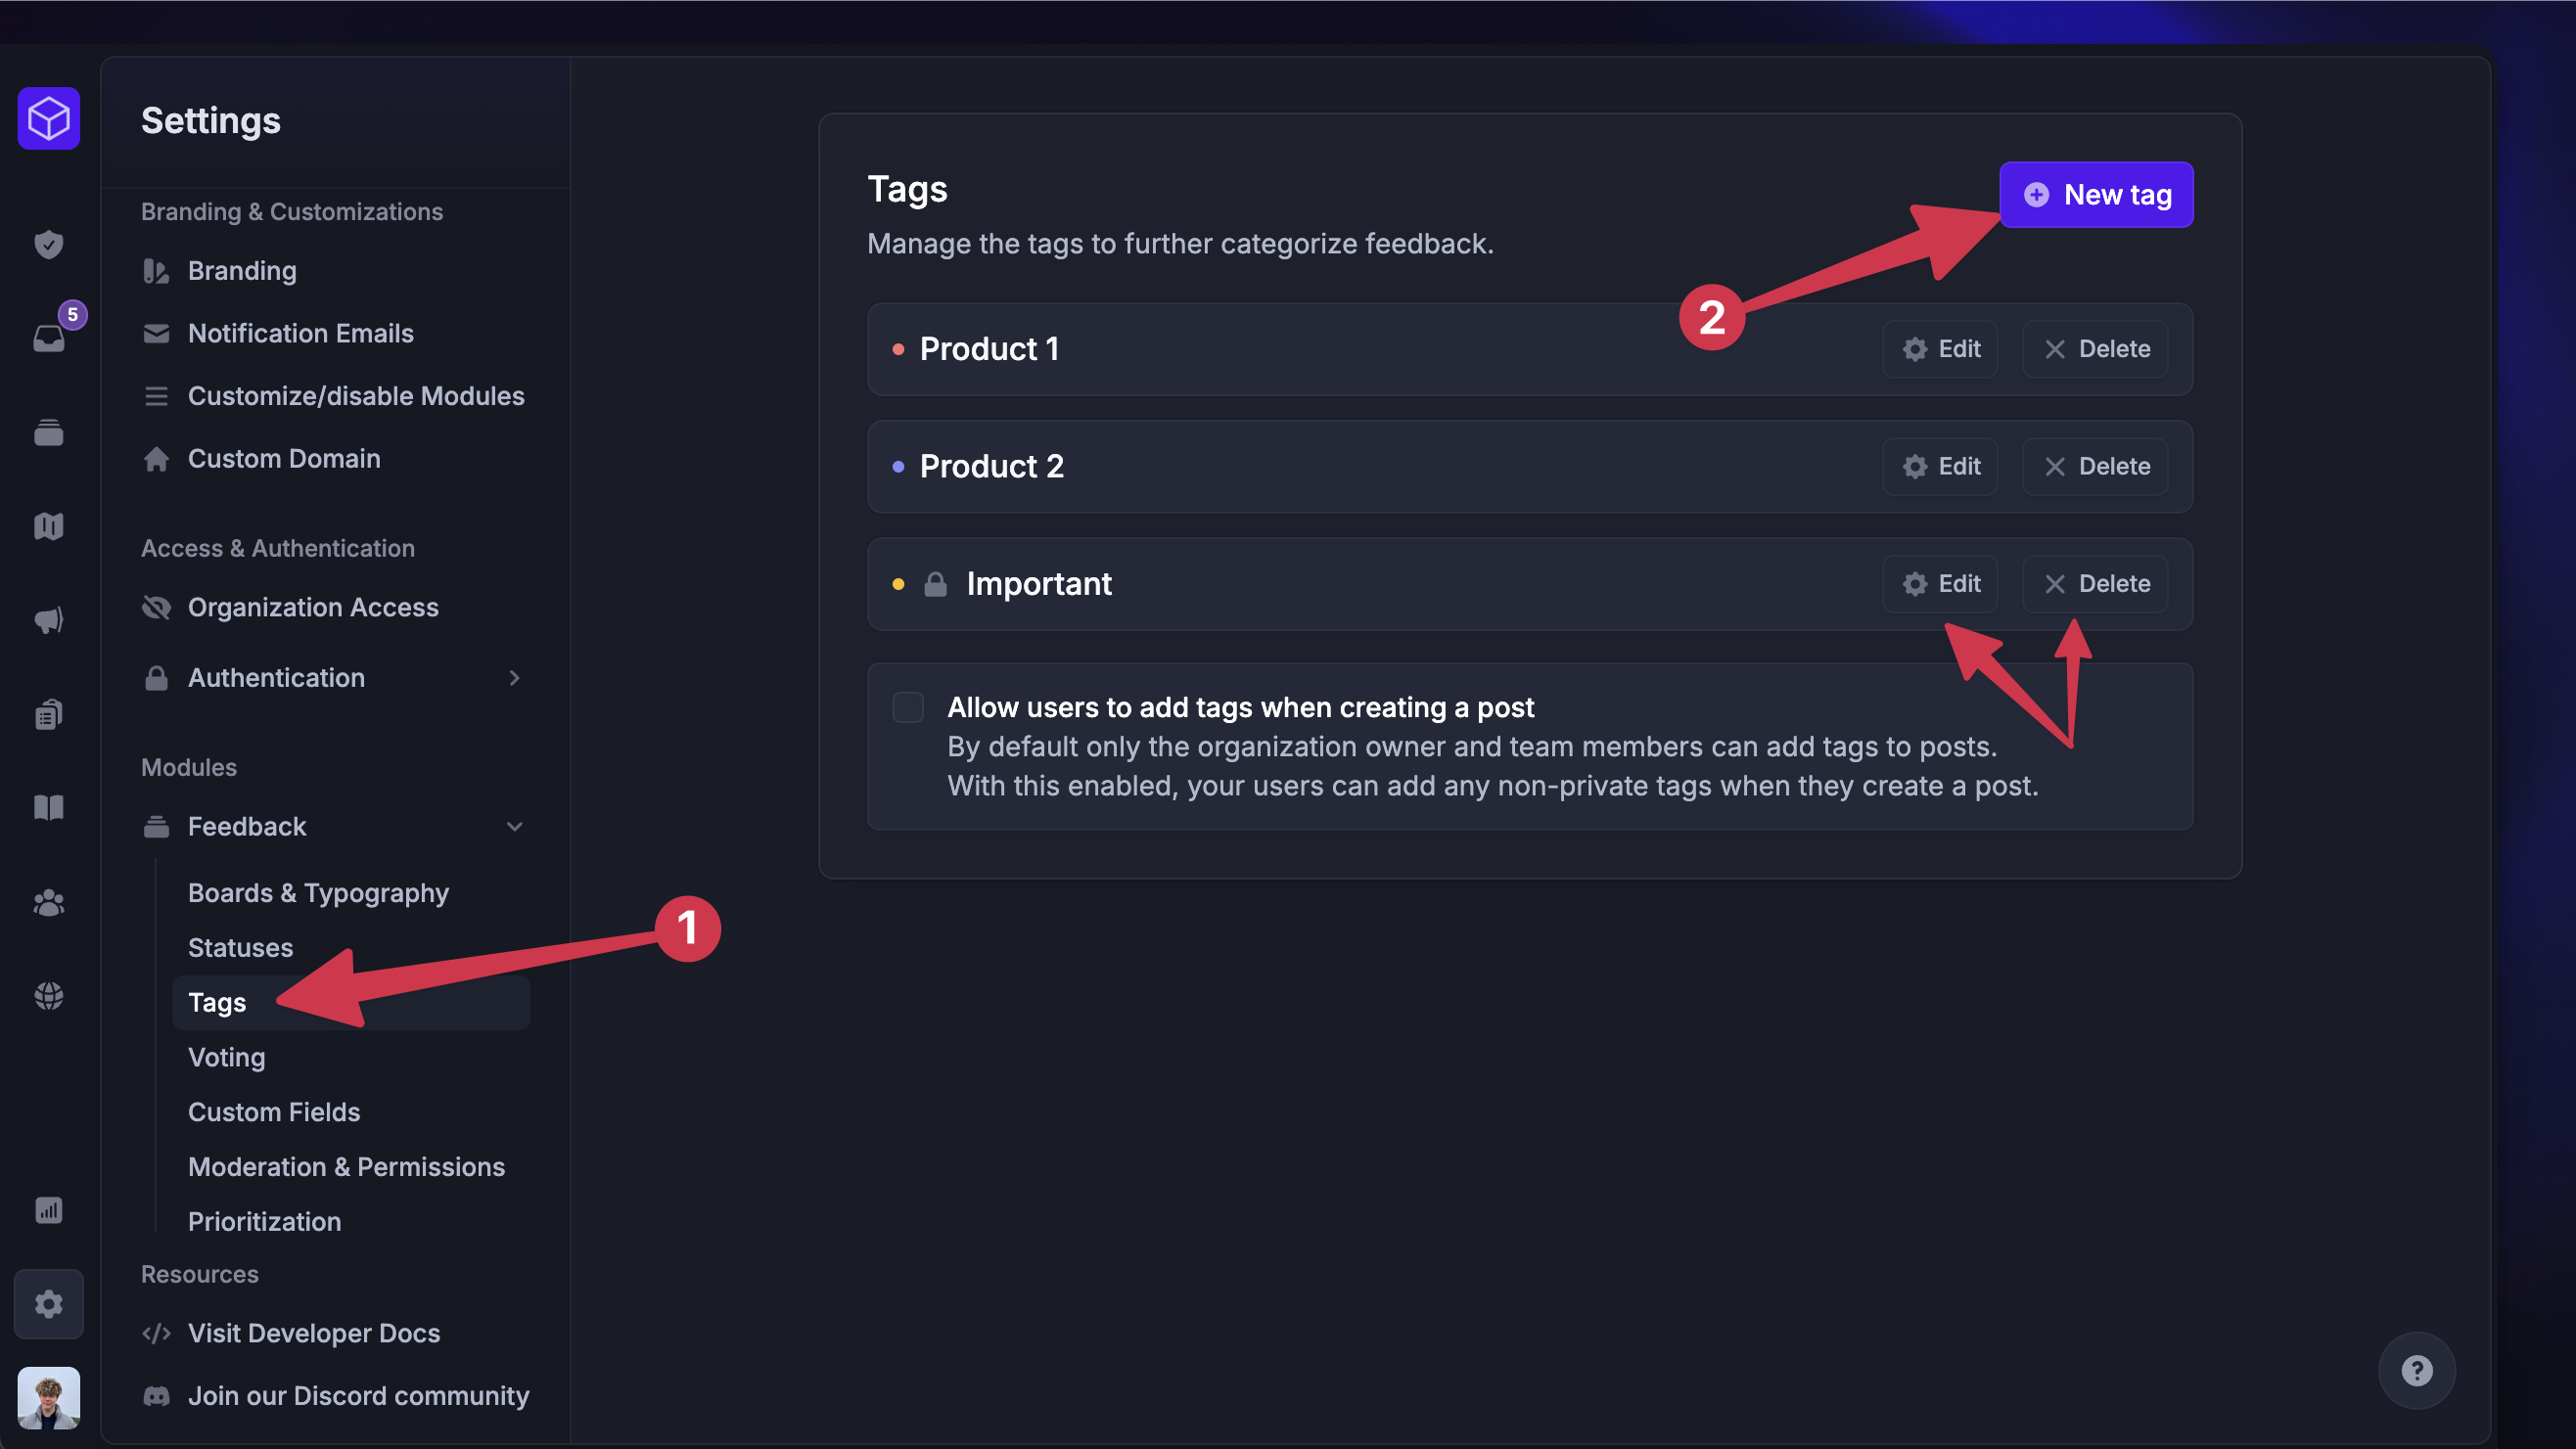
To create new post tags:
Click on New Tag in the top right
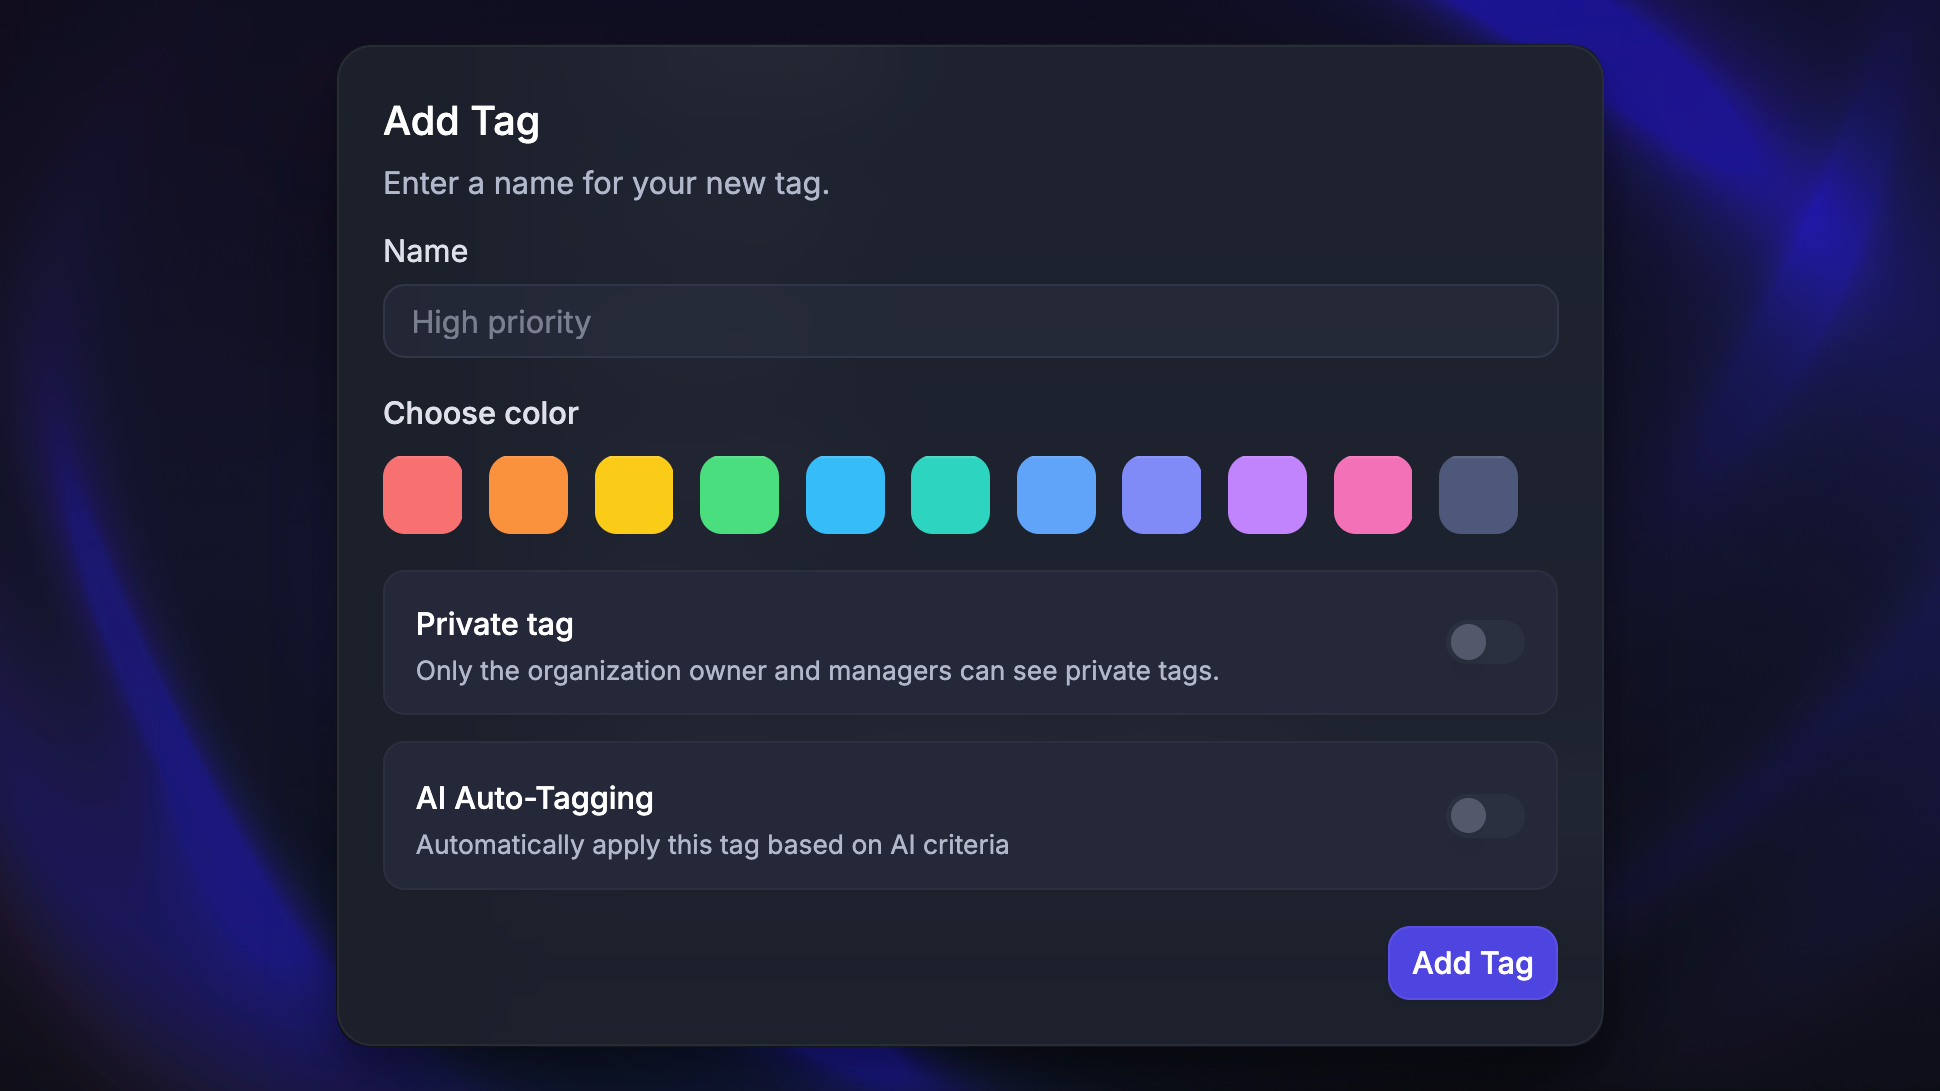
Enter a name and color for the tag (e.g. High Priority)
Choose whether you want to make the tag private (so it’s visible only to your team)
Enable AI auto-tagging and (optional)
Click on Add Tag in the bottom right
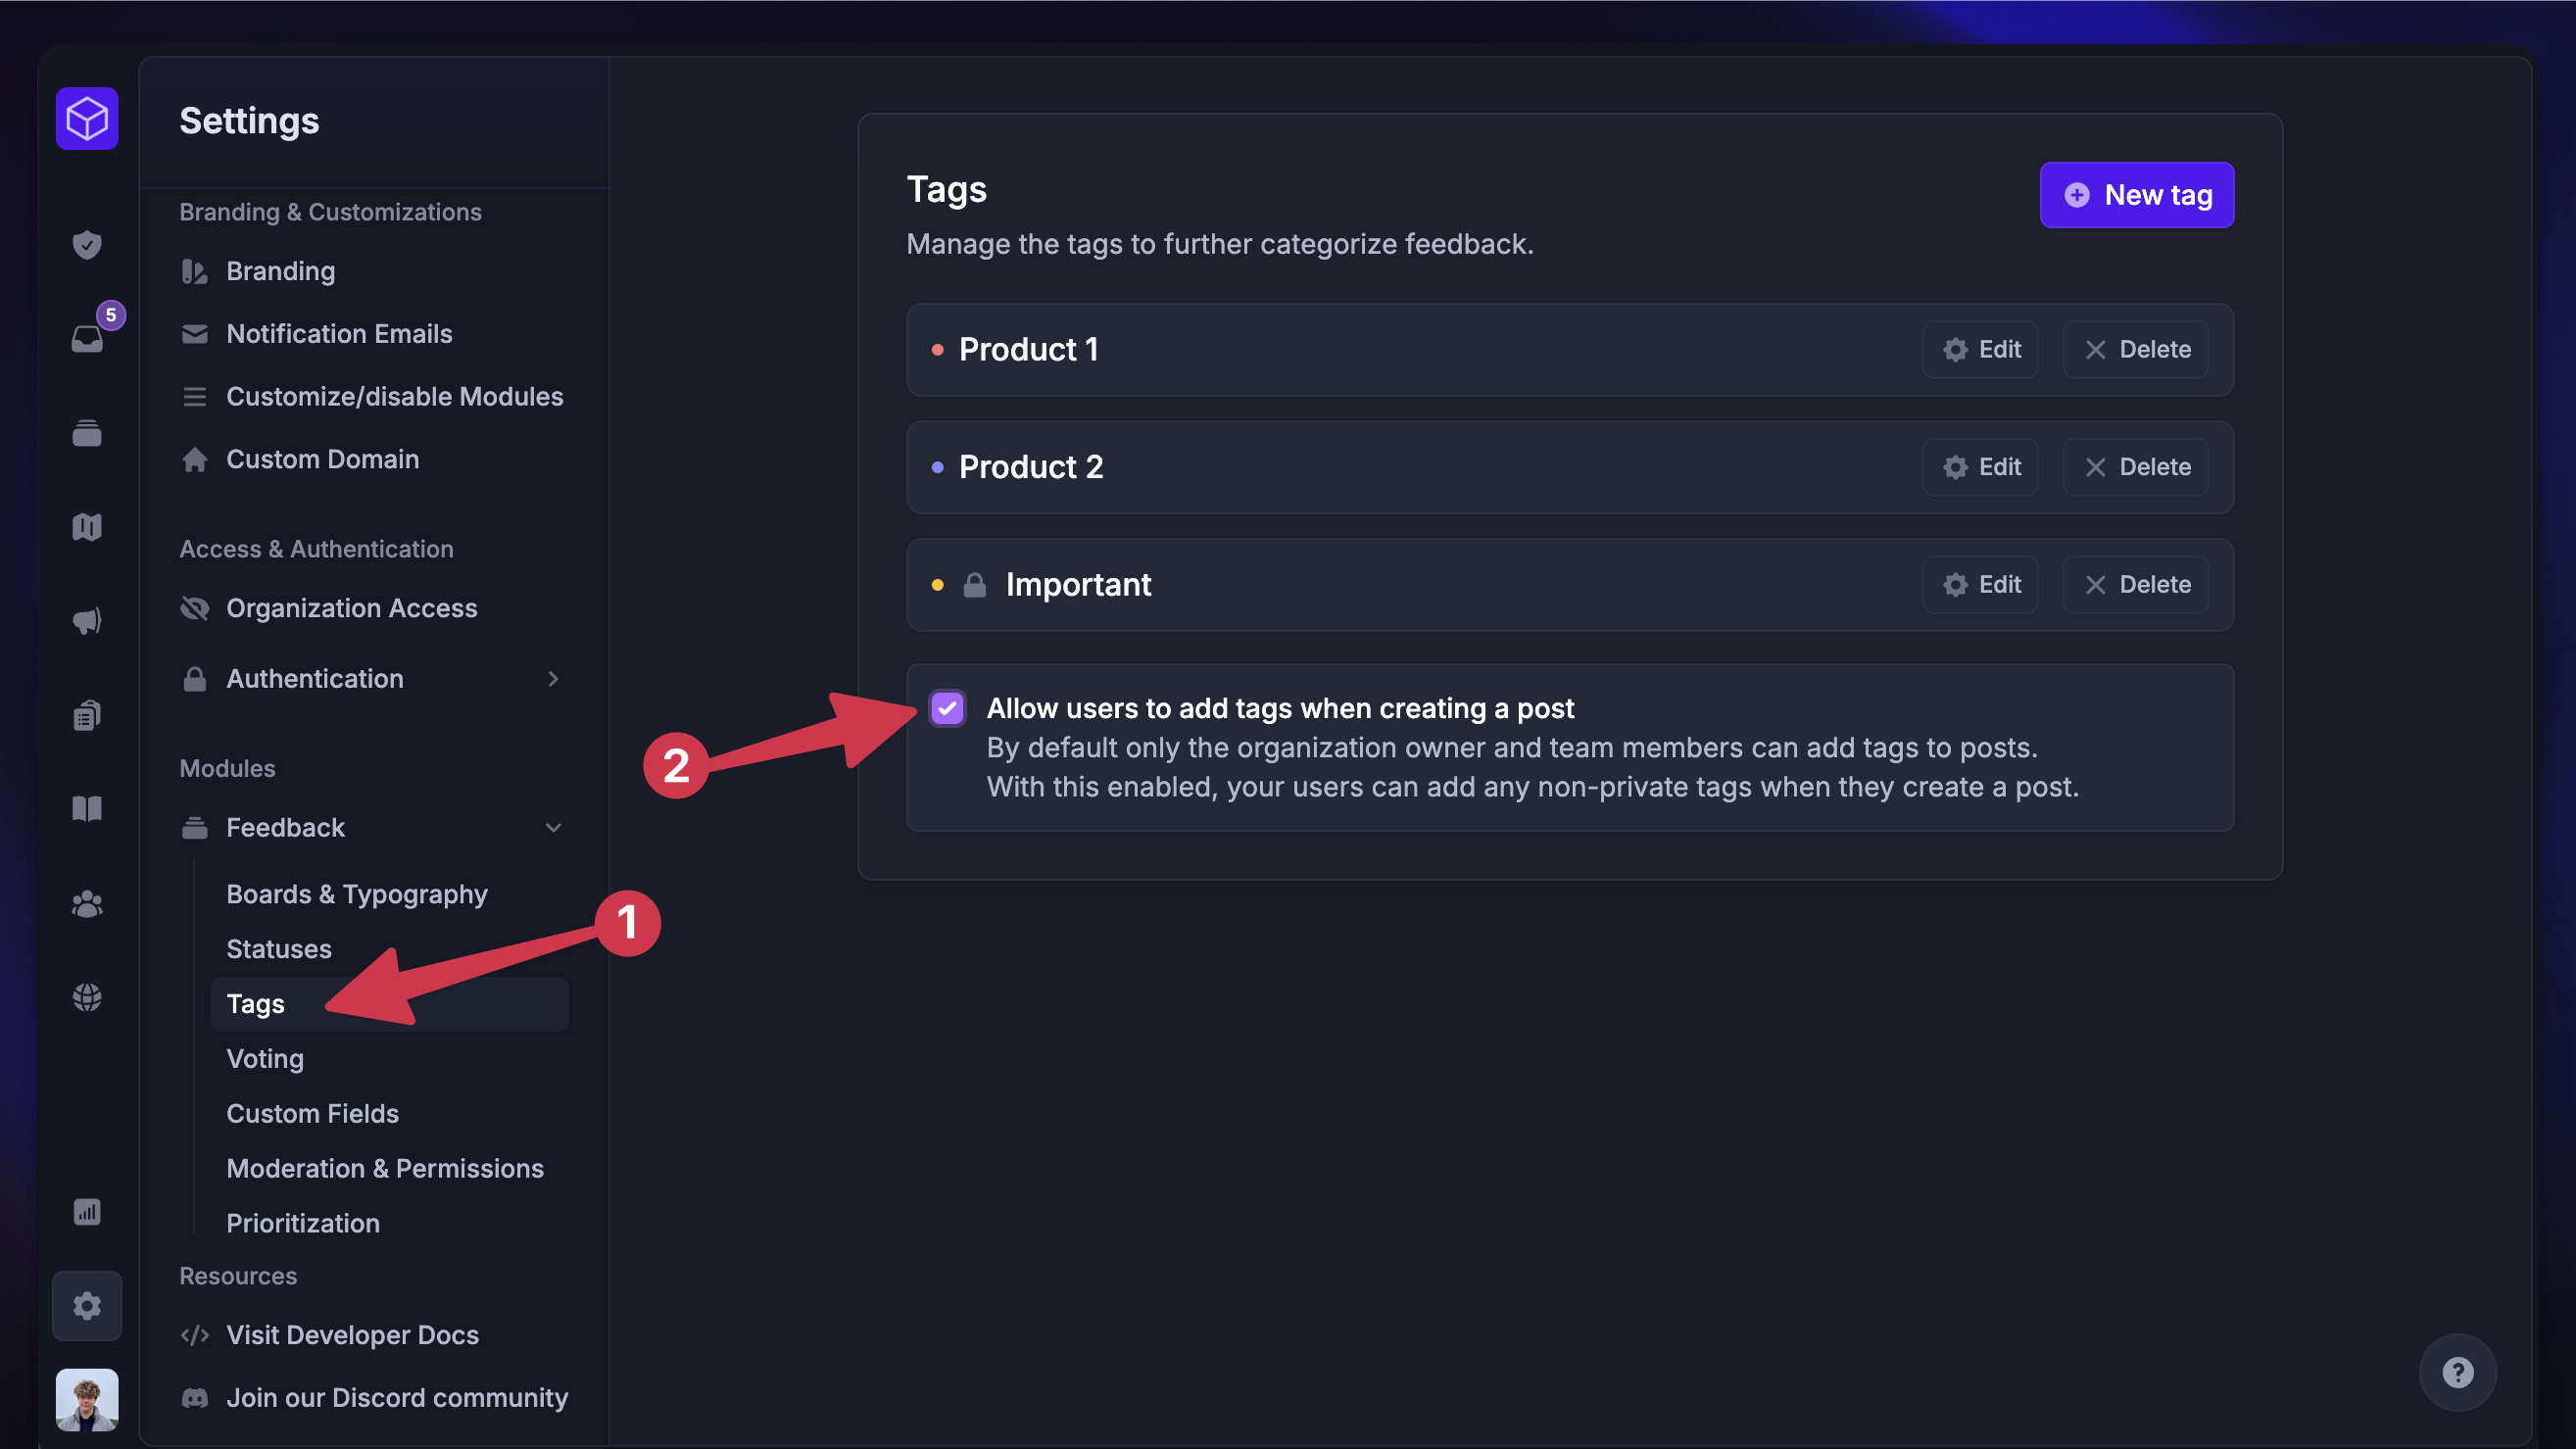
You can edit and delete tags from the same place.
Automatic AI tagging
Automatic AI tagging categorizes new feedback posts for you by analyzing their content and applying tags based on rules you define. This helps keep incoming feedback organized without manual work.
AI tagging runs when a new post is created and has no tags. The AI evaluates the post against all tags that have AI tagging enabled and applies any matching tags. A single post can receive multiple AI-applied tags.
Setting up AI tagging
To enable automatic AI tagging for a tag:
Create a new tag or edit an existing one
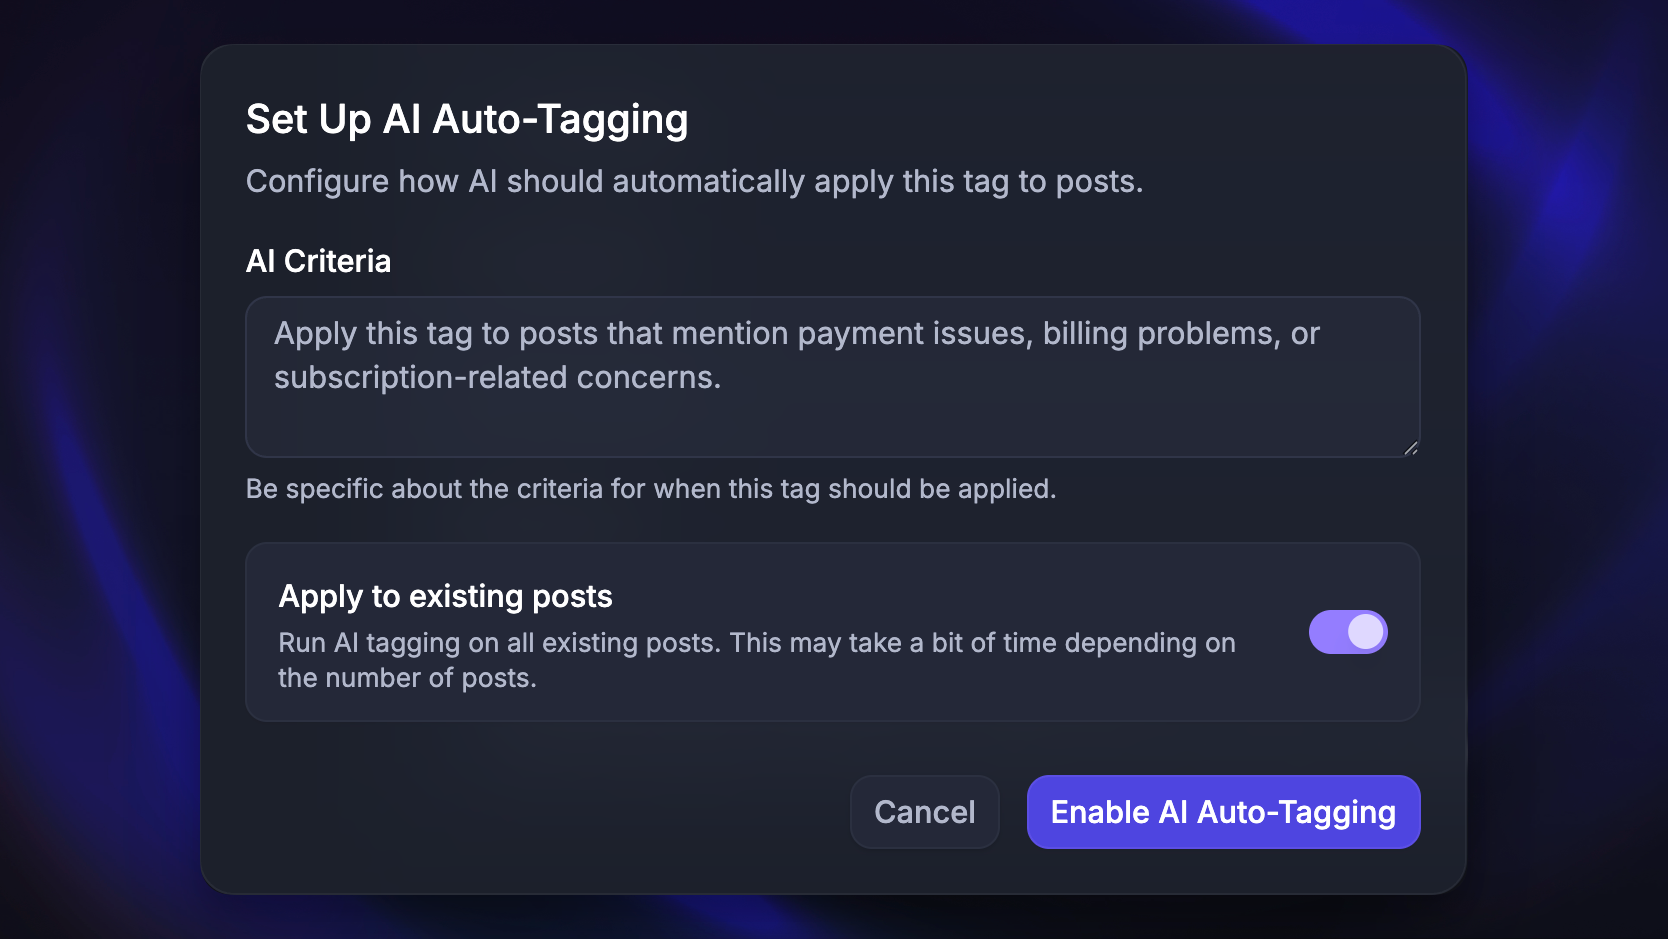
Enable AI Auto-Tagging
Write an AI prompt describing when the tag should be applied
Example AI prompt: Apply this tag to posts that mention payment issues, billing problems, or subscription-related concerns.
Enable ‘Apply to existing posts’ to evaluate older posts (optional)
By default, only new posts are evaluated
Save the tag
Good to know:
AI tagging only runs once, when a post is first created (and has no tags!)
If a user/admin has manually added a tag during post creation, AI tagging is skipped
If you manually remove an AI-applied tag, it will not be re-applied automatically. A tag is reapplied only if you manually run ‘Apply to existing posts’ again, or change the AI prompt, which triggers a re-evaluation
You can manually remove incorrect AI-applied tags at any time. AI-applied tags are marked, making it possible to review later
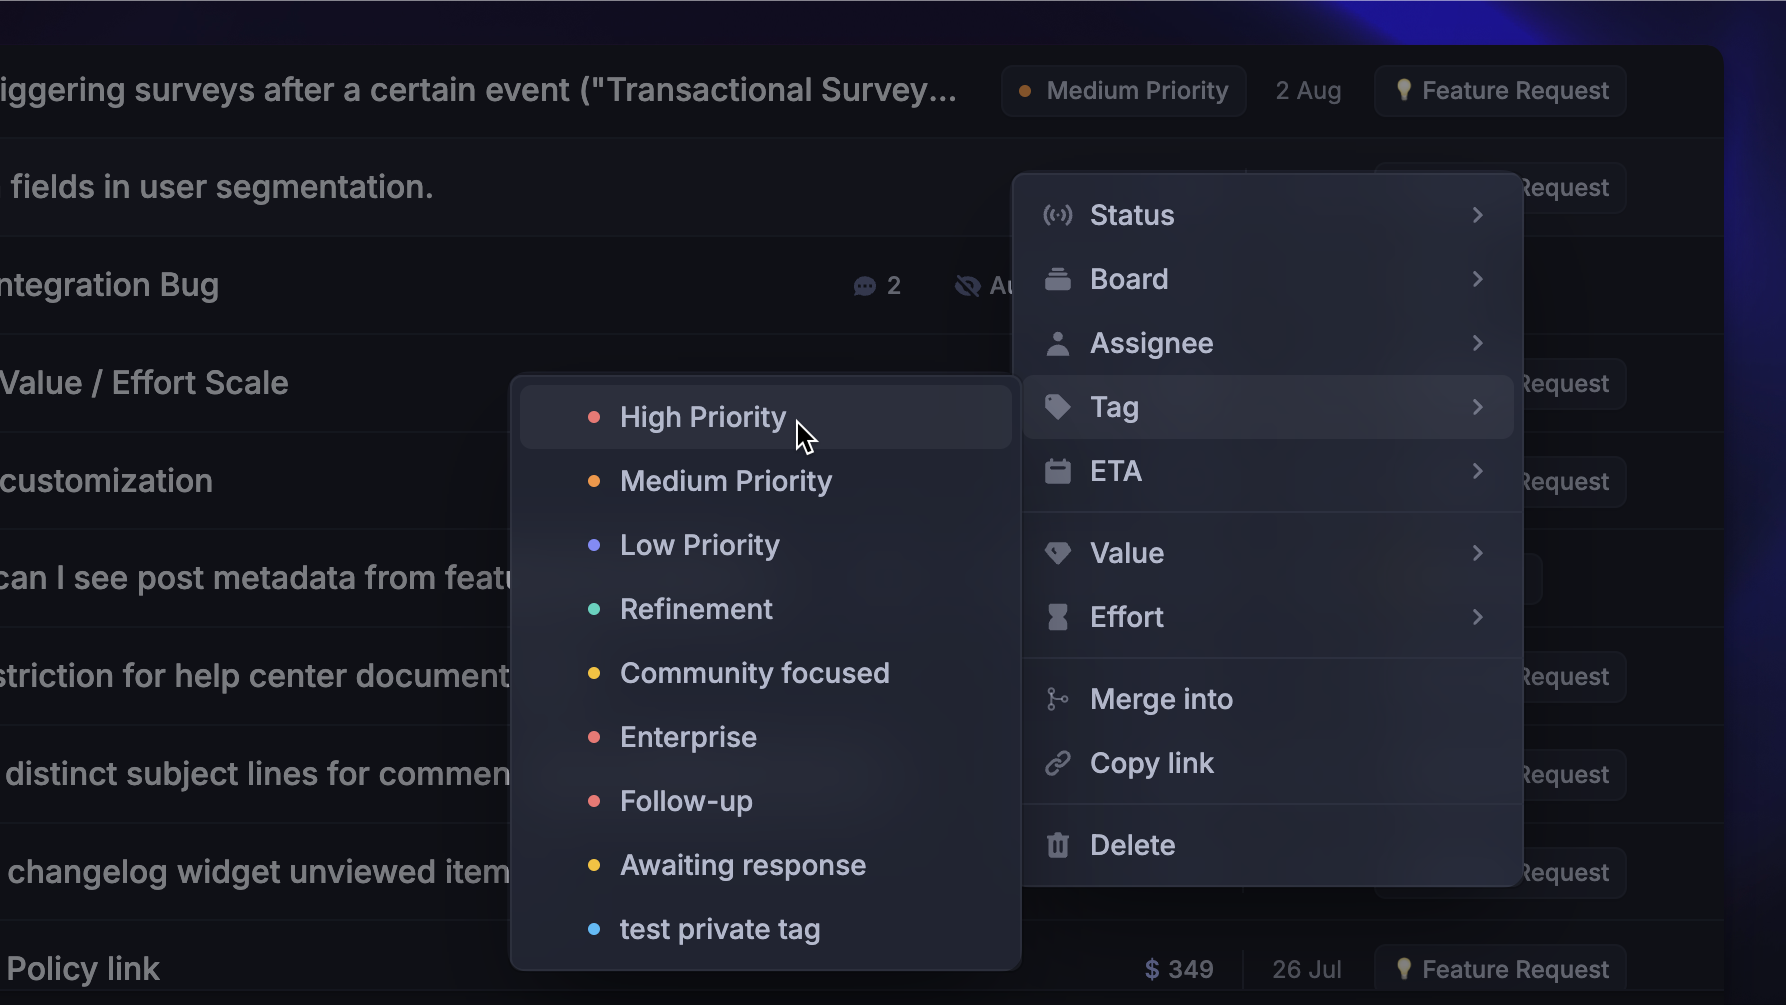
Manually tagging
Manually adding tags to posts
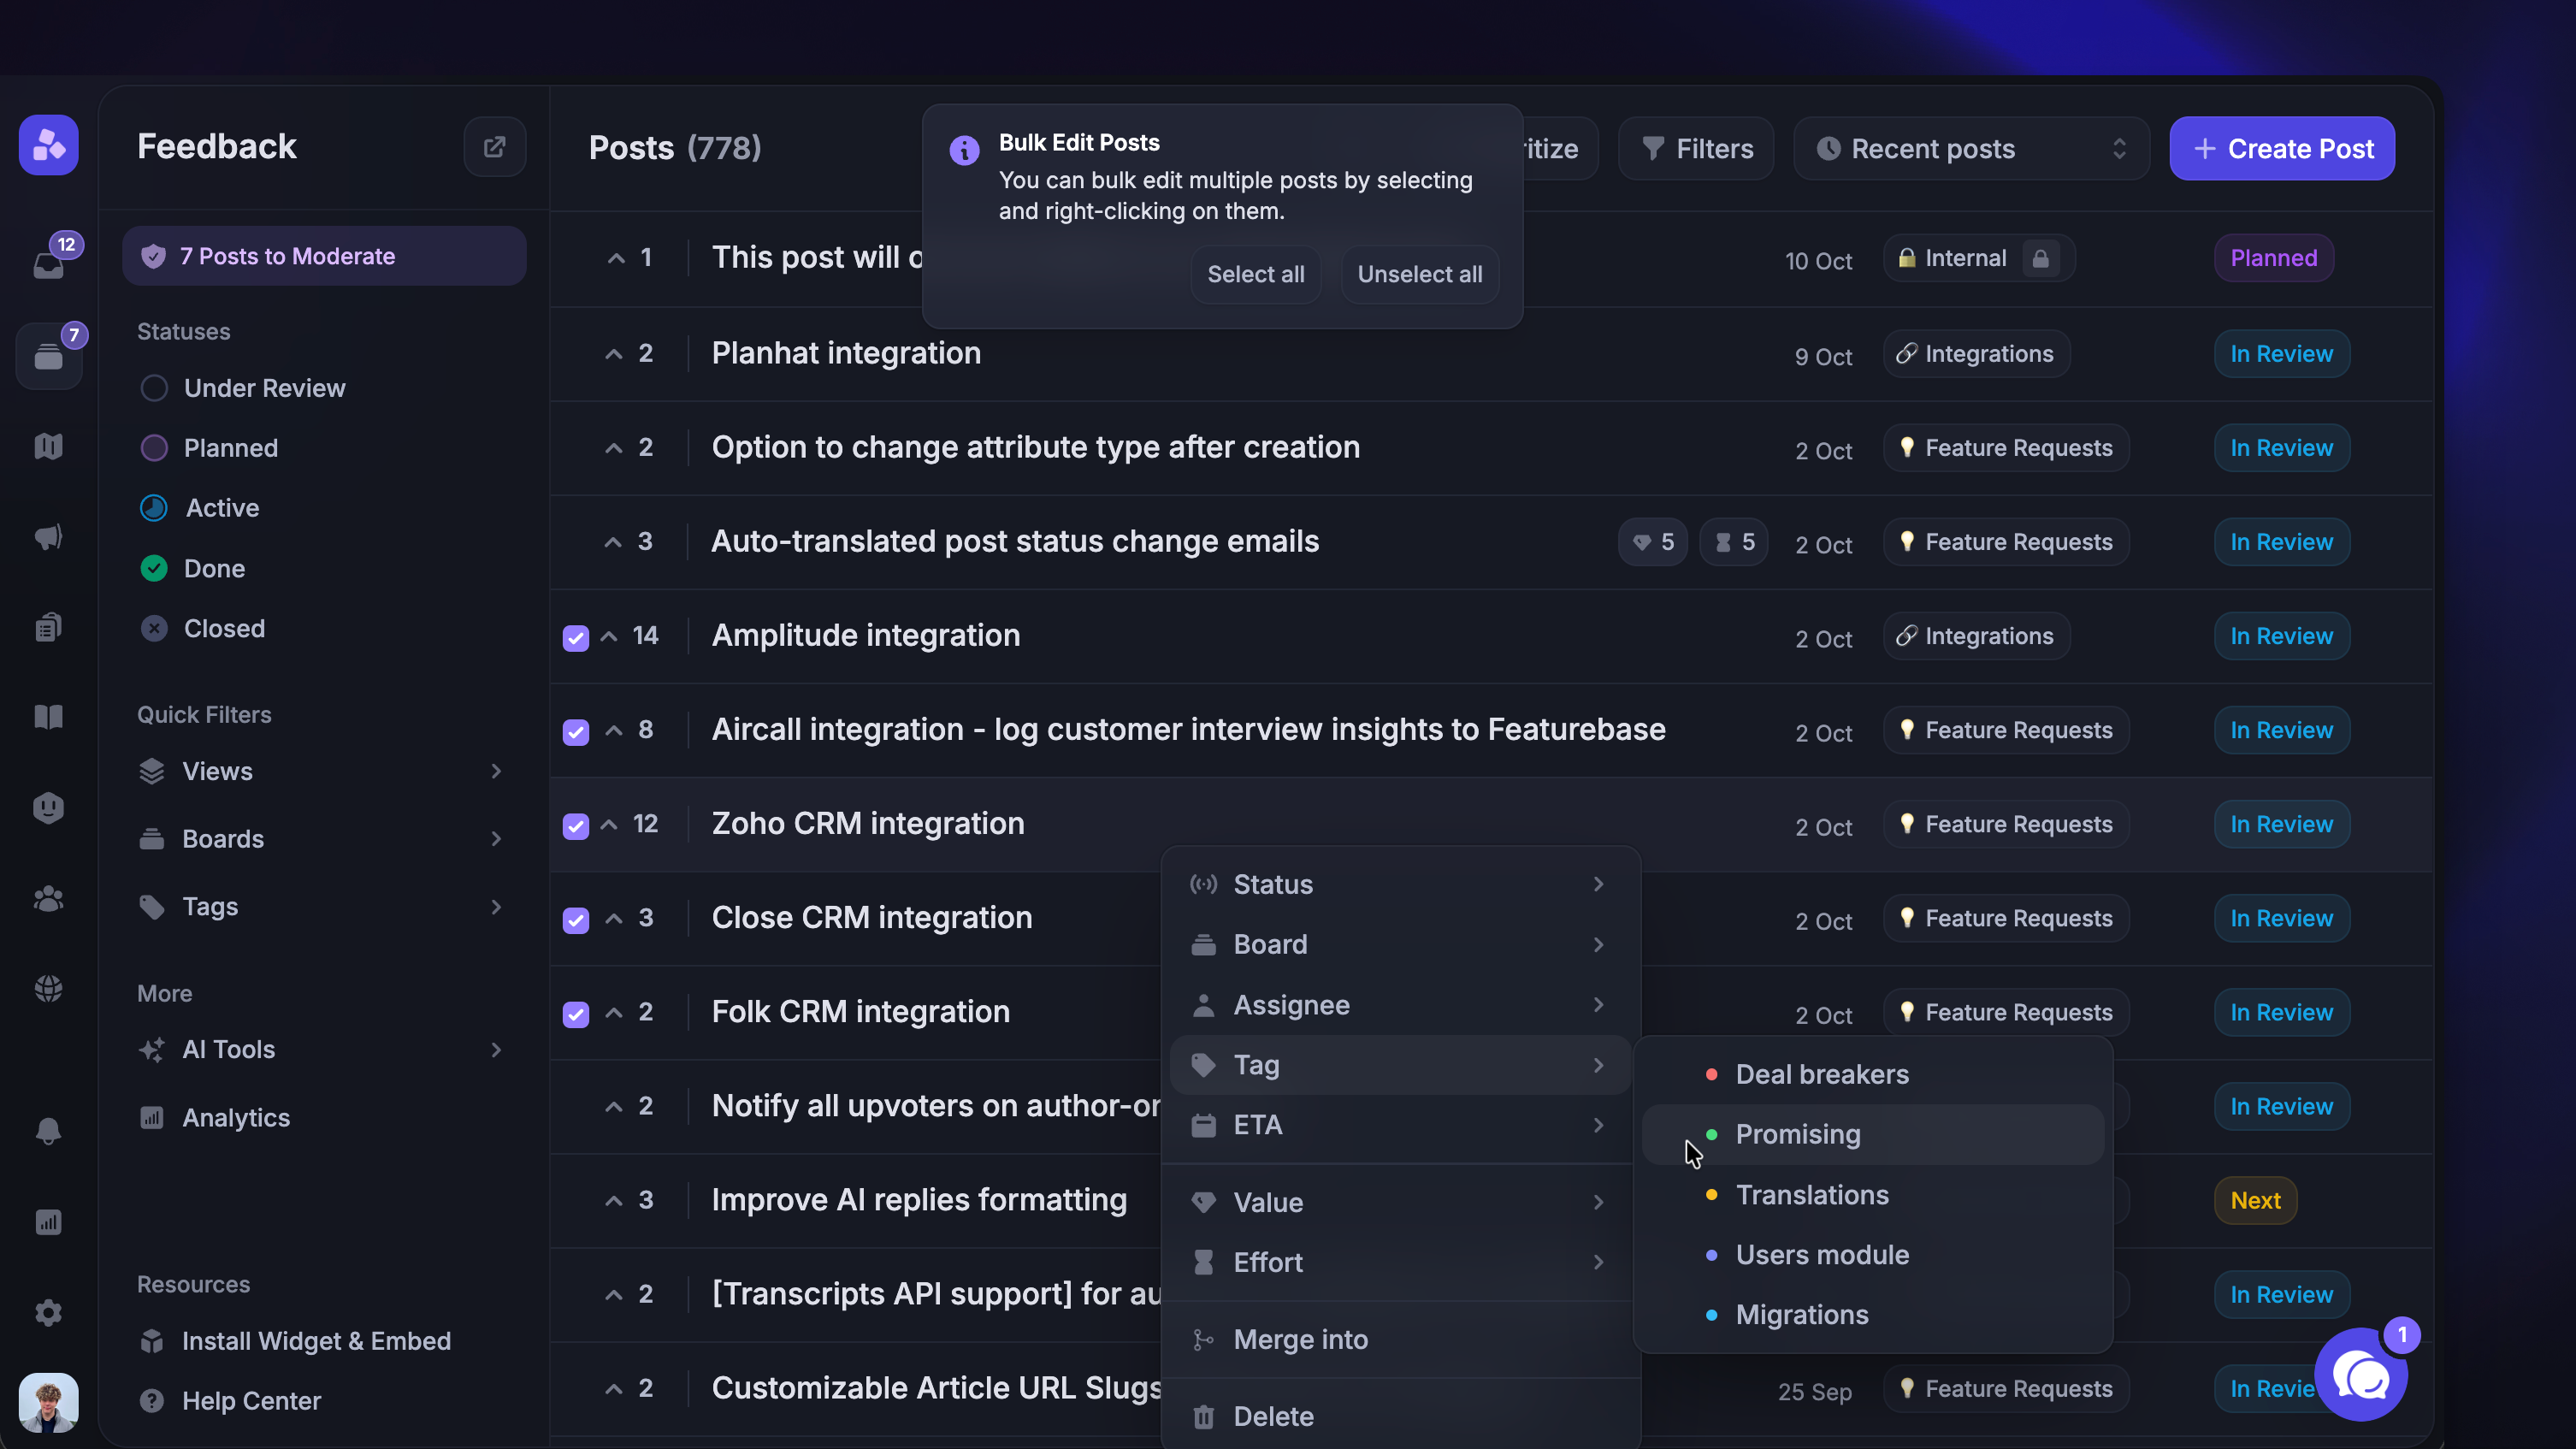
You can also manually assign tags to posts by right-clicking them in the Dashboard or from the right-hand panel after opening a post.
Tip: To select multiple posts at once, just check the first post, hold down SHIFT, and select the last post to select everything in between.
Allow users to select post tags
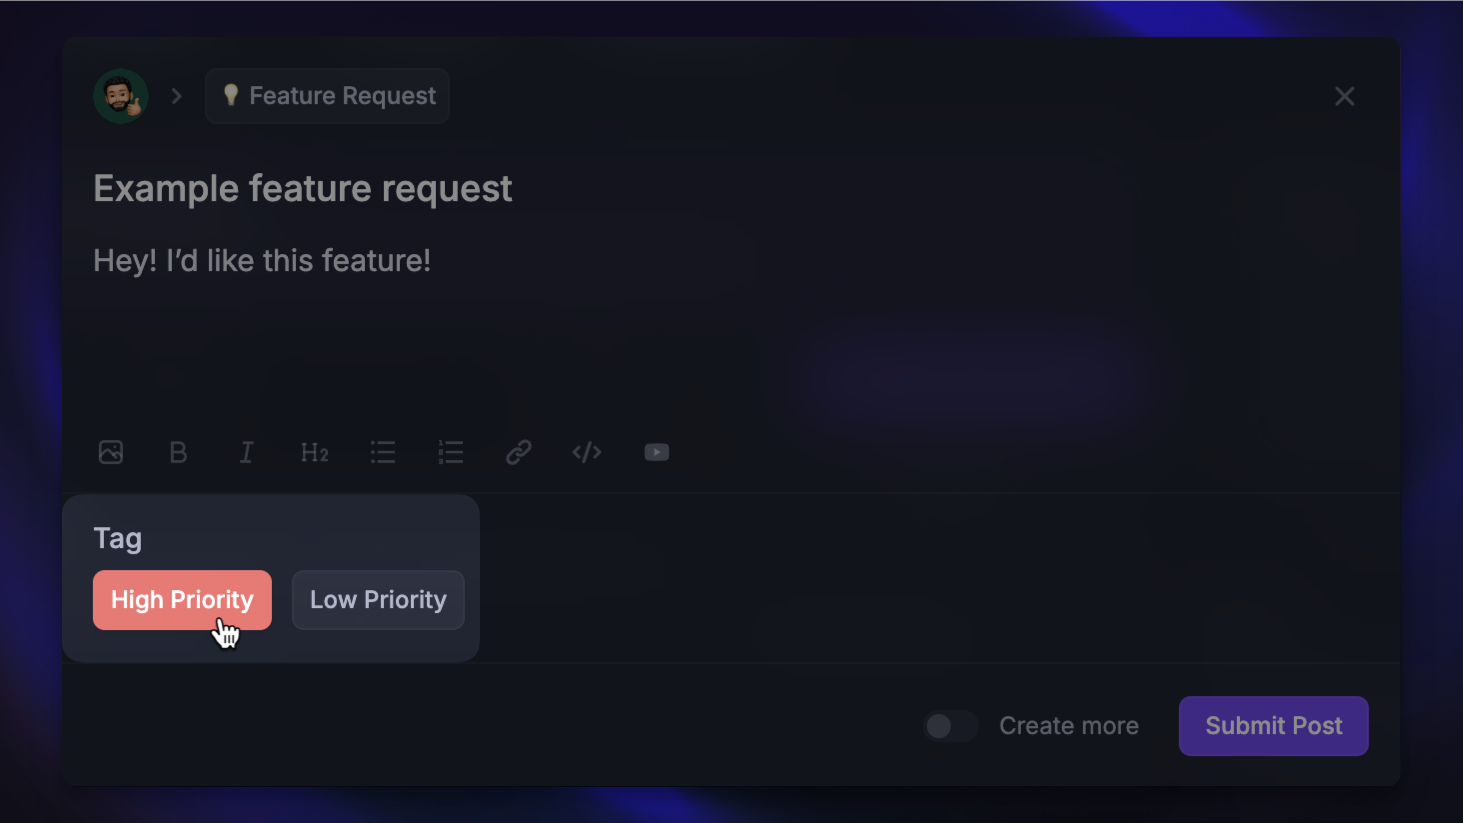
By default, public tags are visible to everyone, but only Featurebase admins can add them to posts. However, you can also use public tags to allow your users to add tags to their posts during creation:
Check the ‘Allow users to add tags when creating a post’ checkbox
Tip: A more effective way to have customers specify additional information about their feedback (e.g., product area, app version, etc.) is to use custom fields, which you can customize per board and make required.